
IN THIS CHAPTER
Typing text and automating text entry tasks
Selecting and editing text
Creating columnar text layouts
Inserting special text
Building documents using the Outline, Publishing Layout, and Notebook Layout views
Building a document may seem like a simple task—just start typing. Alas, there's a bit more to it than that. First, you need to decide what kind of document you're creating. Is it a letter, a report, a blog? Figuring out what type of document you're creating can help you utilize the proper tools and features to get the job done. This chapter teaches you what you need to know to enter basic text or build a complex page layout document.
We go over the rudimentary steps for entering and working with text onscreen, as well as how to move it around, copy it, search through it, and automate it to make document building easier. You also learn how to create tabular columns and regular columns and how to insert specialized character and text features, like drop caps. Finally, you find out that creating complex documents isn't so complex when using Word's outlining, page layout, and notebook features.
You're probably ready to jump in and just start typing, right? That's the nice thing about Microsoft Word, you can do just that—jump in and start tapping into the keyboard. Click where you want to type in the document window, and let those fingers fly across the keys. As you tap the keyboard, characters, numbers, and symbols magically appear onscreen. That sounds easy enough, eh? Just to help you along, this section covers a few basics about entering text into a document.
When you open a new document, Word places the cursor, also called the insertion point, at the top-left area of the document page ready to go. The cursor is the blinking horizontal line marking your current location in the document. If that's where you want to start your document, you can begin typing. However, you may want to start your text in another area of the document. For example, you may want to start your document out with a title page and a title centered smack dab in the middle of the document. In much earlier versions of Word, you couldn't do such a thing, but rather you had to add lots of empty lines to physically move the title down the page to the right location. With newer versions of Word, you can now click and type anywhere and start typing. Well, actually it's a double-click, but you get the general idea. Word calls this feature "click and type." Figure 6.1 shows the feature in action, with the cursor smack dab in the middle of the document ready to go. This works in Print Layout view; see Chapter 5 to learn more about Word's view modes. Print Layout view is a good view mode to use for ordinary document creation. It shows any graphic objects you add, as well as headers and footers.

Figure 6.1. It's incredibly easy to start entering text into a document. Simply double-click where you want to start, and begin typing.
Tip
Don't forget—you can magnify your view of a document, including the text you're typing, using the Zoom button on the Standard toolbar. Just click the arrow icon, and choose another magnification setting.
As you move your mouse pointer around the document, the pointer takes on different icons or shapes based on where you're pointing. If you're moving the mouse pointer over the left side of the main document, the pointer looks like a cursor with a bunch of little lines next to it resembling a paragraph of text. This little paragraph of text icon shows all the lines aligning to the left. This indicates left-alignment, and if you start typing, all of your text aligns to the left. If you move the pointer to the center of the document, as shown in Figure 6.1, the pointer takes on a similar shape, but this time the lines are centered in the tiny paragraph icon. This indicates center alignment, and any text you type from this spot in the document will be centered. If you move the pointer over the right side of the document, the pointer's lines appear lined up on the right, indicating right-alignment, and text you type takes on the same appearance. If you move the pointer over the header area—the space at the very top of the page where you can insert extra text about the document, such as page numbers, titles, author or company name, and so on—the pointer looks like a tiny document page. If you move the pointer over the left margin area, the pointer becomes an arrow icon. You can use this pointer icon later to select lines of text in the document.
Here's the important thing to remember about the mouse pointer/cursor shapes we just discussed: You can double-click in these areas of the document and start typing from that point onward, with the exception of the arrow icon pointer shape that appears in the left margin. You can type header text if you double-click in the header area (which does not appear in Draft view).
Note
You can turn off the Click and Type feature if you don't find a need for it. To turn it off, choose Word
Here are some more tips for typing text:
You do not need to press the Return key when you reach the right margin. Word starts a new line automatically for you when you reach the margin.
At the end of a sentence, just press the spacebar once to create a space. In ages past, typists had to insert two spaces with the spacebar key on typewriters to make the text look nice. With today's word processors and printers, such a practice is no longer needed.
When you're ready to start a new paragraph in your document, you can press Return.
You do not need to type hyphens for word breaks at the end of a line; Word's hyphenation feature can help you hyphenate later.
If you notice red or green wavy lines under your text as you type, don't worry. That's just Word's spelling and grammar checking feature pointing out any issues. You can ignore it, turn the feature off, or just turn off spelling or grammar, and leave the other checking feature on. You can learn more about this feature in Chapter 11.
The remainder of this section covers some additional typing features Word offers.
Tip
If you need to free up some onscreen space for typing, you can close the Toolbox. Just click the Toolbox button on the Standard toolbar to hide the feature. Click the icon again to bring it back.
Word's AutoCorrect feature is turned on by default. It automatically corrects common spelling problems as you type. You may see it in action as you mistype a word, such as inverting two characters or misspelling a word, and it magically fixes itself. Try it and see for yourself. Type something like teh to see AutoCorrect in action. As soon as you type a space after the mistake, AutoCorrect jumps into action and fixes the error. In fact, it happens so fast that you might not even notice it. Autocorrect works behind the scenes to fix mistakes, basing its work on an exhaustive list of commonly misspelled words and special characters. AutoCorrect fixes everything from misspellings to common typos, such as typing two initial capital letters instead of one, or forgetting to capitalize the first letter of a sentence or the names of days.
If you move your mouse pointer over a word that AutoCorrect just fixed, you can display the AutoCorrect smart button, shown in Figure 6.2. Click the button to reveal a pop-up menu pertaining to the word or action. The menu may list an option for changing the word back to the way you originally typed it, an option for stopping any AutoCorrect actions on future uses of the same word, and an option for opening the AutoCorrect dialog box. Of course, you can click any option on the menu to activate the option. There's more you can do with AutoCorrect, including adding to and deleting from its list of misspelled words, or turning the feature off entirely.

You can use the AutoCorrect dialog box to control and change options for the AutoCorrect feature. The dialog box, shown in Figure 6.3, offers various settings for controlling what types of things AutoCorrect checks for as you type and keeps a list of special characters and commonly misspelled words. In addition, you can use the dialog box to access settings for Word's AutoFormat and AutoText tools, covered later in this chapter.
The top of the AutoCorrect list is filled with special characters you can type and replace with emoticons. These are handy if you're typing a blog. As you scroll through the library, you'll quickly see that it's filled with a variety of common words and various ways in which they're mangled during typing.

Figure 6.3. You can find AutoCorrect's list of commonly misspelled words in the AutoCorrect dialog box, along with options for controlling how the feature checks your text.
If you find yourself making a mistake on a word not covered in the list, such as the spelling of a corporate name or a person's name, you can add it to the list. Follow these steps:
Choose Tools
AutoCorrect.
The AutoCorrect dialog box opens (refer to Figure 6.3).
In the Replace: field, type the word you commonly misspell, as shown in Figure 6.4.
In the With: field, type the correct spelling of the word.
Click the Add button.
AutoCorrect adds the word to the list.
Click OK to exit the dialog box.

The next time you misspell the word, AutoCorrect goes into action and corrects it without any hesitation.
Tip
You also can access the AutoCorrect dialog box through the Word Preferences dialog box. Choose Word
If AutoCorrect keeps fixing a spelling or special symbol that you do not want fixed, you can remove the word or symbol from the list. To remove a word, follow these steps:
Reopen the AutoCorrect dialog box, as shown in the preceding steps.
Scroll through the list of words and special symbols, and click the one you want to remove.
Click the Delete button.
Click OK to exit the dialog box.
Sometimes, you do not want AutoCorrect to fix anything. To undo a correction while typing, press
Reopen the AutoCorrect dialog box, as shown in the first set of steps.
Deselect the Automatically correct spelling and formatting as you type check box at the top of the dialog box (refer to Figure 6.4).
Click OK to exit the dialog box.
Word turns off the feature.
Another Word feature you'll encounter while typing text is AutoText. This feature automatically fills in common words and phrases so you don't have to type the whole thing. For example, if you're typing the name of a day in the week, such as Sunday, AutoText attempts to complete the word for you when you first start typing it. A yellow AutoComplete box appears listing the word in its entirety. You simply press Return, and AutoText fills it in for you. If you ignore the box and keep typing, the AutoText box disappears.
AutoText is part of the whole AutoCorrect group, which includes AutoFormat (you learn about that in Chapter 7). AutoText is turned on by default. Like AutoCorrect, AutoText keeps track of some common words and phrases in its library of entries. For example, if you type Attention: or Dear Sir or Madam: AutoText offers to help. You may want to add some words or phrases of your own to the library. If you type the name of your company over and over again, for instance, add it to AutoText and make typing easier on yourself. You can add and delete entries using the AutoCorrect dialog box. With the AutoText options displayed, you also can control how the feature works and what items are included in its realm of help.
If you find yourself typing the same word or phrase repeatedly, such as a company name or lengthy motto, you can add it to the AutoText entries list. Follow these steps:
Choose Tools
AutoCorrect.The AutoCorrect dialog box opens (refer to Figure 6.3).
Click the AutoText options, as shown in Figure 6.5.
In the Enter AutoText entries here: field, type the word or phrase you want to store as an entry.
Click the Add button.
AutoText adds the word to the list.
Click OK to exit the dialog box.

The next time you start typing the word or phrase, AutoText jumps in with an AutoComplete tip box, and you just press Return to complete the entry.
Tip
You also can access the AutoCorrect dialog box through the Word Preferences dialog box. Choose Word
After you've started adding text to a document, chances are good that you'll want to change it in some way by making edits. For example, you may want to change a word, retype a sentence, or rearrange a paragraph, and so on. You can easily edit your text in Word, and you can use a variety of techniques to do so. If you've used previous versions of Word or other word-processing programs, the same editing techniques will work in Word 2008 for Mac.
You can edit as you type by using the Backspace key. This technique simply backs up a space to the left of the cursor, erasing what you just typed. You also can use the arrow keys to move to the place you want to edit and press the Del key to erase any characters sitting to the right of the blinking cursor. Pressing the arrow keys (↑, ↓, ←, →) moves the cursor around the document. To make all kinds of edits to an existing document, you can use selection techniques.
Learning to select text in Word is a crucial skill necessary for making edits to a document. You can easily select a single character, a word, a sentence, a paragraph, or the entire document. When you select text, it appears highlighted with a bluish-gray block of color. In Word for Windows, you may be used to seeing highlighted text with a black block behind it. Mac users get the cooler bluish block. After you've selected text, you can make changes, such as retyping, changing the formatting, moving or copying the selection, and so on. Figure 6.6 shows an example of selected text.

When it comes to mouse selection methods or keyboard selection methods, it really depends on which you prefer. Some people like the mouse best for editing text, so zooming around the screen with a hand movement seems second nature to them. Other people prefer to keep their hands on the keyboard at all times, fingers flying over the keys. These folks prefer using keyboard techniques for selecting and editing text. A third group of people utilize both the mouse and the keyboard at different times and whims.
Selecting text with the mouse is a pretty straightforward task. You're either clicking and dragging or using some fancy double-clicking and triple-clicking methods. Word offers an invisible selection strip over in the left margin area that you can use to quickly select text. When you move your mouse pointer over the selection strip area, the regular arrow pointer icon points to the right instead of the left, indicating that you're hovering over the selection strip. Table 6.1 explains the various mouse selection techniques.
As discussed earlier, the arrow keys—↑, ↓, ←, →—are perfect for navigating around the document from the keyboard and changing the location of the cursor. Like the mouse selection techniques, keyboard selection methods are fairly universal, which means the same methods are common among most word-processing programs and other programs as well. Table 6.2 lists the keyboard shortcut keys for selecting text.
Table 6.1. Mouse Selection Techniques
Selection | Technique |
|---|---|
A single character | Click in front of the character, and drag across the character to select it. |
A single word | Double-click the word. You also can click in front of the word and drag across it to select it. |
A sentence | Click in front of the first word in the sentence, and click and drag across to the end of the sentence. You also can press the |
A paragraph | Triple-click anywhere in the paragraph, or double-click in the left margin's selection strip in front of the paragraph. |
A line of text | Move the mouse pointer in front of the line of text and click in the selection strip. |
The entire document | Triple-click anywhere in the selection strip. |
Sections of text | Click in the selection strip in front of the line of text you want to start with, and drag down the margin to add more lines to the selection. |
Table 6.2. Keyboard Selection Techniques
Keys and Combinations | Selection |
|---|---|
Shift+→ | Selects one character to the right of the cursor. |
Shift+← | Selects one character to the left of the cursor. |
Option+Shift+→ | Selects from the current cursor location to the end of the word. |
Option+Shift+← | Selects from the current cursor location to the beginning of the word. |
Selects from the current cursor location to the end of the line of text. | |
Selects from the current cursor location to the beginning of the line of text. | |
Shift+Home | Selects from the current cursor location to the beginning of the line of text. |
Shift+End | Selects from the current cursor location to the end of a line of text. |
Selects everything from the current cursor to the beginning of the document. | |
Selects everything from the current cursor to the end of the document. | |
Shift+↓ | Selects from the current cursor location to one line down. |
Shift+↑ | Selects from the current cursor location to one line up. |
Selects from the current cursor location to the end of the paragraph. | |
Selects from the current cursor location to the beginning of the paragraph. | |
Shift+Page Up | Selects a screenful or half page of text from the current cursor upward. |
Shift+Page Down | Selects a screenful or half page of text from the current cursor downward. |
Select everything in the document. |
You can use the mouse and keyboard together to make even more quick selections in your document:
To select words or characters not next to each other, select the first word and then press and hold the

If you want to edit only a portion of a word, such as the first syllable, press the Option key as you drag over the portion you want to select.
To extend a selection you dragged over with the mouse, just press Shift and click at the end of the additional text you want to select. This works great when extending the section of words, sentences, paragraphs, and other blocks of text.
To select a sentence,
Move the cursor where you want to start selecting text, and press F8. This turns on Extend mode. Now you can use the arrow keys and the Page Up and Page Down keys to select text. To cancel Extend mode, press

The Redo command works in the same manner, except it redoes an action. So if you deleted a word, decided to put it back with the Undo command, then decided to delete it again, you can apply the Redo command. Or if you undid a sequence of actions, you can redo them all again using Redo. To activate the Redo command, click the Redo button on the Standard toolbar or Choose Edit
Another very important part of editing text is the ability to move it or copy it around the document or to other files and programs. You can use several methods to move and copy text. The method you choose is entirely up to you and depends on how you like to work onscreen. You can use the drag-and-drop technique, you can use the Edit menu, you can use the context pop-up menu, or you can use the old keyboard shortcut keys.
Follow these steps to move text from one location in the document to another or to copy text from one place to another using the drag-and-drop method:
Select the text you want to move or copy.
Click and drag the text to the location where you want to insert it, as shown in Figure 6.8. If you want to copy the text instead of just move it, press and hold the Option key while dragging.
When you release the mouse button, the text is moved or copied.

Tip
You can use the drag-and-drop method to move text to other open programs or out onto the desktop. When you drag text onto the desktop, Word creates a clipping file. These are just text clippings waiting for use later when you drag them back into another document or program. The clipping file remains on your desktop to be reused again. You might use clipping files for text you include in every document you create. The clippings are named Picture Clipping in Finder, even though they only contain text.
Follow these steps to move text from one location in the document to another or to copy text from one place to another using the Edit menu:
Select the text you want to move or copy.
Choose Edit
Cut to move the text, or choose EditCopy to copy the text, as shown in Figure.Click where you want to insert the text.
Choose Edit
Paste.The text is moved or copied.

Follow these steps to move or copy text using the context pop-up menu:
Select the text you want to move or copy.
Right-click the selected text.
The context menu appears, as shown in Figure 6.10.
Click Cut to move the text or Copy to copy the text.
Right-click where you want to insert the text.
Click Paste.
The text is moved or copied.

If you're an avid keyboard user, or even if you're not, you're sure to appreciate the keyboard shortcut keys for moving, copying, and pasting text. After you memorize the commands for Word, you'll also find they apply almost globally to every other program. Follow these steps to move or copy text using shortcut keys:
Select the text you want to move or copy.
Press
Click where you want to insert the text.
Press
The text is moved or copied.
In addition to a regular paste action, which simply pastes the cut or copied text, you also can activate the Paste from Scrapbook, Paste Special, and Paste as Hyperlink commands, all found on the Edit menu. The Paste from Scrapbook command lets you paste any items you've collected and stored in the Office Scrapbook feature. Learn more about this element in Chapter 33. The Paste as Hyperlink command lets you paste the cut or copied text as a hyperlink in the document. You can use this feature to create links to the original source from which it was copied in the document, becoming a bookmark to the area in the document. Learn more about this element in Chapter 9. The Paste Special command allows you to control how an item is pasted. When you activate this command, the Paste Special dialog box appears, as shown in Figure 6.11. Here you can specify how you want the pasted text treated in the document, as listed below:
Microsoft Word Document Object: Word treats the text as an embedded object, which you can move and resize like any other object.
Formatted Text (RTF): Also known as rich text format, Word retains the font and table formatting of the original source text.
Unformatted Text: Word pastes the text without any of the original formatting.
Picture: Word treats the text as a picture object.
Styled Text: Word copies all the original formatting and styles originally applied to the text.
HTML Format: Word treats the text as Hypertext Markup Language formatting for Web page display.
PDF: Word treats the text as Adobe Portable Document Format.
You also have the option of treating the pasted text as a link, which means the text retains a link back to the original document, and any changes made to the original text are reflected in the pasted text as well. This is very useful when copying and pasting text between two documents. You can activate the Display as icon check box in the Paste Special dialog box to include an icon representing the program in which the pasted text was created. This works only if you paste the text as a link.

Figure 6.11. You can use the Paste Special dialog box to control how you want the copied text to appear.
Follow these steps to move or copy text using the Paste Special command:
Select the text you want to move or copy.
Cut or copy the text as needed.
Click where you want to insert the text.
Choose Edit
Paste Special.The Paste Special dialog box appears.
Click Paste, and choose how you want the text treated.
If you choose to paste the text as a link, Word inserts the text as a link to the source file.
Click OK.
Word inserts the text.
Regardless of which method you use to cut, copy, or paste text, the Paste Options button almost always appears next to the newly pasted text. The Paste Options button is a small, square button that has a clipboard icon on it, as shown in Figure 6.12. When you click the button, a context menu appears with several paste options you can choose from:
Keep Source Formatting: Select this option if you want to keep the text looking exactly like it did from where you moved or copied it. This is the default option.
Match Destination Formatting: Select this option if you want the newly pasted text to match the formatting surrounding it rather than retain its original formatting.
Keep Text Only: Select this option if you don't want to copy any original formatting, just the text.

You don't have to select any of these options. Word automatically copies all the original formatting along with the text unless you choose otherwise. You can just ignore the Paste Options button and keep right on working. The button disappears as soon as you start typing or choosing other commands. However, if you do want to stop and address how the formatting is handled, the button is handy.
Removing text is an inevitable part of editing. You may need to remove a single character or word, remove text to type new text, or delete entire sentences, paragraphs, or pages of text. Several key tools are in your editing arsenal for removing text. First, you have the Backspace key on the keyboard. Use it as you're typing to quickly delete characters and retype them again. If it's the big guns you need, however, break out the Del key. It's good for all kinds of removal tasks in Word. You can click in a sentence or word and press Del to remove characters to the right of the cursor. You can select any text you want to remove and press Del to quickly delete it from the document. You also can use the Del key to delete selected objects, paragraphs, tables, drawn objects, and more.
If you're looking for a tool for removing formatting and not the text, use the Clear command. Select the text, and choose Edit
As your document grows in length and complexity, you'll encounter times in which you need to find a particular word or phrase in the document. Or perhaps you need to replace a word with another word entirely throughout the document. You can use Word's Find and Replace commands to help you locate text as well as replace it with something else. The Find and Replace dialog box is the nerve center for searching through your document. It includes three tabs: Find, Replace, and Go To. This section discusses how you can use each tab and how to utilize the Advance Find options.
You can use the Find command to locate a specific term or phrase in a document. For example, you might want to check to see if you referenced the full name of a company or find out if you mentioned a particular product name in an article. You can use the Find feature to quickly scroll to the term and check it out. To activate the feature, follow these steps:
Choose Edit
The Find and Replace dialog box opens with the Find tab displayed, as shown in Figure 6.13.
Type the word or phrase you want to look for in the Find what: text box.
Click Find Next.

Figure 6.13. Use the Find tab in the Find and Replace dialog box to search for words or phrases in a document.
Starting from the current insertion point, Word searches the document and scrolls to the first occurrence, highlighting it onscreen, as shown in Figure 6.13.
If Word cannot find the word or phrase, a prompt box appears telling you so.
If you activate the Highlight all items found in Main Document check box, Word selects every occurrence, and you can apply global formatting changes all in one fell swoop.
Optionally, you can continue searching for additional occurrences by clicking the Find Next button.
When the search is complete, click OK, or exit the dialog box by clicking Cancel.
You can use the Replace feature to search through a document for a word and replace it with something else. For example, perhaps you've misspelled a name throughout your document and need to fix each occasion. Instead of endlessly scrolling and reading, you can instruct Word to look for every instance and determine how each one is replaced. You also can search and replace formatting and special characters, such as spaces or hyphens. Follow these steps to find and replace text:
Choose Edit
The Find and Replace dialog box opens with the Replace tab displayed, as shown in Figure 6.14.
Type the word or phrase you want to look for in the Find what: text box.
Type the word or phrase you want to use as replacement text in the Replace with: text box.
Click Find Next.

Figure 6.14. Use the Replace tab in the Find and Replace dialog box to find and replace text in a document.
Starting from the current insertion point, Word searches the document and scrolls to the first occurrence, highlighting it onscreen, as shown in Figure 6.14.
If Word cannot find the word or phrase, a prompt box appears telling you so.
Click the Replace button to replace the occurrence.
To replace every occurrence in the document, click the Replace All button.
Optionally, you can continue searching for additional occurrences by clicking the Find Next button.
When the search is complete, click OK, or exit the dialog box by clicking Cancel.
The Find and Replace dialog box can expand to show additional Advanced Find search options you can apply, as shown in Figure 6.15. Click the Expand arrow button to reveal the hidden options. You can click the button again to hide the extra options.

You can use the additional search options to narrow down exactly what Word locates in the document. The Advanced Search options are organized into two categories: Search and Find. Here's what you can do with the settings under the Search category:
Search pop-up menu: Click the Search pop-up menu to specify how you want to search the main document: from the current insertion point down or up, from the very beginning of the document, or all open documents one at a time.
Match case: Select this check box to find words that match the specified capitalization you entered.
Find whole words only: This tells Word to search only whole words, not just instances of the string of characters, such as searching for "we" only and not finding "went," "between," and so on.
Use wildcards: Activate this feature to use special characters standing in for actual letters, such as substituting "th*" to find words like "the," "that," "theirs," and so on.
Sounds like: To look for a phonetic spelling of the word, check this option. This is useful if you commonly misspell "their" and "there."
Find all word forms: Check this option to find irregularly spelled nouns and verbs.
You can use the pop-up menus under the Find category to search for specific formatting attributes throughout the document. For example, the Format pop-up menu lets you open specific formatting dialog boxes, such as the Paragraph dialog box, and choose what attributes you want to search for. After making your selections, you'll see what attributes you selected listed under the Find what field at the top of the Find tab, as shown in Figure 6.15.
Here's what you can do with the Find options:
Just what sort of formatting can you find with the Find and Replace dialog box? Just about any kind of formatting you can think of. You can search your text for a particular font, font size, indents, tab stops, styles, and more. When used in conjunction with the Replace command, you can find formatting throughout a document and replace it with new formatting. Among the list of Format options offered in the Format pop-up menu, you can search for the following attributes:
Font: Finds specific fonts and font characteristics, such as bold, italic, or color.
Paragraph: Finds paragraphs based on indentation, line spacing, alignment, outline level, and page breaks.
Tabs: Finds tab stops by position or type.
Language: Finds text based on a certain language.
Frame: Finds frames and their attributes. (Most people use text boxes instead of frames these days as containers for text that you can freely position and resize on a page.)
Style: Finds styles and style attributes.
Highlight: Finds highlighted text in a document.
You can use the Special pop-up menu in the Find and Replace dialog box to search for special characters and non-alphanumeric characters throughout a document, such as hyphens, en dashes, or em dashes. You also can search for document elements that are not text, such as page breaks, column breaks, or even white space. When you click the Special pop-up menu, the following special character choices appear:
Paragraph Mark
Tab Character
Comment Mark
Any Character
Any Digit
Any Letter
Caret Character
Column Break
Em Dash
En Dash
Endnote Mark
Field
Footnote Mark
Graphic
Manual Line Break
Manual Page Break
Nonbreaking Hyphen
Nonbreaking Space
Optional Hyphen
Section Break
White Space
Simply choose what you want to search for from the list. As soon as you choose a character, it appears in the Find what: text box at the top of the dialog box.
As with any dialog box, you can exit without applying any changes, or in this case without conducting a search, by clicking the Cancel button at any time.
The Find and Replace dialog box has one more tab you need to know about—the Go To tab. You can use this feature to navigate to a particular location in a document. If your document is very long, the Go To command can help you find your way to a particular spot with greater precision than the scroll bars. Follow these steps to use the Go To feature:
Choose Edit
The Find and Replace dialog box opens with the Go To tab displayed, as shown in Figure 6.16.
Tip
With some laptop Macs, you must press function+F5 to activate the Go To feature.
Type the page number you want to go to in the Enter page number text box field.
You also can choose to go to another element, such as a bookmark or comment. Simply select the element and enter any name.
Click Next.
Word automatically displays the page in the document window.
Click Close to exit the dialog box.

As you're building your document and entering text, you may find yourself needing to create columns of some sort. Word offers two ways to create columnar text: tabs and columns. Both allow you to create two or more columns of text on a page. You can use tabs to create lists in columns. You can use the Columns command to create columns in which text flows from one to another, just like a newspaper or magazine layout. You might consider tables as a third way of creating columns, but that topic isn't covered until Chapter 8, where we discuss it in great detail. In the meantime, the following sections walk you through the process of creating tabs and straight-up columns.
In the history of typography and the golden age of the typewriter, tabs were an important tool for indenting text for paragraphs and tables. Today's word-processing indentation tools offer much more flexibility, but because people commonly use tabs, they're still around. Tabs are essentially preset indentations across the width of the page. You can use the ruler to view tab stops in a document, as shown in Figure 6.17. By default, every new document you start in Word has invisible, preset left-aligned tabs every half inch across the page. When you press the Tab key on the keyboard, the cursor (or the insertion point) moves over approximately one-half inch. Any text you type lines up at this tab stop. If you set your own tab stops, the default tab stops disappear.
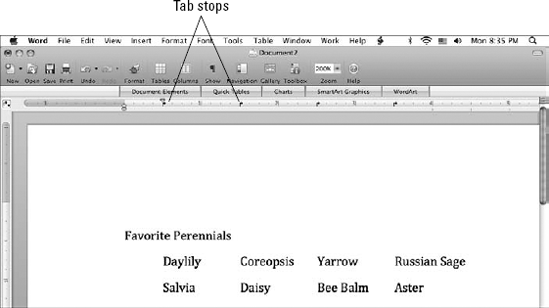
To utilize the default tab stops, just press Tab as you're typing. Many people use the Tab key to create a quick indent at the start of a paragraph. But you can do much more than just create indents: You can create decimal-aligned columns, add leader dashes between columns, and control the alignment of text in a tab column. You can align Tab stops come in five different alignment modes:
Left: Aligns text to the left of the tab column.
Center: Centers text in the tab column.
Right: Aligns text to the right of the tab column.
Decimal: Aligns decimals in the column.
Bar: Aligns text to the left of a vertical bar.
You can set your own tab stops using the ruler or using the Tabs dialog box. You can set tab stops for an entire page before you even start typing. You also can set tab stops for the current paragraph or for selected paragraphs in a document. Be sure to select all the paragraphs you want to include with the new tab stops before you set the tabs.
The fastest way to create your own tab stops is to do so directly on the horizontal ruler at the top of the document window. The Tab button, also called the tab well, at the far left end of the ruler lets you control what type of tab stop you create. When the button is clicked, as shown in Figure 6.18, you can view the five alignment options. Notice that the pop-up menu has an option for opening the Tabs dialog box. After you select a tab alignment, you're ready to start adding tab stops to the ruler. For example, if you want a tab stop at 2″, just click on the 2″ mark on the ruler. The little icon that Word adds to the ruler to represent the tab stop also shows the alignment of the tab, as shown in Figure 6.18.

To set tab stops using the ruler, follow these steps:
Click the Tab button.
Click a tab alignment.
Click on the ruler where you want to insert the tab.
Word adds the tab stop.
You can easily edit tab stops on the ruler, too. Simply drag them where you want them placed. If you no longer want the tab stop, drag it off the ruler, and it's deleted.
The Tabs dialog box lets you set tab stops a bit more precisely than the ruler. You can also use the dialog box to add leader dashes between tabular columns. Leader dashes are dashes or dots that appear after the text and extend to the beginning of the next tab column. Leader dashes can help readers follow a line of text across the tabbed columns.
Follow these steps to set up tabs using the dialog box:
Choose Format
Tabs, or double-click any tab stop on the ruler.The Tabs dialog box appears, as shown in Figure 6.19.
Type the position you want to assign for the tab stop in the Tab stop position field.
Choose an alignment option from the Alignment radio buttons.
Choose a leader character if you want to add leader dashes to the tabbed columns.
Click the Set button.
Word adds the tab stop to the list box.
You can continue adding more tab stops as needed by following Steps 2 through 4.
Click OK to exit the dialog box.

You can now use your new tabs stops. If for any reason you no longer want a tab stop, reopen the Tabs dialog box, select the tab stop from the list box, and click the Clear button. To remove every tab stop listed, click the Clear All button.
You also can use the Tabs dialog box to set a new default tab stop setting. Just type a new position in the Default tab stops text box, or use the arrow buttons to set a new position. When you click OK and exit the dialog box, the new default setting is applied.
Note
If you're serious about placing text neatly across a page, tables are the best way to control the layout of text, even in columnar fashion. To learn more about using tables, see Chapter 8.
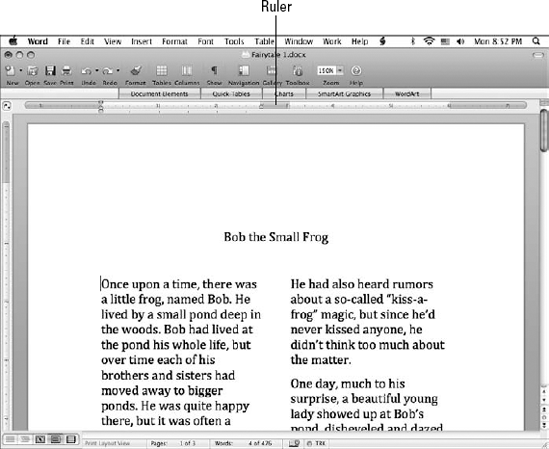
You can use Word's Columns feature to create newspaper or magazine-style columns in a document. When using these types of columns, text flows from one column before proceeding to the next column. You can create columns using the Columns button on the Standard toolbar or by opening the Columns dialog box. You can apply columns to selected text or to a document you just opened. This section shows you how, along with tips on editing columns after you've added them to a document.
The quickest way to create columns is to use the Columns button on the Standard toolbar. You can choose to create as many as six columns in a document. Although the initial pop-up menu shows only four, you can drag past the right edge of the menu to extend the number. Follow these steps to add columns:

Drag across the number of columns you want to insert.
Word creates the columns in the document.

You can return a document to single column again by selecting the column text and choosing 1 column from the Columns pop-up menu.
For more precise columns, use the Columns dialog box shown in Figure 6.21. Here you can choose from preset columns or set your own custom columns. You also can use the options in the dialog box to add a vertical line between columns, adjust the column width and spacing, and specify how columns are applied to the document. Follow these steps to set columns using the dialog box:
Choose Format
Columns.The Columns dialog box opens, as shown in Figure 6.21.
Type the number of columns you want in the Number of columns field, or select from the Preset column styles.
Optionally, to add a vertical line between columns, click the Line between check box.
To set custom columns, click the column you want to adjust and set a new width or spacing. You can type directly in the fields or use the arrow buttons to adjust the settings.
To keep the columns equal in width, leave the Equal column width check box selected.
Click the Apply to pop-up menu, and choose how you want to apply the columns. You can apply them to the selected text, from this point forward in the document, or to the whole document.
The Preview area shows a sample of your column settings.
Click OK to apply the new settings and create your columns.

After you've added columns, you can control the column width and how the text flows from one column to the next. You can use the ruler to quickly adjust the width of any column. However, in order to do this, you must use Print Layout view. The column markers appear at either end of the blue "gutter" that signifies the distance between the columns, as shown in Figure 6.22. Simply drag the column markers to change the width.
For more precise controls, revisit the Column dialog box, shown in Figure 6.21, and set your own measurements for column widths in the Width fields for each column. If you leave the column width check box selected, Word makes sure all the columns are always the same width.
To control how text flows from one column to another, you can insert a column break. Column breaks tell Word exactly where you want the text to flow into another column. To insert a column break, click where you want it to start and choose Insert
By default, column text is left-aligned, and the right margin is uneven. For some documents, you may prefer both margins to look neat and aligned. You can justify column text for a professional look. To do so, select the text, click the Alignment and Spacing pane on the Formatting Palette, and then click the Justify button.
When you apply columns, you may want to turn on automatic hyphenation to automatically break longer words at the right margin. This can help create a straighter, more even right margin for your columns. To turn on the feature, choose Tools
If you're having trouble making your columns come out evenly at the bottom of the columns, try adjusting the paragraph spacing. In the Formatting Palette, click the Alignment and Spacing pane and use the Before and After fields to set space before and after the paragraphs.
Sometimes you may have a need for other kinds of characters in your documents, such as special symbols or drop caps, or you may need to quickly change the case of your text. Word has plenty of tools to help you set specialized text in your documents. This section shows you several ways to insert fancy text elements.
Drop caps are a feature commonly used in publishing in which the first character of a word in the first paragraph is super large compared to all the other text. These extra large capitals are common in books at the beginning of the book or a chapter. You might think you can create the same effect just by making the first character a large font size. Alas, you cannot. The effect also involves dropping the capital letter well below the other characters on the line, and the only way to do that is with the built-in drop cap feature.
To create a drop cap, follow these steps:
Select the character you want to turn into a drop cap.
Choose Format
Drop Cap.The Drop Cap dialog box opens, as shown in Figure 6.23.
Under the Position setting, choose Dropped.
If you prefer to have the drop cap sit by itself in the left margin, click the In margin setting.
To change the font, click the Font pop-up menu and choose another.
By default, drop caps drop by 3 lines of text. To change the setting to more or less lines, click the Lines field and set a new number.
Optionally, Word also sets no distance between the drop cap and the second character. To set some space, click the Distance from text field and set a new measurement.
Click OK.
Word applies the drop cap.

Figure 6.23 shows an example of a drop cap applied to text. If you need to edit the drop cap in any way, simply reopen the Drop Cap dialog box and make your adjustments to the settings.
As you're typing along creating a document, you may find yourself needing to insert some characters not found on the keyboard. For example, you may want to insert a copyright symbol, a registered trademark, or an em dash (a very long dash). You can easily add symbols and other special characters using the Symbol dialog box, shown in Figure 6.25. Most fonts include symbols you can insert, but a few are geared just for symbols. The fonts Symbol and Wingdings, for example, offer a huge selection of symbols. If you're looking for a symbol from another language, the font list offers other language selections as well.
Follow these steps to insert symbols:
Click in the document where you want to insert a symbol.
Choose Insert
Symbol.The Symbol dialog box opens, as shown in Figure 6.24.
Click the Symbols tab if it's not already selected.
Click the Font pop-up menu, and choose a symbol font.
Click the symbol you want to insert.
Click Insert.
Word adds the symbol to the document. The dialog box remains open in case you want to insert more symbols.
Click Cancel to exit the dialog box.

Follow these steps to insert special characters:
Click in the document where you want to insert a special character.
Choose Insert
Symbol.The Symbol dialog box opens.
Click the Special Characters tab, as shown in Figure 6.25.
Click the character you want to insert.
Click Insert.
Word adds the special character to the document. The dialog box remains open in case you want to insert more characters.
Click Cancel to exit the dialog box.

As you're typing text, you may have occasion to change the text case. Normally, unless you've left the Cap Lock key on, you type using both uppercase and lowercase letters. To quickly change the text case, you can activate the Change Case dialog box, as shown in Figure 6.28. You can choose from five different case options. Follow these steps to change text case:
Select the text you want to change.
Choose Format
Change Case.The Change Case dialog box opens, as shown in Figure 6.26.
Choose an option:
Sentence case capitalizes the first word of each sentence.
Lowercase sets all the text to lowercase text.
Uppercase creates all uppercase letters.
Title Case sets capitals for the first letter of every word.
Toggle Case does the opposite of whatever is typed currently.
Click OK.
Word applies the new case.


Figure 6.27. The Formatting Palette's Font pane also has a couple of text case options you can apply.
On the other hand, the All Caps button, when clicked, just turns the selected letters to all capital letters. Strangely enough, if you toggle the All Caps button off again, the text reverts to the way you typed it. You can't do this if you typed everything with the Cap Lock key engaged. Word treats the Small Caps and All Caps buttons like formatting you apply, the same as applying bold or italics.
From time to time, you may need to insert a block of text that sits separately from the rest of the document. For example, you may want to set a quote aside in the middle of the document and format it differently to stand out. You can create text boxes to create text that is independent from the rest of the document. Word treats the text box as a graphic object, which means you can move and resize the box as needed, and apply special formatting commands to the object. A text box can have a border or no border at all, and you can even apply a fill color to the box to really set it apart from the rest of the document.
Follow these steps to create a text box:
Choose Insert
Text Box.Click and drag across the page to create a box the size you want.
Type your text, as shown in Figure 6.28.

You can now treat the box like any other graphical element. You can select the box and drag it around to a new location. Simply click the box to select. To assign a line or fill color, select the box and use the settings on the Formatting Palette in the Colors, Weights, and Fills pane. To change the text box formatting, such as setting a new margin or text wrap, click the Text Box pane in the Formatting Palette. You also can double-click the text box to open the Format Text Box dialog box and set line and fill colors, inner margins, change wrapping style, and more. To learn more about formatting objects, including text boxes, see Chapter 30.
In the preceding chapter, you learned how to use Word's view modes to view your documents in different ways. Outline view is one of those modes, and it truly comes in handy when you're trying to build a document based on an outline. In this section, I'll show you how to use Outline view and start creating a well-planned document. Outlines are all about categorizing and prioritizing your thoughts to help you create a well-constructed document, whether it's an essay, white paper, or report.

A special toolbar, called the Outlining toolbar, appears with all the tools you need for building an outline, point by point. Table 6.3 explains each of the toolbar buttons.
If you have an existing document you want to view as an outline, you can still use Outline view. When you switch to Outline view, Word uses the headings, line breaks, and indents you typed to display the document in outline form.
Table 6.3. Outlining Toolbar Tools
Button | Name | Description |
|---|---|---|
Promote | Promotes the text one heading level. | |
Demote | Demotes the text one heading level. | |
Demote to Body Text | Demotes the text to body text. | |
Move Up | Moves the text up. | |
Move Down | Moves the text down. | |
Expand | Expands the selected text. | |
Collapse | Collapses the selected text. | |
Show Heading 1 | Shows heading 1 only. | |
Show Heading 2 | Shows heading 2 only. | |
Show Heading 3 | Shows heading 3 only. | |
Show Heading 4 | Shows heading 4 only. | |
Show Heading 5 | Shows heading 5 only. | |
Show Heading 6 | Shows heading 6 only. | |
Show Heading 7 | Shows heading 7 only. | |
Show All Headings | Shows all headings. | |
Show First Line Only | Shows the first line of each heading or paragraph. | |
Show Formatting | Toggles outlining formatting on or off. | |
Master Document View | Switches to Master Document view (learn more about this coming up later in the chapter). |
Outline headings you assign are based on Word's built-in heading styles. Headings can help you arrange your thoughts in an orderly fashion. Heading 1 is the topmost outline heading you can apply, followed by Heading 2, Heading 3, and so on to Heading 7. When you finally get to the point of adding some regular text, you can assign the Body Text style.
To begin any outline, start by typing all the main points as Heading 1 level text in the document. Press Return at the end of each heading and start another heading. You can choose to enter all the level 1 headings first and fill in subheadings afterward, or you can enter in all the text at once and change levels later. It's easy to promote or demote a line to another heading level. To change the heading levels, use any of the following methods:
As you're building your outline, you'll probably need to move parts of it around. You can rearrange your headings in your outline using several methods:
You can drag a heading and drop it where you want it to go. Just click and drag the + or – icons in front of the heading to move the heading.


By default, Outline view shows all the headings and text you type into your outline. As you work with the material, you may want to view only headings with level 1 assigned, or just view heading levels 1 and 2. You can control which headings appear in the outline using the buttons on the Outlining toolbar. Use these methods to change your view of the headings:


To collapse a single heading and subheadings, double-click the + icon in front of the heading. Once collapsed, click the – icon in front of the heading to expand it again.
After completing your outline, you can switch to Print Layout view or Draft view and finish writing the text, fleshing out each heading in the outline.
For many of us, outlines are associated with all the funny numbering techniques they taught you back when you were learning to write research papers and reports, such as Roman numerals or sequences of tiny iii's. You can find these same numbering sequences in Word today. Word offers seven outline numbering formats you can apply, or you can create your own numbering system. To add numbering, follow these steps:
Select the entire outline, and choose Edit
Choose Format
Bullets and Numbering.This opens the Bullets and Numbering dialog box, shown in Figure 6.30.
Click the Outline Number tab.
Choose a numbering style.
If you don't see a style you like, you can click the Customize button and make your own.
Click OK.
Word applies the numbers to the outline.

You can whip up notes for any document you plan to create using Notebook Layout view. One of Word's view modes, Notebook Layout view, looks and acts a bit differently than the other views. Looking just like ...well, a notebook, this view lets you record notes and random thoughts and rearrange them to start creating a cohesive document. By default, Notebook Layout view appears as a binder with notebook rings. When you first open the view, a clean sheet of ruled "notebook" paper appears onscreen. The pasteboard background behind the notebook is supposed to resemble a desk. Figure 6.31 shows an empty page in Notebook Layout view. It suddenly brings back memories of classes and lectures, doesn't it?
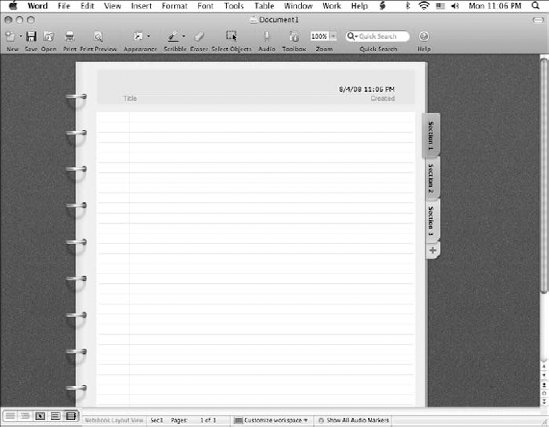
Billing itself as an electronic notebook, Notebook Layout view is ideal for taking notes on a laptop computer, designing an outline, or just gathering materials for a future project. You can even record audio notes using your computer's built-in microphone. You can add tabs to the electronic notebook and organize material into categories, flipping back and forth between your notebook pages. You can even scribble in freehand on the page using a mouse or pen tool. You can add graphics objects, such as AutoShapes, photos, or just about any other type of object you want to place on a page.
As a specialized view mode, Notebook Layout view doesn't play well with the other views in Word, so it's not a good idea to start a document in Print Layout view, and then switch over the Notebook Layout view to finish the document. Rather, this specialized layout view is best for capturing thoughts and ideas. If you do try to convert an existing document into Notebook Layout view, be prepared to lose some formatting, such as headers and footers or caption text. The prompt box shown in Figure 6.32 appears to warn you if you convert an existing document. To create a new document, click the Create New button instead. If you want to convert an existing document, click the Convert button.
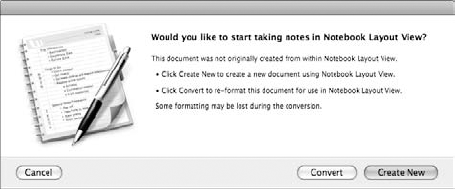
Figure 6.32. If you switch to Notebook Layout view with an existing document open, Word displays this prompt box.
To change your notebook's appearance, click the Appearance button on the Standard toolbar and choose another look. To turn the ruled lines on or off, display the Rule Lines pane in the Formatting Palette and click the Style menu. Choose None to turn the lines off. You also can specify a distance between lines using the Distance setting. To change the pasteboard background, click the Customize workspace button located on the Status bar and choose another design from the pop-up menu.
To enter note text in Notebook Layout view, just click where you want to insert it and start typing. When you press Return, you start a new paragraph or outline heading. As you enter each line, a tiny gray circle bullet appears over in the left margin. You can see the bullet when you move your mouse pointer over the note text, as shown in Figure 6.33. This bullet works much like the icons that appear in front of headings in Outline view. You can click and drag the bullet icon to move the text around on the page. To create subheadings under a main heading point in your outline, press Tab. If your text includes subheadings, as in Figure 6.33, you can expand and collapse the headings by clicking the Expand or Collapse arrow icon in the left margin.
The Notebook Layout view offers several special toolbar buttons on the Standard toolbar. Table 6.4 explains each of the buttons you see on the toolbar, including the ones you're already familiar with. The Formatting Palette in the Toolbox also displays some special panes just for working with notebook text and items.

Table 6.4. Notebook Layout Tools
Note
You can use the Formatting Palette's formatting controls in Notebook Layout view just like you do in the other view modes. You can format your text by changing fonts, sizes, and text color, or adding bullets, numbers, borders, or shading. You cannot, however, control alignment or other paragraph formatting options.
To add text on another section tab in your notebook, click the tab heading. Notebook Layout view starts you out with three sections or pages. You can add more if you need them; click the + tab, or Control+click the section heading tab and choose New Section from the context menu. To assign the tabs unique names, double-click the name and type another. Press Return, and the new name is assigned. You also can rearrange sections by dragging and dropping them where you want them to appear in the lineup.
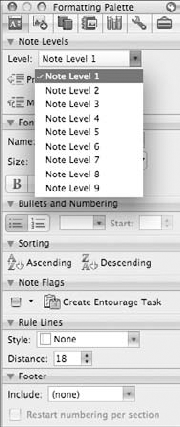
Like Outline view, you can set text levels to promote or demote notes in your notebook outline. Note Level 1 is the highest level, and Note Level 9 is the lowest. You can use the buttons in the Formatting Palette's Note Levels pane to assign text levels, you can drag and drop text to change levels, or you can use keyboard shortcuts. Figure 6.34 shows the Level menu from the Note Levels pane.
When you first start typing in Notebook Layout view, Note Level 1 is assigned by default. To change the text level, click the line of text and then apply any of these methods:
To demote text, click the Demote button in the Note Levels pane in the Formatting Palette or press Control+Shift+→.
To promote text, click the Promote button in the Note Levels pane or press Control+Shift+←.
To move a line of text up in the outline, click the Move Up button in the Notes Levels pane or press Control+Shift+↑.
To move a line of text down in the outline, click the Move Down button or press Control+Shift+↓.
Press Control+Tab to indent text without changing text levels.
Press Control+Shift+A to expand all levels.
To assign a different note level, click the Level menu on the Note Levels pane and choose a level.
To add actual bullets or numbers to your text levels, display the Bullets and Numbering pane in the Formatting Palette and click the Bullets or Numbering button.
You can sort your notes using the sorting commands in the Formatting Palette. Display the Sorting pane in the Formatting Palette, as shown in Figure 6.35, and click either Ascending or Descending. Ascending sorts your notes in ascending order based on the first letter of the text level, while descending sorts the notes in descending order.

Figure 6.35. The Sorting pane has options for sorting your notes, while the Note Flags pane has options for flagging your notes.
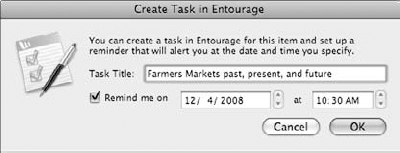
You also can assign a flag to your notes. For example, you can insert a colored check box in front of a text level or assign a priority level. Display the Note Flags pane, click the Note Flag arrow icon, and choose a flag. To turn a note into an Entourage task, click the note and then click the Create Entourage Task button. The Create Task in Entourage dialog box opens, as shown in Figure 6.36. Set a reminder date and time, and click OK to create the task.
You can create freehand drawings on your notes pages using the Scribble tool. If you have a pen tablet, you can use a stylus to scribble on the page. If you don't, you can use your mouse. Your scribbles may be a bit rough, but with a little practice, you can create some basic shapes. Word treats the drawings as picture objects, which means you can move, resize, and format them like other graphic objects. To learn more about how to work with graphics in Word, see Chapter 30.

If you're using Notebook Layout view in a classroom or lecture environment, you can turn on the audio features and record notes. You can focus on typing the main points and let the audio recording take care of the details. As you type your notes, the audio tool inserts speaker icons for the snippets of audio that match what you typed at the time, synching the audio as you type. You can play back the recording later to refresh your memory about the material covered. Figure 6.38 shows an example of the audio tools.

Table 6.5. Audio Notes Tools
Name | Description | |
|---|---|---|
Record Status | Displays the recording status as Standing By or Recording. | |
Input Level Indicator | Displays the microphone volume level. | |
Input Volume | Lets you drag the slider to increase or decrease the microphone's volume input. | |
Record | Starts recording audio. | |
Pause | Pauses audio playback. | |
Stop | Stops recording or audio playback. | |
Timeline Slider | Displays the audio recording length. | |
Audio File Size | Displays the audio file size. |
When you're ready to record, click the Record button and begin typing your notes. As you type, Word creates new audio notes for each line you create in the notebook. Click the Stop button to stop recording. To play back the recording, click the Play button or click the audio icon in front of the note text. If you need to pause the recording, click the Pause button.
Any audio notes you record are saved along with the Word document file. If you no longer need the audio recording, you can delete it; choose Tools
Note
You can export any audio files you record in Notebook Layout view. Choose Tools
Hold onto your hats, because this next feature is extremely cool and easy to use, and it can manufacture amazing documents in a flash. New to Office 2008 for Mac, the Publishing Layout view is a built-in desktop publishing program that you can use to create all kinds of professional-looking documents from newsletters and brochures to posters and flyers. You can choose from dozens of well-crafted templates, plop in your own text, and create a snazzy document that's sure to impress and communicate your ideas efficiently.
If you've ever worked with a desktop publishing or page-design program before, you'll find that Word's Publishing Layout application works in much the same way. Publication documents are based on layouts that govern the positioning of text, graphics, and photos on a page. Each object can be moved and edited separately. Depending on what type of publication template you choose, the layout may include more than one page or section. Every publication starts with placeholder text that gives you some idea about the appearance of the text.
In addition to a variety of templates, Word's Publishing Layout view also offers quick access to tools to help you edit and change the text and objects in a layout. You can customize any template to create a publication that suits your needs.
If you attempt to open an existing document in Publishing Layout view, a Welcome box appears, as shown in Figure 6.39. Click the Create New button to start a brand new publication, or click the Continue button if you want to edit the existing document in Publishing Layout view.
Word opens a new, blank document in Publishing Layout view. To get started, click the Publication Templates tab from the Elements Gallery, and then click the type of template category you want to browse. When you find a template you like, click it, and Word creates it onscreen. Simply insert your own text and photos. It really is as simple as that—and if you're in a hurry, you couldn't ask for a better way to fast-track a document that looks as good as any of the templates available for this feature.

Note
You also can create a new Word publication using the Office Project Gallery. See Chapter 33 to learn more about this feature.
Here's a run-down of the templates you can expect to find in Word's Elements Gallery:
Newsletters: This category lists all kinds of newsletters you can create in Word.
Brochures: This category lists a variety of brochures you can whip up in Word.
Flyers: Choose from several flyer templates available in Word.
Invitations: Choose from informal and formal invitations.
Programs: Create a picture or school program for your next event.
Business Cards: Choose from several professional-looking business card documents you can make in Word.
Postcards: Create a marketing or announcement postcard.
Catalogs: Create a photo catalog or booklet catalog.
Awards: Whip up a nice award document to print out.
Menus: Create a bistro or takeout menu.
Posters: Choose from several poster styles.
Signs: This category lists several signs you can create to announce sales or other events.
CD Labels: You can create your own DVD or CD labels using these Word templates and make use of Avery brand stickers to print them.
As soon as you choose a template from the Gallery, Word creates the document, and it's ready to go. Most templates include placeholder text, as shown in Figure 6.40. You can replace the placeholder text with your own text. The placeholder text is there to show you what the layout and formatting looks like for the template. Of course, you can change the formatting to suit your own needs. To replace the placeholder text, click the text box and start typing. To replace a photo or graphic, drag a photo into the box. You also can Control+click the object and select Change Picture from the context menu. You can then navigate to the image you want to use and insert it instead of the default image.

When you finish creating the publication, you can save the file. To learn more about saving documents, see Chapter 5. To learn more about using graphic objects in Word, see Chapter 30.
For most users, whipping up a quick publication is all that's needed, and filling in placeholder text and photos is pretty straightforward and intuitive. Because all the formatting and design is done for you, the hard part is coming up with your own words. However, as you can see by all the tools available on the Standard toolbar, you can certainly start tweaking a publication's design and formatting if the need arises. You can create your own publication templates, altering the Master Pages to create new designs and layouts, adding your own page elements, and even including movies and sound. You can find tutorials online to help you navigate the techniques and procedures for creating more complex layouts in Word. Of course, if it's real page layout tasks you want to perform, a desktop publishing or page-design program is your best bet. Word's Publishing Layout tools can certainly put you one step closer to a full-blown design program, but even then, it's limited. Regardless of any limitations, including such an innovative feature in Word is a fantastic idea and you're bound to have fun seeing what sorts of publications you can generate using it.
This chapter showed you how to start creating documents in Word. First, you learned how to enter and edit text. This chapter taught you how to use AutoCorrect and AutoText to speed up your typing tasks. You also learned how to select and edit text, use the Undo and Redo commands, copy and move text, and find and replace text. You found out how easy it is to give your document structure using columnar layouts using tabs and columns. You also learned how to insert special text elements, like drop caps, symbols, and special characters.
To finish up your education on document building, this chapter instructed you on how to create documents based on outlines and templates using Word's Outline, Notebook Layout, and Publishing Layout views.