
IN THIS CHAPTER
Creating tables
Navigating tables
Entering table text
Insert and deleting table parts
Formatting tables
Come on over here, pull up a table, and join me in a rousing discussion of Word's table tools. Tables are one of Word's most flexible program features. Tables are widely used to give structure to all kinds of document types, including Web pages, reports, lists, and more. What's the big deal about tables, you may ask? Tables allow you to precisely control the positioning of text and other elements across a page. No other columnar tool does this. Everything you type into a table has its own spot and never encroaches into another cell unless you okay it. Because everything stays in its own cell, you can be sure it's going to look nice, neat, and confined. That's not to say tables are confining. They're anything but confining because of the flexibility they offer. This clearly defined structure, however, is something you can count on when laying out a page design.
In this chapter, you'll learn how to create tables of all types to hold all types of content. You'll find out how to create quick tables using the Elements Gallery, design your own table from scratch, edit tables, make them look extra pretty, and even perform a whiz-bang mathematical formula—that's right, Excel's not the only math wizard in this Office town.
By their very nature, tables are rectangular in shape and appearance, even if you don't include any set borders to define their edges. Tables are constructed of columns and rows, and the areas in which the columns and rows intersect are called cells. Tables are an excellent choice for placing text and other content across and up and down a page. Each cell in a table is like a room in a house, holding the content faithfully. Maybe that's not a very good analogy after all, because you may have some rooms in your house overflowing with content that seems to spill into other rooms. Table cells can expand to fit content as needed, yet still retain the original structure and design. Tables are ideal for making invoices, lists, catalogs, newsletters, reports, calendars, and so on—you name it, a table can help you build it in some form or fashion. For years, Web designers have been using table structures to build Web pages. In this section, I show you all the various methods for creating tables in Word. After you've created a table, you can start inserting text and other types of content.
Word's Elements Gallery comes stocked with a variety of table elements you can use, called Quick Tables. You can find everything from basic tables to more complex table structures. Word's Quick Tables are preset and preformatted, which means all you have to do is plug in your table text and rest assured it's going to look good. When you display the Quick Tables in the Elements Gallery, you can scroll through the list and pick the table element you want to apply. Click the Basic tab to view 12 different tables with various degrees of color and shading applied. Click the Complex tab to view more intricate tables for creating calendars, directions, invoices, or reports.
To assign a table from the Quick Tables library, follow these steps:
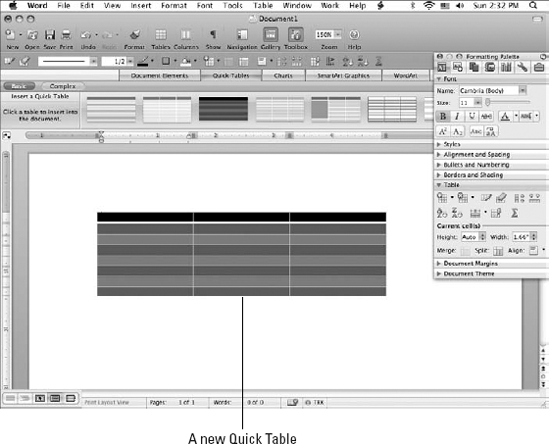
Click the Quick Tables tab on the Elements Gallery.
Word opens the Quick Tables display, as shown in Figure 8.1.
You can scroll through the tables to find the one you want; move the mouse pointer over a table to view a description.
Click a table.
Word inserts it into your document, as shown in Figure 8.2.

Wow. How easy was that? The hard part, as always, is adding your own data to the table cells. When you insert a table, the Formatting Palette adds the Table pane to the list of panes. You can use the tools on the Table pane to edit and work with your rows and columns.

If you want to insert a table with a little more planning and thought, use the Insert Table dialog box. Here you can find settings for specifying a table size, controlling how data fits with AutoFit, and applying AutoFormatting. You can learn more about using AutoFormat later in this chapter. The Insert Table dialog box has three AutoFit behavior radio buttons from which you can choose. The Initial column width radio button is set to Auto by default. If you want to set a precise measurement for column width, you can change this setting by typing a measurement. The AutoFit to contents radio button creates narrow columns that expand as you type in your table text. The AutoFit to window radio button spaces the columns evenly across the page.
If you know you're always going to be inserting the same table size, you can make the table settings you specify the default sizes for any new tables you create.
To insert a table, follow these steps:
Choose Table
Insert Table.
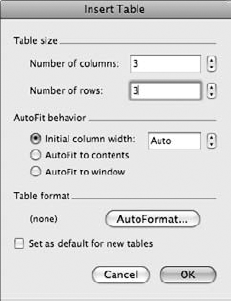
The Insert Table dialog box opens, as shown in Figure 8.4.
Under the Table size options, specify a number of columns for the table.
You can type the number into the field, or you can use the spinner arrows to set a number.
Specify the number of rows you want to create. Again, you can type the number in directly or use the spinner arrows.
Choose an AutoFit behavior.
Optionally, you can AutoFormat your table with the AutoFormat button.
Click OK.
Word creates your table, as shown in Figure 8.5.
Look on the Formatting Palette for the Table pane, a collection of tools for working with table elements.

If you're really after a custom table, you can design your own using Word's Draw Table tool. When activated, this tool opens the Tables and Borders toolbar, and you can use the various tools to draw your own table using a pencil tool. By drawing a table, you can control how big it is, how many columns and rows it contains, and the size and spacing of your columns and rows.
To draw a table, follow these steps:
Choose Table
Draw Table. You also can click the Draw Table button located in the Table pane on the Formatting Palette.The Tables and Borders toolbar opens, and the mouse pointer takes the shape of a pen icon.
Click and drag the size of the table you want to create in the document, as shown in Figure 8.6.
Click and drag each row and column you want to appear inside the table, as shown in Figure 8.7.
When the table is complete, click the Draw Table button to turn off the drawing feature.


You can edit your table at any time by drawing new lines or erasing existing ones. Table 8.1 explains each of the tools available on the Tables and Borders toolbar.
Table 8.1. Tables and Borders Toolbar Tools
Button | Name | Description |
|---|---|---|
Draw Table | Turns the drawing feature on or off. | |
Eraser | Erases table lines you drag over. | |
Line Style | Changes the line style. | |
Line Weight | Changes the line thickness. | |
Border Color | Assigns a color to the table borders. | |
Border | Controls which borders appear on the table. | |
Shading Color | Assigns a background color. | |
Insert or Draw a Table | Inserts table elements, such as rows or columns, or open the Insert Table dialog box. | |
Merge Cells | Merges two or more cells into one large cell. | |
Split Cells | Splits a large cell into two smaller cells. | |
Align | Aligns table cell contents. | |
Distribute Rows Evenly | Evenly spaces your rows throughout the table. | |
Distribute Columns Evenly | Evenly spaces your columns throughout the table. | |
Table AutoFormat | Opens the AutoFormat dialog box and applies preset formatting to the table. | |
Change Text Direction | Changes the direction of text inside a cell. | |
Sort Ascending | Sorts the table in ascending order. | |
Sort Descending | Sorts the table in descending order. | |
AutoSum | Applies Excel's AutoSum formula to total a row or column. |
These techniques help you utilize the toolbar buttons and tweak your freshly drawn table:
To erase a line, click the Eraser tool and drag across the line you want to remove.
To add a new line to create a new column or row, click the Draw Table tool and draw another line on the table.
To let Word insert a row or column for you, click where you want it to go, click the Insert Table arrow icon, and choose what you want to insert.
To change the thickness, color, or style of a line, select it and click the appropriate formatting button on the Tables and Borders toolbar.
To add inner and outer borders to your table cells or whole table, click the Border button and click a border style.
To merge two cells into one, select both cells and click the Merge Cells tool.
To split a cell, select it and click the Split Cells tool.
To control text alignment inside a cell, select the cell, click the Align button, and choose a new alignment.
To move a row or column border, drag the border.
You can learn more about entering text and selecting table elements later in this chapter.
You can convert existing text within a document into a table. For example, if someone sends you a document with tabbed text, you can convert the text into a table. To make this technique work properly, the text should be in some sort of list format. When converting the text, you can choose to separate the text at the paragraph marks, commas, tabs, or another key. Even then, it might not turn out the way you might expect, so anticipate some editing afterward.
Follow these steps to convert document text into a table:
Select the text, as shown in Figure 8.8.
Choose Table
ConvertConvert Text to Table.The Convert Text to Table dialog box opens, as shown in Figure 8.9.
Set the number of columns you want to use.
Optionally, leave the default Auto as the Initial column width setting to let Word determine the column widths. If you want to set a precise width, type a measurement instead.
Choose how you want the text separated.
Click OK.
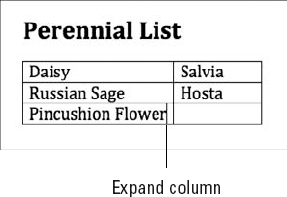
Word converts the text into a table, as shown in Figure 8.10.


Note
You also can turn table text into regular text. Select the table, and choose Table

After you have a table inserted into your Word document, you can "set" your table with text and graphics. Insert your forced snicker or guffaw here, because I'm sure that pun has never shown up in a Word chapter before now. With a nicely made table now in place, you can begin entering text into the table cells. You also can start tinkering with the table structure to make it suit your needs. Missing a few rows? Add as many as you like. Need a bigger cell? Merge the cells. Want to dress it all up with a border and shading? Click a few formatting buttons, and you're good to go. Everything about a table is editable, as you're about to find out in this section.
Before we begin, let me also advise you to check out the Tables and Borders toolbar. The Tables and Borders toolbar is extremely handy for performing all kinds of table tasks, so you might want to keep it open while working with tables. Choose View
Each table cell can contain the content of your choice, such as text, clip art, photographs, drawn shapes and objects, hyperlinks, and so forth. The easiest way to enter text is to click in the first cell and start typing. You can use keyboard shortcut keys to navigate the table as you type so your fingers never have to leave the keyboard. Table 8.2 lists the keyboard navigation keys you can use.
Table 8.2. Table Navigation Keys
Keys | Navigation Action |
|---|---|
Control+Home | Moves to the first cell in the current row. |
Control+End | Moves to the last cell in the current row. |
Control+Page Up | Moves to the top cell in the current column. |
Control+Page Down | Moves to the bottom cell in the current column. |
Option+Clear | Selects the entire table. |
Tab | Moves to the next cell. |
Shift+Tab | Moves to the previous cell. |
Note
Not all of the shortcut keys listed in Table 8.2 are available on all Mac laptops.
Depending on how you set up your table, the cells may expand to fit the text, or the text may wrap to the next line when it reaches the cell's right margin. If the table is set to AutoFit, the column resizes to fit the text you enter. To turn on the AutoFit feature to resize as you type, choose Table
If you set up specific measurements for your table columns in the Insert Table dialog box, any text that exceeds the column width is wrapped to the next line in the cell, an action known as text wrapping. In Figure 8.12, the same text now wraps to the next line in the cell. If you don't want text to wrap in the table cells, you can turn off the text wrap feature. To do so, you must open the Table Properties dialog box by choosing Table

If you're typing along and get to the end of the table and need to add another row, just press Tab, and Word inserts it for you so you can keep typing.
Adding text to tables is pretty easy. Adding other types of content is just as easy. Word's tables expand to fit any graphic objects you might add. For example, to add a photo to a cell, click the cell and choose Insert

You need to learn how to select table elements in order to edit them or apply formatting. Selecting parts of a table is sometimes a tricky endeavor. You can select a single cell, groups of cells, columns, rows, or the entire table. You can select text within a cell just like you select any other document text; see Chapter 6 to learn more about basic text selection techniques. Use the following tips and techniques to select table elements:
To select a cell, click the cell.
To select multiple cells, drag across the cells.
To select an entire column, click the top border of the column or Option+click anywhere in the column.
To select an entire row, click the left border of the row.
To select an entire table, move the mouse pointer to the upper-left corner of the table and click the table's selection box, or triple-click the beginning of a row. In Figure 8.14, the entire table is selected.
You also can use the Table menu to select table elements; choose Table

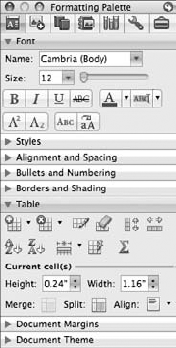
When you add a table to a document, the Formatting Palette adds a Table pane to the list of formatting panes, as shown in Figure 8.15. You can find a variety of tools in the pane for working with tables, columns, and rows. If the Formatting Palette is not displayed, click the Toolbox button on the Standard toolbar. Click the Table pane heading to expand the pane and view the tools. To activate a tool, simply click it, or in the case of the Height and Width fields, click the spinner arrows.
Table 8.3 explains the table-oriented tools you can find on the Table pane. Many of these tools can also be found on the Tables and Borders toolbar.
Table 8.3. Using the Table Pane

You can resize the columns and rows in a table, making rows shorter or taller, or making columns thinner or wider. To manually resize columns and rows, move the mouse pointer over the border of any row or column and drag to resize the row or column. Figure 8.16 shows a column resizing by dragging the selected column border.

You also can let Word handle all the resizing for you using the AutoFit and Distribute commands. Both of these commands and their subcommands can help you adjust column width and row height to make the table look the way you want. Use any of the following methods to activate the commands:
To create symmetrically balanced columns and rows, choose Table
To make the table fit the contents of whatever you type into the cells, choose Table
You also can find the AutoFit to Contents command on the Table pane in the Formatting Palette. Click the AutoFit arrow button, and click AutoFit to Contents.
Another way to find AutoFit to Contents is to click the Insert or Draw Table arrow button and click AutoFit to Contents.
Wait, there's one more place to access the AutoFit command: Control-click and choose AutoFit from the context menu and then click the AutoFit command you want to apply.
To make the table fit the entire width of the page regardless of what you type, choose Table
If you prefer to control how big your columns and rows are in a table, you can set your own measurements using the Height and Width fields in the Formatting Palette's Table pane, as shown in Figure 8.17. Simply type a measurement in the appropriate field, or click the spinner arrow buttons to set a measurement.
You also can set the row height, column width, or cell width using the Table Properties dialog box, as shown in Figure 8.18. Choose Table

You can make edits to any of the table elements to modify the table structure. For example, you may find you didn't make your table big enough the first time and you need to add some more rows and columns. Or perhaps you were much too ambitious with the number of cells you created and need to remove some. You find plenty of tools in Word to help you edit the various parts of your tables.
If your table needs more columns and rows, you can quickly insert them using the Table menu or the Tables and Borders toolbar. If the Tables and Borders toolbar is not displayed, choose View
Start by clicking where you want to insert a new column or row, and use any of the following techniques:
To insert a column, choose Table
To insert a row, choose Table
To insert multiple columns or rows, select the number you want of existing columns or rows and apply the Insert Columns or Insert Rows command.
If the Tables and Borders toolbar is displayed, click the Insert Table arrow icon, as shown in Figure 8.19, and choose what you want to insert. You can insert columns to the left or right or rows above or below.

You can remove columns and rows you no longer want or need. When you delete columns and rows, any data contained within the cells is deleted as well. Word shifts all the other columns and rows over and up to fill the void. Select the column or row you want to remove, and use any of these techniques:
To delete a column, choose Table
To delete a row, choose Table
You also can Control-click and choose Delete Rows or Delete Columns.
You might think you can simply press the Delete key, but that only deletes the cell contents, not the column or row. Learn how to delete cells entirely coming up next.
You can insert and delete cells in a table. When you insert cells, Word automatically adds a row or column, not just a cell. When you delete cells, Word can literally delete just the cell, leaving a hole where the cell once resided. Whether you're inserting or deleting cells, the steps are the same. The only thing different is the name of the dialog box.
When you add or delete cells, you must tell Word how you want to handle the remaining cells in the column or row. Do you want them to shift left or right, or shift up or down to fill the void? Depending on your location in the table, the option names may vary slightly. Follow these steps to remove cells:
Click where you want to delete a new cell.
Choose Table
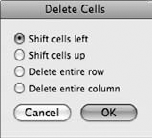
DeleteCells. You also can click the Eraser arrow button on the Table pane and choose Delete Cells.The Delete Cells dialog box opens, as shown in Figure 8.20.
Choose how you want to remove the cells.
Click OK.
Word removes the cells as specified. Figure 8.21 shows an example of a table with one cell removed.

To insert cells, choose Table
You can easily remove tables you no longer want in a document. Select the table (click its table selection box icon in the upper-left corner), and use any of these methods:
Click the Delete Table button in the Table pane.
Choose Table
Click the Eraser button, and drag across the entire table.
Tip
You can move a table to another location in your document. The easiest way to move a table is to switch to Print Layout, Web Layout, or Publishing Layout view, select the table selection box, and drag the table to a new location.
You can insert tables within tables in Word, thus creating nested tables. Nested tables are handy when you're using a Word table to create a page layout, or need to present other table information within your main table. To create a nested table, just click inside the cell in which you want to add a table and use any of the table creation methods you learned earlier in this chapter. Figure 8.22 shows a nested table.

Another way you can manipulate a table's structure is by merging or splitting cells. When you merge cells, you take two or more cells and combine them to create one large cell. When you split cells, you're taking a single cell and splitting it into two smaller cells.
To merge cells, follow these steps:
Select the cells you want to merge.
Click the Merge Cells button on the Tables and Borders toolbar, or choose Table
Merge Cells.Word merges the cells into one.
To split cells, follow these steps:
You also can activate the Draw Table features and simply draw a line to split a cell or erase a line to create a larger cell.
Tables are fairly simple structures, clean and neat in appearance. As such, they look pretty good on their own. You can apply formatting attributes to make them look more interesting. For example, you may want to control how borders are used in a table. You can apply borders to the outside of a table, borders to the inside, borders around every cell, or no borders at all. Borders can help define the structure of your table and make the data within the cells easy to distinguish. Borders are just one example; there are more. Are you ready to see what you can do with formatting? Let's start styling tables.
To begin, you'll find options geared just for tables in the Tables and Borders toolbar. You can quickly assign a border; change the line style, thickness, and color; and add shading behind the cell text. To view the toolbar, choose View

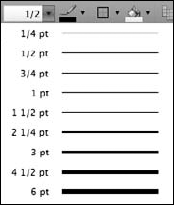
To control the line thickness, click the Line Weight arrow button, as shown in Figure 8.24, and choose a thickness setting from the menu that appears. You can choose from 1/4-point thickness to 6-point thickness.
To set a line style, such as dashes, dots, or double-line, click the Line Style button, shown in Figure 8.25, and choose a style.
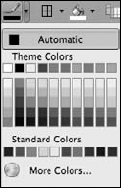
To change the border color, click the Border Color arrow button and select a color from the color palette, as shown in Figure 8.26.

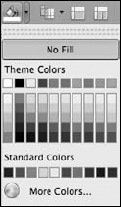
To add a color background, called shading, behind the table cells, click the Shading Color arrow button and choose a color, as shown in Figure 8.27. The palette looks shockingly like the Border Color palette.
To control the alignment of text within a table cell, you can use the Align button. You also can find table alignment controls on the Table pane in the Formatting Palette. When you click this button, shown in Figure 8.28, you can choose a horizontal or vertical alignment. Your alignment choices are:
Align Top Left
Align Top Center
Align Top Right
Align Center Left
Align Center
Align Center Right
Align Bottom Left
Align Bottom Center
Align Bottom Right

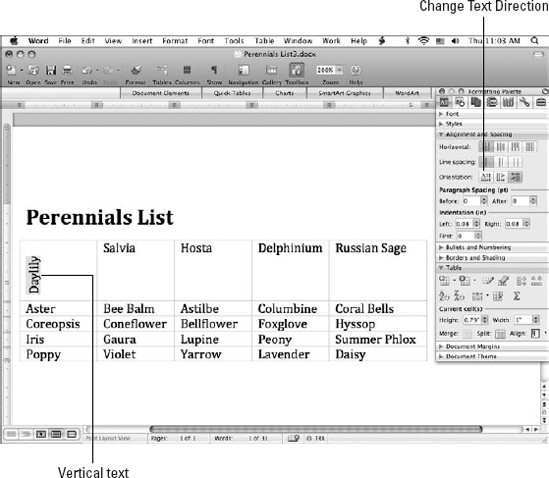
To create vertical text, click the Change Text Direction button found on the Alignment and Spacing pane. Word rotates the selected cell's text, as shown in Figure 8.29. You can keep clicking the button to arrive at the direction you want to apply.
In addition to these table-specific formatting controls, you also can use the regular formatting tools to change the font, font size, alignment, text color, and so on.
You can spend lots of time fine-tuning the appearance of your Word tables, tweaking border styles, adding shading, and trying this and that to see how it looks. But if you're short on time and creativity, let Word handle all the formatting for you. How? That's easy—AutoFormatting. The AutoFormat feature taps into a library of preset formatting you can apply to Word tables. The presets include shading for cells, borders, 3-D looks, and more. You can use the Table AutoFormat dialog box to browse through the library of table formatting styles and preview each one. You also can control exactly which formatting attributes to include and which table elements to apply the formatting to—all in one convenient location.
To apply AutoFormat, follow these steps:
Select the table you want to format.
Click the Table AutoFormat button on the Table pane in the Formatting Palette or on the Tables and Borders toolbar. You also can choose Table
Word opens the Table AutoFormat dialog box, as shown in Figure 8.30.
Scroll through the list of formats, and select the one you want.
You can preview each format in the Preview area.
Optionally, you can choose which formats you want to apply by deselecting check boxes.
You also can choose to apply the formatting to specific parts of your table.
Click OK.
Word applies the formatting, as shown in Figure 8.31.

The first row of a table is typically used as headings in your table structure. For example, your first row might contain labels in each cell for days of the week, financial quarters, category headings, and so on. You may have a table that lists a long inventory of products and prices, for instance. When the table exceeds a document page, you can no longer see the headings for each column. Word has a fix for this, called Heading Rows Repeat. To utilize this command, select the top row of your table and choose Table
When you create a table, Word assigns default margins inside the cells. You can set your own margins using the Table Properties dialog box. For example, you may want no margins in a cell containing a photo so you can resize it to fit the entire cell, or you may want extra space outside the cells if you're using a table to create a page layout for a Web page. A measurement of .1 or less can make for a very attractive appearance; anything more than this creates a table that resembles a waffle.

To set cell margins and spacing for the entire table, follow these steps:
Select the table.
Choose Table
Table Properties.Word opens the Table Properties dialog box, as shown in Figure 8.32.
Click the Table tab.
Click the Options button.
Word opens the Table Options dialog box, shown in Figure 8.33.
In the Default cell margins fields, set the cell margins you want to use.
You can type a measurement or click the spinner arrows to set a measurement.
Wrapping Text around Tables
You can use Word's text wrapping command to control how document text flows around a table you insert onto a page. By default, the text wrap is set to None, which means text cannot flow around a table. Using the Table Properties dialog box, you can set text wrapping to Around. Choose Table
To control spacing between cells, set a measurement in the Allow spacing between cells field.
A setting of .1 or less looks great, but a larger setting creates the waffle effect discussed earlier.
Click OK.
Click OK again to exit the Table Properties dialog box.
Word applies the changes to the table.


To set cell margins and spacing for a selected cell or group of cells, follow these steps:
Select the cells you want to edit.
Choose Table
Table Properties.Word opens the Table Properties dialog box, as shown in Figure 8.32.
Click the Cell tab.
Click the Options button.
Word opens the Cell Options dialog box, shown in Figure 8.34.
Deselect the Same as whole table check box.
Set the cell's margins using the Top, Left, Bottom, and Right fields.
You can type a measurement or click the spinner arrows to set a measurement.
Click OK.
Click OK again to exit the Table Properties dialog box.
Word applies the changes to the table.

Lest you think your Word tables are just static containers for text, allow me to introduce you to a couple of unique actions you can perform with your tables. First, you can sort your tables and redisplay their contents based on an alphabetical sort in ascending or descending order. Second, you can use the AutoSum function to quickly produce a sum total for a column or row of numeric data. Sound intriguing? Keep reading.
You can sort a table based on a heading. For example, if your table's first row contains headings that describe the rest of the table, you can sort the entire table based on one heading in the table. Perhaps your table lists various types of flowers with headings for Latin plant names, bloom season, and flower color. You can sort the entire list by flower color using the Flower Color table heading.
To perform a sort, follow these steps:
Click the table heading you want to sort by.
Click the Sort Ascending or Sort Descending button in the Table pane or on the Tables and Borders toolbar.
Word sorts the table, as shown in Figure 8.35.

If your table is much more complex, you can perform detailed sorts using the Sort dialog box. Choose Table
You can use the AutoSum tool to quickly insert a sum of cells in a table. For example, AutoSum automatically sums the row or column based on its location in the table. If you click in the last cell in a row and activate AutoSum, the function totals all the cells in the row to the left of the current cell. If you click in the last cell in a column and activate AutoSum, it totals all the cells above the current cell.
To apply the AutoSum function, follow these steps:
Click the cell where you want to add a sum.
Click the AutoSum button in the Table pane or on the Tables and Borders toolbar.
Word sums the row or column, as shown in Figure 8.37.
You can use other Excel functions in your Word tables as well. Choose Table


In this chapter, you learned a variety of ways to create tables. You learned how to use the Elements Gallery to insert Quick Tables, which are preset table designs that install with Microsoft Word. You also learned how easy it is to build your own tables using the Tables button on the Standard toolbar or the Insert Tables dialog box. If that wasn't enough, you learned how to create custom tables by literally drawing them on the document page. Using the table drawing tools, you can draw the exact size of the table and control where columns and rows appear.
This chapter also showed you what to do after creating a table structure. You learned about the plentiful tools available to help you work with the structure and contents, and make the table look good. You saw how you can choose from a wide variety of preset formatting to apply to your tables through the AutoFormat feature. If you prefer to format manually, the Tables and Borders toolbar offers a variety of tools for editing and working with tables, and you can find the same tools in the Table pane on the Formatting Palette. Both of these areas offer you quick access to table commands, but you also can access table commands through the Table menu.
Regardless of how you create your table, how you format it, or what it holds, you'll quickly see how useful and flexible tables can be in your document building tasks.