
IN THIS CHAPTER
Making use of the Office Help system
Searching for help on Office commands, tools, and features
Using the Office Reference tools to find help with words and research tasks
Have you ever bought a new gadget that came with an instruction sheet? Did you stop and read the instructions, or did you just plow right in and start using the new gadget? What about those assembly-required gadgets? Did you read the instructions then? Truth is, nobody likes reading the instructions, yet they're often very important in learning how to assemble and use the gadget. Most of the time, we only turn to the instructions when we get into trouble.
Microsoft Office 2008 for Mac also comes with some instructions, called the Help system, and like an instruction sheet, they're relatively brief, not much fun to read, and often lack detail. However, they can help you learn to use the programs, especially when you find yourself in a jam. Granted, they'll never be as good as a handy book like this one, but they'll do in a pinch.
In this chapter, you learn a few things about finding help with Office 2008. Whether you want to look up a feature or learn how to apply a command or you need some assistance with a current task you're trying to perform, you can tap into the Help features for some able assistance. This chapter shows you how. You also might find yourself needing help with words or research from time to time. There's a special type of help you can employ for such instances—the Office Reference tools. This chapter shows you how to look up words using the Dictionary or Thesaurus features, translate text, or look up info in the Encarta Encyclopedia.
Long, long ago, software manufacturers used to include bulky Help manuals along with the software you purchased for the computer. Those days didn't last too long, especially since it's so much easier to include a manual electronically now and the manuals were quickly outdated anyway. Today, almost every software program you buy comes with electronic Help files. You can use the Office Help files to find all kinds of information about tools, features, tips, and techniques. Each Office program has program-specific Help files. You won't be able to find information about an Excel function in the PowerPoint Help files. Office Help also works in the background. For example, the Office Help system kicks in when tooltip boxes pop up to reveal the name of a command button or a description of a feature, as shown in Figure 4.1. Prompt boxes that appear the first time you use a complex feature are also an example of the program's attempts to help guide you. Some dialog boxes and windows you encounter offer links to the Help system as well. The point is help is always at hand. To make the most of it, you need to know a few things about how to access it when you need it and how to navigate around the Help window when it's onscreen.

Figure 4.1. If you're paying attention, Office is always trying to lend a helping hand with tooltips that appear as you pause the mouse over icons and features.
You can find your way to the Office Help system using several different methods. The method you use depends on your preferred work style, whether you like to use menus or toolbar buttons or never let your fingers leave the keyboard. You can employ any of the methods below to access the Help files in any Office program:
Click the Help button on the Standard toolbar.

Press

After you activate the Help command, the Help window appears, as shown in Figure 4.2. This figure shows an example of a Help window from Word 2008.

Figure 4.2. The Help window first opens to a default Home page, showing links to popular topics and online help.
The very first thing you see when you open the Help window is a main page and a title like "Word Help Home" or "Excel Help Home." This title page has a few links you can follow to popular topics. It also has a few links for going online and finding help on the Microsoft Office Mac support Web site. When viewing the Help files, keep your eye out for links that can help you learn more about a topic or take you to information about a related topic. These are often good ways to learn new stuff about a program.
The next section explains how to navigate your way around the window and find the help you need.
The Help window operates like a mini-window, complete with window control buttons for closing, minimizing, and zooming the window, a toolbar, a viewing pane, and a bottom bar with a couple more tools. When you first open the window, the main Help page appears in the viewing pane, with links to popular topics or the Microsoft Web site. This page is called the Home page.
You have two major options for using the Help window. You can access Online Help or Offline Help. If your computer has a constant Internet connection, you can utilize the Online Help files from the Microsoft Web site. This option is the best because you can always be assured you're accessing the latest information. When you set the window to Offline Help, the help topics are more limited. You can toggle between Online Help and Offline Help using the pop-up option in the bottom-left corner of the window, as shown in Figure 4.3.

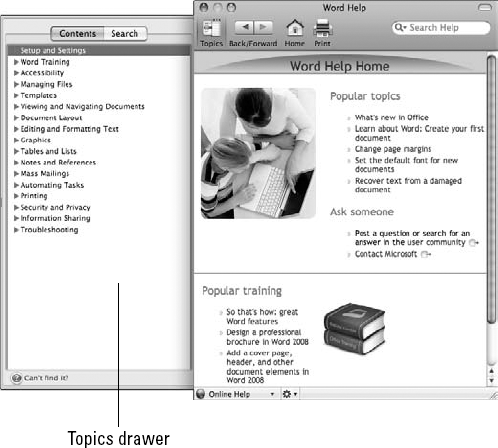
Figure 4.4. The Topics drawer has tabs for viewing the Help topics and searching through the topics.
The Help topics listed in the Contents tab are arranged under headings, and related topics are grouped together. For example, you'll find printing information under the Printing heading or information about templates under the Templates topic. To look through the topics in the Contents tab, click the topic you want to view. The list expands, and you can keep drilling down to find the information you want to read more about. When you find a topic you want to view, click it, and the information appears in the main viewing pane, as shown in Figure 4.5. In some cases, the help information contains links to other topics. Be sure to scroll to the bottom of the Help page to look for other useful information links.

Figure 4.5. Help topics range from descriptions and explanations to detailed steps, such as the ones shown in this figure.
The toolbar at the top of the Help window has buttons you can use to make your way around the Help topics. Table 4.1 explains how you can use each button.
Table 4.1. Help Window Toolbar Buttons
Button | Description |
|---|---|
Click the Topics button to open the Topics drawer for viewing Help topics. Click the button again to hide the drawer. | |
Click the Back button to return to the previous topic. | |
Click the Forward button to move forward a topic. | |
Click the Home button to return to the opening Help page. | |
Click the Print button to print the current Help topic. |
Clicking topics in the Contents tab of the Help window doesn't always produce the immediate results you're looking for. If you know what you want to find, you can use the search tools to look up a specific topic, command, or feature in the Help window. The Spotlight field, located in the top-right corner of the Help window, lets you type a keyword or phrase. As soon as you press Return, the Search tab in the Topics drawer displays any matches, as shown in Figure 4.6. Click a topic to view more about it.

You also can use the Mac OS X 10.5 (Leopard) search field located on the drop-down Help menu on the main menu bar, as shown in Figure 4.7, to look for help. Unlike the Office program search, however, this search tool looks through all the Apple programs. It also does a little something extra. If you're looking for a specific command or feature in the current program, type the word for it in the field, and the menu immediately displays a list of locations where you can find the command. Simply move the mouse over the location, and it's pointed out to you onscreen—literally. The menu where the command is located drops and highlights the command or points it out with a floating arrow. Very impressive!
In addition, the Help menu displays any related topics found in the Mac Help files. Click a topic to open the Mac Help system and view more about the topic.

By their very name, you'd think the Help files would be exhaustive in terms of explaining every nuance of a program. Alas, they are not. In fact, it seems that many software manufacturers are being very skimpy in what sort of information is included in the Help system these days. Perhaps they think everyone knows instinctively how to do everything on a computer these days? More likely, they want you to visit their Web sites for the info, and it's often buried where you can't find it easily. Don't give up, though, you can always do a general Web search and perhaps find the information you want elsewhere.
If you still can't find what you're looking for, try some of these Web sites:
Or better yet, buy a good book (like this one!) so you don't have to waste time on the Internet or looking through the Help system!
If you ever run into any trouble pertaining to words or language or you need some help researching a topic, the Office Reference tools can really be of great assistance. The Reference tools include a dictionary, thesaurus, text-translation feature, bilingual dictionary, and the Encarta Encyclopedia. You can find all the tools available in one spot—the Reference Tools palette, a part of the new Toolbox overhaul. To view the tools, follow these steps:


The Reference tools appear, as shown in Figure 4.8.

Figure 4.8. Use the Reference tools to look up information, find and translate words, look up meanings and synonyms, and search the Web.
Tip
You won't find a Toolbox icon on a toolbar in Entourage. Instead, you can access the Reference tools through the Tools menu directly (choose Tools
Each pane listed in the Reference Tools palette can be expanded or collapsed when you click the pane name. Obviously, the screen doesn't have enough room to view all the panes at once, but you can easily display the one you want to use at the moment. The following sections explain how to use each of the tools.
Do you ever find yourself in the middle of a document trying to think of another way of saying the same word you used earlier? Don't sweat it; help is here in the form of the Thesaurus tool. You can look up synonyms—words that have the same meaning as another—while you work and quickly insert them into your document, spreadsheet, presentation, or e-mail message.
Follow these steps to look up and insert a synonym:
Display the Toolbox, and click the Reference Tools button. See the previous steps to learn how to display the Toolbox.
The Reference tools appear.
Click the Thesaurus section heading.
Type the word you want to look up, and press Return.
The Meanings box lists any meanings for the word, and the Synonyms box lists any synonyms, as shown in Figure 4.9.
Click the synonym you want to use.
Click the Insert button.
The new synonym appears in the document.

You can use these same steps to replace a selected word in a document with a synonym.
You don't always have to open the Reference Tools palette to look up a synonym. If you're working in a document and need to look up a word, you can use the handy pop-up menu to utilize the Thesaurus tool. Simply Ctrl+click a word to display a pop-up menu, as shown in Figure 4.10, and then click the Synonyms command to see a list of synonyms. You can click a synonym from the list to replace the word in the document.

Do you ever need to look up a word to find its meaning? The Dictionary tool, another valuable part of the Office Reference tools, is ready to assist you. The feature taps into the Encarta World English Dictionary, which contains definitions, pronunciations, word histories, and usage notes. You need an Internet connection to use this feature. Follow these steps to look up a word:
Display the Toolbox, and click the Reference Tools button.
The Reference tools appear.
Click the Dictionary pane.
Type the word you want to look up and press Return.
The list box displays any meanings for the word, as shown in Figure 4.11.
You also can Ctrl+click a word to display a pop-up menu and then choose Look Up
Tip
Need more room in a Reference Tool pane? You can resize the panes, if needed, to view more information in the list box area. To do so, move the mouse pointer over the three dots at the bottom of the pane until the pointer changes to a double-sided arrow icon; then drag the pane border to the desired height in the palette.
If any of your Office projects involves researching a topic, you'll be happy to know you can do your research from within the Office program window. For this reference tool, you utilize the knowledge base of the Encarta Encyclopedia. You must have an Internet connection up and running to utilize this feature. Follow these steps to look up a topic:
Display the Toolbox, and click the Reference Tools.
The Reference tools appear.
Click the Encarta Encyclopedia pane.
Type the word you want to research, and press Return.
The list box shows the results, as shown in Figure 4.12, including any online links you can follow to view Web pages about the topic.
If you click a link, your default browser window opens and displays the page.


If any of your Office projects or work requires using foreign languages, you may find the Translation feature quite helpful. For example, if you're working on or viewing a letter containing a word you need to translate, you can activate the Translation tool, one of the many helpful tools among the Reference Tools palette. Follow these steps to translate a word:
Display the Toolbox, and click the Reference Tools.
The Reference tools appear.
Click the Translation pane.
Click the From: pop-up menu to choose a language to translate from.
Click the To: pop-up menu to choose a language to translate to.
Type the word you want to translate, and press Return.
The list box shows the results, including any online links you can follow for additional translation help, as shown in Figure 4.13.

Like the Thesaurus and Dictionary tools, you can use a shortcut to translate a word in a document. You can Ctrl+click a word to display a pop-up menu and then click Translate to open the Reference Tools palette and see the word defined in the Translation pane.
Tip
You also can translate an entire document using the online link in the Translation pane and use a Web-based translation service.
Along with the regular dictionary found in the Reference tools, you also can access a Bilingual Dictionary. The Bilingual Dictionary tool uses local and online bilingual dictionaries and machine translation on the Web. You can translate a single word or a phrase. You need an Internet connection to utilize this tool. Follow these steps to look up a word using the Bilingual Dictionary:
Display the Toolbox, and click the Reference Tools.
The Reference tools appear.
Click the Bilingual Dictionary section.
Click the From: pop-up menu to choose a language to translate from.
Click the To: pop-up menu to choose a language to translate to.
Type the word you want to translate, and press Return.
The list box shows the results, as shown in Figure 4.14.

The last Reference tool to discuss is the Web Search pane located at the bottom of the Reference Tools palette. You can use this feature to research data and find links to Web sites on the Internet. Follow these steps to use the Web Search tool:
Display the Toolbox, and click the Reference Tools button.
The Reference Tools appear.
Display the Web Search pane.
Type the word or phrase you want to look up, and press Return.
The list box displays the results, as shown in Figure 4.15.
You can click any links to open the default Web browser and view the page.

In this chapter, you learned what you can expect to find among the Office Help system files. You learned how to open and navigate the Help window, how to view topics, and how to switch between Online Help and Offline Help. The chapter also covered how to search for a specific command or feature from among the many Help topics. What's more, this chapter showed you how to find help with words and research using the Office Reference tools. The next time you need to look up a synonym or translate a word, you'll know exactly what to do.