
IN THIS CHAPTER
Installing any software may seem like a straightforward task. Just pop in a software CD-ROM, and tell it to go. Sometimes the installation process contains nuances or things you need to know before you ever get started. This chapter describes what system requirements are needed, walks you through the installation process, and shows you how to uninstall a program. You also find a few troubleshooting tips and learn how to check for program updates.
If you haven't yet installed your copy of Microsoft Office 2008 for Mac, this section explains what system requirements are needed. What is a system requirement, you might ask? It's the minimum necessary elements like a computer processor, type of operating system, amount of memory, and hard disk space your computer needs in order to run the software sufficiently. Some items go without saying, like needing a mouse, a modem or other Internet connection, and a CD-ROM or DVD-ROM in which to insert and install the software. Here's a list of minimum requirements:
A Mac with an Intel, PowerPC G5, or PowerPC G4 (500 MHz or faster) processor
Mac OS X version 10.4.9 or later
512MB of RAM or more
1.5GB of available hard disk space
HFS+ hard disk format (also known as Mac OS Extended or HFS Plus)
1024 × 768 or higher screen resolution monitor
How do you know if you meet these requirements? You need to do a little homework about your computer. Choose

To find out how much space is available on your hard drive, double-click the hard drive icon on the desktop, and then look at the top of the window that appears.
Tip
Not enough room on your hard drive for all of Office? You can choose to do a custom installation and install only the programs and proofing tools you know you'll use the most. See the next section, "Using the Installer," to learn more.
When you install Office 2008 for Mac, the Microsoft Office Installer utility walks you through the necessary steps. The Installer is really just a series of windows, each with a specific part of the installation that requires some interaction on your part. Mainly, you're just clicking the Continue button repeatedly. But some of the windows warrant a bit more input than that, such as choosing a drive in which to store the software, or choosing whether you want a standard or custom installation.
A standard installation installs all four of the Office suite programs, Microsoft Messenger, and all the proofing tools (such as foreign language dictionaries); basically, a standard installation installs everything. A standard installation takes up about 1.1GB of space on your Mac. If you don't plan on using all the programs, you can pick and choose which to install with a custom installation. For example, if you need to save space, you might consider opting out of installing all of the foreign language dictionaries especially if you're not going to use them. Doing so can save you up to a megabyte of hard drive space. If you opt out of a program or feature, you can always pop the CD-ROM or DVD-ROM back in and add an item later.
It typically takes about 3–5 minutes to install the Office 2008 for Mac suite, but your own installation time may vary based on the speed of your computer. Before you begin, you need the user name and password for an administrator's account for permission to install software. Also, you should disable any virus protection applications and close any open program windows.
Follow these steps to install Microsoft Office 2008 for Mac:
Insert the software CD-ROM or DVD-ROM.
Double-click the Microsoft Office 2008 icon on the Mac desktop.
The Microsoft Office 2008 window opens, as shown in Figure 2.2.
Double-click the Office Installer icon.
A prompt box appears warning you to make sure your software source is trustworthy; click Continue. That is, unless you've purchased your software from a seedy underground Internet alley, in which case, you might want to reconsider exactly what you're installing to begin with.
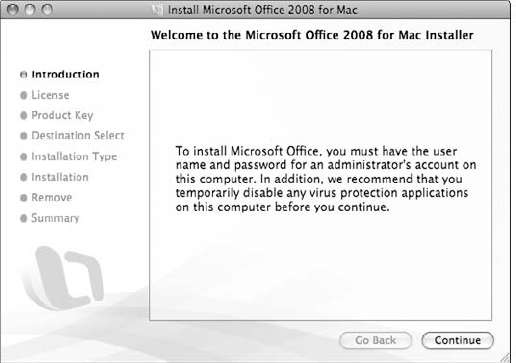
The Welcome screen appears, as shown in Figure 2.3; click Continue.
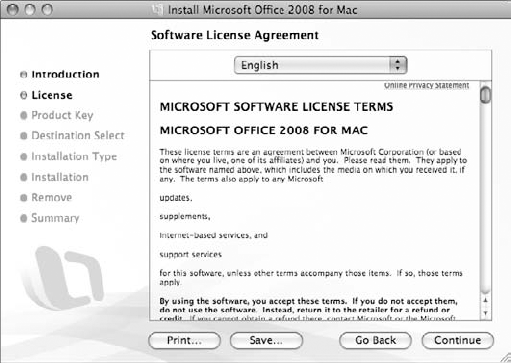
The Software License Agreement screen appears with the standard lengthy legalese agreement as shown in Figure 2.4; click Continue.
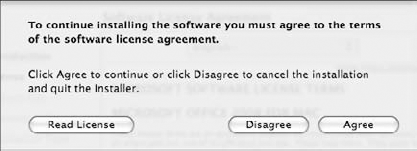
The next screen lets you actually agree or disagree to the agreement, as shown in Figure 2.5, so click Agree if you want to continue installing the software.
Use the next screen that appears to enter your Product ID and then click Continue.
If you are prompted to quit any programs you have running, as shown in Figure 2.6, stop and close any open programs, and then click Continue Installation.
The Destination Select window, shown in Figure 2.7, asks you to select where you want to install the software; click the volume or drive you want to use, and click Continue.
When the Installation Type window finally appears, as shown in Figure 2.8, click Install to perform a standard installation.
To change installation locations, you can click the Change Install Location button and choose another drive.
Click the Customize button if you want to customize which programs you want to install. This opens another window, shown in Figure 2.9, where you can check or uncheck which program(s) to install or not install.
The Installer asks you to type in your administrator password; type it, and click OK.
Suddenly, it looks as if the installation is about to begin in earnest, and the Installer begins copying the Office 2008 files to your computer, as shown in Figure 2.10.
Next, the Installer attempts to search for and remove prior copies of any Office programs, as shown in Figure 2.11. The Remove Office utility searches your computer for previous versions of Office and lets you know what it finds; click Continue at the prompts.
A final window, shown in Figure 2.12, lets you know the installation is complete; click Close.


That probably didn't take very long, but it might have seemed like it did with all the starts and stops with input required along the way. Lest you think you're finished, you're not. The Setup Assistant kicks in to ascertain your input a bit longer, as explained in the next section.
Immediately after you finish installing the Office suite, the Microsoft Office Setup Assistant appears to help you finalize the setup. The first bit of business is to choose whether to participate in the Customer Experience Improvement Program. This is just Microsoft's way of saying it wants to collect information about your program and computer use. You can opt in or out of this "program."
The second bit of business is to read more about the programs, register your software, and check for updates—all of which requires an online connection to complete. You can always revisit the registration option at a later time, but you definitely want to check for updates. This process, once started, may take awhile to complete, but it's worth it to have all the software files up to date and in place.
How to Register Later
If you chose not to pursue online registration using the Office Setup Assistant, you can always register your software later. You need an Internet connection to finish registering your product. To register, click the program's first menu (Word, Excel, PowerPoint, or Entourage) and click the Online Registration. For example, if you're using Word, choose Word
Follow these steps to finish the installation:
The first screen in the Microsoft Office Setup Assistant window, shown in Figure 2.13, is a Feedback participation invitation; click No or Yes to participate.
Click Continue.
The Get Started window, shown in Figure 2.14, offers three options: Learn More, Register, and Check for Updates.
Click the Learn More icon to open your Web browser to the Microsoft Web site and learn more about the product.
Click the Register icon to go online and fill out the software registration forms.
Click the Check for Updates icon to go online and download the latest software updates.
After jumping through all the hoops you want, click Finish or Close based on what final Setup Assistant screen presents itself and eject the CD-ROM or DVD-ROM.


Now that you've installed the software completely, you're ready to start using the individual programs.
You can uninstall all or, if you performed a custom install, parts of the Office suite. To uninstall, follow these steps:
Open the Applications folder.
Double-click the Microsoft Office 2008 folder icon.
Double-click the Additional Tools folder icon, shown in Figure 2.15.
Double-click the Remove Office folder icon, as shown in Figure 2.16.
Double-click the Remove Office icon.
The Remove Office utility (the uninstaller) opens and searches your computer to see what programs you've installed, as shown in Figure 2.17.
If you chose a custom install, you can choose which programs to remove.
When the removal is complete, the Removal Utility lets you know it has moved all the necessary files to the Trash; click Finish.


Your work is almost done. To completely remove the files, you must empty the Trash; choose Finder
From time to time, you should check the Microsoft Office Web site for updates of the Office suite. Periodically, Microsoft releases updates you need to keep your software safe to use and up to date, and it releases critical bug fixes to make the programs work better. You can use the Microsoft AutoUpdate feature to check for updates manually or automatically on a schedule. You can schedule updates daily, weekly, or monthly. You also need an Internet connection to perform an update. Be forewarned: Some of the updates are very large, so be prepared for some lengthy download times.
You can check for updates from any Office program following these steps:
Choose Help
Check for Updates.
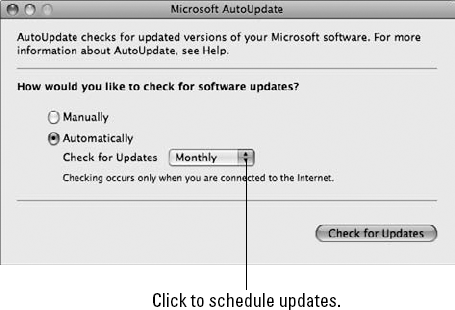
The Microsoft AutoUpdate window appears, as shown in Figure 2.18.
Choose an update option from these choices:
Click the Manually option to check for updates right now.
Click the Automatically option, and click the pop-up menu to set the feature to Daily, Weekly, or Monthly.
Click the Check for Updates button.
AutoUpdate begins checking for any updates. If it finds any, it displays a list box, as shown in Figure 2.19.
Note
If no updates are available, a prompt box appears telling you so. Click OK to exit, and then close the Microsoft AutoUpdate window.
Click the update you want to install.
Click Install.
AutoUpdate begins the downloading process, as shown in Figure 2.20.
After downloading the update, you need to jump through the installation hoops again, similar to the installation steps you covered earlier, to install the updates on your computer.
When the update is successfully installed, click Finish.
Close the AutoUpdate window.


When you install the Microsoft Office 2008 suite, it installs gazillions of pieces of itself in your computer system. Office then keeps track of all your settings and preferences that customize how you use the programs. In the course of use or over the course of time, you may accidentally move a file or delete it, or it just becomes corrupted. You can perform a little test to see if a corrupted file or preference setting is causing problems. Exit all the Office programs, and using Finder open the following folder path: Home
If removing preference files and settings doesn't help clear up a problem, you may need to seek help online. You can find plenty of Mac and Microsoft Office help sources on the Web, but you might start with the Mactopia Help Center (www.microsoft.com/mac/help.mspx) or Microsoft's Office forum (www.officeformac.com).
Lastly, if you are still experiencing trouble with Office, you can always try uninstalling the programs and reinstalling them again. Keep in mind that in doing so you'll lose all your program preferences. Follow the steps in the section "Uninstalling Office" earlier in this chapter to learn how.
Whew! Aren't you glad you're finished with this chapter? Installation and troubleshooting are often nail-biting situations, but with the tools that come with the suite of programs, you've got everything you need to successfully use the software. In this chapter, you learned how to install the Office 2008 for Mac software and check for product updates. You also learned how to uninstall the software, just in case you decided you didn't want to use it anymore, or if you needed to do a reinstall. You also learned how to troubleshoot any problematic files. Now you can relax and start using the programs to get your work done.