
IN THIS CHAPTER
Rearranging slides in Slide Sorter view
Adding transitions to slides
Adding animation effects
Customizing animations
Adding action buttons
Adding soundtracks
Recording narration
Rehearsing your show
You've worked hard assembling a presentation, adding slide content, and formatting your slides. While you certainly can give your presentation as is, you also can do more. You can fine-tune a presentation by adding transition effects, animation effects, and sound or music. Consider these elements the icing on the presentation cake, so to speak. You can polish a presentation by adding special effects, such as making bullet points fly in one at a time, setting time lengths for each slide to appear onscreen, and recording narration to accompany a presentation. Just between us, this is where the real fun begins for assembling a presentation—controlling how slides progress from one to the next and assigning animations to make your slide elements interesting and eye-catching.
In this chapter, you learn how to work with slide transitions, rearrange slides in Slide Sorter view, add animation effects, add sound or narration, and use action buttons. You also learn how to rehearse the timings for the show. The end result of these techniques is a presentation that's professional, enjoyable to watch, and successful in conveying your message to an audience in meaningful ways.
You can increase or decrease the number of slides shown on a single screen by using the Zoom feature to adjust the magnification setting. To see larger slides, increase the magnification setting. To zoom out and view more slides, decrease the magnification.
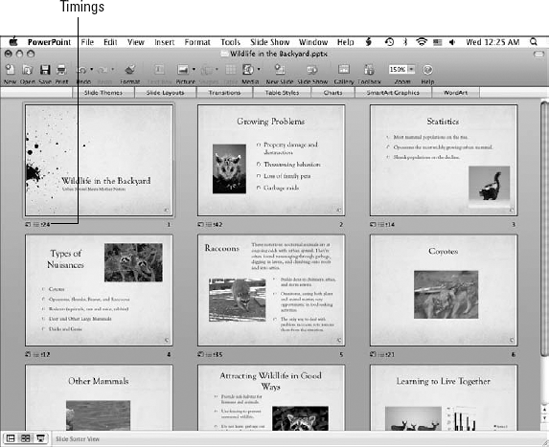
Acting rather like a light-table for viewing actual slides, you can use Slide Sorter view to get a general idea about your content and presentation flow, moving slides as needed, or hiding slides you don't want to include with the show. You can double-click any slide in Slide Sorter view to open the slide in Normal view and make edits.
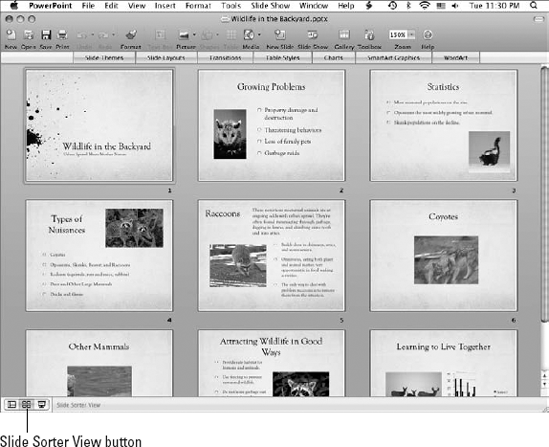
Figure 22.1. PowerPoint's Slide Sorter view is the place to view all the slides in a show and make adjustments to the arrangement.
Use any of these techniques to rearrange and work with your slides:
To move a slide, click it and drag it where you want it to appear.
To hide a slide, Control+click the slide and choose Hide Slide, or choose Slide Show

To delete a slide, click it and click Delete, or choose Edit
To duplicate a slide, click it and choose Edit
Transitions control how slides move from one to the next in a slide show. Without any transitions assigned, PowerPoint simply changes slides instantly or cuts to the next slide. The effect can be a bit jarring. If you prefer something a little smoother, try assigning one of many preset transitions found in PowerPoint's Transitions library, shown in Figure 22.2. PowerPoint offers more than 60 transition effects, ranging from slow dissolves and fades to wipes and shape transitions.

Figure 22.2. You can add transitions to slides using the Transitions library found in the Elements Gallery.
Mind you, we can't easily demonstrate what PowerPoint transitions look like in a book. You must see them for yourself to appreciate their artistic accomplishments. Because the transition possibilities are vast, you can get carried away easily and want to assign all kinds of transition effects to a single slide show program. Do yourself and your audience a favor by reining in the urge to use every transition effect in the library. Instead, keep to simple effects and use them sparingly. One or two different types in a single show is a good general rule. The entire idea behind transitions is to provide a way to move from one slide to another, creating segues that moves your audience along with the message you're trying to convey. Sometimes, you'll want a dramatic transition, and other times something less showy will suffice.
The transitions you do end up selecting should mesh nicely with the type of show you're giving. For example, if your presentation is all about launching a new product line, then by all means, try some fancy transition effects. On the other hand, if your presentation is more on the somber tone, simpler transition effects work best with the content.
Transitions appear in between two slides, controlling how the first slide moves to the second slide. The transitions are divided into six unique categories: Fades and Dissolves, Wipes, Push and Cover, Stripes and Bars, 3-D, and Random. The All Transitions category lists all the available transitions. When you click a transition, PowerPoint immediately previews it in the selected slide. The selected transition's name appears on the left end of the Gallery. You also can move the mouse pointer over the transitions and view the name of the transition before assigning it.
Follow these steps to assign a transition from the Elements Gallery:
Click the first slide to which you want to assign a transition.
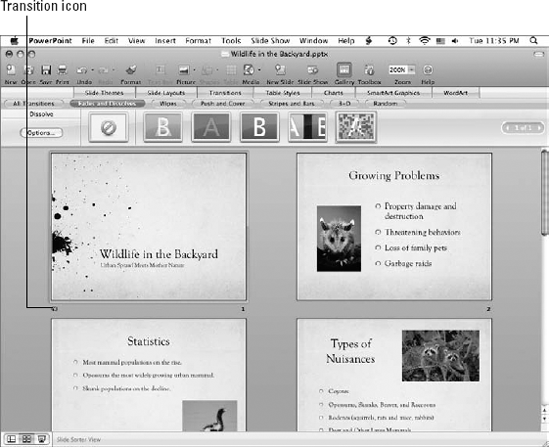
Click the Transitions tab in the Elements Gallery, or choose Slide Show
Transitions. You also can Control+click the slide in Slide Sorter view and choose Transitions from the pop-up menu.PowerPoint displays the transitions, as shown in Figure 22.3.
Click the type of transition you want to create from among the Transition tabs.
You can use the scroll arrows at the far right end of the Transitions library to browse the category's transitions.
Click a transition to preview the effect on the selected slide and assign the transition.
You can continue testing transitions until you find the one you want to keep.
When you assign a transition, PowerPoint displays a tiny transition icon in the bottom-left corner of the slide's thumbnail in Slide Sorter view, as shown in Figure 22.4.

You also can apply the same transition to every slide by first selecting the slides. Choose Edit
You can revisit the Transitions library at any time to assign a different transition to a slide. To remove a transition, click the No Transition choice at the far left end of each category.
You can customize your transition effects using the Transition Options dialog box, shown in Figure 22.5. You can use this dialog box to set a different transition effect, adjust the speed of the transition, add a sound to the transition, and choose how to advance the slide. To open the dialog box, click the Options button located at the far left end of the Gallery bar.
The dialog box is divided into three areas. You can choose from three transition speeds: Slow, Medium, and Fast. Fast is the default option. You can slow down the effect, if desired. When you select a speed option, PowerPoint previews the speed effect in the preview thumbnail.

PowerPoint installs with a library of sound effects from which you can choose. You can assign a sound along with a transition using the Sound pop-up menu. For example, at the beginning of your slide show, you may want to insert the sound of applause or clapping to a transition from the opening slide to the start of the show. You also can choose to loop the sound until the next transition.
The Advance slide options let you control how a transition advances to the next slide, either on mouse click or automatically. You may, for example, want to advance the slide after 10 seconds, or you may prefer to click to move to the next slide.
After you set any transition options, you can click the Apply button to exit the dialog box and add them to the effect. You can apply the same transition to every slide using the Apply to All button.
You can use animation effects to animate slide elements. Also called builds, animations allow you to add movement to text boxes, bullet points, clip art, pictures, tables, charts, and SmartArt graphics. For example, you might make bullet points fly into the slide as you talk about each point. This can keep the audience from reading ahead so they focus on what you're trying to say.
As with transition effects, you can easily be caught up in the Hollywood special effects that animations offer. However, it's one thing to dazzle your audience, and it's quite another to distract them from your message with a dizzying array of flying bullet points, chart parts that boomerang back and forth, and spinning clip art. Try to keep the animation effects to a minimum, and use effects that suit the tone of your presentation as well as the tone of the audience. With that said, do have some fun seeing what's available in the effects library. It might inspire you to new artistic heights.
PowerPoint divides the animation effects into three main categories: Entrance effects, Emphasis effects, and Exit effects. The Entrance effects are designed to help a slide element make an entrance onto the slide. The Emphasis effects help to emphasize an element. The Exit effects determine how a slide element exits the slide. Within each of the main categories, PowerPoint divides the effects into subcategories, such as Basic and Exciting. You can assign multiple effects to an element for each of the main categories. For example, you might have a bullet point fly into the slide, make it blink to emphasize the point later, and then make the point disappear.
To assign an effect, follow these steps:
Click the slide element you want to animate in Normal view.
Display the Custom Animation Palette, shown in Figure 22.6.
Click the type of effect you want to assign: Entrance effect, Emphasis effect, or Exit effect.
PowerPoint displays the last few effects you previously assigned. You can choose an effect from the list or open the full library of effects.
To choose from the complete list of effects, click the More Effects command.
PowerPoint opens the Animation Effects dialog box, as shown in Figure 22.7.
Click the effect you want to add.
PowerPoint immediately previews the effect. Each time you test out an effect, PowerPoint previews it on the actual slide in Normal view.
Click OK.
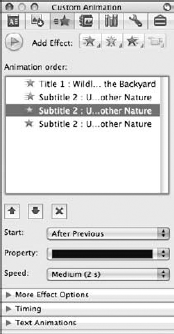
PowerPoint adds the effect to the list box in the palette, as shown in Figure 22.8.
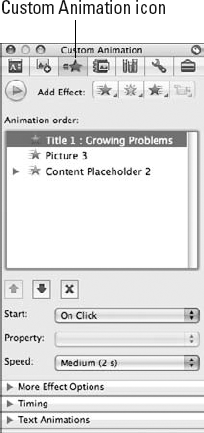


Figure 22.8. PowerPoint keeps track of all the animation effects you assign by listing them in the list box.
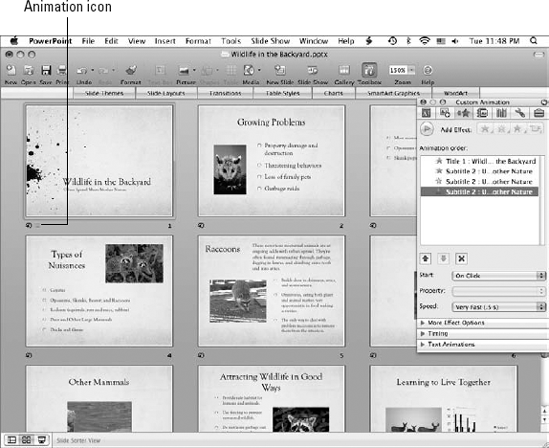
If you switch over to Slide Sorter view, you'll notice a tiny animation icon at the bottom-left corner of any slide with an animation effect assigned, as shown in Figure 22.9.
Tip
If you assign an animation effect to a bulleted list, PowerPoint animates each bullet point individually.
You can customize an effect using the Start, Property, and Speed settings located below the list box in the Custom Animation Palette, as shown in Figure 22.10. Start by selecting the effect you want to modify from the list. You can click the Start pop-up menu to choose when you want the effect to play: On Click, With Previous, or After Previous. The default setting is On Click. When you click the mouse or a keyboard key, PowerPoint plays the animation. If you choose the With Previous setting, the effect begins at the same time as the effect just above it in the list. If you choose the After Previous setting, the effect begins as soon as the previous effect finishes.
The Property pop-up menu lets you control from which direction the effect happens, such as flying in from the top of the slide. Not all animation effects have properties you can set.
The Speed pop-up menu lets you choose from five speed settings: Very Slow, Slow, Medium, Fast, and Very Fast. The speeds range from half a second to 5 seconds in length.
After you start adding effects, you may need to reorder them in the palette. You can click an effect in the list and change its order by clicking the Move Up and Move Down arrow buttons. To remove an effect entirely, click the Delete button.
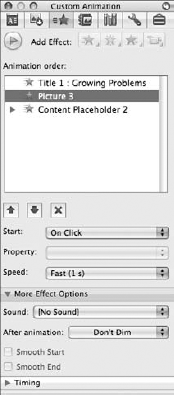
The More Effect Options pane includes options for adding sounds to an animation effect or options for choosing what you want PowerPoint to do after the animation plays. Click the pane heading to view your options, as shown in Figure 22.11. To add a sound effect to the animation effect, select the effect from the list box, click the Sound pop-up menu, and choose a sound effect, such as applause or a camera click.
Click the After animation pop-up menu to control what you want to happen to the element after the animation plays. You can choose to change the element to another color, hide it, or hide it when the next animation effect plays. Choose the Don't Dim option to leave the element onscreen after the animation plays, which is the default setting.
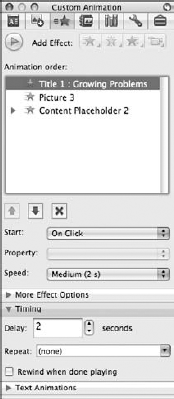
Click the Timing pane in the Custom Animation Palette to view several timing settings you can assign to an animation. As shown in Figure 22.12, you can use the Delay box to set a delay for the selected effect. For example, you may want to delay the effect for a few seconds. Use the Repeat pop-up menu to instruct the effect to repeat however many times you choose. Click the Rewind check box to return the appearance of the element to the same state as before the animation played.
If you're assigning animation effects to a text box, you can use the Text Animations pane to view and set additional options, shown in Figure 22.13. For example, you can choose to animate each letter, each word, or all at once using the Animate Text pop-up menu. You can use the Group Text pop-up menu to treat text lines as a single object, or you can animate them one line at a time according to their outline level. If the text is inside a shape object, you can choose to keep the two grouped together for the animation effect by checking the Animate attached shape check box. Lastly, click the In reverse order check box to make the lines of text appear in reverse order on the screen.

If you're animating a chart, the Chart Animations pane is available on the Custom Animation Palette, as shown in Figure 22.14. You can click the Group graphic pop-up menu to choose whether the chart element appears all at once or by data series. You also can start the animation effect with a blank chart background and then add the finished chart. Just click the Start animation by drawing the chart background check box.

You can embed slide controls into your presentation that allow you to jump to other slides or control the pace of the show. For example, if you're designing a training module or self-guided presentation, embedded slide controls allow other users to run the presentation, choosing when to move forward or go back a slide. The slide controls are actually action buttons found in the Object Palette. Action buttons are predesigned buttons for common slide show tasks, such as Forward or Back. You also can find action buttons for playing a sound or a movie clip. PowerPoint includes 12 predesigned buttons, one of which is a custom button. When adding slide control or action buttons, you must specify a particular action to carry out, such as a hyperlink to another slide, an object action, or an action that opens and runs another program.
When embedding slide controls, you can choose to embed them on a particular slide or include them on every slide in the program by placing them on the slide master. (See Chapter 20 to learn more about working with slide masters.) You can find slide controls and action buttons in the Object Palette, or you can add them through the Slide Show menu. If you use the Slide Show menu, PowerPoint automatically opens the Action Settings dialog box, where you can assign an action to the newly drawn button. The dialog box offers two tabs: Mouse Click and Mouse Over. If you want the user to click the button to perform an action, use the Mouse Click tab settings. If you want the action to take place if the user moves the mouse pointer over the button, use the Mouse Over settings.
Follow these steps to add slide control action buttons from the Slide Show menu:
Display the slide on which you want to place an action button.
Choose Slide Show
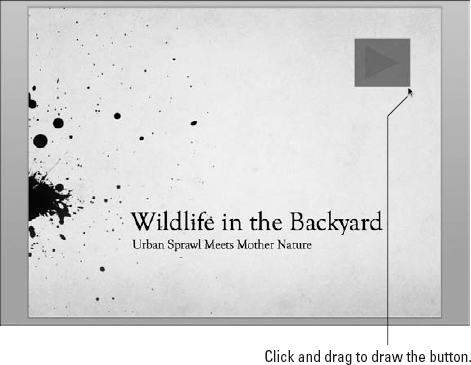
Action Buttonsclick the name of the button you want to create.Click and drag on the slide to create the button, as shown in Figure 22.15.
As soon as you finish dragging, PowerPoint creates the button and automatically opens the Action Settings dialog box, shown in Figure 22.16.
Click the Hyperlink to pop-up menu, and choose where you want to jump to when clicked.
Click OK to exit the dialog box.

You can now test your new button in Slide Show view. Click the Slide Show View button to start the presentation. When you reach the slide containing the button, click it to test its action. If you need to change what action the button does, you can reopen the Action Settings dialog box and make the necessary changes; Control+click the button, and choose Action Settings.
Follow these steps to add slide control action buttons to your slide from the Object Palette:
Click the Object Palette button in the Toolbox.
Click the Shapes button.
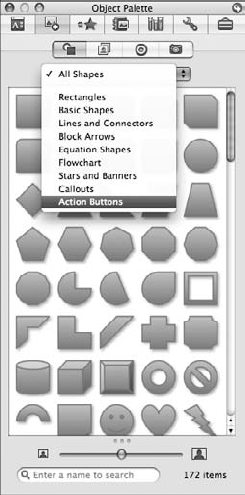
Click the categories pop-up menu, as shown in Figure 22.17, and choose Action Buttons.
The list box displays the 12 action buttons for PowerPoint, as shown in Figure 22.18.
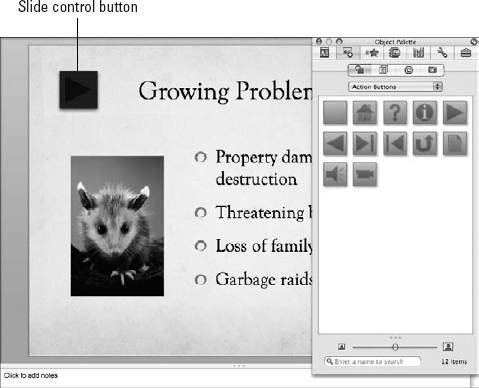
Click the button you want to assign, and drag it onto the slide.
PowerPoint inserts the slide control, as shown in Figure 22.19.
Control+click the button, and choose Action Settings.
The Action Settings dialog box opens (refer to Figure 22.16).
Click the Hyperlink to pop-up menu, and choose where you want to jump to when clicked.
Click OK to exit the dialog box.

You can format an action button by changing its color, adding a shadow effect, or adding any other special graphic effect. Double-click the button to open the Format Shape dialog box, as shown in Figure 22.20. To change the button color, click the Fill button and choose another color from the Color pop-up palette. You can use any of the other formatting options to change the appearance of the button.

You can add sound to a slide presentation in the form of sound clips, soundtracks, and recorded narration. You've already learned how to add sound effect clips from the PowerPoint library to transitions and animation effects. Chapter 20 explained how to add both movie clips and sound clips to slide content. Now you'll learn how to play a music CD, add a soundtrack, and add narration.
You can play a music CD during a slide show presentation as background music. The nice thing about a music CD is that you don't have to worry about importing a large sound file along with your PowerPoint file. Instead, the computer plays the music directly from the CD.
Follow these steps to add music to a presentation:
Insert the music CD into your computer's CD-ROM drive.
Click the slide where you want the soundtrack to start playing in Normal view.
Choose Insert
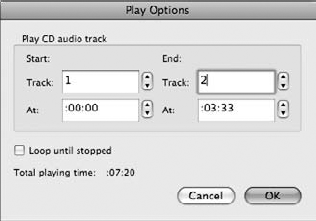
Sound and MusicPlay CD Audio Track.PowerPoint opens the Play Options dialog box, as shown in Figure 22.21.
Choose the track you want to start playing under the Start options.
Choose the track you want to stop playing at under the End options.
Optionally, you can loop the sound by clicking the Loop until stopped check box.
Click OK.
PowerPoint asks you how you want the sound to start, as shown in Figure 22.22.
Click When Clicked to play the sound when clicked, or click Automatically to have the sound start playing automatically when the slide appears.
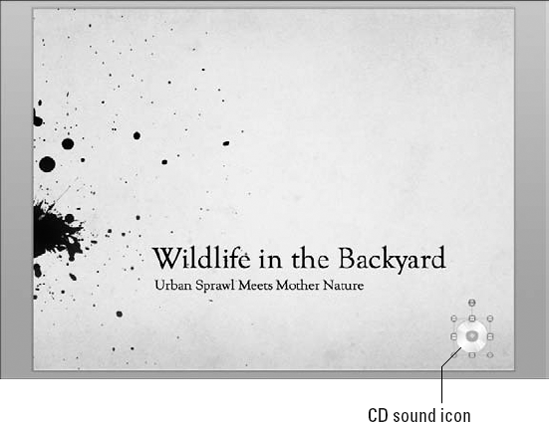
PowerPoint adds a sound icon to the slide.
To test the sound in Normal view, double-click the sound icon, as shown in Figure 22.23.

You can add a soundtrack to play along with your PowerPoint presentation. For example, you may use a soundtrack as background sound that plays throughout the entire presentation.
Follow these steps to add music to a presentation from a CD or your computer's library:
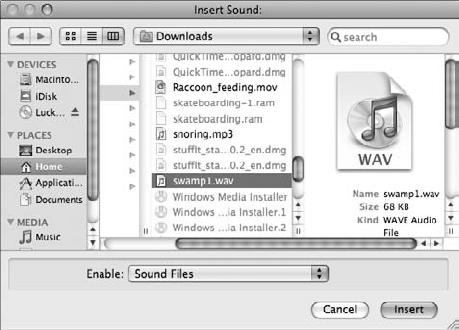
Click the Media button on the Standard toolbar and click Insert Sound and Music, or choose Insert
Sound and MusicFrom File.The Insert Sound dialog box opens, shown in Figure 20.24.
Navigate to the sound file you want to insert, select it, and click Insert.
PowerPoint prompts you to choose how you want the sound to start and then adds a sound icon to the slide.
Click the sound icon in the slide as shown in Figure 22.25.
Display the Formatting Palette and the Sound pane.
Click the Play pop-up menu, and choose Across Slides.
If your slide show runs longer than the music file, you can click the Loop Until Stopped check box to keep the music playing.

To test the sound in Normal view, double-click the sound icon. To remove the sound, click the icon and press Delete.
If you have a microphone attached to your computer or a built-in microphone on your computer, you can record your own narration to add to a presentation. By default, narration files are embedded with the presentation. If you like, you can link the narration file you create to the slide show. Sound files are often very large, so linking can save you space by storing the narration elsewhere.
When you start recording your narration, PowerPoint switches you to Slide Show view and displays the first slide. As you start recording, you can advance to each slide to narrate. If you make any mistakes, you can stop the process and start all over again. At the end of the narration process, PowerPoint prompts you to save the timings to correspond with the narration file.
Follow these steps to add narration:
Open the slide on which you want to start a narration clip.
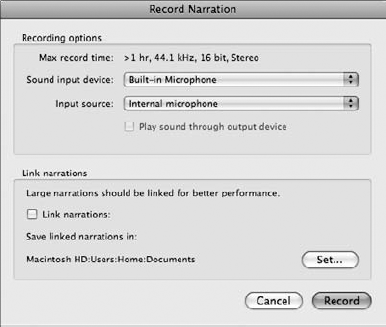
Choose Slide Show
Record Narration.PowerPoint opens the Record Narration dialog box, as shown in Figure 22.26.
Optionally, if you need to change the input device or input source listed, click the appropriate pop-up menu and make your selection.
When you're ready to start recording, click the Record button.
PowerPoint starts the presentation in Slide Show view.
Begin your narration for the first slide. When you're ready to move on, click the slide to advance to the next slide.
Continue narrating for each slide.
When you finish, click the Stop button.
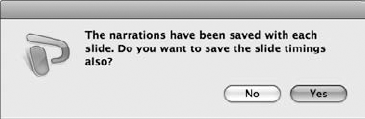
PowerPoint saves the recordings, and a prompt box appears, as shown in Figure 22.27, offering to save the slide timings as well.
Click Yes.
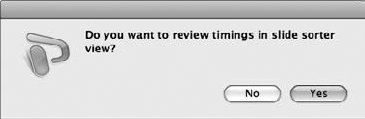
Another prompt box appears asking if you want to review the timings in Slide Sorter view, as shown in Figure 22.28.
Click Yes.
PowerPoint switches to Slide Sorter view, as shown in Figure 22.29.
Notice in Slide Sorter view timings appear under each slide. These indicate the length of time each slide will appear onscreen in the actual slide show. Learn more about slide timings in the next section.
PowerPoint has an extremely useful feature to help you run through your presentation and get an accurate timing for each slide. Called Rehearse Timings, this feature keeps track of how long you want each slide to appear onscreen. It does this by running through the actual slide show, with you determining how long each slide appears. A running clock at the bottom-right corner of the slide shows you the time. When you advance to the next slide, a new clock appears for that particular slide. When you finish, all the recordings appear along with the slides in Slide Sorter view.
To rehearse your slide show and assign timings, follow these steps:
Choose Slide Show
Rehearse Timings.PowerPoint starts Slide Show view and displays the first slide, as shown in Figure 22.30.
After the slide has appeared as long as you require, click the slide to advance to the next slide.
Repeat Step 2 for each slide in the presentation.
When you've rehearsed the whole show, a prompt box appears asking if you want to save the timings.
Click Yes.
PowerPoint saves the timings and displays them in Slide Sorter view, as shown in Figure 22.31.


In this chapter, you learned your how to reorder your slides using Slide Sorter view. Slide Sorter view is handy for viewing your overall presentation and quickly making changes to slide order and viewing timings, transitions, and more. You also learned how to apply transition effects to move from one slide to the next and how to animate individual slide elements to add visual interest to your presentation. You discovered how to customize the special effects to suit your presentation needs.
This chapter also introduced you to PowerPoint's action buttons for creating slide controls. These buttons allow users to navigate the presentation without you. You also learned how to add CD music and narration to your presentation.
Lastly, you learned how easy it is to rehearse a slide show and make sure the timings are just right to give your presentation.