
IN THIS CHAPTER
Setting up your slide show
Creating a custom show
Understanding presentation scenarios
Navigating a slide show
Printing presentations
At last, your big moment is here. It's time to actually give the presentation you've been working on so hard, building, tweaking, and rehearsing these past few weeks, days, or hours. Like any performer, you're probably pacing backstage waiting, giving yourself a pep speech, and hoping the audience likes what you've done. Before you know it, the appointed moment is here. The lights dim, the stage is ready, and the crowd roars in expectation. Are you ready to wow them?
Granted, giving a PowerPoint presentation is not like giving a rock concert, and it's doubtful you'll have screaming fans showering you with adoration, but perhaps you'll find some gratification in your presentation. The best reward is an audience that's captivated by your information and attentive to your slides and your accompanying message.
In this chapter, you learn how to set up and run a slide show, paying particular attention to the tools needed to navigate the show while it's running. You also learn the various avenues for presenting, how to create and print notes, and how to create your own custom shows.
Before you give a slide show presentation, you need to do a little setup work. One of the ways you can set up a slide show is by using the Set Up Show dialog box. You can even create your own custom slide show. This section shows you how to utilize the dialog box controls.
Before you present a slide show, you can specify a show type. You can choose from three types of slide shows: a show presented by you using the full screen, a smaller screen show browsed by someone else, or a full-screen self-running show browsed at a kiosk. A kiosk is an enclosed structure with an open window displaying a computer screen running a looped program, or in the case of a slide show, a looped presentation. Kiosks are common in places like malls, trade shows, conference centers, and so on. The first option is the default option in PowerPoint. If you want to choose either of the other two, you must use the Set Up Show dialog box.
You can use the dialog box to set looping to make the show run continuously, turn off any narration or animation effects, advance the slides manually or automatically, or even choose to show only a range of slides. If you choose a manual advance, you can move through the slide show one slide at a time based on mouse clicks. If you used the Rehearse Timings command to record any timings, as you learned about in Chapter 22, the timings option is already selected for you.
To specify a show type, follow these steps:
Choose Slide Show
Set Up Show.
PowerPoint displays the Set Up Show dialog box, as shown in Figure 23.1.
Under the Show type options, choose the type of show you want to create.
Optionally, under the Show options, you can choose to loop the presentation, include narration or animation effects, and display a scrollbar. The last option is available only if you're using a windowed slide show style.
You also can set the pen color for any onscreen note-taking you plan to do during the show.
Optionally, under the Slides options, you can choose which slides to include in the show.
You also can choose whether you want the slides to advance manually or automatically.
Click OK.
PowerPoint applies your changes to the presentation.

You can create custom shows in PowerPoint to tailor your slides for a particular audience. For example, you may want to recycle a show, but cut a few slides to meet shortened time requirements, or you may want to cut out a few slides you don't want a particular audience to see. You can customize exactly which slides appear in a show and save the custom treatment. PowerPoint saves the custom show as part of the original presentation file. You can create as many custom shows based on one presentation as you need. You cannot, however, add new slides without adding them to the original presentation. You can only customize what's already in the original presentation.
To create a custom show, follow these steps:
Choose Slide Show
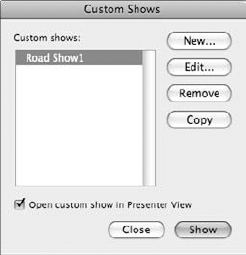
Custom Shows.PowerPoint displays the Custom Shows dialog box, as shown in Figure 23.2.
Click New.
The Define Custom Show dialog box opens, as shown in Figure 23.3.
Type a name for the custom show.
Click which slide you want to include.
Click the Add button to add it to the list.
Repeat Steps 4 and 5 to continue adding just the slides you want.
Optionally, you can use the arrow buttons to rearrange the slide order. Select the slide number, and click an arrow button to move the slide up or down in the list order.
Click OK.
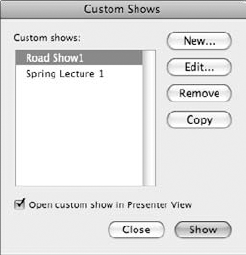
PowerPoint adds the show to the list box shown in Figure 23.4.
Click Close.
Optionally, you can click the Show button to view the custom show. To view the show in Presenter view mode, leave the Open custom show in Presenter View check box selected and click the Show button.

After you have several custom shows saved with a presentation, you can do the following by reopening the Custom Shows dialog box:
To remove a show from the list, click it and click the Remove button.
To edit which slides appear in the custom show, select it and click the Edit button to revisit the Define Custom Show dialog box and make your changes.
To duplicate a custom show, click the show and click the Copy button.
To view a custom show at any time, open the Custom Shows dialog box, click the show you want to view, and click the Show button.
Years ago, the words "slide show" conjured up nights trapped at Uncle Jack and Aunt Edna's house watching photos projected onto the wall of their latest trip to the Grand Canyon. In today's culture, "slide show" is more synonymous with PowerPoint presentations. Like Uncle Jack and Aunt Edna, you can still project a slide show onto a wall. You also can use a variety of other methods to present the show.
A standard way to present a slide show is to project it onto a screen or wall. To do this, you need a projector. You hook up your computer to the projector and present the show to a group of people, such as in a classroom or conference room scenario. A projector is ideal for larger groups. A variety of multimedia projectors on the market today are available in a wide range of price points, from $500 at the low end to $20,000 at the high end. Used primarily for business presentations, multimedia projectors are much like a combination overhead projector/DVD player/PowerPoint presenter all rolled into one device. They allow you to project a presentation directly from your PC. Most major electronics manufacturers offer such devices today, and most projectors are both Mac and PC compatible. Just about every multimedia projector includes a remote, which is handy for slide show presenters to advance or pause a program. Of course, another simple option is to give a presentation directly on your computer with a user or small group huddled around the screen.
If you are a frequent traveler and plan on giving presentations on the road, you should consider a slimmer projector, one that doesn't weigh too much. Slim, personal multimedia projectors weigh in at 15 pounds or less, making them about the same size as a laptop. Some are as small as five pounds. Portable projectors cost anywhere from $1,000 to $8,000. If you're giving presentations for a company at corporate headquarters, a larger, more expensive model probably suits your needs more. Most of the larger projectors include extra video ports, laser pointers, and other bells and whistles. If you plan on giving presentations in one spot all the time, consider a fixed installation projector. These are usually mounted in large conference rooms or auditoriums, and they typically weigh up to 100 pounds. At this stature, these projectors provide the highest resolution settings and work well for classrooms and large group training situations.
Multimedia projectors use either LCD or DLP displays. LCDs offer brighter pictures, but DLPs give greater contrast and deeper background imaging. You also can find LCOS projectors (liquid crystal on silicon), which use aspects of both LCD and DLP projectors, but they're very, very expensive.
Brightness and resolution are the specs to look for in the world of multimedia projectors. Lamp types, also known as projector bulbs, are a crucial component when figuring out which projector to buy. Generally speaking, the brighter the room in which you are projecting, the brighter your projector lamp should be; lamp brightness is measured in ANSI lumens. A minimum of 300 lumens or higher is good for relatively dark rooms. If it's a larger room, 500 lumens is the absolute minimum. If the room is a large auditorium, 750 lumens or higher is the way to go. If it's a sunny conference room, you may need up to 2,500 lumens. Because most projectors range from 1,000 to 10,000 lumens, you should be able to find a projector that meets your requirements. Most multimedia projectors today use 1,500 to 2,000 ANSI lumens and higher as the standard. The most common lamp types are UHP, UHE, and halide. Each type differs in lamp life. You can expect anywhere from 1,000 to 4,000 hours from a lamp. As with all things technical, nothing's worse than having a projector lamp blow the day of the big presentation. So make sure you choose a projector with a bulb that you can easily and quickly replace or have on hand as a backup. Bulbs are notoriously expensive, so check the cost of a replacement bulb at the time you're purchasing a projector. The cost can very well influence your decision regarding what device to buy.
Resolution, or the number of pixels on a screen, is another big factor in multimedia projectors. If your presentations require the sharpest images possible, then you need a projector that supports the highest resolution settings. The standard today is SVGA (800×600) and XGA (1024×768).
You may be tempted to hunt for a bargain projector. This may do if you're on a very tight budget, but if you want a long-term piece of equipment, you need a projector that meets your long-term needs. Be sure to ask about customer support policies before you buy, price the replacement bulbs, and find a reputable seller who's willing to help you.
As far as actual projection goes, it's always better to project your show onto an actual projector screen. These are designed for use in larger classroom or auditorium settings, and they make projected images much more visible. A plain wall will do in a pinch, however.
Another popular way to present a show is to use your laptop computer. You can easily run a presentation on your laptop screen. Because laptops are so portable, you can haul one anywhere to make a presentation. For example, if you're presenting to a new client in his office, you can simply set the laptop down in front of the client and run the show. The laptop scenario is great for one-on-one presentations, or small groups that can easily gather around the screen and view the show.
If you cannot give a presentation in person, you can save the show to a CD-ROM and hand it off for viewing at the other person's convenience. You also can set up a slide show to run on the Internet as a Web page.
If you can't deliver the actual show using any of the methods described, you can print out the slides to give to someone. You also can print them to transparencies and show them on an overhead projector.
Is this your first time giving a presentation? Or are you looking for a few tips to make your slide shows more engaging? Here are a few helpful tips if you're giving a presentation before a live audience:
Always start out by welcoming your audience. Don't just jump in and start showing slides; instead, briefly tell what you're presentation is and give your audience some idea of how long it will be, how you want to handle questions, and whether they need to take notes.
Open with something that grabs the audience's attention. Depending on the type of presentation, you may try an opening joke to relax the audience. Another option is to solicit audience participation right off the bat. Ask some questions that allow people to respond as a group and find out how the audience relates to your topic.
Introduce yourself. Take time to explain why you're there to give the presentation, what makes you a specialist on the topic, and what your background is related to the topic or the presentation at hand.
Do you tend to be a bit nervous when speaking in public? Try to relax. If that's entirely impossible, the next best thing is to fake it. Pretend to be relaxed, and don't let on that you're not!
Talk directly to the audience as much as possible. Nobody wants to sit through a presentation being read from a script with the speaker looking down at his notes all the time. Glancing at the slides is fine, but don't turn your back on the audience the entire show. The only exception to this is if the room is so completely dark that no one would notice.
Your presentation's slides shouldn't contain all the text of your lecture, just the highlights. It's up to you to fill in the details with your speech.
At the end of the show, take time to review your points and presentation goals. If you're opening the lecture up for a question/answer time, be sure to define the timeframe.
End by thanking your audience for their time, and be sure to offer any contact information or additional steps they need to take.
Take time to evaluate your performance after the fact. Make notes on where you can improve the presentation, and consider collecting feedback from audience members.
Are you ready to actually run the show? We hope you've rehearsed, set up all the required equipment, and everything's ready to go. This section shows you how to navigate a show and utilize PowerPoint's presenter tools.
Starting a show is incredibly easy. From the PowerPoint window, you can use any of these methods to start a show:
Click the Slide Show button on the Standard toolbar.
Click the Slide Show View button in the lower-left corner.
Choose Slide Show
Press

Depending on what hardware you're using, your presentation shows up onscreen with the first slide. For example, if you're showing the presentation on a single monitor, the first slide fills the entire screen. If your situation involves two screens, the slide appears only on the projected screen or secondary monitor, while your laptop's screen becomes the command center of your presentation. In this scenario, the laptop screen utilizes the Presenter Tools view mode. You learn more about this view mode coming up.
If your presentation is set on manual, it's up to you to advance each slide. You can do this by clicking the screen or pressing the spacebar. If a slide has animation effects assigned, such as bullet points that fly in one at a time, each click you make brings another bullet onto the slide. If you've assigned timings to your show, the slides advance according to the timings you set. You can interrupt the timings by clicking the slide.
By default, PowerPoint displays a small pop-up menu button in the lower-left corner of the slide screen, as shown in Figure 23.5. You also can move the mouse pointer to the corner to display the button. You can click this button to display a pop-up menu of navigation commands and tools, as shown in Figure 23.6. You also can Control+click the screen to display the menu.


The pop-up menu offers several navigation commands: Next, Previous, Last Viewed, Go to Slide, and End Show. In addition, you can apply the following options using the menu:
To choose a custom show to run, click the Custom Show command and select the show.
To go to a black screen, click the Black Screen command.
To pause the show, choose Screen
To change the pointer, click the Pointer Options command and choose an option: Automatic, Hidden, Arrow, Pen, or Pen Color.
Tip
Need help navigating? From the pop-up menu, choose the Help command to open a Slide Show Help window full of navigation hints.
Although the pop-up menu is handy, for a much more seamless presentation, consider using keyboard shortcuts to navigate your show. Table 23.1 lists the keyboard shortcuts you can use to navigate a slide show. Notice that some of the navigations you can perform can be activated by a variety of keys.
Table 23.1. Navigation Controls
Navigation | Description |
|---|---|
Move to next slide or animation effect | Mouse click, spacebar, Return, N, Enter, →, ↓, Page Down |
Move to previous slide or previous animation effect | ←, ↑, Page Up, P, Delete |
Move to a particular slide in the presentation | Type the slide number and press Return |
Move to the first slide | Home |
Move to the last slide | End |
Move to a black slide | B, period |
Move to a white slide | W, comma |
Show or hide the arrow pointer | A, = |
End the slide show | Esc, |
Stop or restart a self-running show | S, + |
Erase any onscreen drawings | E |
Change pointer to pen | |
Change pointer to arrow | |
Hide the pointer and the pop-up menu button | ctrl+H |
Automatically show the pop-up menu | |
Go to the next hidden slide | H |
When you reach the end of the slide show, PowerPoint returns you to the view you were previously using in the program window.
PowerPoint's pop-up menu that appears in a slide show presentation offers several pointer options you can assign. By default, the mouse pointer does not appear onscreen during the show; it's set to Automatic, which means it does not appear unless you move the pointer. You can turn the pointer on, if desired, or turn it into a pen. To view the pointer at all times, click the pop-up menu button and choose Pointer Options

To hide the pointer completely, choose Pointer Options
You can write on a slide using your mouse by turning the pointer into a pen. For example, you may want to circle an important fact or figure on a slide, or write a word or phrase, underline a keyword, or draw a simple sketch. To turn on the Pen tool, choose Pointer Options

By default, the pen color you draw with is set to black. You can assign another color to make the pen easier to see on the screen; choose Pointer Options
If you're using a multimedia projector to display your slide show, you can use PowerPoint's Presenter Tools to help you run the show from your computer or laptop screen. The Presenter Tools display in a special view mode on your laptop or computer. While the presentation's slides appear projected on the wall or projection screen, the computer screen allows you to see notes, the next slide, a clock, and more, as shown in Figure 23.9. Acting like a command center, the Presenter Tools let you control and survey what's going on in your presentation.

To view the Presenter Tools, choose Slide Show
The Slides pane works just like does in the PowerPoint program window, listing thumbnails of each slide. To view a slide from the display, click it. The main Slide pane shows the slide currently being projected. The Notes pane displays any notes assigned to the current slide. You can actually edit notes within this pane. For example, you may want to make note of someone's question or make a note of a slide that elicited the best response. Just click in the pane and type. You can use the Zoom button in the top-right corner of the pane to magnify your view of the Notes text.
The Previous and Next arrow buttons in the top-right corner let you move back or forward in your presentation. In addition to these navigation buttons, you can use any of the presentation navigation keys you learned about earlier from within Presenter Tools view.
The Preview window is a tiny window showing you the next slide to appear in the show. Like the clock feature, you can toggle the Preview window on and off. Click the Preview button located next to the Clock button to toggle the feature on and off. Directly below the toggle buttons are buttons for ending the program or for accessing help about keyboard navigation keys.
If your slide show has preset timings assigned, the Presenter Tools view shows the slides advancing automatically. You can interact with the show at any time to override the timings. To turn the Presenter Tools off, just click the End button or press Esc.
You can print various aspects of your PowerPoint presentation. For example, you may want to print your slide notes to have them handy while giving a presentation, or you may want to print slides to show someone who could not attend the presentation. This section shows you how to print in PowerPoint.
You can use the Page Setup dialog box to control the size of your printouts, which printer to use, and what paper size to apply. The settings in this dialog box also control the size of slides as they appear on the computer screen. To open the dialog box, choose File
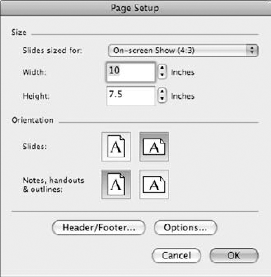
Figure 23.10. You can use the Page Setup dialog box to set slide sizes and other page and printing options.
To change the size of the slides for printing purposes, click the Slides sized for pop-up menu and choose a preset size. If you prefer to set a custom size, you can enter your own dimensions in the Width and Height boxes. To change the slide orientation, click the setting you want to apply under the Orientation options.
Note
Among the preset sizes on the Slides sized for pop-up menu, On-screen Show (4:3), Letter Paper (8.5×11 in), and Overhead all use the same slide size—10×7.5 inches.
Click the Options button to open another dialog box for setting paper size and scale options. You also can find these options in the Print dialog box, which you learn about later in this chapter.
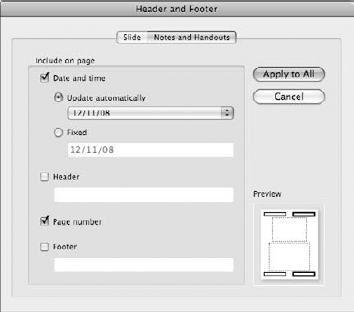
A header is text that appears at the top of every slide, while footer text appears at the bottom of every slide. You might add a footer that lists the company name at the bottom of your presentation or the name of the class you are teaching, or you might add slide numbers to every slide. To add header and footer text to a slide, click the Header/Footer button in the Page Setup dialog box. This opens the Header and Footer dialog box, as shown in Figure 23.11. You also can access header and footer features through the View menu; choose View

Figure 23.11. You can add header or footer text to a slide by going through the Page Setup dialog box.
With the Slide tab selected, you can view fields and check boxes in the Header and Footer dialog box for adding footer elements to a slide. You cannot, however, add header text to a slide. For example, you can insert the date and time and update it automatically or insert a fixed date. You can include slide numbers and tell PowerPoint which number to start on. Or you can type your own footer text, such as a company name. If you don't want the footer text shown on the title slide, be sure to click the Don't show on title slide check box. After you've selected which options you want to include, click the Apply button to add to the current slide, or click the Apply All button to add the information to every slide in the presentation.
To add header or footer text to handouts and notes, click the Notes and Handouts tab, as shown in Figure 23.12. Nearly identical to the previous dialog box, you can add the date and time, page number, or footer text. You also can add header text. Simply make your selections, fill in any fields as needed, and click the Apply to All button.
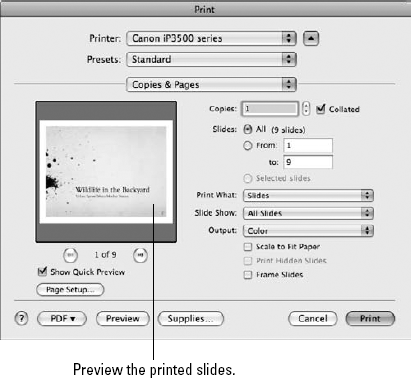
To print your presentation, choose File
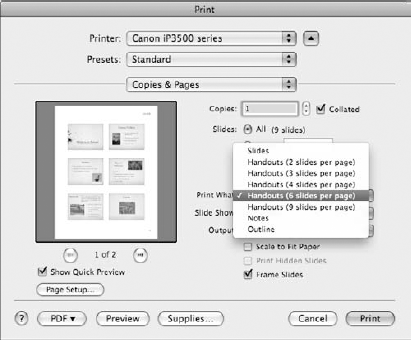
To specify what to print, click the Print What pop-up menu and make a selection. You can choose to print slides, handouts, notes, or the presentation in outline form. If you choose to print slides, you can use the Slides options to specify which slide numbers to print. PowerPoint prints a single slide on each printed page.
The Handouts print option, shown in the pop-up menu in Figure 23.14, is great if you want to create handouts of your presentation. When you choose this option, PowerPoint prints thumbnail versions of the slides and fits them onto the printed page in the layout you designate. You can choose to print anywhere from two to nine slides per printed page.
If your presentation includes notes for each slide that you want to distribute, you can choose the Notes option from the Print What pop-up menu, as shown in Figure 23.15. When you select this option, PowerPoint prints a thumbnail of the slide along with any note text assigned to the slide.
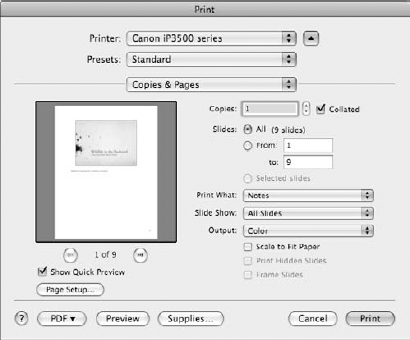
Figure 23.15. If your slides include notes, you can print thumbnails of the slides and note text to use as handouts or to use to help you give the presentation.
The Preview window shows you what your printouts will look like. When everything's set the way you want it, click the Print button to send the information to your printer.
You also can convert your presentation into a PDF file, which anyone with a PDF viewer can read as a document. To choose a PDF format, click the PDF button at the bottom of the Print dialog box. Here, you can find commands for saving as a PDF, faxing as a PDF, emailing as a PDF, and so on.
If your intended audience needs to view a presentation as another format besides a slide show, you can save the presentation as a movie, you can save individual slides as graphics, or you can even send the presentation to your video iPod. For example, you can save a show as a QuickTime movie, which can be viewed if the user has QuickTime installed. You also can save individual slides as graphic files and send them to Mac's iPhoto program for importing into iMovie.
QuickTime is a very popular multimedia framework designed to view digital video, movie clips, sound, text, animation, and more. As a viewer program, QuickTime is available for free, and as a helper app, many people have it installed for viewing multimedia content on their Web browsers. If you know someone who doesn't have PowerPoint, but does have QuickTime, you can save your presentation as a QuickTime movie to be viewed in the QuickTime player. When you create a movie file, PowerPoint saves it in the .MOV file format.
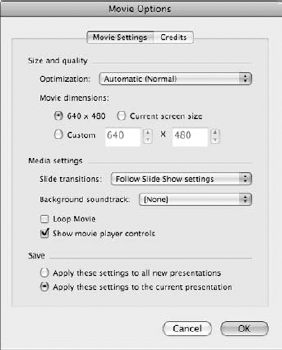
When saving a slide show as a movie, you can designate optimizing features, set movie screen dimensions, set looping, and specify which PowerPoint elements to include, such as transitions, soundtrack, or movie player controls. By default, PowerPoint is set up to save the presentation in a 640×480 movie size. You can set a custom size, if desired. You also can choose to disregard transition effects and turn off the sound. If you want users to control the movie, you can add movie player controls. If you want the move to be self-running, you can apply the Loop Movie command.
To save a slide show as a QuickTime movie, follow these steps:
Choose File
Save As Movie.The Save As dialog box opens, as shown in Figure 23.16.
Type a name for the movie file.
Navigate to the folder or drive where you want to save the file.
Click the Movie Options button.
PowerPoint opens the Movie Options dialog box, as shown in Figure 23.17.
In the Movie Settings tab, you can set size and quality settings, media settings, and save options. Make your changes, as needed.
Optionally, you can save your movie settings for use with other presentations you save as QuickTime movies using the Apply these settings to all new presentations radio button.
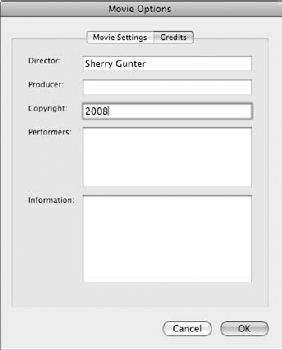
Click the Credits tab, as shown in Figure 23.18.
Type any movie credits you want associated with the presentation.
Click OK.
Click Save.
PowerPoint saves the file as a QuickTime movie.

You can now open the saved file in the QuickTime Player window and view the presentation, as shown in Figure 23.19.
Note
QuickTime doesn't actually support PowerPoint's slide transitions, but it does its best to duplicate them with QuickTime equivalents. If you keep your transitions really simple, like fades, the results are the same.

You can turn a slide into a graphic and use it in another program or share it as a photo. You can then easily share the graphic files of all or parts of your presentation with other users regardless of whether they use PowerPoint. Mind you, transitions, animations, and sounds are not part of this process.
To save your slide show as a collection of individual picture files, follow these steps:
Choose File
Save As Pictures.PowerPoint opens the Save As dialog box, as shown in Figure 23.20.
Navigate to the folder or drive where you want to store the files.
Type a name for the files.
If you're saving more than one slide as a graphic, PowerPoint sequentially adds numbers to the filename you specify.
Click the Format pop-up menu, and choose a graphic file type.
JPEG and TIFF work well for photos, while GIF and PNG formats work well for smaller files and Web images.
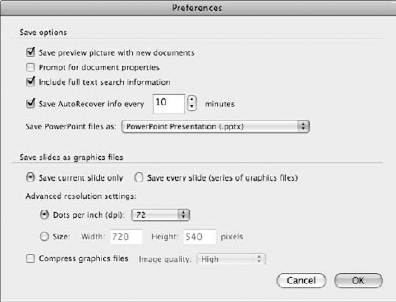
Click the Options button.
PowerPoint opens the Preferences dialog box, as shown in Figure 23.21.
Under the Save slides as graphics files heading, choose whether you want to save the current slide or all the slides.
Optionally, you can adjust the resolution settings and size dimensions or apply compression.
Click OK.
Click Save.
PowerPoint saves the files.

You can send all the slides in your presentation to the iPhoto program and save them as photo files, use them in an iPhoto slide show, or import to iMovie. To save your slide show as a collection of individual picture files, follow these steps:
Choose File
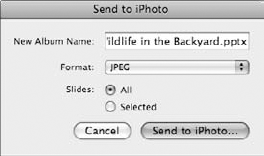
Send ToiPhoto.You also can specify which slides you want to send by selecting them in the Slides/Outline View pane.
The Send to iPhoto dialog box opens, as shown in Figure 23.22.
Type a name for the photo album.
Click the Format pop-up menu, and choose a graphic file type. You can choose JPEG or PNG.
Click a radio button to send all the slides or just the selected slide.
Click the Send to iPhoto button.
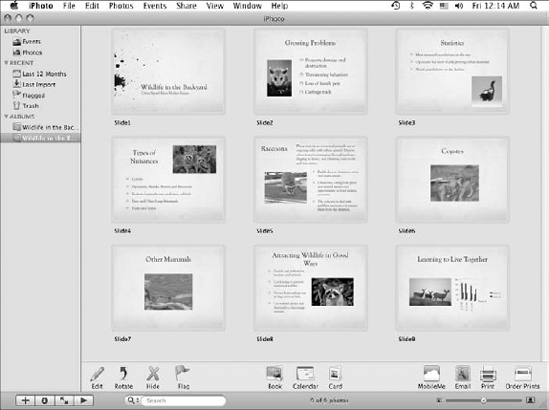
iPhoto opens to finish the procedure and display the slides as photos as a new album, as shown in Figure 23.23.
Do you want to turn your presentation into a Web-worthy slide show? You can, using PowerPoint's Save as Web Page command. When you turn a presentation into a Web page, PowerPoint handles all the coding and JavaScript programming needed to create the file. As with movies and graphics, you can expect to lose transition and animation effects in the process, and other slide elements may not translate well either. However, if you keep your graphics simple, the transition should prove acceptable.
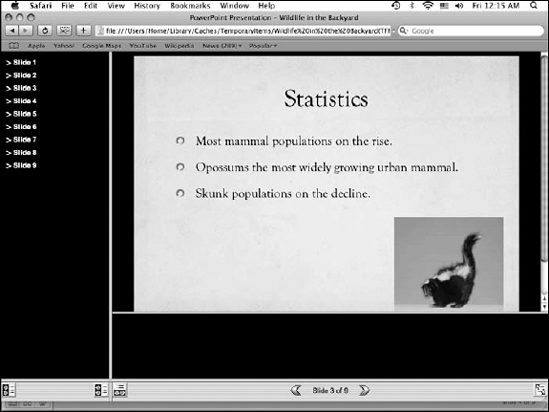
The first thing you should do is to preview your presentation as a Web page. Choose File
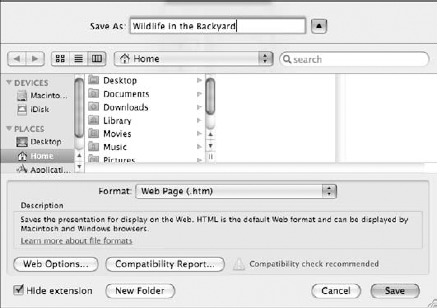
To save the presentation as a Web page, or more appropriately a set of HTML pages, follow these steps:
Choose File
Save As Web Page.PowerPoint opens the Save As dialog box, as shown in Figure 23.25.
Navigate to the folder or drive where you want to store the file.
Type a name for the file.
To set additional options, click the Web Options button.
PowerPoint opens the Web Options dialog box, as shown in Figure 23.26.
The General tab lets you add a document description.
The Files tab offers two save options for updating links and including the original file with the presentation file.
The Appearance tab, shown in Figure 23.26, lets you set Normal or Full screen view, change presentation colors, and include navigation buttons.
The Pictures tab enables PNG as an output format and sets a target monitor screen size.
The Encoding tab lets you save the document in another language format.
Click OK.
Click Save.
PowerPoint saves the files.

In this chapter, you learned how to set up a slide show and create custom shows based within the main presentation. You also learned about the various ways you can give a show using different hardware scenarios, and we gave you a few presentation tips to help you manage the speaking end of a live presentation.
You also learned how easy it is to actually conduct a presentation using PowerPoint's navigation tools and commands and using the Presenter Tools. You discovered how to turn your slide content into printed materials, including handouts and notes. Finally, this chapter taught you how to turn a slide show into graphics files, a QuickTime movie file, and a Web page.
With the slide show ins and outs behind you now, you're well on your way to the fame and fortune that awaits you on the PowerPoint presentation circuit. Enjoy your time in the limelight!