
IN THIS CHAPTER
Assigning formatting attributes to text
Applying formatting effects to other slide elements
Adding backgrounds to slides
As the author and creator of the presentations you make in PowerPoint, you have complete control over how things look. You're in charge of everything from fonts and sizes to backgrounds and color. This may seem a little overwhelming at first, but as you'll soon see, PowerPoint makes it easy to manage all these things through formatting controls found throughout the program. Even if you turn over most of the formatting to PowerPoint's themes or templates, chances are good that your slides will need a little tweaking from time to time. You may need to make the font more legible on a background or make the bulleted text larger to fill up some space. In this chapter, you learn how to utilize all the formatting controls to make your presentations look their very best.
Many presentations utilize text boxes to convey a message. As such an important slide element, text boxes are often one of the first things you need to format when you're making changes to the appearance of a slide. For example, sometimes you can improve the legibility of slide text simply by making it bold or bigger. Or maybe you want to add emphasis by italicizing a keyword or phrase in a text box. This section covers all the various formatting techniques you can apply to your presentation text. When it comes to formatting techniques, PowerPoint has a myriad of options to help you quickly change the appearance of text and text boxes in your slides and change the formatting of other slide elements.
When applying formatting to text in PowerPoint, you can select the text box by clicking the box border, or you can select text within the text box. You can use the same text selection techniques you learned in Word to select text in PowerPoint. For example, you can click and drag to select words with the mouse, or you can double-click to select a single word or triple-click to select a sentence. Learning to select a slide element is the key to applying any sort of formatting changes.
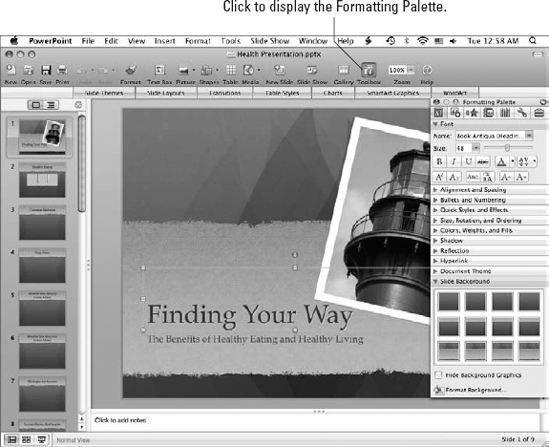
Your first stop for any formatting needs is the Formatting Palette. The Formatting Palette is one of several palettes contained within PowerPoint's Toolbox feature. As shown in Figure 21.1, the Formatting Palette is the first palette in the Toolbox bunch. On this palette are settings and options for formatting the text font and size, alignment, bullets and numbering, backgrounds, and so on.
You can hide or display the Toolbox by toggling it on or off using the Toolbox button on the Standard toolbar. You also can open the Toolbox to a specific palette using the View menu; choose View
Tip
If you're unhappy with any formatting you apply to a slide element, you can click the Undo button on the Standard toolbar to quickly undo it. Or you can choose Edit

If you're using the Format dialog box to apply simple formatting, as shown in Figure 21.3, click the Font style drop-down menu and choose Italic, Bold, or Bold Italic. To apply underlining, click the Underline Style menu and choose a style. Use the Format dialog box when you want to find a greater selection of underline styles to apply to your text. The Underline button on the Formatting Palette only applies a default underlining style.
One of the most common formatting tasks you'll perform in PowerPoint is changing the font and size of your slide text. A font governs the appearance of text characters, and the font size, naturally, determines how big or small the text is. You can use the Font pane in the Formatting Palette to change fonts and sizes, or you can use the Format dialog box.
To change the font using the palette, start by selecting the text and making sure the Font pane is displayed in the Formatting Palette. You can click the Font arrow button to view a drop-down list of fonts, as shown in Figure 21.4. Click the one you want to apply, and PowerPoint immediately changes the selected text. To change the font size, click the Size arrow button and choose another size, or you can click and drag the Size handle to the right of the Size setting.

Figure 21.3. You can use the Format dialog box to apply bold, italics, or underlining to your slide text.

You also can use the Format dialog box to set a new font and size. Choose Format


You can change the style of the bullets or numbers using the Style pop-up menu, shown in Figure 21.8. You can choose from several bullet and number styles, such as open bullets or check marks. In the case of numbers, you can choose from several number styles including Roman numerals and letter numbering.
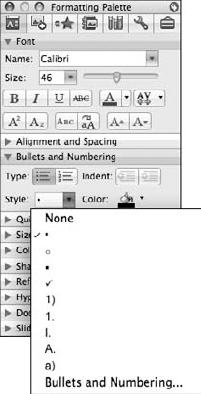
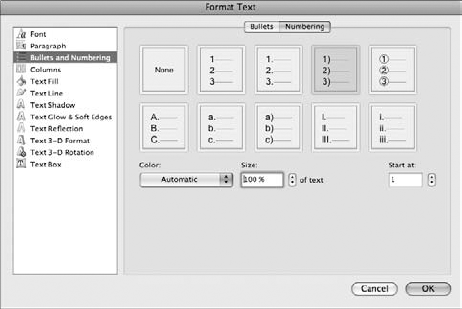
If the pop-up menu doesn't display the style you're looking for, you can open the Format Text dialog box to the Bullets and Numbering tabs, as shown in Figures 21.9 and 21.10. You can access the dialog box through the Bullets and Numbering command at the bottom of the Style menu, or you can choose Format

You can use the Alignment and Spacing pane in the Formatting Palette to control how text is positioned within a text box. The pane, shown in Figure 21.11, offers controls for horizontal and vertical positioning and controls for changing the orientation of the text within a text box. Here you'll find common alignments such as left, center, right, and justified.

Figure 21.11. The Alignment and Spacing pane features controls for setting alignment and spacing in your text.
You'll also notice additional alignment and spacing controls in the pane. For example, the Wrap text check box lets you choose to wrap a text box around a graphic object, while the Shrink text to fit check box automatically resizes the text to fit within a box. The buttons under the Paragraph Spacing and Columns area let you control space between paragraphs and turn the selected text into columns.
In addition to the Alignment and Spacing pane, you also find alignment controls in the Format menu; choose Format
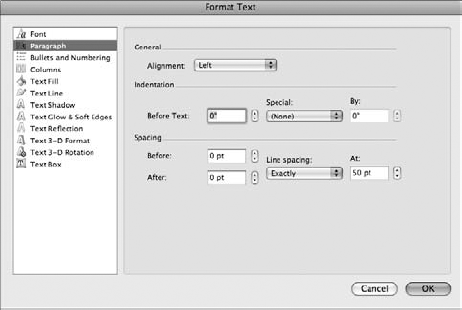
Figure 21.12. Find additional spacing options in the Format Text dialog box in the Paragraph category.
You can click the More Colors option on the Font Color menu to open the Colors dialog box and set a custom color for your text. To match an existing color, use the Pick A Color command. To set additional text colors, such as fills and outlines, open the Format Text dialog box by choosing the Text Effects option form the Font Color menu. From the Format Text dialog box, shown in Figure 21.14, you can use any of the text categories to apply formatting. For example, you can click the Text Fill and Text Line categories to reveal settings for creating an inside fill color for the text and an outer border. This works well with a heavy or thick font type. You also find options for creating glowing text, text with shadows, reflecting text, 3-D text, and rotated text.
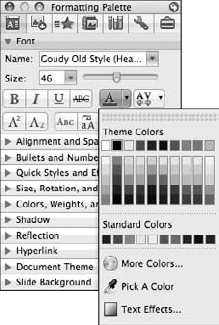

Figure 21.14. Use the Text categories in the Format Text dialog box to create all kinds of specialized formatting attributes.
You can find controls for text boxes in the Format Text dialog box, shown in Figure 21.15. Select the Text Box category to find settings for text layout within a text box, settings for controlling margins, and settings for controlling how text fits inside the text box.
Tip
You can double-click the border of any text box to quickly access the Format Text dialog box and choose what formatting you want to change.

You can use PowerPoint's Quick Styles and Effects pane to apply a reusable artistic style to text boxes, pictures, charts, tables, and other slide elements. Depending on which slide element you're working on, different Quick Styles are available to apply. When formatting text boxes, you can choose from Quick Styles, Shadows, Glows, Reflections, 3-D Effects, and Text Transform. Click the Quick Styles and Effects pane to view your options, as shown in Figure 21.16.

You can click a style button to view a menu of effects. You can choose from the following styles:
Quick Styles: Click this style to display a menu of text box color backgrounds to apply to the text.
Shadows: The Shadows styles include effects that create the illusion of shadows behind your slide text.
Glows: Choose from a menu of effects that create the illusion of glowing text on a slide in this style category.
Reflections: Styles in this menu create a reflective effect for your slide text.
3-D Effects: This category creates various 3-D effects, but is applicable to picture boxes rather than text.
Text Transforms: Create specialized text effects, such as circular text or arched text, in this category.
You can click the More Options button at the bottom of the pane to open the Format Shape dialog box and change the effect's fill, line, shadow colors, and so on.
Aside from text boxes, you can apply formatting to other slide elements in your presentation. Although you can learn more about formatting graphic objects in Office in Chapter 30, we touch on some of the easy formatting options available in PowerPoint in this section. For example, you may decide a clip art box needs a new color background or shape, or the photo you inserted may need a frame. You can use several techniques to apply formatting to other slide elements, including clip art, pictures, charts, tables, and SmartArt graphic objects.
Depending on which slide element you're currently working with, the handy Formatting Palette on the Toolbox offers panes specific to the element. For example, if you click a clip art or picture element, the Picture pane appears, as shown in Figure 21.17. If you click a table, the Table pane appears on the palette. You can use the element-specific pane to make formatting changes to the object. In addition to the element-specific pane, the Formatting Palette may display panes for formatting the size, rotation, and ordering of the object, borders and shading, shadows, and reflections.
If the Formatting Palette doesn't offer enough options for you, you also can double-click the border of a slide element or Control+click the element to open its Format dialog box, shown in Figure 21.18. The dialog box offers many of the same settings found on the Formatting Palette, as well as some additional options not found on the palette. For example, if you double-click a picture or clip art element, the Format Picture dialog box opens, and you can choose a category and options for formatting the element.
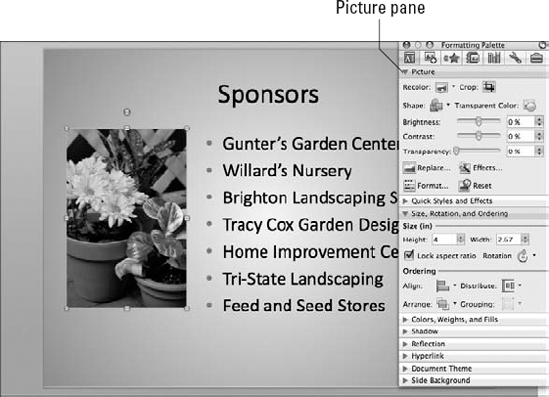

Figure 21.18. You can find formatting options for slide elements in the element-specific Format dialog box.
Tip
If you expand all the available panes on the Formatting Palette, you'll never be able to see them all onscreen. You can expand and collapse which panes you want to work with by clicking the pane name.
For easy formatting effects, turn to PowerPoint's Quick Styles and Effects pane. You can use the controls in this pane to apply a reusable style to text boxes, pictures, charts, tables, and other slide elements. As you learned in the text formatting section, this pane displays different Quick Styles depending on what kind of slide element you're formatting. When formatting a picture or clip art element, you can choose from Quick Styles, Shadows, Glows, Reflections, and 3-D Effects. Not all styles and effects are available for every slide element. Click the Quick Styles and Effects pane to view the styles and effects, as shown in Figure 21.19.

Figure 21.19. Use the Quick Styles and Effects pane to assign frames, shadows, 3-D effects and more.
You can choose from the following styles:
Quick Styles: This option displays a menu of frames and other background color effects to apply to the element.
Shadows: This option displays a menu of shadow styles to create the illusion of shadows behind the slide element.
Glows: This option displays a menu of glow effects to create the illusion of glowing object.
Reflections: This option displays a menu of reflection styles to create the illusion of a reflection of the slide element.
3-D Effects: This option displays a menu of various 3-D effects.
If you click the More Options button at the bottom of the pane, the element's Format dialog box appears where you can further customize the effect.
You can whip up customized shadow and reflection effects for slide elements using the Shadow and Reflection panes on the Formatting Palette. For example, the Shadow pane, shown in Figure 21.20, lets you control the angle of the effect and the style, color, distance, blur, and transparency of the shadow. You can experiment with the controls to create your own specialized effect.

You can find the same controls and more in the element's Format dialog box; double-click the element's border area or Control+click the element and choose the Format command.
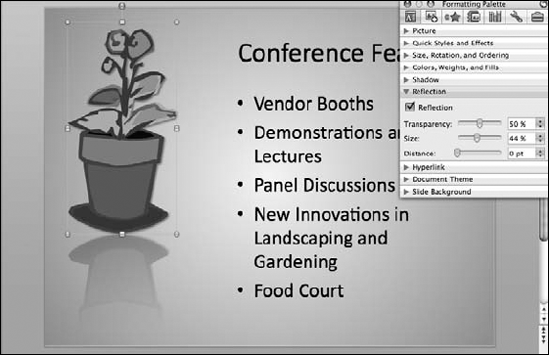
Like the Shadow pane, the Reflection pane, shown in Figure 21.21, offers controls for customizing a reflection effect. You can set a transparency level, size, and distance for the reflection.
The Colors, Weights, and Fills pane on the Formatting Palette contains settings for controlling the fill color and line style for a slide element. The fill color is the interior color of a selected element, while the line style is the outer border of an element. For example, you can select a clip art object and click the Fill Color button to change the clip art's fill color. You can customize the effect further by setting a transparency level. You might add a border to an element and make it thick or change its color to match the slide theme. The Colors, Weights, and Fills pane, shown in Figure 21.22, includes controls for customizing any fill or line styles, and you can experiment with the controls to create your own specialized effect.

The Size, Rotation, and Ordering pane in the Formatting Palette includes options for setting a precise size for a slide element. Do you need to rotate a piece of clip art, change the alignment positions of objects, or change the order of shapes stacked in a slide to create artwork? You can find controls for all these formatting options in this one pane. Shown in Figure 21.23, you can use these options to perform a variety of edits based on size, rotation, and order. For example, if you want to move several slide elements at once, you can group them with the Grouping command, or if you want to distribute the objects equally on the slide, you can use the Distribute command. If you want to tilt a picture slightly, you can rotate it left or right, or flip it horizontally or vertically. This is handy if you need a piece of clip art to face into the slide, for example.

Figure 21.23. To control the size, rotation, and order position of an object, use the Size, Rotation, and Ordering pane.
The Arrange setting, part of the Ordering option group, helps you control how items are ordered in a stacking scheme on the slide. Your options are Bring to Front, Send to Back, Bring Forward, and Send Backward. For example, if you have several shapes you want to place behind a text box, you can use the Bring Forward or Bring to Front commands to place the text box on top of the stack. This means you can still read the text, yet see the other shapes in the background behind the text box.
In Chapter 20, you learned how to assign themes to a presentation using the Slide Themes tab on the Elements Gallery. You can customize any assigned theme using the Document Theme pane in the Formatting Palette. As you already know, themes assign preset color schemes, fonts, sizes, and backgrounds to a presentation. In the Document Themes pane, you can choose a different color scheme for a theme, change the font associated with the assigned theme, and save the settings as a new theme. Figure 21.24 shows the Document Theme pane. With a little tweaking, you can make your presentation look just the way you want, and themes make sure every slide has a similar look and feel.
If you have any previously saved themes, you can assign them using the Browse button. When clicked, this button opens the Choose Themed Document or Slide Template dialog box where you can navigate to the saved theme file you want to apply.

Slide backgrounds appear behind the text boxes and other elements you place on a slide. PowerPoint offers a library of preset backgrounds you can assign, or you can choose to use a solid background color. The Slide Background pane, shown in Figure 21.25, lets you choose from several styles.

Figure 21.25. You can set a different slide background using the preset styles found on the Slide Background pane.
If, for example, a theme's background objects are distracting you while building a slide, you can hide them by activating the Hide Background Graphics check box in the Slide Background pane.
You can customize your own background style using the Format Background dialog box, shown in Figure 21.26. For example, you can set a new solid fill color for a background, control its transparency level, or import a photo to use as a background. You also can find a library of preset textures you can use as slide backgrounds. The Format Background dialog box has two categories: Fill and Picture. Each category has a unique set of tabs with options you can set.

In this chapter, you learned how easily you can apply formatting attributes in PowerPoint. You learned how to format text by changing its font and size, color, and alignment. You also learned how to customize bullets and numbers for lists in your slides. Another way to customize a slide is to format individual slide elements, such as clip art, pictures, charts, and tables. You can use the panes and options found on the Formatting Palette to make changes to your slide elements. For example, you can customize a clip art image by adding a border or assigning a shadow effect. There's no end to the combination of formatting attributes you can apply, and PowerPoint makes it easy to experiment with the settings to create just the right look. You can even customize themes to work the way you want.
As you saw in this chapter, the Formatting Palette is the main hangout for all the major formatting attributes you might want to apply. However, if you're looking for even more formatting controls, just open the slide element's Format dialog box.