
Let's add a text box to your profile page:
- In the Pages section of the Portfolio area, click on the button to the right of your Profile page to begin editing it:

- You will now see your profile page in edit view. It will look something like this:

- You will notice that you are being encouraged to select different blocks from within a set of six tabs at the top of the screen and drag them down onto your page. Later you will be looking at these blocks and learning how to position them on your page. Right now though, you will be focusing on how to work with the text box. Click into the General tab. You should see this:

- Click on the text box icon and drag it somewhere onto the space below in the page, to position it amongst the other blocks already present on your page layout. You will see the other blocks moving as you are dragging to make space for the text box. You will also see a dotted gray line showing you where the new block will appear. Here is a diagram showing the drag-and-drop action:

Tip
Can't drag-and-drop in Internet Explorer 6
The functionality allowing you to drag blocks around the page, when you are editing, is enabled by JavaScript. All modern browsers support JavaScript as default, including Chrome, Firefox, Safari, and Internet Explorer 7, 8, and 9. Unfortunately, for Internet Explorer 6 users, Mahara's drag-and-drop facility won't work in this browser because of problems (or bugs) it has with layout that newer browsers don't have. Tablet computers with touch-input also have this issue. You can still use IE 6 without the drag-and-drop feature, and use the radio buttons instead, but it is recommended that you upgrade your Internet Explorer browser or (even better) upgrade to an Open Source browser, such as Mozilla's Firefox (www.mozilla.com/firefox/).
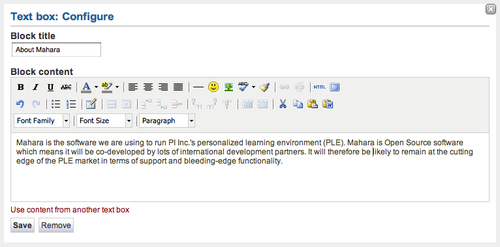
- A box will open. Click into the Block title field and add your title. If you don't want a title, just leave this blank.
- Click into the Block content input box. Type in the body of your text box. Janet Norman decided that she would like to have some information about Mahara on her profile page:
- Click on Save to finish, and that's it, you've added your first text box.
You just added a text box to your profile page.
A section on your page is called a block, and you've just learned how to add a new text box by clicking and dragging it onto your profile page. Blocks are what Mahara uses to personalize your profile page and your other pages. You can add and delete blocks, and move them around. There are actually quite a variety of blocks, and the Mahara developers are keen to keep adding to the list. You have started here with a basic text box, as it's probably the one you will use most frequently. In Chapter 4, Organize and Showcase Your Portfolio, you will be exploring what you can do with the other blocks that are already available.
You may have noticed that in the text box there is a link to Use content from another text box. This is linked to the Mahara notes feature that we will discuss in detail later. It allows you to re-use information that you have typed into different text boxes rather than writing it all out again each time.
One of the other things you would have probably noticed when adding text to your text box is that you have a number of editing options available. Janet would like to make her text look more interesting, so let's revisit your text box and look at what these options do.
You will probably find that you have already used most of the options in the text editor when working in word processing applications. Let's have a quick look at some of the most commonly used options:
|
Icons |
Function |
|---|---|
|
|
These icons can be used to make your characters bold, italicized, or underlined. |
|
|
Align your text to the left, to the center, to the right, or justify your text into a square, newspaper-style layout. |
|
|
Add bullets or numbers to your lists of text. |
|
|
Enter full screen. Click this button to edit in full screen mode. It is handy for editing tables and full-width text blocks. |
|
|
Enter HTML mode. |
|
|
Add a hyperlink to your text. |
|
|
Break an existing hyperlink. |