
Let's upload your files into your own private space:
- Click on the Content option on the main menu. By default, the Profile tab will be selected, click on the Files tab.
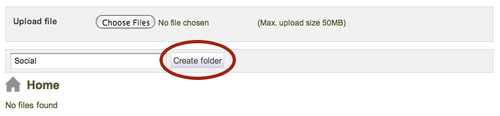
- We recommend that you start by creating a structure of folders just like you would do on your laptop or desktop computer. Don't worry about getting them perfect because you will be able to edit this structure later. Enter the name for your first folder and click on Create folder. In the following example, Janet Norman has created a folder in her portfolio called Social:
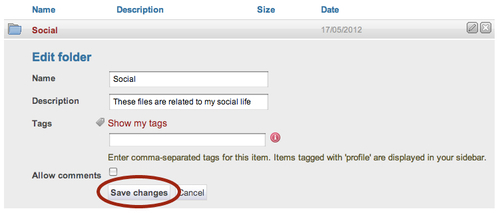
- You should now see the folder that you have just created. By the side of it, you have the option to edit or delete it. Let's add some more detail to your new folder by giving it a description. Click on the edit button, which is represented by a pencil in Mahara:

- You will now see a new section appear as shown in the following screenshot. Write in your description for your folder. This will appear in the information next to the folder under the heading Description. Don't worry about the tags, you'll see more about those later. When you have finished, click on Save changes:
- Go ahead and make as many folders as you like. You can make folders within folders too.
- You're ready to start adding files. Click into one of the folders you just made. You will notice that there is a section called Upload file at the top of the page; click on Choose Files, and search for a file on your own computer that you would like to add to your portfolio. You may also have to tick a box to say that you have permission to reproduce and distribute the file. Choose the file you want and click on Open. You will see a spinning progress wheel that is telling you that your file is uploading. Be patient and let Mahara do its work — the larger the file, the longer it takes to upload. When the file has uploaded, the spinning progress wheel will turn into a confident check mark and you will see that your file has appeared in your files area. In the following screenshot, you can see that Janet has uploaded a video, called myHobbies.mov, of herself talking about her hobbies:

You have just used the files area of your Mahara site. You have learned how to set up a folder structure and uploaded your first file. In the example, Janet Norman uploaded a video file (.mov), but the file you upload in Mahara can be almost anything — a word-processed document, a spreadsheet, an audio clip, a PDF, and so on.
You may have noticed that when you uploaded your file, there was a small message indicating that your file has been uploaded. These helpful messages appear from time to time in Mahara:
Let's just reflect a little on some of the other things you came across during the file upload process.
Although it is possible to make modifications to your folder structure at any time you wish, it is a good idea to work out how you want to organize your folders right from the very beginning. Here are some options for you to think about:
- You could set up folders by file type. For example, video
(mp4, avi, and ogv), audio (mp3), doc(odt, odp, ppt, ods, andxls), images (png, gif, andjpg), and so on. - You could set up folders by audience. For example, friends, colleagues, finance, sales team, and so on.
- You could set up folders by content or topic. For example, electrics, lathe, cutting, and so on.
- You could set up folders according to commonly known in-house reference codes. For example, Class3A, Topic7a(ii), and so on.
- Or any way you wish.
The key point is that you should try to keep things organized as this will help you later when you come to create Mahara pages. Later in this chapter you will see how you can use tags to be even more organized.
When you uploaded a file in the preceding Time for action — adding some folders and files to your portfolio section, you may have been required to tick a box (if your administrator has set up the site in this way) to say that you have the permission to reproduce and distribute the file you are uploading:
It's important that before you use any files in your portfolio, you have legal ownership over them. Anything you publish will be your personal responsibility, so please do not upload material that you are not allowed to upload. You can always link out to existing material published by other people on the web, if you need to, and you will see how to do that in the next chapter. But, just to remind you again, you will have legal responsibility for anything that you upload into your files area. By uploading a file here you are either saying that it belongs to you or that you have the expressed permission to use it as if it was your own.
You may have noticed the Quota block appearing on the right-hand side of the screen that looked a bit like this:

This useful information tells you how much storage space you have in your site's quota. On the demonstration site, by default, this value is 50.0MB although it may be different on your own site. You can see in the preceding screenshot that Janet has used 3.1MB of her quota, which is 6% of what she is allowed, according to the progress bar. As you upload more files you will notice the progress bar moving across to indicate what percentage of your allocated space you have left. If you feel that you need to have a larger quota, get in touch with your Mahara tutor or administrator. If you are likely to be uploading lots of large files, for example audio or video recordings, you will very quickly run out of storage space, but you can always nudge an administrator to see if they allow you some more.
Now, let's have a look at how you can edit, delete, and move your files, as well as tag them.
Mahara's filesystem is intuitive and easy to get to grips with. Wherever you see a folder named Parent folder, click on its small arrow icon on the left to jump up to the parent folder:

To move files around different folders, just click on their icon and drag them onto the icon of the folder where you want them to be. Simple, isn't it?
To delete a file, simply click on the small cross button to the right of the edit button.