
Using UV Textures
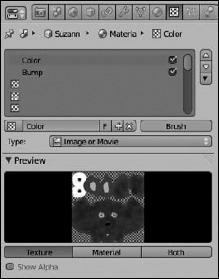
After you create a bunch of UV textures, either by painting them yourself or by baking them from the mesh, you need a way to bring them back into Blender and apply them to your mesh. This process is where Image textures in your Texture Properties come in. Figure 8-12 shows Texture Properties with image textures on two different texture slots, one for a color map and another for a bump map.
Figure 8-12: Texture Properties with two Image textures loaded.
The process for adding an Image texture is pretty similar to adding any of the procedural textures:
- Choose Image or Movie from the Type drop-down menu in Texture Properties.
- In the Image panel, left-click the Open button.
A File Browser opens, and it's where you can find the image you want to load as a texture. Alternatively, if you already have an image loaded, you can use this datablock to select that image by clicking the image datablock button on the left of the datablock field.
- Choose your image from the File Browser.
- With the image loaded, choose Clip from the Extension drop-down menu in the Image Mapping panel.
This step isn't critical, but it's something I like to do. Basically, it prevents the image from tiling. Because I'm loading a UV texture, I don't need it to tile.
- Choose UV as the type of Coordinates in the Mapping panel.
This step tells the material to use your UV layout for texture coordinates to properly place the texture. Even if the image isn't the original one you painted in Texture Paint mode, as long as you painted the texture using the UV layout as your reference, it should perfectly match your mesh.
- In the Influence panel, choose the material attributes you want the texture to influence.
If the texture is just a color map, left-click the Color check box. If it's a bump map, left-click the Normal check box, and so on.
- Repeat Steps 1 through 6 for each texture channel that you want add a UV image texture to.