
Baking Texture Maps from Your Mesh
Another benefit of unwrapping your mesh is render baking. Render baking is the process of creating a flat texture for your mesh that's based on what your mesh looks like when you render it. What good is that? Well, render baking is really useful to people who want to create models for use in video games. Because everything in a game has to run in real time, models can't usually have a lot of complicated lighting or highly detailed meshes with millions of vertices. To get around this limitation, you can fake some of these effects by using a texture. And rather than paint on shadows and detail by hand, you can let the computer do the work and use a high-resolution render instead.
Although this technique is used a lot in video games, render baking is also helpful when creating animated models for film or television. If you can create a model that looks really detailed but still has a relatively low vertex count, your rendering and animating process goes faster.
Another use of render baking is for texture painters. Sometimes it's helpful to have an ambient occlusion or shadow texture as a frame of reference to start painting a more detailed texture. A technique that I like to use is to first rough in colors with vertex painting (see Chapter 7). Then you can bake out those vertex colors to a texture, which can serve as a great starting point for a hand-painted texture.
So how do you create these baked textures? Well, the magic all happens in the Bake panel (see Figure 8-11) at the bottom of Render Properties.
Figure 8-11: The Bake panel in Render Properties.
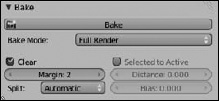
You have six different kinds of images that you can bake out:
- Full Render: This is the whole mess — textures, vertex colors, shadows, ambient occlusion, specular highlights — the works.
- Ambient Occlusion: Ambient occlusion, or AO, is an approximated form of global illumination, or the effect that happens from light bouncing off of everything. If you have AO enabled in World Properties, you can bake its results by choosing this option.
- Shadow: Any shadows that fall on this object are baked out as a texture.
- Normals: A normal map is similar to a bump map, but instead of just using a grayscale image to define height, normal maps can get even more detailed by using a full-color image to define height as well as direction. Artists who like to use Sculpt mode bake the normals from their sculpted mesh to a low-resolution version of the mesh to get details on the model without the additional geometry.
- Textures: This option takes all the textures you applied to the mesh, both image-based and procedural, and flattens them out to a single texture. This option is also what allows you to bake out vertex colors.
- Displacement: Baking displacement is similar to baking normals. The difference is that normal maps just redirect surface normals to provide the illusion of more geometry, whereas a displacement map can actually be used to move geometry around and create real depth on the surface of the object. Using displacement maps in Blender can be computationally expensive. However, a few third-party rendering engines have a nice way of handling displacement maps without the need to heavily subdivide your mesh.
After you have an unwrapped mesh, the steps to bake a new texture are pretty straightforward. Create a new image in the UV/Image Editor (Alt+N) at the size you want the texture to be and just choose the type of texture that you'd like to bake out from the Bake panel. Then left-click the Bake button and wait for the texture to be generated.