
Getting to Know the Interface
Probably one of the most daunting aspects of Blender for newcomers and longtime 3D professionals alike has been its unique and somewhat peculiar interface. It's arguably the most controversial feature Blender has. In fact, at one time, merely calling the interface a feature would raise the blood pressure of some of you who tried using Blender in the past, but gave up in frustration when it did not behave as expected.
Although the interface wasn't the primary focus, the interface updates to Blender added in the 2.5 series of releases have made great strides toward alleviating that frustration. As a small example, when you first launch Blender, the splash image that appears is more functional now, providing you with quick links to online documentation as well as a list of recently opened files. Figure 1-2 shows the splash image you're presented with when you start Blender for the first time.
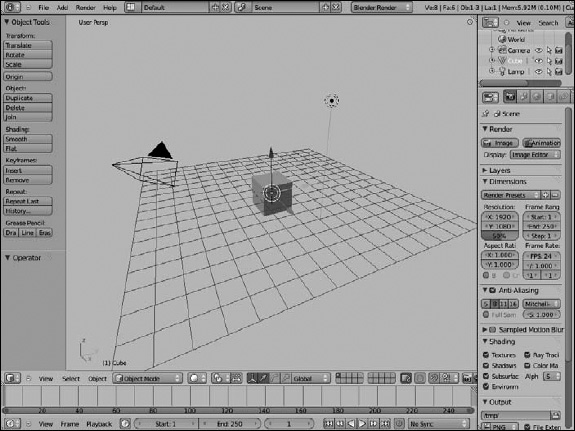
If you click anywhere other than the links provided by the splash image, the splash image goes away, and you're greeted with Blender's default scene, as shown in Figure 1-3. If you're looking at the interface for the first time, you may think it appears pretty daunting. However, the purpose of this book is to help you get the hang of Blender, explaining some of the design decisions in the interface and ultimately allowing you to be productive. Who knows, you might even start to like it and wonder why other programs don't work this way!
Figure 1-2: The new and improved Blender splash image.
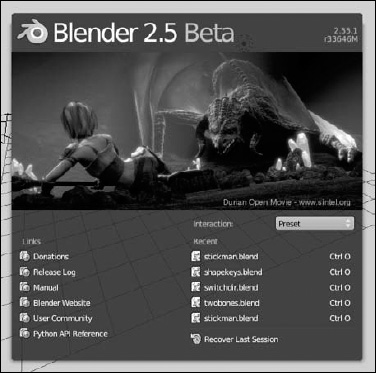
Figure 1-3: The default Blender interface.
An interface that stays out of your way
The first thing to understand about Blender's interface is its basic organization. Figure 1-3 displays a single Blender window. Each Blender window can consist of one or more areas that you can split, resize, and join at will. In nearly all cases, an area defines the space of an editor, such as the 3D View, where you actually make changes and modifications to your 3D scene. Each editor can include one or more regions that contain additional features or tools for using that editor. An example of a region that all editors have is a header region at the top or bottom of the editor that typically includes menus and buttons to give you access to features in that editor.
Knowing this organizational structure, the next important thing to know is that Blender is designed to be as nonblocking and nonmodal as possible. Areas in Blender never overlap one another (nonblocking) and using one feature of Blender typically won't restrict you from using any of the others (nonmodal). As an example, in most software, if you want to open a new file or save your project, a file browser dialog pops up. This dialog is an overlapping window that not only blocks things behind it from view, but usually also prevents you from making any changes to your file. This setup isn't the case with Blender. In Blender, the file browser is an editor just like any other, and it makes perfect sense to be able to make a couple of tweaks to your scene before hitting the Save button. Figure 1-4 shows what it might look like to have a file browser open while you make tweaks.
Figure 1-4: Doing those last couple of tweaks before finally saving (Model credit: Blender Foundation, Sintel).

 At first, working in a nonblocking, nonmodal interface may seem to be really restrictive. How do you see different types of editors? Can you see them at the same time? Everything looks like it's nailed in place, so is it even possible to change anything? Fortunately, all these things are possible, and you get the benefit of never having your view of one area obstructed by another. Having an unobstructed workspace is a great way to be able to see at a glance what's going on in your file. Furthermore, as of the Blender 2.5 development series, if you absolutely need multiple windows that can overlap, you can have them. For example, you might have two computer monitors that are different sizes, and you'd like a full-sized Blender window in each. I show you how to do task later in this chapter in the “Duplicating an area to a new window” section.
Resizing an area
You can modify and change all the areas in a Blender window in the same way: Change the size of an area by left-clicking the border between two areas and dragging it to a new position. This method increases the size of one area while reducing the size of those that adjoin it. If you have only one area in your Blender window, it's exactly the same size as that window. To resize it, you need to either adjust the size of its parent Blender window or split a new area into that space.
Splitting and removing areas
![]() While working in Blender, it's pretty common that the default layout isn't quite what you need to work efficiently. Sometimes you may need an additional 3D View, or you may want to see the UV/Image Editor in addition to the 3D View.
While working in Blender, it's pretty common that the default layout isn't quite what you need to work efficiently. Sometimes you may need an additional 3D View, or you may want to see the UV/Image Editor in addition to the 3D View.
To create either of these layout changes, you need to split an existing area into two. Splitting a new area doesn't work like it used to in previous versions of Blender. In earlier versions, you'd split or join areas by right-clicking the border and choosing an option from a pop-up menu. As of Blender 2.5, a new system uses the corners at the bottom left and top right of any area. These corner widgets are marked as a triangular region indicated by diagonal lines.
To split any area into two, use the following steps:
- Left-click one of the corner widgets and drag your mouse cursor away from the area's border.
- Drag your mouse cursor left or right to split the area vertically.
Dragging it up or down splits the area horizontally. As you drag your mouse, the areas update in real time so that you can see the result of the split while you're working. To cancel the operation, right-click or press Esc.
If you want to remove an area, the process is similar. Rather than splitting an area in two, you're joining two areas together. So instead of left-clicking the corner widget and dragging your mouse cursor away from the area border, drag it toward the border of the area you want to join with. This action darkens the area your mouse is in and draws an arrow to indicate which area you want to remove. Figure 1-5 shows the basic steps for splitting and joining areas.
Duplicating an area to a new window
![]() In addition to the new way of splitting and joining areas, the Blender developers have also introduced a brand-new feature in the 2.5 series via corner widgets. You now have the ability to take any area and duplicate it to a new Blender window. You can move that window to a separate monitor (if you have one), or it can overlap your original Blender window. And within this new Blender window, you can split the duplicated area into additional ones as you like. This area duplication feature is a slight violation of Blender's non-overlapping principles, but the benefits it provides for users with multiple computer screens make it very worthwhile.
In addition to the new way of splitting and joining areas, the Blender developers have also introduced a brand-new feature in the 2.5 series via corner widgets. You now have the ability to take any area and duplicate it to a new Blender window. You can move that window to a separate monitor (if you have one), or it can overlap your original Blender window. And within this new Blender window, you can split the duplicated area into additional ones as you like. This area duplication feature is a slight violation of Blender's non-overlapping principles, but the benefits it provides for users with multiple computer screens make it very worthwhile.
To take advantage of this feature, follow these steps:
- Shift+left-click one of the corner widgets in an area and drag your mouse cursor away from it.
This step duplicates the area you clicked in and creates a new Blender window to contain it. You can also achieve this effect from the menus in the header region of some editors by choosing View
 Duplicate Area into New Window.
 - Close the additional Blender window by clicking the close button that your operating system adds to the border of the window.
All editors in Blender areas have a horizontal region called the header running along either the top or bottom of the editor. The header usually features specialized menus or buttons that are specific to the editor you're using. Here are some ways you can customize the header:
- Hide the header. If you drag the seam all the way to the area border, then the header becomes hidden, leaving only a small plus icon (+) in the corner of the area. If the header is at the bottom of the editor, the plus icon appears at the bottom right. If the header appears at the top, it's at the top left. Left-click this icon, and the header reappears.
- Change the location of the header. You can also change the location of the header to either the top or bottom of the editor it belongs to. To do so, right-click the header and choose Flip to Top (or Bottom, depending on where your header currently is).
Figure 1-5: Creating a new area and then removing that area.

Maximizing an area
When working in Blender, you also occasionally need to maximize an area. Maximizing an area is particularly useful when you're working on a model or scene and you just want to get all the other areas out of your way so that you can use as much screen real estate as possible.
To maximize any area, hover your mouse cursor over it and press Shift+spacebar. You can toggle back to the tiled screen layout by pressing Shift+spacebar again. These options are available in almost all editor types by choosing View![]() Toggle Full Screen from that editor's header or by right-clicking the header and choosing Maximize Area from the menu that appears. If the area is already maximized, then the menu item will say Tile Area.
Toggle Full Screen from that editor's header or by right-clicking the header and choosing Maximize Area from the menu that appears. If the area is already maximized, then the menu item will say Tile Area.