GUIs
So far, all of the programming that we have done has been part of a text interface. The programs print information to a terminal window and to give them input we enter text from the keyboard. These types of programs have their place in computing, but these days very few people actually use such programs. They typically run in the background instead, doing things that people do not see. The programs that you are likely used to working with are more graphical. They open up windows and you can interact with them through mouse clicks as well as typing.
This type of program is called a GUI (Graphical User Interface). In this chapter we will look at how we can write GUIs in Scala and get them to interact with the user.
11.1 GUI Libraries and History
There are reasons why we began doing our programming with the console. There are certain complications involved in programming GUIs. Some of that is inherent to the medium. In Scala, some of that is due to history. Scala relies on the underlying virtual machine and the libraries for it to do a lot of the work in a GUI. Scala simply adds things on top when it is possible to improve them in a significant way by doing so. In the implementation of Scala that we are using, this means that there is a dependence on the Java GUI libraries.
When Java was originally released, there was one GUI library called the Abstract Windowing Toolkit, AWT. The AWT library makes direct calls to the operating system or windowing environment for building elements of the GUI. This gave the AWT a significant benefit in speed. However, it also provided a significant limitation. Due to the cross-platform nature of Java, they only included elements in the AWT that were present on virtually all platforms. They are the most fundamental parts of GUI construction like windows, buttons, text boxes, etc. These elements were drawn by the underlying platform and always looked like the underlying platform.
Both the restriction in appearance and the limited number of component types led to the creation of a second GUI library for the Java standard. This second library was called Swing and it was a "pure" Java library. That means that all the code in Swing was written in Java. It uses calls to AWT to make things happen, but does not directly call anything that is not in Java itself. The Swing library includes a lot of different GUI elements that are more powerful and flexible than what was provided in AWT. It also includes the ability to have elements of the GUI rendered in different ways so they do not have to look just like the underlying system. Originally this flexibility came at a significant cost in speed. Over time various optimizations have been made and now Swing runs perfectly fine assuming the programmer does not do anything silly to slow it down.
Scala has its own library that is a wrapper around Swing. It is making calls to Swing and we will call it Swing, but we get to interact with it in a way that is unique to Scala. This makes things simpler and is a big part of the reason that GUIs are included this early in the text.
The way that the various GUI libraries are built on top of one another makes it so that we will be using a little bit from each one. The Scala Swing library is where we will focus most of the time. The types we use for it are in the scala.swing and scala.swing.event packages. Every so often we might have to go back down to the Java Swing libraries which are found in javax.swing1 and various packages under it. There will even be a need to go down to AWT occasionally. We will be working with a fair number of AWT types in the next chapter. Those will come from the java.awt package and its subpackages.
11.2 GUI Components
The construction of GUIs is very modular. They are constructed by putting together different pieces called Components. The specific types that we use, such as Button, are subtypes of the more general Component type. Subtyping was discussed briefly in section 7.5.3 and will be discussed in more detail in chapter 19.
11.2.1 Frames and Windows
To display a GUI we need to start by bringing up a window. There is more than one type of window. The type that we will use as a main window for an application is called a MainFrame. Other options include a regular Frame and a Dialog. The advantage of the MainFrame is that it terminates the program when it is closed. The following is a little script that you can run to bring up a window.
import scala.swing._
val frame=new MainFrame {
title = "First GUI"
size = new Dimension(500,500)
}
frame.visible=true
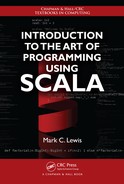
When you run this it should pop up a window that looks like figure 11.1. There are quite a few things in this script that are worth describing. We start with an import statement. The underscore is a wild card that tells Scala to import everything in the scala.swing package. We do not have to do that here, but it will be more useful as we go on because we will use a lot of different types from this package.

This is a sample window brought up by a simple script. The window is 500×500 pixels and has the title "First GUI". When you close the window, the script will exit.
Below the import we make the Frame and store it in a val named frame. The syntax here can be read in the following way. We are making a new MainFrame object and the curly braces go around stuff that we want to put into this object. Inside the curly braces we are changing some things so they will not be the defaults used for MainFrame. The first is to set the title. This appears on the top of the window. After that we set the size. The size has type Dimension (technically it is a java.awt.Dimension). In this script we make a new Dimension object with width and height both set to 500.
After the creation of frame, there is a line that sets the visible value in frame to be true. This causes the window to pop up and be visible.2
11.2.2 Components
In order to make a GUI do something, we need to add other components into it. There are many different components in the scala.swing package. A partial list is shown here with brief descriptions.
- Button - A standard button that you click to make things happen. Create by calling Button(text:String)(action : => Unit).
- CheckBox - A labeled box that you can select or de-select. Create with new Check-Box(label:String). Contains selected:Boolean that will tell you if the box is currently selected.
- ComboBox - This is a drop-box that allows the user to select from one of several options. Create with new ComboBox(items:Seq[A]). Has an object in it called selection that deals with the current selection. Use selection.index to get the index of the current selection.
- EditorPane - A complex text element that displays multiple lines and formatting. Create with new EditorPane(contentType:String,text:String).
- Label - A simple, inactive, label. Create with new Label(text:String).
- ListView - A display of a list of information that is selectable. Create with new ListView(items:Seq[A]). Has an object called selection in it to deal with making selections on the list. You can use the collection selection.indices to interact with the index values that are selected.
- PasswordField - A text field that hides the data input into it. Create with new PasswordField if there is no default or new PasswordField(text:String) if you want to start with a default. Has a member called text:String that will tell you the text that is currently entered.
- ProgressBar - A graphical display for progress. Has fields called min:Int, max:Int, and value:Int that are used to control/read the progress display.
- RadioButton - A selectable button that can be put in a ButtonGroup so only one can be selected at a time. Has a field called selected:Boolean that will tell you if this currently selected.
- ScrollBar - A horizontal or vertical bar intended for scrolling. The ScrollBar has a minimum, maximum, and value, which are all Ints, that let you set or inspect where it is. Few applications will use a ScrollBar directly. The functionality you generally want is part of the ScrollPane described in the next section.
- Slider - A horizontal of vertical component that can slide to select a value. Has fields for min, max, and value.
- Table - A table for displaying data. Create a new one with new Table(rowData: Array[Array[Any]], columnNames: Seq[Any]).
- TextArea - A multiline text display and input. Has a text:String member that will let you know what has been entered.
- TextField - A single line text display and input. Has a text:String member that will let you know what has been entered.
As you can see, there are quite a few different options for building GUIs in Scala. It is not the purpose of this book to document the use of all of the different GUI elements. The API can help you with that. We will just consider a few in this chapter so that you will get a general understanding of the concepts.
The easiest one to demonstrate is the Button. The line below can be added into the code block for the new MainFrame will cause it to have a single button in it that says "Press me".
contents=Button("Press me"){println("Button pressed")}
When you press the button the program prints out "Button pressed". How the button looks depends a bit on where you put this line. If you put it before the line that sets the size, the window is still 500×500 and the button takes up the whole center area. On the other hand, if you put it after the size line, changing the contents causes the Frame to resize itself to an optimal size for the contents. In that case, the button is just big enough to look nice with the text in it and the window is just large enough to hold the button.
So what does this line do? The Frame only gets to hold one thing and that one thing is determined by whatever we set contents to be equal to. In this case, it is being set to a new Button. There are several ways to make a new Button. This one is the most direct for our purposes. We are making a call to the Button object and giving it arguments telling it the details we want for the new Button. The arguments are Curried and the second one is passed by-name. This is very similar to the way you call Array.fill. The first argument, which is in its own argument list, is a String that is the text on the button. The second one is code that you want to have happen any time the button is clicked. The second argument is put inside of curly braces here. This is just a shortcut that Scala allows. Curly braces are required if there are multiple statements but not in this case. You can put parentheses around the curly braces if you want.
This code works fine, but it has a significant limitation: we can only put one component in the frame. Real GUIs are not made from a single component. In order to include multiple components, we need to learn just a bit more.
11.2.3 Panels and Panes
There are other types of components that were not considered above that act as containers for holding multiple other components. These are called panels and panes. If we want the Frame that we created to have multiple components displayed in it, we put either a panel or a pane in the Frame and then add things into that panel or pane.
While it is possible to specifically place components in a GUI, such a practice is generally discouraged. The main reason is that doing so leads to GUIs that are not flexible. You can not easily change the size of windows, a factor that could be very limiting if you want to move to different platforms or just use computers with different-sized screens. Instead, there are components that can hold multiple other components and which control how things are laid out. These can be nested inside of one another to give the overall effect that the programmer wants.
The simple container components, which just position and size their contents, are called panels. There are also more complex containers that provide some user interaction as well. These are called panes. The list below shows the different panels and panes that are part of scala.swing.
- BorderPanel - Can hold up to five different components in the North, South, East, West, and Center positions. The components are added to the layout of the BorderPanel as a tuple of (Component,Position). The Positions are part of BorderPanel.Position (e.g., BorderPanel.Position.North).
- BoxPanel - Can hold a variable number of components oriented either vertically or horizontally, each taking the space it needs. When you make a new BoxPanel you pass it an orientation (e.g., new BoxPanel(Orientation.Vertical)). The components can be added one at a time to contents (e.g. contents+=Button("text")(action)).
- FlowPanel - Can hold multiple components that are laid out from left to right wrapping when it gets to long like text in a word processor. You can pass a variable length list of Components as an argument at construction or add the components to contents.
- GridBagPanel - A flexible and powerful container that holds contents in a variable-sized grid. The Components are added added to the layout as a tuple of (Component,GridBagPanel.Constraints). This panel is complex and will not be used in this chapter.
- GridPanel - Holds a regular grid of components. You specify how many rows and columns the grid has at creation (e.g., new GridPanel(3,4) for 3 rows and 4 columns). The Components inside are added to the contents of the panel.
- ScrollPane - A pane that holds a single Component, which can be passed in as an argument at construction. If the content Component is larger than what this can display, scroll bars are automatically added so the user can scroll around.
- SplitPane - A container that holds two Components. They are separated by a bar that the user can move as desired. At construction you should provide and orientation and the two children (e.g., new SplitPane(Orientation.Horizontal,leftComp, rightComp)).
- TabbedPane - This can hold multiple different Components. Only one Component is shown at a time, but tabs are always shown for all of them. The user can click a tab to bring one to the front. You can add Components to the TabbedPane by adding them to the page object inside of the TabbedPane. What you add to it are Page objects. Each Page object is constructed by giving it a String for the tab label and a Component that should go under that tab (e.g., pages += new Page("A Tab",tabComponent)).
None of these alone is sufficient to create a complex GUI. Instead, it is customary to nest panels and panes one inside of another to create the desired effect.
To illustrate this, we will lay out the GUI for a little program that we will construct in this chapter. The program is going to be something like a digital recipe book. The program should be able to store multiple recipes. For each recipe, it should allow the user to specify ingredients with amounts as well as have a written description of the cooking directions. The GUI should give the user the ability to add and remove recipes. They should be able to select recipes and edit the various information that we have on them.
At this point in the analysis you would probably want to sketch out a little picture of what you want the GUI to look like. That is done for this GUI in figure 11.2. The left side is taken up by a ListView that shows all the recipes. When the user clicks on a recipe, the information for it should be shown on the right. That includes a list of all the ingredients and the directions. The ingredients can also be edited and there need to be some buttons to help with this. The options for adding and removing recipes will be in the menus, which will be discussed in the next section.

The question is how we should lay this out. Any GUI can be built in multiple different ways using the different panel and pane options that were listed above. For example, the separation between the recipe list and the information about the selected recipe could be created by a BorderPanel, a BoxPanel with a horizontal orientation, or a SplitPane. Which of these you pick will normally be determined by the way in which the panels would size things or whether you want to give the user the control of a SplitPane. We will use a BorderPanel for the top-level split. We will then use a SplitPane to separate the directions from the ingredient information. We will use two BorderPanels for the ingredient information and the Buttons will be built using a GridPanel. The settings area will also need to be refined a bit more. It probably just needs the name of the ingredient along with the amount needed. That can be laid out using a combination of BorderPanel and GridPanel.
The code to do this is shown below. It is the full script and it is fairly long.
import scala.swing._
val recipeList=new ListView(List("Pop Tarts"))
val ingredientList=new ListView(List("Pop Tarts"))
val directionsArea=new TextArea("Toast the poptarts ...
or don’t.")
val ingredientNameField=new TextField("Pop Tart")
val amountField=new TextField("1 packet")
val frame=new MainFrame {
title="Recipe Book"
contents=new BorderPanel {
layout += (new ScrollPane(recipeList)
-> BorderPanel.Position.West)
layout += (new SplitPane(Orientation.Horizontal,
new BorderPanel {
layout += (new BorderPanel {
layout += (new GridPanel(1,2) {
contents+=Button("Add") (println("Add ingredient"))
contents+=Button("Remove") (println("Remove ingredient"))
} -> BorderPanel.Position.North)
layout += (new ScrollPane(ingredientList)
-> BorderPanel.Position.Center)
} -> BorderPanel.Position.West)
layout += (new BorderPanel {
layout += (new GridPanel(2,1) {
contents += new Label("Name")
contents += new Label("Amount")
} -> BorderPanel.Position.West)
layout += (new GridPanel(2,1) {
contents += ingredientNameField
contents += amountField
} -> BorderPanel.Position.Center)
} -> BorderPanel.Position.Center)
}, new ScrollPane(directionsArea)
) -> BorderPanel.Position.Center)
}
size=new Dimension(800,600)
}
frame.visible=true
The interactive elements were stored as values with names at the beginning. The purpose of that will become clear in section 11.3. Indentation has been used to indicate the nesting of panels and panes. Alternately, each different part could have been given a name as a value and then the parts could have been put together. The choice between these options is an issue of style. This example is just big enough, and the panels nested just deep enough that it could be worth considering breaking it up some with named constructs for some of the more deeply nested sections. Here is a different version that uses that approach.
import scala.swing._
val recipeList=new ListView(List("Pop Tarts"))
val ingredientList=new ListView(List("Pop Tarts"))
val directionsArea=new TextArea("Toast the poptarts ...
or don’t.")
val ingredientNameField=new TextField("Pop Tart")
val amountField=new TextField("1 packet")
val ingredientListPanel = new BorderPanel {
layout += (new GridPanel(1,2) {
contents+=Button("Add")(println("Add ingredient"))
contents+=Button("Remove")(println("Remove ingredient"))
} -> BorderPanel.Position.North)
layout += (new ScrollPane(ingredientList)
-> BorderPanel.Position.Center)
}
val ingredientDataPanel = new BorderPanel {
layout += (new GridPanel(2,1) {
contents += new Label("Name")
contents += new Label("Amount")
} -> BorderPanel.Position.West)
layout += (new GridPanel(2,1) {
contents += ingredientNameField
contents += amountField
} -> BorderPanel.Position.Center)
}
val frame=new MainFrame {
title="Recipe Book"
contents=new BorderPanel {
layout += (new ScrollPane(recipeList)
-> BorderPanel.Position.West)
layout += (new SplitPane(Orientation.Horizontal,
new BorderPanel {
layout += (ingredientListPanel
-> BorderPanel.Position.West)
layout += (ingredientDataPanel
-> BorderPanel.Position.Center)
},
new ScrollPane(directionsArea))
-> BorderPanel.Position.Center)
}
size=new Dimension(800,600)
}
frame.visible=true
This second version would likely be preferred because the deepest nesting has been cut down two levels and the named values can help readers figure out what different parts of the code are doing. This can be taken further if you desire.
When you run either of these scripts you get a window like what is shown in figure 11.3. In the code you might notice that each of the ListViews and the large TextArea are put inside of ScrollPanes. This is to make it so that if the lists get large or the directions get long, scroll bars will be added to allow the user to scroll around and see everything they need to.

11.2.4 Menus
All we lack in the appearance of the GUI now is the menus. The MainFrame has a field called menuBar that we can set to be an object of type MenuBar. The MenuBar type has contents, like the panels and panes, but you should only add objects of the Menu type to a MenuBar.
The Menu objects are created with new and should be passed a String that you want as the title of the Menu. The contents of a Menu can be of one of five types.
- MenuItem - This is the most common thing you will put in a Menu. You create them with new and the easiest approach is to give them an Action object. The Action object can be made like a Button with a String and an action that is passed by-name. For example new MenuItem(Action("Exit")(exit(0))).
- Menu - You can add a Menu to a Menu. This will appear as a submenu when you run the program.
- CheckMenuItem - Menus can also have options on them that are selected. To do this use the type CheckMenuItem. You make these with new and pass in a String for the text to display.
- RadioMenuItem - If you have multiple values and you only want to allow one to be selected use a RadioMenuItem. These are made like CheckMenuItems. All the RadioMenuItems and you want to have grouped together should be added to a single object of the ButtonGroup type.
- Separator - This is a simple component used to space items out to improve appearance and usability.
We can set up a simple menu system for our recipe script by adding the following code inside the MainFrame right before we set the size.
menuBar = new MenuBar {
contents += new Menu("File") {
contents += new MenuItem(Action("Open")(openFile))
contents += new MenuItem(Action("Save")(saveFile))
contents += new Separator
contents += new MenuItem(Action("Exit")(exit(0)))
}
contents += new Menu("Recipe") {
contents += new MenuItem(Action("Add")(addRecipe))
contents += new MenuItem(Action("Remove")(removeRecipe))
}
}
In order to get this to run, we have to put declarations of the four functions that are called in the script before we make frame. For now these can be left completely empty.
def openFile {
}
def saveFile {
}
def addRecipe {
}
def removeRecipe {
}
With these additions we now have a script that will bring up a fairly complete GUI. Unfortunately, it still does not do anything yet. We will get to that soon enough.
11.2.5 Tooltips
You have probably seen GUIs where, if you leave the mouse hovering above something for a while, a message will pop up telling you something about what it does. These are called tooltips. All the components have a field in them called tooltip that is a String. You can set the tooltip to be a message that you want to pop up. This will happen automatically if the user leaves their mouse pointer over that component for a period of time.
11.3 Basic Interactivity
The GUI that we have created for our recipe book looks fine and has all pieces that we need. Unfortunately, it does not do anything at this point. In order to make it interactive, we need to code that in. Interactivity in GUIs is significantly different from that in console programs. For a console program, the only real input is to have the user type in information. We were able to read that information using functions like readInt(), readLine(), readDouble(), etc. Similarly, the only output was to print things back to the console. In addition, while the user was typing stuff in, the program was supposed to be paused. We describe this by saying that user input is blocking. So nothing else was happening when we called readLine(). That call would block the execution and it would not continue until the user had entered something.
When you move to a GUI environment, all the rules of interactivity change. There are now multiple components that the user can interact with. Each one might respond in different ways. For example, a Button can just be clicked. On the other hand, a TextField can have the user type into it and you need to know when they are done. Each different component has different ways the user can interact with them, and each of them needs to be waiting for the user to interact. No single component can block execution while it waits for the user. They all have to be active at the same time.
This section looks at the way we do user input in a GUI built with the scala.swing library.
11.3.1 Partial Functions
There is one feature of the Scala language that we have not talked about before that is required for doing interactions in GUIs: the partial function. The idea of a partial function comes from mathematics. It is a function that can only operate on certain values of the arguments and is undefined for other arguments. The syntax for partial functions in Scala is basically like having a match expression without the argument and the match. You simply have curly braces with different cases inside of them.
{
case 1 => // code goes here
case 2 => // code goes here
}
This example partial function would operate on an Int, but would only be defined if the argument was 1 or 2.
This is more useful when we use more of the options for cases and the pattern matching they do. For GUIs in particular, it is most important to be able to match on different types. If the case includes a name that begins with a lowercase letter, it will use that as a variable name to store the value of the match in.
{
case v => println(v) // this will happen for everything
}
Using the colon syntax that you have been using all along to specify the types of arguments to functions and the fields in case classes, you can also specify that a named value in a case has to have a specific type.
{
case i:Int => println("Partial functions called on an Int "+i)
case d:Double => println("Partial functions called on a Double "+d)
case s:String => println("String = "+s)
}
This example partial function is only defined for Int, Double, and String. If you pass in any other type, it will fail. If you call it with one of those types, it will give that value to the name i, d, or s, then print the appropriate output.
11.3.2 Publishers and Reactors
The model for having users interact with GUIs in the scala.swing library is based on types called Publisher and Reactor. The idea is that the components in a GUI are Publishers. When something happens to them, let us call it an event. The Publisher will publish that event. Code can be set up in a Reactor to pay attention to a particular Publisher and then it can react to these events in the proper way. There is a type called Event that represents something that can happen in the GUI. There are lots of different subtypes of Event that are part of the scala.swing.event package.
As we saw above, you do not have to do this for Buttons because when you create a Button, there is a simple syntax for providing the code that will be executed. Not everything is so simple though. For many components there are several different possible events that you might react to or there is other information that you need to know when the interaction occurs.
To see this, consider the example of a ListView. Two of these were placed in the GUI for the recipe book. When the user clicks on something in the ListView, the program needs to be able to display the appropriate information in other fields. To illustrate how this works, we will start with a simpler example that contains only a ListView and a TextField. When the user selects an item from the ListView, the text field should be set to the value of what was clicked. This example can be set up with the following code.
import scala.swing._
import scala.swing.event._
val options = "A list of words".split(" ")
val list = new ListView(options)
val field = new TextField
val frame = new MainFrame {
title = "First GUI"
contents=new BorderPanel {
layout += (list -> BorderPanel.Position.Center)
layout += (field -> BorderPanel.Position.South)
}
size=new Dimension(500,500)
}
frame.visible=true
To make this interactive we need to tell the frame to listen to the selection Publisher in the ListView and then give it a partial function to handle the events that we are interested in.
This can be accomplished by adding the following text inside the block of code for building the frame.
listenTo(list.selection)
reactions += {
case e:SelectionChanged =>
field.text=list.selection.items.mkString("; ")
}
The first line of code has the frame listen to the selection Publisher. If you later decided that you did not want to listen to that anymore, you could call deafTo on the frame. After that, a partial function is added to the reactions of the frame that has a single case for handling the SelectionChanged event. The selection field of ListView has a collection in it called items that contains all the items that are selected from the ListView. This is a collection because the ListView allows multiple items to be selected at a time. The text for the field is set to be all of the items separated by semicolons.
The type SelectionChanged is part of the scala.swing.event package. There are a large number of different event types in this package for all the different things that can happen in a GUI. The list is long enough that they will not be put in here. Readers can go to the Scala API to see the list of different events. We will introduce a few more in this chapter for the recipe book example.
In general, your partial function for the reactions will have more than one case. This example simply did not need that.
11.3.3 Mnemonics
It is often helpful to put keyboard shortcuts into GUIs so that the user can execute certain commands without having to use the mouse to do so. These shortcuts are referred to as mnemonics and the different components in scala.swing that have simple modes of interaction, like Buttons, MenuItems, and CheckBoxes have a member called mnemonic that can be set to the keystroke that you want people to use. The following example demonstrates adding mnemonics to a short menu.
menuBar = new MenuBar {
contents += new Menu("File") {
mnemonic = Key.F
contents += new MenuItem(Action("Exit")(exit(0))) {
mnemonic=Key.X
}
}
}
This can be added into the simple GUI created above to add a "File" menu that you can bring down with Alt-F and an "Exit" item that can be executed by hitting "X" when the menu is down.
11.4 FileChooser
There is at least one other option in the GUI library that is worth pointing out because it is used so frequently, the file chooser dialog. Many programs have "Open" and "Save" options in their menu. When these options are selected, the program will typically pop up a dialog box that allows the user to navigate through the directory structure and pick files. You could write your own dialog to do this, but it would take a significant amount of effort and it is such a common task that it has been added to the library.
The FileChooser type is used to display a file selection dialog. You can make a new FileChooser with or without a single argument for a starting directory. If you omit the starting directory it uses a default directory to start in. There are three different methods in FileChooser that all start with "show" which can be used to pop up a dialog box: showDialog, showOpenDialog, showSaveDialog. All three take a first argument of the Component you want the dialog to pop up over. If you pass null for that argument, the dialog will appear in the middle of the screen. The showDialog method also takes a second argument that is a String that will be displayed on the approval button. These methods will return one of the following: FileChooser.Result.Approve, FileChooser.Result.Cancel, or FileChooser.Result.Error. If it gives back Approve, then the FileChooser will have valid values in the selectedFile and selectedFiles members.
To help understand this, consider the following example of an "Open" option added to the menu that was created in the last section. This option could be added to the menu by adding the following code in the block for the menu bar.
contents += new MenuItem(Action("Open")(openFile)) {
mnemonic = Key.O
}
To make this work, we need an openFile function. This can be defined in the following way and placed after the declarations of list and field and before that of frame.
def openFile {
val chooser = new FileChooser
if(chooser.showOpenDialog(list)==FileChooser.Result.Approve) {
list.listData = Source.fromFile(chooser.selectedFile).getLines.toList
}
}
This code creates a FileChooser and displays an open dialog. If the user selects a file, that file is used to open a Source and the lines from that Source are converted to a List, which is set to be the data for the ListView.
11.5 Tables
One of the more complex GUI elements in Swing is the Table. The name does a good job of describing what this element does. It presents a 2-D grid of data cells the user can interact with. While the scala.swing.Table type can give you basic functionality easily, there is a lot more the javax.swing.Table type can do that requires you to go into the original Java libraries. For that reason, this section is devoted to this component.
When you make a scala.swing.Table, there are three options for arguments you pass to it. You can tell it how many rows and columns to put in the table as two Int arguments. This will make a simple table of the specified size where all the elements are blank. You can play with this by entering code like the following into the REPL.
val frame = new Frame {
title = "Table Test"
contents = new Table(3,4)
}
frame.visible = true
This code will pop up a window with a Table with 3 rows and 4 columns with all the cells blank. This example uses a Frame instead of a MainFrame because it is intended to be done in the REPL. If you use a MainFrame, when you close the window, the entire REPL will be terminated.
You can also pass in the arguments rowData: Array[Array[Any]], columnNames: Seq[_]. This will make a table that has the size of the rowData and starts with those values. Remember from figure 7.1 that Any is a type in Scala which can represent any other type. Your Table does not have to have Strings of data in it. They can be far more complex, but we will not be going into all of those details here. The second argument is a sequence that has the values you want to appear at the tops of columns labeling them. These labels will only appear if the table is nested in a ScrollPane.
To test how this works, try entering the following into the REPL.
val data = Array(Array(1,2,"hi"),Array(3,4,"bye"))
val colHeads = Seq("Num","Num","Word")
val frame = new Frame {
title = "Table Test"
contents = new Table(data,colHeads)
}
frame.visible = true
This will bring up a small window with a Table that has two rows and three columns. Note that the column headers do not appear in this version. To get the column headers, change the line of code setting the contents of the Frame to the following.
contents = new ScrollPane(new Table(data,colHeads))
Now when you make the Frame visible you get a much larger window with the same table except that now the column headers are visible.
The third way to build a Table does not pass any arguments in at all. If you pick this option, you will need to do more work setting things up so for now we will focus on the other options.
If you played with the Tables that you brought up in the REPL with the above examples, you probably found that you can select cells, move around with the arrow keys, and even edit the values in cells. To work with the Table in code, we need to have a name to refer to the Table by. We can get this by modifying the code slightly so we have a variable called table.
val table = new Table(data,colHeads)
...
contents = new ScrollPane(table)
...
To get values out of the table, simply index it with a row and a column. So if you were to do the following line in the REPL you would see the value of the top-left cell.
println(table(0,0))
If you did this immediately after creating the table you would get back the value 1. However, if you edit that cell in the Table manually then print it, you will see the modified value.
You can modify values in the Table in the same manner. Simply do an assignment into the Table indexed by row and column. Try this by doing the following in the REPL.
table(1,1) = "New text"
You will see that the value in cell (1,1) of the Table is updated graphically to reflect the change. This approach can only be used to modify cells within the normal bounds of the Table. If you go beyond the size set when you first created the Table you will get an error.
If you try entering table(0,0) into the REPL you will get back a result with the type Any. This can be a bit of a problem because there are not many things that you can do with the Any type. For example, you might try doing the following.
table(0,0)+table(1,0)
Addition like this would work just fine for any numeric type or the String type as all of those types have the method + defined for them. However, if you try to do this you would get the following error message.
<console>:12: error: type mismatch;
found : Any
required: String
table(0,0)+table(0,0)
^
That is because the type Any does not have a + method. This makes sense as there are some types that qualify as Any that you should not be able to use + with.
To do anything with the values we get from the table we have to call methods that exist on Any. The challenge is that there are not very many of these. You can check for equality or inequality, doing operations associated with multithreading that will be discussed in chapter 21, check the actual type of the object, or convert the object to a String. The last two can provide the functionality that we want. We will focus on the last one because it uses only methods that we have seen before.
To convert any object to a String call the toString method. You can try the following to see how this works.
table(0,0).toString
Once you have done this you can use + to do String concatenation. If you want to do numeric operations on the values in a Table you can use toInt or toDouble on the String. So if you want to multiply two table values you could do this.
table(0,0).toString.toDouble{∗}table(1,0).toString.toDouble
This is a bit verbose, but it is the price we pay for being able to put all types of different things in a Table.
If you play around with this enough you will probably stumble across the primary downfall of this approach, if the contents of the cell are not a number this will fail. To get around this, you would need to use the try/catch construct. We will discuss try-catch in detail in section 22.3. For now we will give a brief introduction. You might have seen that when something goes wrong with a statement the error message you get typically starts by giving you a type name that includes the word "Exception". An exception is an object that indicates a problem and when something goes wrong the code will throw an exception. If you know this might happen and you want to deal with it, you tell Scala you want to try some code and then catch the exception if one occurs. The exceptions you can catch are specified with cases, just like a match expression.
The try-catch in Scala can be used as an expression. If there is no exception you get the value of the code you tried to do. If there is an exception that has a matching case, the value will be what happens in that case. To help you understand this, consider the following function.
def asDouble(a:Any):Double = {
try {
if(a==null) 0.0 else a.toString.toDouble
} catch {
case e:NumberFormatException => 0.0
}
}
This function takes an Any object and returns a number for it. If the value is null it returns zero. Otherwise, it uses the .toString.toDouble method calls shown above. In this function that code is put inside of a try that will catch a NumberFormatException. As the name implies, this is an exception that occurs when you try to make a number of something that does not have the right format. If that happens, the case gives back the value 0.0. The sum above could now be expressed in this way.
asDouble(table(0,0))+asDouble(table(1,0))
This code is more robust in that if a Table cell contains something that is not a number, instead of stopping with an exception, the code uses 0.0 for that cell.
11.5.1 Table Actions
You now know how to set up Tables as well as how to read and alter the values in them. For many applications this will be sufficient. The actions in a GUI can very often be initiated by having the user click a button or select a menu item and have the code initiated by that action utilize the values in the table. There are some applications, however, when you need to actually respond to events that occur with the Table itself. In this situation you need to listen to the Table or possibly the selection object in the Table.
There is a significant list of events that can happen with Tables. You can look in the API for complete information, but here is a list of the main ones.
- TableChanged – Indicates that the structure of the Table stayed the same, but anything else could have changed.
- TableColumnsSelected – Indicates a change in the column(s) currently selected.
- TableRowsAdded – This event occurs when additional rows are added to the Table.
- TableRowsRemoved – This event occurs when rows are removed from the Table.
- TableRowsSelected – Indicates a change in the row(s) currently selected.
- TableStructureChanged – This event indicates the most general type of change. Anything in the Table could have changed including row and column counts.
- TableUpdated – Indicates that values in a specified part of the Table have changed.
To get the events that indicate changes in the selection you listen to table.selection. To get the others simply listen to the table.
If all that you are interested in is knowing when the value in a cell has been changed,you can use code like the following.
import scala.swing._
import scala.swing.event._
val sumLabel = new Label("0.0")
val table = new Table(8,5)
def asDouble(a:Any):Double = {
try {
if(a==null) 0.0 else a.toString.toDouble
} catch {
case e:NumberFormatException => 0.0
}
}
val frame = new MainFrame {
contents = new BorderPanel {
layout += sumLabel -> BorderPanel.Position.North
layout += table -> BorderPanel.Position.Center
}
size = new Dimension(500,400)
listenTo(table)
reactions += {
case e:TableUpdated =>
val sum = (for(i <- 0 until table.rowCount;
j <- 0 until table.model.getColumnCount) yield {
asDouble(table(i,j))
}).sum
sumLabel.text = sum.toString
}
}
frame.visible = true
This code starts with an empty Table and a Label that shows 0.0. Every time that the user edits a cell, the code runs through all the cells and adds up the values in each, using zero if there is not a valid number. It changes the Label to reflect this sum. Enter this code into a file and run it as a script. Make changes to see what else you can do.
11.5.2 Table Models
Changing size is a bit more difficult than simply changing values. Part of the flexibility of Tables comes from the fact that you can change how the data behind them is modeled. The full details of this are beyond the scope of this book, but to have full control over a Table you need to have at least some knowledge of how to utilize this. The Table stores and interacts with the data using a javax.swing.table.TableModel. You can create your own implementations of TableModel to limit the types of values that can go into columns or change how values are edited. We do not need that much power here, but it would be nice to have the ability to add rows or columns. These can be done reasonably well with the javax.swing.table.DefaultTableModel.
A DefaultTableModel can be created in much the same way as a the Table passing in either a size as two Ints or with the arguments rowData:Array[Array[AnyRef]] and columnNames:Array[AnyRef].3 The Table has a member called model that you can assign to any new model you want, including a modified DefaultTableModel.
To help illustrate how this can be used to make an application with a Table that changes size under the control of the user, consider the following example. This program has a Frame with a Table Originally the Table is completely empty because it has no columns. There is a menu option for adding columns that allows the user to name them. In addition, editing the last row in the Table causes it to grow by one row.
import scala.swing._
import event._
import javax.swing.table._
var data:Array[Array[AnyRef]] = Array.fill(1,0)("")
var headers:Array[AnyRef] = Array.tabulate(0)(i => i.toString)
val table = new Table {
model = new DefaultTableModel(data,headers)
listenTo(this)
reactions += {
case tu:TableUpdated =>
if(tu.column>=0) {
tu.range.foreach(i => {
data(i)(tu.column) = this(i,tu.column) match {
case ar:AnyRef => ar
case other => ""
}
})
}
if(tu.range.head==data.length-1) {
data :+= Array.fill(headers.length)("":AnyRef)
model = new DefaultTableModel(data,headers)
}
}
}
def addColumn {
val header = Dialog.showInput(table,"What header do you want for the
column","Header",Dialog.Message.Question,null,Nil,"")
header match {
case Some(name) =>
data = data.map(_ :+ "")
headers :+= header.get
table.model = new DefaultTableModel(data,headers)
case None =>
}
}
val frame = new MainFrame {
title = "Resizable Table"
contents = new ScrollPane(table)
menuBar = new MenuBar {
contents += new Menu("File") {
contents += new MenuItem(Action("Add Column")(addColumn))
contents += new Separator
contents += new MenuItem(Action("Exit")(sys.exit(0)))
}
}
size = new Dimension(500,500)
}
frame.visible = true
The information for the Table is stored in data and headers. To match with the types needed for building a DefaultTableModel, they are an Array[Array[AnyRef]] and a Array[AnyRef] respectively. Unfortunately, these types can not be used with the normal Scala creation approach so instead of passing in the data, the declaration of table includes a line that sets the model.
The table listens to itself and reacts to TableUpdate events. The updated data is always stored back into the data array. Note that this requires a bit of extra work because data pulled from the table is of the Any type. A match is used to make certain we have an AnyRef. There is also a check to see if the row being changed is the last one. In that situation, a new row is appended to data and the model is updated.
The addColumn method is called from a menu option. It asks the user for a name using Dialog.showInput, then appends a blank to the end of every row and uses the result as the updated data. It also appends the new header name to the end of headers. The last thing it does is to update the table model. The full signature of showInput is as follows.
def showInput [A] (parent: Component, message: Any, title: String, messageType:
Value, icon: Icon, entries: Seq[A], initial: A): Option[A]
In our usage, we have the dialog box pop up over the table. We tell it that we are asking a question, with no icon, no entries, and an empty String for the initial value. This lets the user type in a String of their choosing. If entries were not empty, the user would get a drop-down box instead of a text field.
Note that showInput returns an Option type. That is because the user could hit "Cancel" or close the dialog box. This is the reason for the use of match. If the user does not provide a proper response, the Option is None and nothing is done.
This code does not demonstrate removing rows or columns, but either operation could be done with patch in a manner very similar to what is shown here.
11.6 Putting it Together
We can now put together all of the various aspects of GUIs into the recipe book script. Earlier we had built a GUI and added menus to it. However, the GUI was not interactive. Clicking on various elements did not do anything to other elements of the GUI. Now that we know how to make GUIs interactive we can add the proper functionality to this script. In order to be able to do this, we need to add some groundwork first. In particular, we need a good way to store the information associated with a recipe. This calls for some case classes.
We definitely want a case class to represent a recipe. The fact that a recipe can contain multiple ingredients makes it advantageous to have a case class for that as well. This leads to something like the following.
case class Ingredient(name:String,amount:String)
case class Recipe(name:String,ingredients:List[Ingredient],directions:String)
You can put this near the top of the script as many other parts of the script will be referring back to it.
We also need to have a way to store multiple recipes. We will do this with a variable declaration of an Array of Recipes. One could also choose to use a var List, but some of the interactions will require swapping out values and others might require doing direct access. Both of those will be easier and more efficient with an Array. The adding of new recipes would be easier with a List, but that operation will probably occur less frequently and can be done almost as easily with an Array.
var recipes = Array(Recipe("Pop Tarts",List(Ingredient("Pop Tart","1 packet")),
  "Toast the poptarts ...
or don’t."))
val recipeList = new ListView(recipes.map(_.name))
val ingredientList = new ListView(recipes(0).ingredients.map(_.name))
val directionsArea = new TextArea(recipes(0).directions)
val ingredientNameField = new TextField(recipes(0).ingredients(0).name)
val amountField = new TextField(recipes(0).ingredients(0).amount)
This code includes a declaration of the Array as well as revisions of the active component declarations that use the one Recipe in the Array.
Now that we have this set up, we can start with the easy part of completing the functions that are called from the menus. We will start with the saveFile function as that defines the format that we will use in the file and it is a bit easier.
def saveFile {
val chooser = new FileChooser
if(chooser.showSaveDialog(recipeList)==FileChooser.Result.Approve) {
val pw = new PrintWriter(chooser.selectedFile)
pw.println(recipes.length)
for(r <- recipes) {
pw.println(r.name)
pw.println(r.ingredients.length)
for(ing <- r.ingredients) {
pw.println(ing.name)
pw.println(ing.amount)
}
pw.println(r.directions)
pw.println(".")
}
pw.close()
}
}
This function allows the user to select a file, then writes the size of the Array to the file. After the size it writes each recipe. The format of the recipes is fairly simple with a name, then the number of ingredients and alternating lines of ingredient names and amounts. The only thing that might seem a bit odd is the line with a period after the directions. This is required because the directions can be multiple lines long and we have to have a way to know when to stop reading them.
After we have written save and defined the format of the file, we can write the openFile function. This is slightly more complex, primarily because we have to deal with the directions.
def openFile {
val chooser = new FileChooser
if(chooser.showOpenDialog(recipeList)==FileChooser.Result.Approve) {
val src = Source.fromFile(chooser.selectedFile)
val lines = src.getLines
recipes = Array.fill(lines.next.toInt)(Recipe(
lines.next,
List.fill(lines.next.toInt)(Ingredient(lines.next,lines.next)),
{
var dir = ""
var line=lines.next
while(line!=".") {
   dir += (if(dir.isEmpty) "" else "
")+line
line = lines.next
}
dir
}
))
src.close()
recipeList.listData = recipes.map(_.name)
recipeList.selectIndices(0)
setFields(recipes(0))
}
}
The code is not all that different from save other than it uses a source and builds an Array to store in recipes with fill. A fair bit of the length of the method comes from the block of code that is used to read the directions. This block is used as an expression. It builds up the directions in a variable named dir and uses a while loop to continue reading until a line is reached that contains only a single period.
After the Source is closed, there are two more lines. The first one changes to contents of the recipeList so that it matches what has just been read in. The second calls a yet undefined function named setFields that is supposed to set the other elements of the GUI to values for a particular recipe. This function could be written in the following way.
def setFields(r:Recipe) {
ingredientList.listData = r.ingredients.map(_.name
directionsArea.text = r.directions
if(r.ingredients.isEmpty) {
ingredientNameField.text = ""
amountField.text = ""
} else {
ingredientNameField.text = r.ingredients.head.name
amountField.text = r.ingredients.head.amount
}
}
This function will be useful later on when we include the code to let the user select different elements from the recipeList.
Now we can turn to the functions to add recipes or remove recipes. The addRecipe function might look like this.
def addRecipe {
val name = Dialog.showInput(recipeList, "What is the name of this recipe?",
"Input", Dialog.Message.Question, null, Nil, "")
name match {
case Some(n) =>
recipes = recipes :+ Recipe(name.get,
List(Ingredient("ingredient","amount")),"Directions")
recipeList.listData = recipes.map(_.name)
recipeList.selectIndices(recipes.length-1)
setFields(recipes.last)
case None =>
}
}
This creates a new recipe array that includes a new default recipe. This uses an operator that we have not seen before. The :+ operator can be used to add elements to the end of an Array or a List. This is not something that you want to use in loops that occur a lot because it is inefficient for either of these types, but this only happens when the user selects an option from the menu so it can not happen all that often for this code. This also uses a part of the javax.swing library. The Dialog object has methods that can be used to bring up simple input dialog boxes. For most of these, there is similar functionality in the scala.swing.Dialog object. The input dialog that allows the user to type in a String is not mirrored in the Scala library so we use the one from Java.
The removeRecipe function needs to take out the item from the recipe list that the user has selected. As part of this it needs to check if anything is selected. The code could be written like this.
def removeRecipe {
if(!recipeList.selection.items.isEmpty) {
recipes = recipes.patch(recipeList.selection.leadIndex,List(),1)
if(recipes.isEmpty) {
recipes = Array(Recipe("New recipe",
List(Ingredient("ingredient","amount")),"Directions"))
}
recipeList.listData = recipes.map(_.name)
recipeList.selectIndices(0)
setFields(recipes(0))
}
}
Here too there is one element that might stand out as odd. Instead of having a simple remove method to remove the item at a particular index, the Scala collections have a patch method that is far more flexible. The patch method can replace part of a collection with some other collection beginning at a certain index. When called with an empty collection, it will remove the specified number of elements at the specified location. This code also has a check to see if the last element was removed and if so, it adds in a default element. So the recipe book can never be empty.
With this written, the GUI now has the ability to react to all of our menu options. What it lacks is the ability to display information about different recipes or edit that information. For the first part, we need to be listening to the ListView to find out when selections are changed. We also need to react to it when it is changed. Having already written the setFields function makes the second part of this fairly easy.
listenTo(recipeList.selection)
reactions += {
case e:SelectionChanged =>
if(!recipeList.selection.items.isEmpty) {
setFields(recipes(recipeList.selection.leadIndex))
}
}
This code could be added into the block of the frame to give us the desired behavior.
All that remains is having the ability to edit the recipes. This requires reacting to the different events that can happen with the panels associated with the ingredients. This code can go in a number of different locations. There are two styles that can make sense. One is that you put the code in a single location in the program so it is easy to find all the different reactions. A second approach is to put the reactions close to the code that adds those elements into the GUI. The advantage of this second approach is that everything associated with a given component tends to stay in a certain part of the code. We will adopt the second style here.
The Buttons for adding and removing ingredients had earlier just printed lines saying they were clicked. Those need to be changed so that they call functions that do what we want. All of the functions that edit the contents of a recipe can only work if there is a recipe selected in the recipeList. So the first thing that happens is a check to make sure that something is selected. If nothing is selected, nothing will be done because we do not know what recipe we would be editing. Given this, the addIngredient function and a helper it uses could be written in this way.
def setIngredients(ingr:Ingredient) {
ingredientNameField.text = ingr.name
amountField.text = ingr.amount
}
def addIngredient {
if(!recipeList.selection.items.isEmpty) {
val index = recipeList.selection.leadIndex
val oldIngrs = recipes(index).ingredients
val newIngr = Ingredient("Stuff","Some")
recipes(index) = recipes(index).copy(ingredients=oldIngrs:+newIngr)
ingredientList.listData = recipes(index).ingredients.map(_.name)
ingredientList.selectIndices(recipes(index).ingredients.length-1)
setIngredients(recipes(index).ingredients.last)
}
}
This code checks that something is selected, finds the index of the selection, creates a new default ingredient, then makes an altered recipe and adjusts the GUI. The removeIngredient function is similar, but it also needs to check if the is an ingredient selected from that ListView.
def removeIngredient {
if(!recipeList.selection.items.isEmpty &&
!ingredientList.selection.items.isEmpty) {
val rIndex = recipeList.selection.leadIndex
val iIndex = ingredientList.selection.leadIndex
val shortIngr = recipes(rIndex).ingredients.patch(iIndex,List(),1)
recipes(rIndex) = recipes(rIndex).copy(ingredients=shortIngr)
ingredientList.listData = recipes(rIndex).ingredients.map(_.name)
ingredientList.selectIndices(0)
setIngredients(recipes(rIndex).ingredients.head)
}
}
As we have seen earlier, this code uses some local variables to store values that are used frequently. It also takes advantage of the patch method to remove a element from the List.
The only things that are left are having it so that editing the TextFields or the TextArea alters the data stored in the recipes Array and selecting ingredients changes what is displayed. The easiest field to change is the directions because it is a field of the recipe itself. Making this happen requires listening to something that happens with the directionsArea. When users enter text in a TextArea or TextField, it fires a ValueChanged event. However, we do not really want to change things for every single character. We only need to know when they are done editing. For a text element, the user is done editing it when he/she moves focus to a different part of the GUI. For that reason, we will listen for the FocusLost event. We will also need to start listening to the different text elements. Below is what we need to change our listening and reaction code to in the frame.
listenTo(recipeList.selection,ingredientList.selection,
directionsArea,ingredientNameField,amountField)
reactions += {
case e:SelectionChanged =>
if(e.source==recipeList) {
if(!recipeList.selection.items.isEmpty) {
setFields(recipes(recipeList.selection.leadIndex)
}
} else if(e.source==ingredientList) {
if(!recipeList.selection.items.isEmpty &&
!ingredientList.selection.items.isEmpty) {
val rIndex = recipeList.selection.leadIndex
val iIndex = ingredientList.selection.leadIndex
setIngredients(recipes(rIndex).ingredients(iIndex))
}
}
case e:FocusLost =>
val rIndex = recipeList.selection.leadIndex
if(e.source==directionsArea) {
recipes(rIndex) = recipes(rIndex).copy(directions = directionsArea.text)
} else if(e.source==ingredientNameField) {
if(!recipeList.selection.items.isEmpty &&
!ingredientList.selection.items.isEmpty) {
val rIndex = recipeList.selection.leadIndex
val iIndex = ingredientList.selection.leadIndex
changeIngredientName(rIndex,iIndex)
}
} else if(e.source==amountField) {
if(!recipeList.selection.items.isEmpty &&
!ingredientList.selection.items.isEmpty) {
val rIndex = recipeList.selection.leadIndex
val iIndex = ingredientList.selection.leadIndex
changeAmount(rIndex,iIndex)
}
}
}
This code works for the directionsArea and selecting ingredients. It also sets up things for the two different TextFields so all we have left is writing two functions. In the case for FocusLost, the code checks the source of the event. The source of an event is the component that it came from. If it is the directionsArea, it alters the recipe in the way shown here. The altering of the ingredients is done with these functions.
def changeIngredientName(r:Int,i:Int) {
val ing = recipes(r).ingredients(i)
recipes(r) = recipes(r).copy(ingredients = {
recipes(r).ingredients.patch(i,List(Ingredient(
ingredientNameField.text,ing.amount)),1)
})
ingredientList.listData = recipes(r).ingredients.map(_.name)
ingredientList.selectIndices(i)
}
def changeAmount(r:Int,i:Int) {
val ing = recipes(r).ingredients(i)
recipes(r) = recipes(r).copy(ingredients = {
recipes(r).ingredients.patch(i,List(Ingredient(
ing.name,amountField.text)),1)
})
}
patch is used again here, but this time the patched list is one that contains a revised ingredient.
All of these different pieces go together into a single script. To help you see how they all fit together, this is the full script.
import scala.swing._
import scala.swing.event._
import java.io.PrintWriter
import scala.io.Source
case class Ingredient(name:String,amount:String)
case class Recipe(name:String,ingredients:List[Ingredient],directions:String)
var recipes = Array(Recipe("Pop Tarts",List(Ingredient("Pop Tart","1 packet")),
  "Toast the poptarts ...
or don’t."))
val recipeList = new ListView(recipes.map(_.name))
val ingredientList = new ListView(recipes(0).ingredients.map(_.name))
val directionsArea = new TextArea(recipes(0).directions)
val ingredientNameField = new TextField(recipes(0).ingredients(0).name)
val amountField = new TextField(recipes(0).ingredients(0).amount)
def setFields(r:Recipe) {
ingredientList.listData = r.ingredients.map(_.name)
directionsArea.text = r.directions
if(r.ingredients.isEmpty) {
ingredientNameField.text = ""
amountField.text = ""
} else {
ingredientNameField.text = r.ingredients.head.name
amountField.text = r.ingredients.head.amount
}
}
def setIngredients(ingr:Ingredient) {
ingredientNameField.text = ingr.name
amountField.text = ingr.amount
}
def addIngredient {
if(!recipeList.selection.items.isEmpty) {
val index = recipeList.selection.leadIndex
val oldIngrs = recipes(index).ingredients
val newIngr = Ingredient("Stuff","Some")
recipes(index) = recipes(index).copy(ingredients=oldIngrs:+newIngr)
ingredientList.listData = recipes(index).ingredients.map(_.name)
ingredientList.selectIndices(recipes(index).ingredients.length-1)
setIngredients(recipes(index).ingredients.last)
}
}
def removeIngredient {
if(!recipeList.selection.items.isEmpty &&
!ingredientList.selection.items.isEmpty) {
val rIndex = recipeList.selection.leadIndex
val iIndex = ingredientList.selection.leadIndex
val shortIngr = recipes(rIndex).ingredients.patch(iIndex,List(),1)
recipes(rIndex) = recipes(rIndex).copy(ingredients=shortIngr)
ingredientList.listData = recipes(rIndex).ingredients.map(_.name)
ingredientList.selectIndices(0)
setIngredients(recipes(rIndex).ingredients.head)
}
}
val ingredientListPanel = new BorderPanel {
layout += (new GridPanel(1,2) {
contents += Button("Add")(addIngredient)
contents += Button("Remove")(removeIngredient)
} -> BorderPanel.Position.North)
layout += (new ScrollPane(ingredientList)
-> BorderPanel.Position.Center)
}
val ingredientDataPanel = new BorderPanel {
layout += (new GridPanel(2,1) {
contents += new Label("Name")
contents += new Label("Amount")
} -> BorderPanel.Position.West)
layout += (new GridPanel(2,1) {
contents += ingredientNameField
contents += amountField
} -> BorderPanel.Position.Center)
}
def openFile {
val chooser = new FileChooser
if(chooser.showOpenDialog(recipeList)==FileChooser.Result.Approve) {
val src = Source.fromFile(chooser.selectedFile)
val lines = src.getLines
recipes = Array.fill(lines.next.toInt)(Recipe(
lines.next,
List.fill(lines.next.toInt)(Ingredient(lines.next,lines.next)),
{
var dir = ""
var line = lines.next
while(line!=".") {
   dir += (if(dir.isEmpty) "" else "
")+line
line = lines.next
}
dir
}
))
src.close()
recipeList.listData = recipes.map(_.name)
recipeList.selectIndices(0)
setFields(recipes(0))
}
}
def saveFile {
val chooser = new FileChooser
if(chooser.showSaveDialog(recipeList)==FileChooser.Result.Approve) {
val pw = new PrintWriter(chooser.selectedFile)
pw.println(recipes.length)
for(r <- recipes) {
pw.println(r.name)
pw.println(r.ingredients.length)
for(ing <- r.ingredients) {
pw.println(ing.name)
pw.println(ing.amount)
}
pw.println(r.directions)
pw.println(".")
}
pw.close()
}
}
def addRecipe {
val name = Dialog.showInput(recipeList, "What is the name of this recipe?",
"Input", Dialog.Message.Question, null, Nil, "")
name match {
case Some(n) =>
recipes = recipes :+ Recipe(name.get,
List(Ingredient("ingredient","amount")),"Directions")
recipeList.listData = recipes.map(_.name)
recipeList.selectIndices(recipes.length-1)
setFields(recipes.last)
case None =>
}
}
def removeRecipe {
if(!recipeList.selection.items.isEmpty) {
recipes = recipes.patch(recipeList.selection.leadIndex,List(),1)
if(recipes.isEmpty) {
recipes = Array(Recipe("New recipe",
List(Ingredient("ingredient","amount")),"Directions"))
}
recipeList.listData = recipes.map(_.name)
recipeList.selectIndices(0)
setFields(recipes.head)
}
}
def changeIngredientName(r:Int,i:Int) {
val ing = recipes(r).ingredients(i)
recipes(r) = recipes(r).copy(ingredients = {
recipes(r).ingredients.patch(i,List(Ingredient(
ingredientNameField.text,ing.amount)),1)
})
ingredientList.listData = recipes(r).ingredients.map(_.name)
ingredientList.selectIndices(i)
}
def changeAmount(r:Int,i:Int) {
val ing = recipes(r).ingredients(i)
recipes(r) = recipes(r).copy(ingredients = {
recipes(r).ingredients.patch(i,List(Ingredient(
ing.name,amountField.text)),1)
})
}
val frame=new MainFrame {
title = "Recipe Book"
contents = new BorderPanel {
layout += (new ScrollPane(recipeList)
-> BorderPanel.Position.West)
layout += (new SplitPane(Orientation.Horizontal,
new BorderPanel {
layout += (ingredientListPanel
-> BorderPanel.Position.West)
layout += (ingredientDataPanel
-> BorderPanel.Position.Center)
},
new ScrollPane(directionsArea))
-> BorderPanel.Position.Center)
}
listenTo(recipeList.selection,ingredientList.selection,directionsArea,
ingredientNameField,amountField)
reactions += {
case e:SelectionChanged =>
if(e.source==recipeList) {
if(!recipeList.selection.items.isEmpty) {
setFields(recipes(recipeList.selection.leadIndex))
}
} else if(e.source==ingredientList) {
if(!recipeList.selection.items.isEmpty &&
!ingredientList.selection.items.isEmpty) {
val rIndex = recipeList.selection.leadIndex
val iIndex = ingredientList.selection.leadIndex
setIngredients(recipes(rIndex).ingredients(iIndex))
}
}
case e:FocusLost =>
val rIndex = recipeList.selection.leadIndex
if(e.source==directionsArea) {
recipes(rIndex) = recipes(rIndex).copy(directions=directionsArea.text)
} else if(e.source==ingredientNameField) {
if(!recipeList.selection.items.isEmpty &&
!ingredientList.selection.items.isEmpty) {
val rIndex = recipeList.selection.leadIndex
val iIndex = ingredientList.selection.leadIndex
changeIngredientName(rIndex,iIndex)
}
} else if(e.source==amountField) {
if(!recipeList.selection.items.isEmpty &&
!ingredientList.selection.items.isEmpty) {
val rIndex = recipeList.selection.leadIndex
val iIndex = ingredientList.selection.leadIndex
changeAmount(rIndex,iIndex)
}
}
}
menuBar = new MenuBar {
contents += new Menu("File") {
contents += new MenuItem(Action("Open")(openFile))
contents += new MenuItem(Action("Save")(saveFile))
contents += new Separator
contents += new MenuItem(Action("Exit")(sys.exit(0)))
}
contents += new Menu("Recipe") {
contents += new MenuItem(Action("Add")(addRecipe))
contents += new MenuItem(Action("Remove")(removeRecipe))
}
}
size = new Dimension(800,600)
}
frame.visible = true
Take some time to run through this code and make sure you understand all of the pieces of it. The way it was presented in this section reflects how you might write it. Writing code is a very non-linear process. You can not expect to write a program from top to bottom straight through. You will generally jump from one part of the code to another, hitting on the areas that you need to complete. This code makes extensive use of functions to break things down. Doing this in your own code will help you keep things organized and make it easier to understand.
There are a number of different aspects of this code that are less than ideal. There are ways to put the GUI into inconsistent states. It also is not exactly robust when it comes to the reading of files and you can make it crash if you play with it some. Finding these shortcomings and fixing them is left as an exercise for the student.
11.7 End of Chapter Material
11.7.1 Summary of Concepts
- Most of the programs that people interact with these days have Graphical User Interfaces, GUIs.
- We can write GUIs in Scala using types from the scala.swing package. This package wraps around code in the javax.swing package, which itself sits on top of the java.awt package. Occasionally we will have to go back to the Java libraries to include certain types of functionality.
- The elements of a GUI are called Components. There are a number of different active and passive Components in the scala.swing library. You should consult the API to see everything that is available.
- To represent windows you can use Frame, Dialog, or MainFrame.
- There many different active Components ranging from the simple Button to the complex Table.
- Complex GUIs are built using panel and pane Components. These Components can hold other Components, including other panels and panes. Different panels and panes have different rules for how their contents are placed and sized.
- The window types can be gives a MenuBar that holds Menus. These can hold several types including MenuItems and other Menus.
- You can make additional information appear when the user hovers over a Component by setting the tooltip member to an appropriate String value.
- User interactivity for GUIs is different from terminal applications which have a single point of input and can block when waiting for information.
- The model in scala.swing uses publishers and reactors. Any Component that might take input and which would need to notify some other code to occur will be a Publisher. Components can be told to listenTo or be deafTo various Publishers. They then need to have appropriate reactions set to deal with what they are listening to.
- Reactions are given as partial functions. These look like the case portion of a match.
- GUI actions can be made faster and easier for the user using mnemonics that attach keystrokes to them.
- The FileChooser type provides a standard file selection dialog box.
- The Table component is an easy to use method of displaying a grid of data.
- There are a number of different actions that can occur with Tables that you might want to react to.
- To have complete control over a Table you would need to write a new TableModel. You can have the ability to resize Tables by simply creating new instances of DefaultTableModel with the modified size.
11.7.2 Self-Directed Study
Enter the following statements into the REPL and see what they do. Some might produce errors. You should try to figure out why. Try some variations to make sure you understand what is going on.
scala> import scala.swing._
scala> import event._
val frame = new Frame {
| title = "Small"
| contents = new Label("A Label")
|}
scala> frame.visible = true
scala> frame.size = new Dimension(500,500)
scala> frame.dispose
scala> val frame = new Frame {
| title = "Large"
| contents = new Label("Another Label")
| size = new Dimension(600,600)
|}
scala> frame.visible = true
scala> frame.dispose
val frame = new Frame {
| title = "4 Buttons"
| contents = new GridPanel(1,4) {
| for(i <- 1 to 4) contents += Button("b"+i)(println(i))
|}
|}
scala> frame.visible = true
scala> frame.dispose
scala> val frame = new Frame {
| title = "Append Numbers"
| val field = new TextField
| contents = new BorderPanel {
| layout += field -> BorderPanel.Position.North
| layout += new GridPanel(1,10) {
| for(i <- 1 to 10) {
| val str = (i%10).toString
| contents += Button(str)(field.text += str)
| }
| } -> BorderPanel.Position.Center
|}
|}
scala> frame.visible = true
scala> frame.dispose
11.7.3 Exercises
- Using three ComboBoxes and a TextField set up a little GUI where the user makes simple math problems. The ComboBoxes should be in a row with the first and third having numbers and the middle on having math operators. When the user picks a different value or operation, the TextField should update with the proper answer.
- Write a GUI for a simple text editor. Use a TextArea for the main editing field and put in menu options to open and save files.
- Write a GUI that has a Table that can display the contents of a CSV file. You can take a normal spreadsheet and save to CSV format. You want to be able to load it in and have the values appear in your Table in the appropriate locations.
- Write tic-tac-toe with a 3×3 grid of buttons. Have something print when each is clicked.
- Make a GUI with one of each of the Component types mentioned in this chapter, excluding panels and panes. You can decide what, if anything, it does.
- Find bugs in the recipe script given in this chapter and fix them.
- Add menu options to the last table example for removing a row or a column and implement the code to carry out those operations.
- Make a GUI that has one Slider and one TextField. When the user moves the Slider, the value it is moved to should appear in the TextField.
- Write a GUI that has two ListViews with two Buttons in between them. The Buttons should say "Add" and "Remove".
- Write a GUI that has three CheckBoxes and a ListView. The CheckBoxes should be labeled "Uppercase", "Lowercase", and "Digits" for uppercase letters, lowercase letters, and the numeric digits. When the state of a CheckBox is altered, the ListView should be changed to show only the values for the things that are selected.
- Repeat the above exercise except use RadioButtons and have them in a ButtonGroup so that only one option can be selected at a time.
11.7.4 Projects
-
Write a functional calculator in a GUI. You need to have at least the basic four math operations. Feel free to put in other functionality as well.
-
If you did project 5 (p.206) on parsing chemical equations, you might consider doing this problem as well. The chemical parser is not required for this, so you can start here if you want. In that problem, the chemical equation was converted to a system of linear equations. Systems of linear equations can be represented as matrix equations. For this problem you will build a GUI that represents matrices as tables then lets you edit them and do basic operations of addition and multiplication on them.
To keep things easy, the matrices will be square. You should have a menu option where the user can set the size of the matrices. They should be at least 2×2. The GUI will display three matrices that we will call A, B, and C. The user gets to enter values into A and B. The value of C is set when the user selects menu options for add or multiply.
-
Write a GUI to play a basic minesweeper game. You can use a GridPanel of Buttons for the display and the user interaction. The challenge in this problem is deciding how to store the mines and associate them with Buttons. There are many ways to do this. Students should think about different approaches instead of just rushing into one.
-
This project continues the line of ray tracing options. You should build a GUI that lets you edit a scene. You should have ListViews of spheres, planes, and light sources. Each one should have the geometric settings as well as color information. You need to have menu options to save to a file or load from a file.
-
Editing rooms for the map traversal in project 3 (p.244) using a text editor in a basic text file can be challenging and is error prone. For this reason, it could be helpful to have a GUI that lets you edit the rooms. It can display a ListView of rooms that you can select from and then other options for setting values on the selected room. You need to have menu options for loading a file, saving a file, and adding a room. For a little extra challenge consider putting in the option to remove a room. Note that when you do this, the indices of all the rooms after that one change.
-
For this project you will write a GUI that lets users build schedules of courses. It should read information on the courses that are being offered from a file. It needs to have GUI elements that let you pick courses you want to take and put them into a different ListView. You should also be able to remove courses from that ListView. Give the user menu options to save and load the build schedules. You do not have to deal with conflicts in times or even duplicates of courses right now. Just let the user build a schedule from options. Consider how to prevent different types of conflicts and do that if you want an extra challenge.
-
Make a program that displays a music database. You want to store significant information for different songs including the name of the song, the artist, the album, the year released, and anything else you find significant. The program should be able to display the information for all the songs as well as allow the user to narrow it down to certain artists, albums, years, etc.
-
For this project, we want to turn the menu driven script of project 4 (p.245) into a GUI driven program. You can use a ListView or a Table to display information related to the pantry and recipe items. You need to have menu options for saving and loading. Like the menu-based version, users should be able to add items to their pantries, add recipes to the recipe books, check if they can make a recipe, and tell the program that they have made a recipe and have the proper amount reduced from their pantry contents. The details of how this looks and whether you use Buttons or MenuItems for most of the functionality is up to you.
-
This chapter did not user the theme park example so it appears in this project idea instead. You should write a GUI for the theme park functionality using different tabs in a TabbedPane for different areas of the park. The GUI should interact with files for saving activity in the park. You should keep at least the following three tabs, "Ticket Sales", "Food Sales", and "Ride Operation".
For the first two, you should have Buttons that the user can click on to add items to a purchase. On the ticket tab those would include people of different ages, whether they were going to the water park, and various numbers of coolers. For the food purchase there are different types of food and their sizes. You can find food prices on page 81. All purchases should be added to a ListView. There should also be a Button to remove selected items.
On the ride operation tab you need to have a ComboBox for selecting the ride, a ListView with all the possible operator names for the user to select from, a TextField for entering how many people rode in the last period of time, and a Button for submitting the data.
-
For this project you will convert the functionality of the text menu based program in project 5 (p.245) to a GUI. You can decide the exact format of the GUI, but you should have a ListView of the courses of interest with the ability to add and remove entries as well as the ability to edit values for entries. The courses should have at least a course number, name, interest level, and time-slot information associated with them.
When the user chooses to generate schedules, you should show the different schedules in some format and allow the user the ability to select one that they will take. All courses from that selected schedule should be removed from the list of courses of interest. The course of interest information should be saved in a file for use from one run to another.
-
For this project you will extend the work you did for project 6 (p.245) so that there is a GUI. The GUI should include a Table for displaying the statistics from a single game as well as a ListView that shows the different games that are known. A second part of the GUI, perhaps a second tab in a TabbedPane, should have a ListView with all the games and give the user the ability to select multiple options and display average stats for what is selected.
Note that the exact details of how this works will depend significantly on the sport that you have chosen. If your sport does not match this description well, make modifications to get a better fit.
-
You can extend project 6 (p.245) by displaying the information from a box score in a GUI. Depending on the sport and what you want to display, this can be done with a Table or using a complex layout including GridPanel with Labels for the different information. The user should also get a ListView of the different box scores that are available and clicking on an option should display the proper box score. In a separate section of the GUI you should display the average values that you have been calculating in the earlier project.
Additional exercises and projects, along with data files, are available on the book’s website.
1You might wonder about the javax in the package name. There are several libraries in Java that begin this way. These are libraries that started off as extension packages that were not part of the standard libraries. When they were brought into the standard libraries the original name was kept so as not to break existing code that used them.
2Prior to Scala 2.9, reaching the end of a script would cause it to terminate even if there were still windows open. To stop that you could put while(true) {} or readLine() at the end of the script.
3The exact types for the second option is slightly different from that for the Table because the DefaultTableModel is Java code and Java does not have an exact equivalent for Any.