Week 21: Sharing with Applications
I love LinkedIn’s applications. To find applications on LinkedIn, go to the More tab and click Get More Applications. You can view all of LinkedIn’s applications, those that they’ve created or own (such as Skills, Polls, Events, GitHub, SlideShare) as well as third-party applications (such as Box.net, My Travel, Legal Updates and Lawyer Ratings, Amazon Reading List, WordPress and BlogLink, Projects and Team Spaces, E-Bookshelf, Creative Portfolio, Real Estate Pro).
Monday: Learn More about Applications
LinkedIn says you can have a total of 15 modules or applications on your profile, and six will show up on your home page, although many people have commented that they are unable to add more than six or seven apps. Personally I’ve never been able to add more than eight applications. Look through the apps offered and choose the best ones for you.
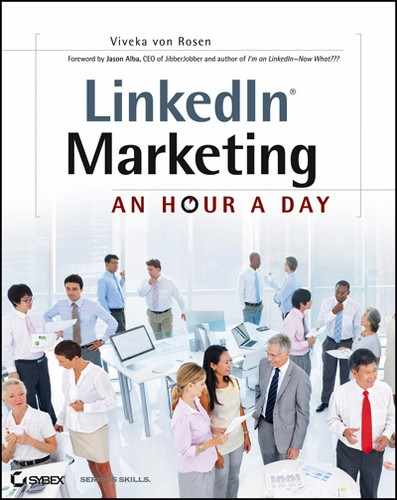
From Get More Applications, LinkedIn will open a page where most of their commonly used applications are listed. You can then choose the application icon you are interested in, which will also give you more information on the application itself, as shown in Figure 7-13.
Figure 7-13: Get More Applications

Choose whether you want to display the application on your profile and/or on your home page. What’s the difference between adding an application on your home page and adding an application to your profile? When an application displays on your profile, anyone with access to your profile URL can see it. These are the people in your network. If you are using an application and are not interested in anyone else knowing about it (maybe you are using Projects and Team Sharing to develop a project with other LinkedIn members), choose to display the app only on your home page so you can easily access it.
Now click Add Application. To remove an application, just go back to the application in Get More Applications, click its icon, and click Remove. Or you can go into Settings and in Groups, Companies, And Applications, remove the app.
Let’s look at the various applications next.
Tuesday: Use Box.net
LinkedIn has a few applications you can use to share and repurpose your existing content. One of my favorite applications is Box.net.
Box.net allows you to upload any type of office-type document (Word and text files, Excel and spreadsheets, PDFs, MP3s, etc.), and then manage and share your files on LinkedIn. Remember all those marketing assets I had you gather in Chapter 1 (and share in Answers)?
What existing marketing documents have already rendered you excellent results?
- Are you known for a specific white paper or article?
- Do you have an audio interview that can give you credibility and position you as an expert?
- Do you have a useful checklist that you would want people to share, thereby promoting you and your business?
- Do you have a portfolio?
- Do you have a résumé?
- Do you have testimonials from people who aren’t on LinkedIn?
- Do you have an intake form?
- Do you have an e-book?
- Do you have a calendar you’d like to share?
- Do you have a brochure?
- Do you have JPEGs of certifications, awards, or degrees?
- Do you have job descriptions of current openings?
If you answered yes to any of these questions, then Box.net is for you.
Box.net is a third-party application, so you will have to create an account at www.Box.net to use it in your LinkedIn profile. It’s free. I suggest opening up Box.net in a new browser window and creating your account there, but you can create it from within LinkedIn as well.
Once you create an account with Box.net, you’ll be able to upload files, create new folders for them, rename your files, and arrange them in any order that makes sense to you. LinkedIn will tell you which folders are visible on your LinkedIn profile, so make sure that any file or folder you want seen by your network is in this LinkedIn profile folder. I choose to display my Box.net contents on my profile and on my home page. At the very least make sure you display the contents on your profile—otherwise what’s the point?
To upload a file, click the Upload link to open the dialog shown in Figure 7-14.
Figure 7-14: Uploading files to Box.net

Choose a file from your computer and click Open. Make sure you have permission to share that file.
If you upload a lot of different documents, you’ll probably want to divvy up those files into different folders. When you create a new folder, name it in such a way that people will want to click on it. You could name it Awesome Accounting Resources or Everything You Need to Know Before Hiring a Lawyer. And then make sure that folder holds relevant information.
Some of the ways to manage your Box.net account within LinkedIn are to create a List view as opposed to an Icon view, as shown in Figure 7-15. You can sort by type of file, you can click Subscribe (which will send you an email whenever content is added to your Box.net account), and you can go to Settings (which will allow you to edit the settings as seen by your network). You can edit the profile folder name, the default order, the default view, and if you have MP3s listed here, whether you’ll allow visitors to download them.
Figure 7-15: Box.net settings on LinkedIn

Unfortunately at this time Box.net does not let you know who has viewed or downloaded your materials. So make sure each piece has your contact information in case that person decides to contact you or share your information with others.
Besides uploading your own content, Box.net shows you your connections’ files. This is another great source for finding experts to connect and partner with.
You can go to Box.net to do things like add more memory, manage your folders, invite collaborators to add content to your folders, leave comments on other people’s folders, or even add applications. I won’t go into detail here, but Box.net plays well with your iPhone, Salesforce, Zoho, and more. (If you use Dropbox, you will find Box.net to be similar—except that Box.net is a LinkedIn app and Dropbox is not.)
Take a look at how your Box.net files show up in your profile, as shown in Figure 7-16, and make any necessary changes.
Figure 7-16: Box.net in your profile

On my profile only 10 of my 15 files are showing. You may want to create folders if you have too many files. I have folders with documents on Building Your Network, LinkedIn Radio Shows, LinkedIn Tools, and Videos. I also have important files pulled out of folders (such as Testimonials, my LinkedIn Executive Profile Questionnaire, e-books, and my speakers one-sheet).
Go ahead and add some documents to Box.net right now.
Wednesday: Showcase Your Business with SlideShare
LinkedIn bought SlideShare in May 2012 and got rid of Google Presentations, so now there is only one app for uploading presentations and video: SlideShare. Even though LinkedIn bought SlideShare, it is still a standalone application and I recommend creating an account at www.slideshare.net if you do not already have one. According to their website, SlideShare is one of the world’s largest presentation-sharing communities, and it allows you to share presentations and documents with your LinkedIn network. If it’s in a presentation format, you can upload it: your résumé, testimonials, portfolio, conference presentation, marketing and sales presentations, and so forth. As long as it is in Microsoft PowerPoint, PDF, Word Document, Keynote, or iWork format, you shouldn’t have a problem. One of the things that makes SlideShare exciting is that (at this time) it is the only way you can also upload video to play automatically on your profile (you can upload video into Box.net but people have to find the video and then click on it to play). SlideShare is much more effective.
To upload a presentation from within LinkedIn, find SlideShare under Get More Applications, click the SlideShare app icon, and click Add Application. As soon as you add SlideShare, you can choose the presentation you want to upload.
To add a presentation at SlideShare.net, visit www.slideshare.net and upload the presentation. Once your presentation is uploaded into SlideShare, go into LinkedIn and open the SlideShare application. Since you now—or if you already have—a SlideShare account, click the Account link. Choose the presentation you want to upload. If you don’t have a SlideShare account yet, you can also choose to upload your presentation that you’ve created from your desktop. Click Upload, and then select the file you want to upload, as shown in Figure 7-17.
Figure 7-17: Uploading SlideShare

Finally, click View Profile to make sure that your presentation uploaded correctly. Sometimes it takes a few minutes for your presentation to upload, so if it’s not there right away check again in 10 minutes or so.
Thursday: Share with Projects and Teamspaces
A company named Manymoon (recently purchased by Do.com) has created an application called Projects and Teamspaces that works well on LinkedIn, allowing you to create projects, assign tasks, and share documents with people in your professional LinkedIn network. On their original home page, Manymoon said that the Projects and Teamspaces app can be used by professionals for any purpose in any industry: sales for lead management, recruiters for applicant tracking, consultants to manage client projects, and nonprofit to coordinate volunteer initiatives. You can use the Projects and Teamspaces app solely within LinkedIn, or you can track it from your Manymoon.com or Do.com account.
If you already have a Manymoon account, click the “Already have a Manymoon account?" link. If you don’t have an account, click Create Project. Name your project and then you will get the opportunity to register to get more features.
Once you have set up your account, you can start assigning tasks to somebody in your network. You can give them a due date and under Additional Options choose the priority level of their assigned task. You can even add the project to your personal calendar. In addition, you can add comments, files, or Google Docs, as shown in Figure 7-18.
If you want to skip the endless email train back and forth between project participants, and you all are on LinkedIn (or have this application), you might consider Projects and Teamspaces. I like it because it adds the element of tracking and accountability to a project. Since I use Google Docs anyway, this is a natural fit.
Let’s say you are doing a website redesign for a client. You have a web designer, a social media strategist, a coder, an email marketing specialist, yourself as project manager, and of course your client. You all use LinkedIn. You can use Google Docs to share information, and then assign tasks through Projects and Teamspaces to all your contractors and consultants. You give them By When dates and then add those dates to your calendar (and tell them to do so as well). When a date comes up and their contribution has not been added, you have proof of the conversation and of their duties. And leverage.
Figure 7-18: Projects and Teamspaces app

If you use have a virtual assistant (VA), you are going to love this tool! If you’re collaborating on a project, you can track who is doing what and their progress. And because there’s so many due dates and calendaring tools, it adds another level of accountability.
Friday: Get WordPress or Blog Link
If you write a blog, you will definitely want to consider adding either the WordPress or the Blog Link app to your profile. Both can be found under Get More Applications.
If you have a WordPress blog, use the WordPress app on LinkedIn. Click the WordPress link and then click Add Application. LinkedIn will ask you for your WordPress URL. You can use this tool with a myname.wordpress.com account as well as with a vanity URL like www.linkedintobusiness.com. Once WordPress is linked to your LinkedIn account, it will automatically populate on your profile and LinkedIn home page if you choose to view it there.
If you don’t have a WordPress account but you do have a blog, use the Blog Link app. As with the WordPress app, all you have to do is click the Blog Link app icon and then choose to display it on your profile or LinkedIn home page. Unlike with WordPress, you can add your blog to at least one of your websites (in Edit Profile). Blog Link will pull content from that link.
Given the two choices, I prefer WordPress. I think the layout looks better. However, Blog Link will import pictures as well as text, so it is a personal choice as to which blog application you use and the layout you prefer.
If you are a content creator, you might choose to pull your blogging application up higher in your profile so that people see it sooner.