
IN THIS CHAPTER
Starting and exiting Office programs
Moving, resizing, and hiding windows
Opening Office files
Viewing multiple program windows and files
Using basic program window features
After you install Microsoft Office 2008 for Mac and start poking around in all the programs, you'll probably notice something right away. As a suite of integrated programs, the Office 2008 for Mac applications share a similar appearance and many of the same basic features and commands. The title bar, menu bar, and Standard toolbar look very similar from one program to the next, the scroll bars always appear in relatively the same place, and the menu bars display some of the same commands in the exact same way. The beauty of such integration and similarity is that when you learn to use a basic feature or command in one program, the same steps apply for using the feature in the next program. The same is almost true when learning completely new program-specific features—they, too, all seem to work in a similar fashion. All of this integration and similarity make learning to navigate and use the programs much easier and faster.
This chapter is for users who are new to the Microsoft Office suite and need to know how to do very basic tasks. This chapter covers how to start and exit the programs, work with program windows, open files, and use multiple windows. Basic tasks also include how to use menus, toolbars, and scrollbars. If you're a seasoned veteran of the Office programs, you can skip this chapter and move on to building documents, spreadsheets, presentations, calendar schedules, and other Office projects. If you're new to the Office scene, however, this chapter can help you build basic skills and give you the confidence you need to plunge into each Office program.
Let's start with the very, very basic techniques for starting and exiting the Office programs. When you installed Office 2008 for Mac, program icons were put on the Dock. The Mac Dock is a hangout for all your computer's shortcuts. If you move your mouse over the Dock area, as shown in Figure 3.1, you see shortcut icons for Word, Excel, PowerPoint, Entourage, and Microsoft Messenger. To open any of these programs, click the icon. If you're not sure which icon represents which program, simply pause the mouse pointer over the icon to reveal the icon's name.
Note
The first time you open Entourage after installing it, the Setup Assistant utility appears to help you go through the steps of setting up your e-mail account or importing an address book or calendar information.
You also can use Finder to open Office programs. You can find Finder on the Dock as a bluish smiling face on the far left end, as shown in Figure 3.1, or you can find Finder at the top of the Mac window next to the Apple menu. With the Finder window open, navigate to the Microsoft Office 2008 folder. You can find the folder in the Applications folder, as shown in Figure 3.2. Double-click the Microsoft Office 2008 folder, and then double-click the program you want to open.


You also can click the program and choose File
Exiting an Office program is just as simple as opening it. To close an application, use the program's name menu, such as Word

Every Office program you start opens into its own window. Windows can be moved, resized, minimized, and closed. With the exception of Entourage, when you open a program window, a blank document, workbook, or presentation opens, too. These are essentially windows within windows, which mean you can close or minimize a document, workbook, or presentation window and still keep the main program window open.
For controlling windows, the most common tools you use are the program window controls. You can easily spot these buttons because they usually hang out in a cluster in the upper-left corner of windows and dialog boxes. You can use these buttons to minimize, zoom, or close the window. Table 3.1 explains how to use each button.
Table 3.1. Program Window Controls
Button | Description |
|---|---|
The Close button, the tiny red circle, closes the window to which it's attached. In the case of program windows, the main program remains open. | |
The Minimize button, the tiny yellow circle, minimizes or reduces the associated window to the Dock. | |
The Zoom button, the tiny green circle, makes the window as large as possible on the screen. A second click reduces the window to its original size. |
Tip
You can find the Minimize and Zoom window controls on the Office program's Window menu. For example, to minimize the window to the Dock, choose Window
When you move your mouse pointer over any of the buttons in the program window controls cluster, tiny icons appear inside each button. The Close button suddenly has a tiny X in the middle, the Minimize button has a dash icon, and the Zoom button has a plus icon. These icons are also clues as to what each button does when clicked.
Note
If a program window button appears dimmed, it means you cannot use it for that particular window. For example, the Toolbox feature operates as a floating window; however, you cannot minimize it, so the Minimize button is dimmed.
If you minimize a window to the Dock, you can maximize it again simply by finding its icon on the dock and clicking the icon. For example, if you save a Word file as Draft01 and minimize it, it waits on the Dock ready for action again, as shown in Figure 3.4. To display it again in the Word window, display the Dock, find an icon for the Draft01 file, and then click the icon. The document is maximized again in the Word program window.

Figure 3.4. When you minimize a window, it appears on the Dock ready for action when you're ready to summon it back again.
Note
The Zoom button in the program window controls is different from the zoom feature in the Office programs that allows you to change the magnification setting. The Zoom command in Word, for example, lets you magnify a document to see it better or zoom out to get a bird's eye view.
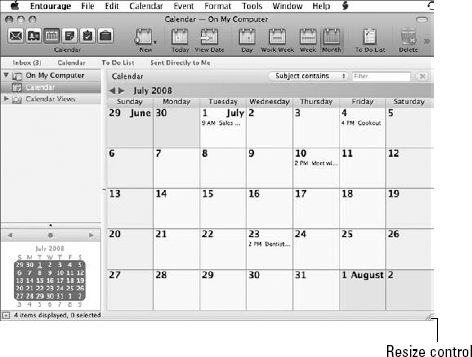
To move a window, you can click and drag it by its title bar. If the window is full size, you must reduce the size in order to move it around; click the Zoom button to reduce a window to its original size. To resize a window, click and drag the bottom-right corner of the window, called the Resize control. The corner displays three little lines to let you know it's the Resize control. See Figure 3.5 to see an example of a Resize control.
Scroll bars are another important part of the Office windows. Depending on your view magnification setting, the contents of your documents, spreadsheets, and presentations may not always fit entirely onscreen. For example, a long document may exceed the depth of the window, so you must scroll to view the remainder of the document. Office windows can use both horizontal and vertical scroll bars, as shown in Figure 3.6. The horizontal scroll bar lets you move left and right to view a document, while the vertical scroll bar lets you move up and down a page. You can click and drag the scroll box, also called the scroller, to quickly move your view, or you can click the scroll arrows found at the end of each scroll bar to move the document view.
You can quickly hide a program from view. This can help you reduce onscreen clutter or keep someone walking by from viewing what you're working on. When you activate an Office program's Hide command, the program window is completely hidden from view. To activate the Hide command, choose Word


You also can choose to hide all the other open windows and keep only the program window open. To do so, choose Word
As you work with the various Office programs, you can create files to add content, save the content, and reopen it again to make changes and amendments, add formatting, and more. The term documents is sometimes used to describe all the Office files to which you add content and text. However, each program creates a specific kind of file. In Excel, files are called workbooks or spreadsheets. In PowerPoint, they're called presentations. In Word, files are called documents. Entourage doesn't create a specific kind of file.
As you learn about how to use each Office program in this book, you find out how to work with program-specific files. For example, when you read more about using Word, you learn how to save, open, and create new Word documents. For the time being, this section explains some general ways to open Office files.
Tip
Each Office program, excluding Entourage, keeps a list of recently opened files and displays them in the Open Recent submenu found on the File menu. You can quickly open a recently viewed file by choosing File
The Office programs offer you several ways to open files, such as using the Open button on the Standard toolbar, or using the File menu and activating the Open command. This inevitably opens the Open dialog box, shown in Figure 3.8. From there, you can navigate to the file you want to open.
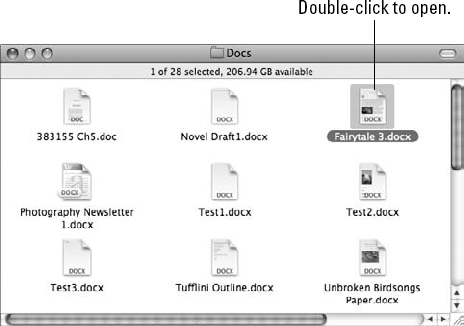
You also can open Office files from outside the Office program windows. You can navigate to the file you want to open in the Finder window and double-click the filename. This action opens the program window associated with the file and displays the document. You also can Control+click the filename and choose Open from the contextual pop-up menu that appears. Figure 3.9 shows the Finder window and a list of Office files.

You can open more than one Office program at a time and switch between them as needed. Called multitasking in the computer vernacular, this technique allows you to move content from one window to the next. You can use the Cut or Copy commands to cut or copy content in one program, and then activate the Paste command to paste it into the other program. If both program windows are visible at the same time, you also can drag data from one window and drop it into the other to copy it. This technique is called drag-and-drop. You also can use the drag-and-drop technique to move content around within a document. Figure 3.10 shows two Office programs open and viewable at the same time. In most cases, you need to resize two open program windows in order to view them both.
When working with two windows onscreen at once, only one window can be active or current. The active window's tools all appear in full color. An inactive window's tools appear faded or diminished. If the two windows overlap, the window that appears on top of the other is the active window. In Figure 3.10, the calendar is the active window. Click a window to make it active.
You also can open multiple windows in the same program to view and move content. For example, you can open two Excel or Word files and view them both at the same time. Figure 3.11 shows two Word documents open. Again, you can use the drag-and-drop technique or Cut, Copy, and Paste content between the two files. Like the scenario with two open program windows, with two open files, only one can be active or current at a time. The active window's tools appear in full color. Click a file window to make it active.

Figure 3.10. If you need to multitask between two programs, you can open them both onscreen and view them at the same time.

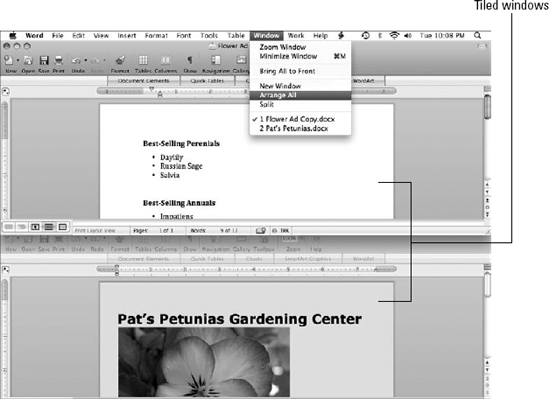
If the two open file windows are maximized to full screen size and only one appears onscreen, you can use the program's Window menu to switch between open files. Shown in Figure 3.12, the Window menu lists all the open files in an Office program.

The Window menu also has valuable tools for arranging how two or more open files appear onscreen. For example, you can activate the Arrange All command, shown in Figure 3.12, to tile the open files so all appear onscreen at once, as shown in Figure 3.13. To return to a full-screen window, zoom a window with the Zoom program window control button.
You can activate the Split command (refer to Figure 3.12) to split the current window into two scrollable panes, which allows you to view the top of the document in one of the split windows while you use the other split area to view the bottom of the document. Figure 3.14 shows an example of a split Word document. To return to a single window, choose Window

Menus and toolbars are an essential part of every Office 2008 for Mac program. Thankfully, they always work the same, regardless of the program. Office menus and toolbars hold the keys to using a program successfully. They list all the tools and features you use to create, build, format, and generate files and projects. If you learn your way around one menu or toolbar, you pretty much know your way around all. If you're new to Office, this section of the chapter shows you the basic principles behind menus and toolbars.
The Office Toolbox is a revamped feature from Office 2004 for Mac. The new and improved Toolbox is a floating palette that actually combines all the other useful palettes into one location. This section also covers how to use this new feature.
The menu bar, which always appears at the very top of the program window, contains all the commands for activating features, tools, and processes. Figure 3.15 shows the menu bar and the Insert menu displayed from the PowerPoint program window. Commands are organized into related groups headed by a single menu name. So you can expect to find all the commands related to formatting under the Format menu, all the commands related to working with files under the File menu, and so on. To view a group of menu commands, click the main menu group name on the menu bar.

As you can see in Figure 3.15, commands are not alphabetized, but rather they appear in related subgroups. Commands with an ellipsis following the command name open a dialog box where you can give further input about the command. For example, if you activate the Table command shown in Figure 3.15, the Insert Table dialog box appears, as shown in Figure 3.16. You can specify more details about what you want and then click OK to apply the feature, tool, or command. If you decide not to activate it, you can click the Cancel button to exit the dialog box without applying any changes.

Figure 3.16. The Insert Table dialog box from PowerPoint lets you enter more input about how you want to use the command before carrying it out.
If you click a menu command that has an arrow icon next to it, a submenu appears with more commands. In Figure 3.17, the Slides From command displays three more choices regarding where to get slides from.

If you prefer using the keyboard to activate commands instead of the mouse, notice that the Office program menus also list keyboard shortcuts you can type. These are listed in the menus to help you learn and memorize the shortcut keys for your favorite tasks.
For many of the actions you perform in the Office programs, you can activate contextual pop-up menus that list commands related to the task at hand. For example, if you Control+click selected text in the Word program, a pop-up menu displays commands you can activate that affect the selected text, such as cutting, copying, or pasting the text or formatting the text. Figure 3.18 shows you an example of a contextual menu. To activate a command on the pop-up menu, click the command. To hide the menu again, click anywhere outside the menu area.

All the Office programs display a Standard toolbar by default. This toolbar contains commonly used tools, such as Undo, Redo, and Print. Using these quick-access toolbar tools can save you time ordinarily spent looking through the menus: With the toolbar, the commands are just a quick click away. Figure 3.19 shows the toolbar from the Word program. Notice that some of the tools have tiny arrow icons next to them. You can click the arrow to display a pop-up menu for additional options. For example, if you click the New button's arrow, a pop-up menu appears allowing you to choose what type of new document to create.
You can minimize the Standard toolbar by clicking the tiny oval button located in the far right-upper corner of the toolbar (refer to Figure 3.19). Once minimized, you can click the button again to display the toolbar. You also can turn the Standard toolbar display on and off through the View menu. Choose View


Tip
You can customize the Standard toolbar to show only the tools you use the most. See Chapter 34 to learn more.
New to Office 2008 for Mac, the Toolbox appears by default when you open an Office program for the first time. The Toolbox, shown in Figure 3.21, consolidates what were formerly separate tool palettes in previous versions of the Office programs into one convenient spot for easy access to your favorite tools and features. The palettes change based on the program you're using. For example, in Word the Toolbox includes the Formatting, Object, Citations, Scrapbook, Reference Tools, Compatibility Report, and Projects Gallery palettes. In Excel, the Formula Builder palette is added to the group replacing the Citations palette.
Note
The Toolbox does not appear by default in the Entourage program window. You can turn it on, however, by choosing Tools
The Toolbox merges the most commonly used palettes into one spot for easy access. To view any particular palette, just click the associated palette button at the top of the Toolbox. For example, if you click the Formatting Palette button, the Toolbox displays formatting tools in sections or panes that you can expand or collapse based on your formatting needs. The name of the current palette always appears at the top of the Toolbox (refer to Figure 3.21).

Use either of these methods to open or hide the Toolbox in Word, Excel, or PowerPoint:
Click the Toolbox button on the Standard toolbar.

Tip
If the Toolbox button does not appear by default on your toolbar, you can add it using the Customize Toolbars and Menus dialog box. To learn more about customizing which icons appear on the toolbar, see Chapter 34.
Because the Toolbox is a floating window, you can move, minimize, and zoom it using the window's control buttons. You learned about window control buttons earlier in this chapter (see "Closing, minimizing, and zooming windows"). For example, you can zoom the Toolbox so it shows only the palette buttons by clicking the Zoom button. Clicking the same button again restores the full palette. You also can move the Toolbox by clicking and dragging its title bar. To close the Toolbox entirely, click the Close button.
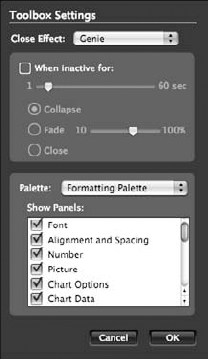
You can customize which panes you want to include in the Toolbox or customize its appearance using the Toolbox Settings dialog box, shown in Figure 3.22. Click the Toolbox Settings button in the upper-right corner of the Toolbox (refer to Figure 3.20) to access this panel. Using the Toolbox Settings options, you can make the Toolbox automatically close or change appearance when not in use, as well as specify which tool panes appear in the palettes. Click OK to save your changes, or click Cancel to exit without saving.
In this chapter, you learned the very basic procedures for starting and exiting the Office program windows. We covered how to open a program window from the Dock or from the Finder window. We also explained the basics for working with the windows themselves, such as moving and resizing windows, and using the program window control buttons. You also learned how to hide windows to reduce desktop clutter.
Although the business of opening program files is covered in the individual chapters dedicated to each Office program, you learned the basic principles for opening files from the Finder window or from the Dock. You can have more than one file or program window open at a time, and this chapter explained how to view and switch between open applications and documents.
Finally, we covered how to use the basic Office program elements: the menu bar, toolbar, and Toolbox. Armed with this knowledge, you no longer have newbie status and can now move forward with gusto in mastering Microsoft Office 2008 for Mac.