
IN THIS CHAPTER
Inserting comments
Tracking revisions
Reviewing changes
Merging multiple documents
Comparing documents
Mom always said it was important to share. I'm not sure she meant Word documents, but if she did, Word has some spiffy features to help you share documents and gather everyone's input. Word's collaboration tools can help you collect input from colleagues and merge it all to create one final document. Many job situations require various types of input from a circle of people, each adding their own comments, revisions, and markups to a document. Word's collaboration tools allow you to track all the revisions, whether it's from one person or a whole team of people.
In this chapter, you learn how to use the tracking and revision features to electronically edit a document. You also learn how to add comments to text without changing the original text itself. Then you learn how to use reviewing tools to create a polished, finished document that meets with everyone's approval. If you shared the multiple documents for tracking, you learn how to merge them to make a single document again. If you shared a document with someone who did not use tracked changes, you can still find out what revisions were. This chapter shows you how.
First up in the world of collaboration is the topic of comments. What are they, and what can we comment about them? Comments can be used on their own or with the tracking and reviewing tools. A comment is simply a notation another user makes to an existing document without making changes to the text directly. Comments appear in their own "balloons" much like the dialog in cartoons or comics, only more uniform looking. For example, you might get a document back from your boss with comments like "change this," "can we mention this," or "this is all wrong." Before you take it all too personally, the comment feature is a tool for collecting input from others. You also can use comments to leave notes to yourself. For example, you might want to add something later in a particular place in the document. Drop in a comment that reminds you to make the addition.
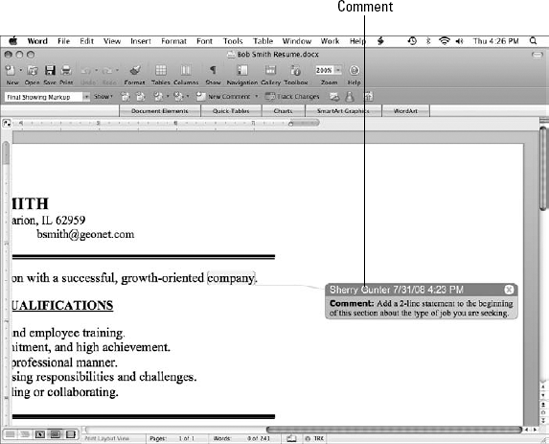
Figure 10.1 shows what comments look like. Outside the tracking and reviewing feature, comments look like nice round-cornered colored boxes poking out from the edges of a document. You need to use Print Layout or Web Layout view to see the comments. (See Chapter 5 to learn more about using Word's many view modes.) The name of the person who wrote the comment appears at the top of the comment box, along with the date and time the comment was inserted. The area of the document to which the comment addresses appears highlighted in a very light color, and a colored line connects the comment balloon to the area of text on which the person is commenting. I magnified the example in Figure 10.1 by 200 percent so you could clearly read the comment. You may have to do the same on your own screen.
Notice that the comment balloon also features a button with an X in the middle. You might think this is a Close button. It's not. You can click it to delete the comment. If you're looking to turn the comments off, you need to turn off the Markup view; choose View
Adding User Information
You may be wondering how Word knows which name to insert along with your comments. Microsoft Office uses the name you specified when you installed the software to mark comments and changes you make using the tracking and reviewing features. If the name is not correct, you can change it; choose Word
You can add as many comments as you like to a document. To do so, follow these easy steps:
Select the text to which you want to add a comment.
Choose Insert
Comment.
Word inserts an empty comment balloon, as shown in Figure 10.2, with your name already filled in, along with the date and time. Word also displays the Reviewing toolbar.
Type your comment text.
Click anywhere outside the comment when finished.

To remove a comment, click the comment's X button. This deletes it permanently. You also can Control+click inside the comment and click Delete Comment from the context menu.
If you have Word's Reviewing pane turned on, comments look and work a bit differently, as you see coming up next. For now, though, this is how comment balloons work.
You can add comments using a pane rather than comment balloons. You may prefer this method if the comment balloons are too hard to read. When activating the Reviewing pane, Word adds a separate pane at the bottom of the window that you can use to add and scroll through comments. Like balloon comments, the Reviewing pane keeps track of who wrote the comment and when it was inserted.
To use the Reviewing pane to enter comments, first turn off the comment balloons. Choose Word
Choose View
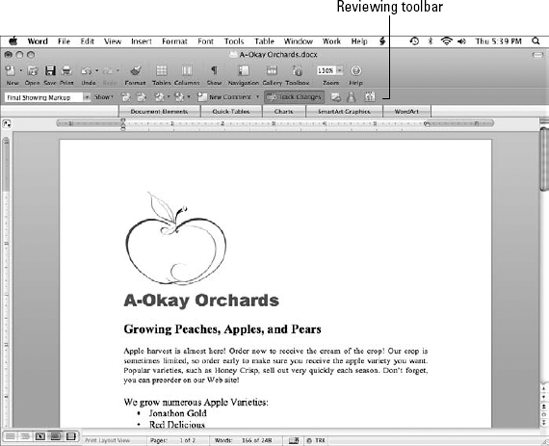
ToolbarsReviewing.This opens the Reviewing toolbar, as shown in Figure 10.3.

This opens the Reviewing pane, as shown in Figure 10.4.
Note
You can also open the Reviewing toolbar automatically whenever you add a comment using the Insert menu and choosing Comment.
Select the text in the document where you want to add a comment.

Word inserts a new comment in the Reviewing pane.
Type your comment.
Continue adding more comments as needed.
You can press F6 to toggle between the Reviewing pane and the document.

Word closes the Reviewing pane.
You learn more about using the Reviewing toolbar in the next section.

You can turn on Word's tracking features and keep track of all the changes users make to a document that's passed around for review. Word's tracking and reviewing features are a big improvement over the old paper and red ink techniques people had to use from ages past. Rather than mark out revisions on paper and scribble in new text between the lines, Word's tracking feature lets everyone add his own input electronically without making a big mess, keeping everything legible and neat.
Just because someone sends you a document file doesn't necessarily mean the tracking and reviewing feature is on. In most cases, you need to turn it on yourself. The easiest way to activate all the tracking tools is using the Reviewing toolbar. Choose View
To turn on the Track Changes tool, click the Track Changes button on the Reviewing toolbar. When you do, the TRK icon is activated on the Status bar, and the Track Changes button remains recessed as long as the tool is active. Now you're ready to start editing the document.
Another way to turn on the Track Changes feature is to choose Tools
As you edit the document, Word marks your changes much like the revision marks shown in Figure 10.7. Edits appear marked in color with comment boxes recording each deletion. Each person's contributions are marked in a different color.
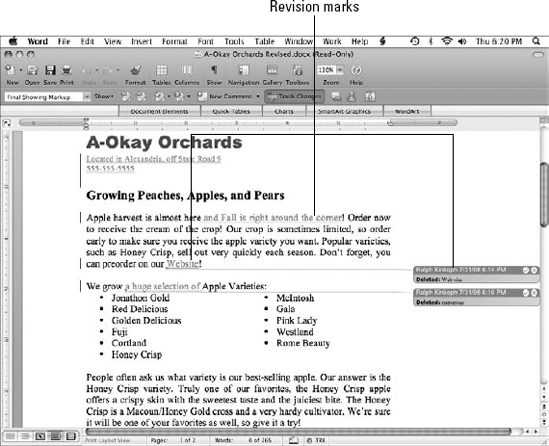
Figure 10.7. When a document is revised, revision marks show up in color, along with any comment boxes.
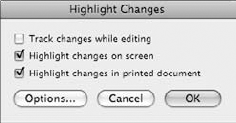
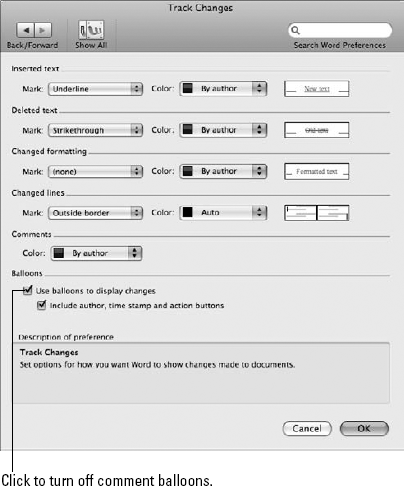
You can control which colors are used with the revision marks using the Track Changes preferences, as shown in Figure 10.8. To open the Preferences dialog box, you can click the Show button on the Reviewing toolbar and click Preferences. You also can choose Word
When you receive a document with revisions, you can review the changes with some help from the Reviewing toolbar. As explained earlier, you can turn the toolbar on or off by choosing View
Table 10.1. Reviewing Toolbar
Button | Name | Description/Action |
|---|---|---|
Display for Review | A pop-up menu lets you choose to view the final document with or without markup, or the original with or without markup. | |
Show | A pop-up menu lets you change which markups are shown in the document and from which reviewer. | |
Previous | This highlights the previous revision. | |
Next | This highlights the next revision. | |
Accept Change | This accepts the change. | |
Reject Change/Delete Comment | This rejects the change. | |
New Comment | This adds a new comment. | |
Track Changes | This turns the tracking feature on or off. | |
Mail Recipient as Attachment | This e-mails the document as an attachment. | |
Send Instant Message | This sends an instant message with Microsoft Messenger. | |
Reviewing Pane | This turns the Reviewing pane on or off. |
Use the following steps to help you navigate through a document to review the changes:

To view details about who made the edit, view the comment balloon or click the Reviewing pane button to display the Reviewing pane.


Click the Next button to continue reviewing.


If you trust your reviewers explicitly, you can choose to accept all their revisions. You can do this using the Accept button on the Reviewing toolbar, or you can use the Accept or Reject Changes dialog box. Choose Tools

The preceding sections discussed tracking changes on a single document that you pass around for review. But what if you send multiple copies of the same document for review and get back multiple changes from multiple people? Relax. Word's gotcha covered. You can merge the edited documents with the original document using the Merge Documents command. On the other hand, what if the people you send the document to fail to utilize any tracking changes tools? What do you do then? Relax again. Word has another feature, called Compare Documents to help you find out what's been changed.
Let's start with the Merge Documents feature. To create a final document out of numerous documents containing changes using the Track Changes feature, begin by collecting all the documents and locating your original file. Open your file, or any of the others, and follow these steps:
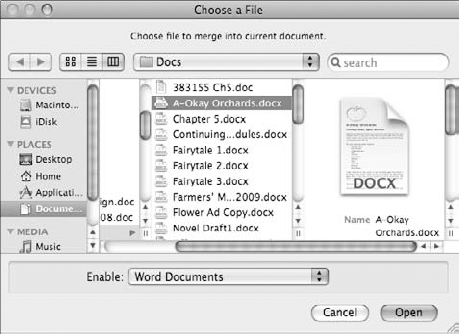
Choose Tools
Merge Documents.The Choose a File dialog box opens, as shown in Figure 10.11.
Choose the first file you want to merge with the current file.
Click Open.
Word merges the two files, including all the tracked changes, as shown in Figure 10.12.
Optionally, if you have more files to merge, repeat Steps 1 through 3.
After merging, you can review the document using the reviewing tools, accepting and rejecting changes as needed.
If you sent out a document in which the reviewer did not use Track Changes, you can still find out what she changed in the document by comparing it to the original. Here's how:
Open the changed document copy first.
Choose Tools
Track ChangesCompare Documents.The Choose a File dialog box opens.
Choose the original file you want to compare with the current file.
Click Open.
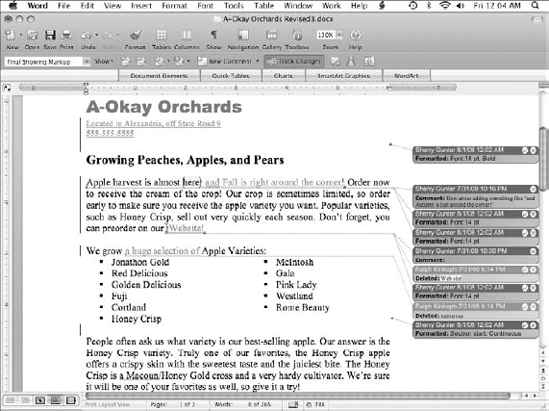
Word compares the documents and creates a new document based on the original, with the changes marked as tracked changes, as shown in Figure 10.13.
Review the changes using the Reviewing tools.
Save the document.
If either document had any revision marks, Word ignores them and examines the unmarked text. If either document has untracked changes, Word prompts you first; click OK to continue, keeping in mind any changes you made to the document while writing it.

Figure 10.13. When you compare documents, Word creates a brand new document incorporating the other two documents.
Going forward, if someone sends you a document to revise, tweak it's filename to include your initials or a number, and make sure you turn on the Track Changes feature so they'll easily see what changes you make to the text.
In this chapter, we covered the various ways other users can add input to a document. You learned how to add comments using comment balloons and the Reviewing pane. You also discovered how to turn on the Track Changes feature to track all the revisions you or anyone editing your document makes. Then you learned how to review revisions made by others to create a final document.
You learned how to merge multiple tracked changes documents into one for reviewing, and you learned how to compare changes between two documents without the Track Changes feature turned on.