Back in the Dark Ages (circa 2000), owning a device like your Windows Phone 7 phone (such devices were then known simply as PDAs) meant two things. First, it meant that you had your information with you wherever you went, as long as you synchronized manually by plugging into your computer regularly. Second, it meant that finding new applications and getting them onto your PDA could be a real pain. But now, 10 years later, things have changed dramatically: your information is generally stored online somewhere, and you can find all that cool stuff straight from your phone's screen using the Windows Phone 7 Marketplace. In this chapter, we will cover how to use the Marketplace to explore new applications, games, and music (From the Zune music store) that you can add to your phone. We will also discuss how to install applications, rate them, share them, and more!
The Marketplace is filled with many interesting applications. It includes some free gems and a number of trial versions you can try out before you buy. Follow these steps to access the Marketplace:
Turn on and unlock your device.
Tap the Marketplace tile on the Start screen (see Figure 25-1).
A screen similar to the one shown in Figure 25-2 will appear. This screen will look slightly different, depending on which company makes your phone. First, the background may change to reflect featured applications. Second, it may include an entry above apps from your phone's manufacturer (e.g., the Samsung Zone or HTC Apps). These special areas let a phone's manufacturer add exclusive applications and content available only on that Windows Phone 7 device.
Note
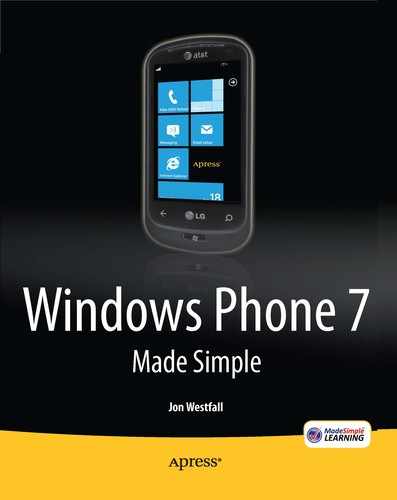
Your phone may show that you have updates available at the bottom of the Marketplace screen (as seen in Figure 25-2). Tapping the update text (3 updates in this case) brings up a screen similar to the one shown in Figure 25-3. This screen lets you install free updates for all your applications at one time. It's generally best to be on a Wi-Fi connection when downloading apps and updates. While only some apps will require a Wi-Fi connection, all apps will certainly download faster over Wi-Fi than over a cellular data network.
The screens in the Marketplace are all panoramas, which means you can swipe from right to left (or vice versa) to scroll between different areas. Let's flip through them quickly. Press your finger on the screen and swipe from right to left.
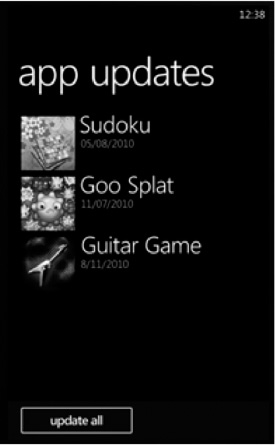
The next page shown (see Figure 25-4) displays featured items in the Marketplace, including applications, games, and music. Swipe once more from right to left.
The next page (see Figure 25-5) shows a specific featured application, game, artist, or album. Swipe once more from right to left to return to the main menu, and then tap apps.
The apps menu opens to a featured application (see Figure 25-6). Swipe from right to left to go to the main apps menu. You can also continue to swipe right to left to cycle through other sections, such as top(the top selling items), featured (specifically featured items), and new (items recently added to the Market).
You should now be at the apps menu (see Figure 25-7). This menu shows the different categories of applications you might want to view. You can also search for applications by name by pressing the search button; you'll learn more about the search button in the "Finding Music and Videos" section.
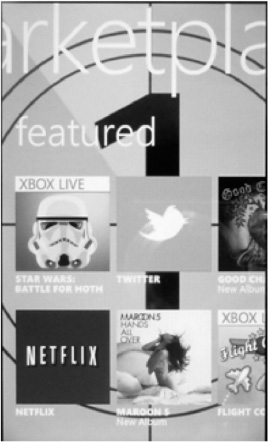
Now move down the list and open the News and Weather category;you'll see a screen that displays the top apps in this section (see Figure 25-8).
Like the previous two menus (apps and marketplace), this menu lets you swipe from right to left to see different views. One swipe shows you new applications (see Figure 25-9).
A second swipe shows you the Free categories section (see Figure 25-10).
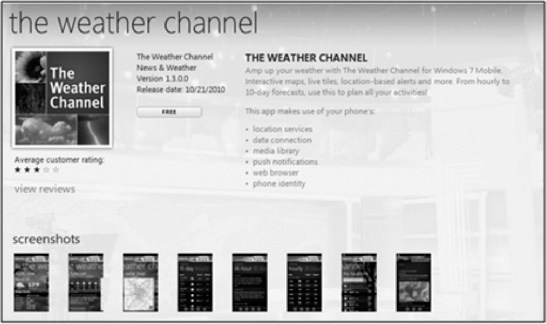
The top of the Free categories section shows one app that looks interesting: the official Weather Channel application. Tapping it brings up the app's information (see Figure 25-11).
The Application information screen contains a lot of information. First, it shows you the name, icon, and price of the application (free, in this case). You can also see a star rating that other users have entered, as well as a brief description. Moving the screen up with your finger also lets you view screenshots of the application, read the reviews, and find related applications that you might be interested in.
Tapping install will install the application (the button will read buy if the application requires you to pay for it or trial if you can install a trial version). If the application uses any special information on your device (such as your current location, as the Weather Channel does), your device will display a prompt and ask whether this is OK. You'll also be asked to confirm that you'd like to install the program.
Note
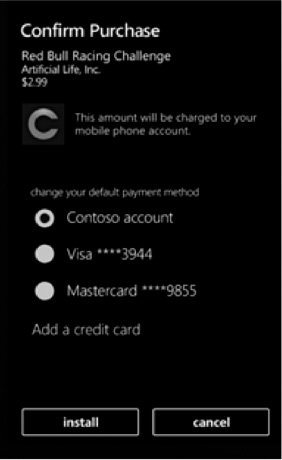
You can purchase applications, games, and music from your phone. If you do so, you'll need to either enter a credit card number or choose from a card previously on file with Microsoft (see Figure 25-12). In countries where Microsoft cannot accept credit cards, your purchase may also be added directly to your monthly cellular phone bill.
Finally, you can tap share. This option sends the application's information to another person via email, allowing you to share a really cool application with your friends.
You can press the Back button to return to other parts of the Marketplace. You navigate throughout the rest of the Marketplace just as you do in the sections described thus far, so you should get the hang of it in no time. Later in this chapter, you'll also learn how to browse for applications from your desktop using the Zune software.


One of the great things about having the Marketplace on your phone is that it lets you explore a number of different applications. As you do this, however, you may find that these applications aren't exactly what you need, or you may find an app that does the job better. The good news: Uninstalling old application is very easy. Simply follow these steps to do so:
From the Start screen, tap the Arrow icon in the upper right to show the applications list.
Find the application you wish to uninstall. Press and hold until the pop-up menu appears. When it does, choose uninstall.
When the prompt appears asking whether you'd like to uninstall, choose Yes.
You can always reinstall an application from the Marketplace if you decide you'd like it back. If the application wasn't free (i.e., you paid for it), you will not have to pay again to re-download it to your device.
The Zune section of the Marketplace built into your phone operates very similarly to the Applications and Games sections discussed previously. However, it contains a few more features that you may want to explore. Follow these steps to learn about the Zune section, including how to search for music, videos, applications, and games:
Follow Steps 1-3 in the "Finding Applications and Installing Them" section to access the Marketplace.
Tap music. A screen similar to the one shown in Figure 25-13 will appear.
Pressing and swiping right to left or left to right will move through a variety of views, just as it did in the Marketplace sections discussed previously. You can see featured artists, new releases, and top albums. Figure 25-14 shows the Genres screen, which lets you explore artists and music by genre (see Figure 25-14).
While you can navigate through the genre menus to find one of your favorite artists, searching is usually faster. Press the search button on the front of your device to bring up the Marketplace Search screen (see Figure 25-15).
Typing the name of the artist and pressing search causes the Marketplace to bring up a variety of possible matches (see Figure 25-16).
Next, tap the name of the desired artist to see a list of that artist's albums (see Figure 25-17).
Swiping from right to left shows a list of songs (see Figure 25-18).
Swiping from right to left once more shows the artist's biography (see Figure 25-19).
Now let's assume you want to hear a preview of one of the songs by that artist. Swipe back to the list of songs and press the small Play button beside a song name. The screen will change to show you the album cover and several controls for rewinding, fast forwarding, and pausing the song preview (see Figure 25-20).
You can also tap the Volume button on the side of the phone to access these controls (see Figure 25-21).


Note
If you are not subscribed to Microsoft's Zune Pass service, you can only listen to 30-second previews of the music in the Marketplace. If you sign up for Zune Pass, you can pay a low monthly rate ($14.99 a month at the time of writing) and stream as much music as you'd like through your phone or computer. You can also download a certain number of songs per month (10 at this time); these songs are included with your subscription. Of course, you can also use Zune Pass to stream all the music you'd like over your Internet connection.
As you can see, the Zune section of the Marketplace on your phone lets you find artists you're interested in, listen to their music, and learn more about them. If you really want to dig deeper though, you might find that exploring the Marketplace through your desktop computer makes it significantly easier to locate the perfect app, game, or song.
The Zune software on your computer allows you to discover applications, music, games, and more. Follow these steps to use the Zune software on your desktop computer:
Open the Zune program on your computer. If you haven't already set up your phone to work with the Zune software, see Chapter 23, "Connecting to the Zune Software", for more information.
Click marketplace on the top bar to bring up a screen that shows featured and top artists and songs (see Figure 25-22).
Tapping the options in the top menu bar (see Figure 25-23) lets you cycle through customized recommendations (picks), music, videos, podcasts, channels, and windows phone 7 applications (apps).
You can also use the Search box in the upper right to search for any relevant items. For example, type in "weather channel" to see the results returned from such a search (see Figure 25-24). If your search terms bring up too many results to go through easily, you can click an item under the Filter list on the left to reduce the number of results.
Clicking an application shows you the same information you would see on your phone; however, it may be easier to read all of this information on the bigger screen of your desktop computer. You can also rate an application here, as well as share your rating and opinion with others by clicking view reviews (see Figure 25-25) and then clicking write review(see Figure 25-26)..
You can then enter your review using the Message box shown in Figure 25-27
Note
You can also write reviews and rate applications on your phone. You can accomplish this in one of two ways. First, you can navigate to the Product page in the Marketplace by tapping view reviews and then entering text in the box at the top. Second, you can press and hold the entry for the application in the applications list, and then choosing rate and review from the pop-up box.
Finally, you can purchase applications for your Windows Phone device from your desktop computer. Let's assume that you find an application that you enjoyed using the trial version of; you can purchase the app by clicking the buy button. You will then see a Confirmation screen similar to the one shown in Figure 25-28.
After confirming that you want to buy the app, you will see a screen informing you that the application will be installed (see Figure 25-29).


The Marketplace on your Windows Phone 7 device lets you find new applications, games, music, and more wherever you happen to be. Finally, accessing the Marketplace with the Zune software on your desktop enables you to find pretty much anything you need for your Windows Phone 7 device quickly and easily.