
For many years, whenever I had some notes I needed to take or keep (such as in my undergraduate years in college), I used a full-fledged word-processor (e.g., Microsoft Word). This worked for my needs, but Word wasn't really designed for taking either on-the-fly notes or the more formal notes required for a class or meeting. Responding to this need, Microsoft introduced OneNote in 2003. This application was created specifically for taking notes (in text, pictures, and voice or audio recording). Your Windows Phone 7 device ships with a special version of OneNote that includes the special ability to synchronize your notes to your Windows Live SkyDrive account, letting you take your notes on the go and view them on your computer later (or vice versa)!
We'll get started by walking through how to open OneNote and then view a few notes that are already on your phone:
Turn on and unlock your phone.
Tap the Arrow icon in the upper right of the screen to access the applicationslist. Next, move the list up and tap Office (see Figure 17-1).
A screen similar to the one shown in Figure 17-2 will load on the OneNote section, conveniently enough. The interface is pretty simple. You can add new notes by pressing the new note button, view all of your notes in a list format by pressing the all button, or see the most recently accessed notes in blocks below the two buttons.
To view a note, simply tap the box with the name of the note you wish to view. Or, if the note isn't on the first page, press the all button and select the note. For example, tapping the Welcome to Office note displays the screen shown in Figure 17-3.
If you like, you can edit the note by tapping the text. Doing so will make the keyboard appear. At this point, you can select or edit text (see Figure 17-4).
To save your changes, simply press the Back button on your device. Your changes will be automatically saved, and you'll return to the main OneNote menu.


Next, let's create a quick note. Along the way, we'll look at how to create a list of your favorite musical groups, add pictures, and apply formatting:
Follow Steps 1-3 under the earlier "Viewing and Creating Notes" section to get to the screen shown in Figure 17-2.
Tap the new note button, and a blank note will load (see Figure 17-5).
Pressing the Ellipsis button brings up many different options for taking notes. You can add lists, pictures, and audio (which you'll learn how to do in the steps that follow). You can also undo your last change, redo a change you just undid, create a bulleted list, increase or decrease your indent level, and change the format (see Figure 17-6).
Tap the top of the note where it reads Enter title and give the note a new title: Best Musical Acts (see Figure 17-7).
The next step is to create a list. However, when you tap the list button, you're given a numbered list (see Figure 17-8). Let's assume you don't want to prioritize the list by numbering. Tap the Ellipsis button and choose bulleted list; this changes the list to a bulleted one.
With the bullets in place, you're ready to enter your own completely subjective list of best musical acts. In my own example, I first tapped out four bullet points, and then decided to speak the name of an artist I wasn't exactly sure how to spell. This way, I could look up the spelling later, when I was at my computer and my extensive music library. Begin by typing in a couple of your own favorite acts, then tap the audio button to add an audio note to the list, as well (see Figure 17-9).
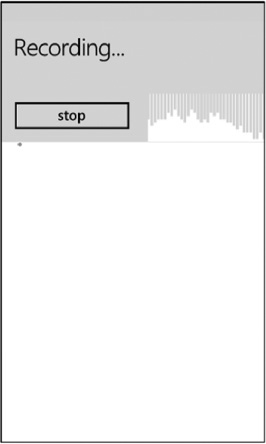
While the phone records your audio, you'll see a screen similar to the one shown in Figure 17-10. When you're done, tap stop.
As shown in Figure 17-11, a small Page icon appears with a speaker. Tapping this icon will play your voice note. Your voice is now included in the note, but now you decide you'd also like to include a picture. Tap the Picture button. This brings up the standard picture chooser, which lets you grab a photo from your camera roll on the device or other pictures you have access to. Once selected, the picture appears in the note.
At this point, you're done editing, so you can simply press the Back button. This displays your note (see Figure 17-12 for my version of this note). Hitting Back once more returns you to the main OneNote menu.
But wait! While you're at this menu (see Figure 17-13), you realize you'd like to make one of the entries bold. Tap Best Musical Acts to bring the note back up.
Tap within the note to bring up the editing keyboard, and then use your finger to select the first act by pressing and dragging your finger over the text. You want to change the format, so once the text is selected, press the Ellipsis key and choose format (see Figure 17-14 for my version of this list).
The Format options screen appears (see Figure 17-15). Tap the bold button.
Now when you return to the note, you can verify the text is in bold-face type (see Figure 17-16). When you're satisfied with your edits, you can hit the Back button and go about your day!


You can work with OneNote notes quickly, share them with others, and search all of your notes with ease. Follow these steps to leverage each of these features:
Follow Steps 1 - 3 under the earlier "Viewing and Creating Notes" section to get to the screen shown in Figure 17-2.
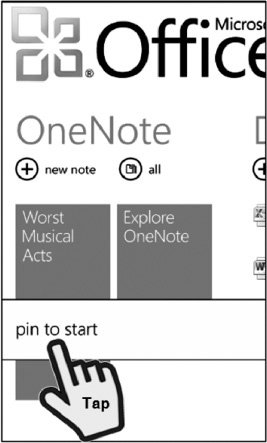
As shown in Figure 17-17, there is another list on my device that is a "work in progress" called Worst Musical Acts. Let's assume that you want to Pin this note to your Start screen, so that you can easily add new items to it as you're moving around town. Tap and hold the Worst Musical Acts tile until the pop-up menu appears. Next, tap the pin to start option.
The item would now appear on your Start screen (see Figure 17-18). Now let's assume you want to send your friend Ye a copy of the Worst Musical Acts list. Ye finds a lot of music enjoyable, so you want to make sure he steers clear of these acts, lest he begin hating music in general!
Tapping the note from the Start screen brings it up. From here, you can tap the Email button at the bottom of the screen (see Figure 17-19).
If you have multiple email accounts set up, the next screen will ask you to select one. After doing so, a new email will appear with your note attached. Simply select a recipient for the email (see Chapter 4: "Using Email" for more information) and press Send.
Now assume a few months have elapsed, and you've made many more additions to the Worst Musical Acts list. You'll want to reference this list, just to make sure you didn't exclude any horrendous bands. To search your notes, follow Steps 1 - 3 to get to the screen shown in Figure 17-2. Next, tap the all button.
Press the search button on your phone, and a box will appear above your list of notes (see Figure 17-20). Typing part of a word (or in this case a single letter) will begin to filter down the list to titles that match the search criteria. From here, you can quickly find the exact note you're looking for.


One of the best uses for OneNote on your device is to take notes on your phone and then view or work with them on your computer (or vice versa). Follow these steps to set up your phone to synchronize with Windows Live SkyDrive quickly and easily:
You'll need to add at least one Windows Live account to your phone (see Chapter 3: "Setting up Accounts" for more information on adding accounts) before you can use this feature.
Once you have a Windows Live account set up on your phone, follow Steps 1 - 3 under the earlier "Viewing and Creating Notes" section to get to the screen shown in Figure 17-2.
From the main OneNote screen, press the all button. A screen similar to the one shown in Figure 17-21 will appear.
Press the Refresh button. If this is your first time synchronizing with a SkyDrive account, a message similar to the one shown in Figure 17-22 will appear, asking if you'd like to enable synchronization.
If you do not have a Windows Live account set up, you'll receive a message similar to the one shown in Figure 17-23. This message informs you that you'll need to sign into a Windows Live account to continue.
Once the synchronization process finishes, you can customize the sync settings by pressing the Ellipsis button on the Allnotes page (see Figure 17-21) and choosing settings. The OneNote settings will appear (see Figure 17-24). You can choose to automatically have your notebooks updated on a regular basis (the default is On, as shown in Figure 17-24), or you can disable automatic synchronization. If you disable automatic synchronization, you'll need to manually press the Refresh button within any note you want to save or download the changes from. This Refresh button will appear on the Main menu bar, next to the Pin and Email buttons (see Figure 17-3).
Once your notebooks are synchronized, you can view them online by visiting
http://skydrive.comand clicking My Documents. You'll see a list of documents appear similar to the ones shown in Figure 17-25. The notebook that you will work with both on your device and on the web is named Personal (web).Hovering your mouse over the Personal (web) notebook will give you multiple options. You can choose edit in browser, and OneNote Web App (see Figure 17-26) will open, letting you make edits through your browser. You can also choose open in OneNote if you have Microsoft OneNote installed on your computer. This will open OneNote on your computer and load up your shared notebook, letting you enter text through the program on your PC and have it synchronize with your phone! Any edits you make through either method will be downloaded by your phone the next time it synchronizes or you press the Refresh button.
Note
To open a new notebook on your phone other than Personal (web), you'll need to use Internet Explorer on your phone to navigate to
http://live.office.com, log in with your Windows Live ID, and then tap the notebook you wish to open.


In situations where a full word processor might not be appropriate, you can now use the powers of Microsoft OneNote Mobile to view, create, keep, and edit notes of all sizes. For the most flexibility, you can also use OneNote on the desktop to edit these notebooks!