
In this recipe, we will secure a proxy service with an OWSM server policy using Eclipse OEPE.
For this recipe, we will use a simple OSB project with one proxy. Import the getting-ready project into Eclipse OEPE from chapter-11getting-ready\securing-a-proxy-service-with-username-token.
The OSB Server must be up and running and configured using the first two recipes of this chapter. This server needs to be defined in the Eclipse OEPE for this recipe to work.
In Eclipse OEPE, perform the following steps to add an OWSM policy to a proxy service:
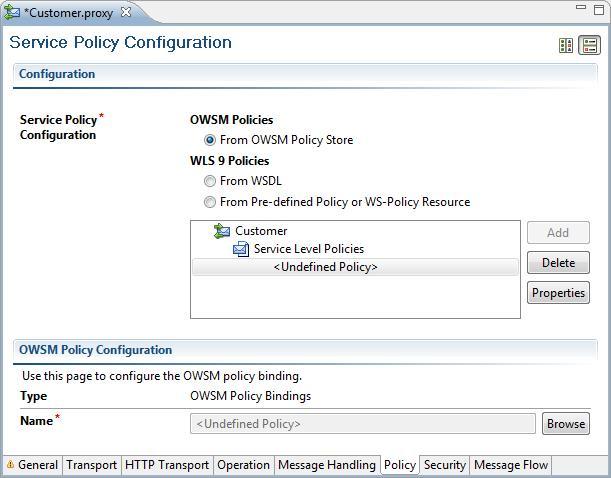
- Open the CustomerManagement.proxy in the
proxyfolder of the securing-a-proxy-service-with-username-token project. - Navigate to the Policy tab.
- Enable From OWSM Policy Store.
- Click Service Level Policies, which will enable the Add button.
- Click Add and the OWSM Policy Configuration window will open.
- Click Browse.
- In the Select OWSM Policy window we need to choose a security or management policy.
- Enter
*username*into the Name field and click Search.
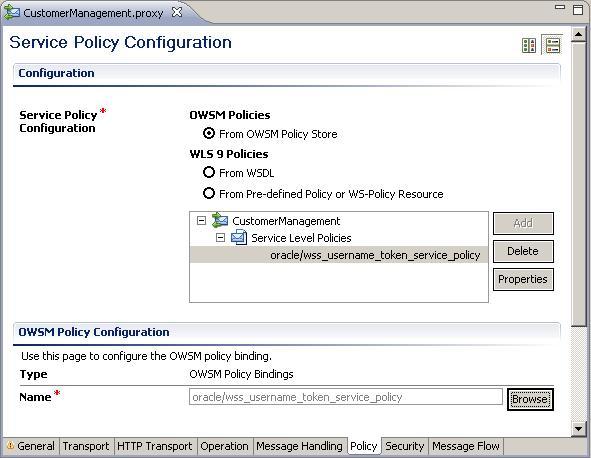
- Select the oracle/wss_username_token_service_policy from the list of policies and click OK.
- The Username Token policy will be displayed in the Policy tab of the proxy service.
- Save the project and deploy it to the OSB server.
We have successfully secured our proxy service using
UsernameTokenWS-Security SOAP headers to authenticate users.Now let's test it first using the Service Bus test console. In the Service Bus console, perform the following steps:
- Navigate to the CustomerManagement proxy service (in Project Explorer, click on the project and then on the
proxyfolder) and click on the Launch Test Console icon (with the bug). - Click Execute (the value passed in the ID does not have an effect; the answer of the proxy service is hardcoded).
- We get an error because we have not passed a username and password.

- Click Back to specify the username and password.
- In the test console, scroll down unt the Security area is visible.
- Enter
osbbook-keyinto the Override Value field and click Execute.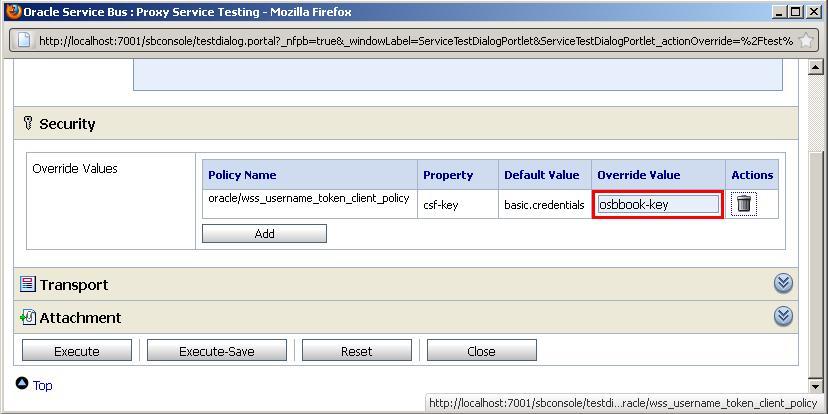
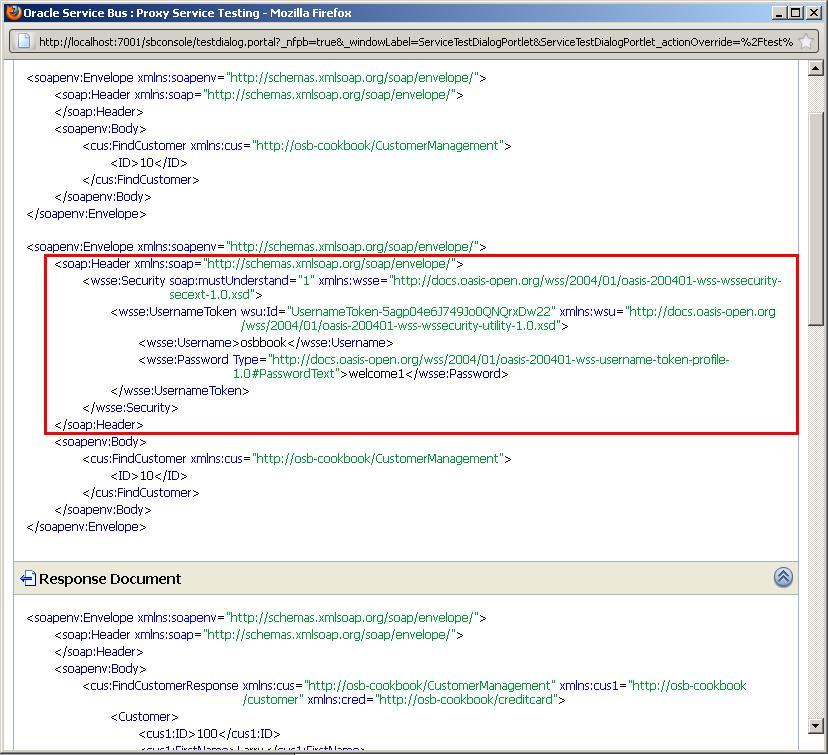
- The test should now work and a valid response should be returned by the proxy service. The test console also shows the SOAP header with the Username Token necessary for the authentication.
The Username Token authentication policy uses the credentials in the UsernameToken WS-Security header to authenticate users. Only the plain text mechanism is supported. The credentials are authenticated against the configured identity store on WebLogic server.
The usernames used in the user authentication policies will be validated against the users of the WebLogic security realm and the SOAP body will not be encrypted.
To add the OWSM policy to the proxy service, Eclipse OEPE needs to contact the OSB WebLogic server to retrieve the available OWSM server policies. We can add one or more OWSM policy references to a proxy service. These policies can only be added or verified when the OSB WebLogic server is running.
When the proxy service is deployed to the OSB Server, we can retrieve the WSDL of the proxy service. This WSDL will contain the WS security policies which can be used b the clients of this proxy service.
SoapUI can also be used to test secured web services. To test the proxy service just created previously, perform the following steps in soapUI:
- Create a new soapUI project by consuming the WSDL from the proxy service, which is available under:
http://[OSBServer]:[port]/securing-a-proxy-service-with-username-token/proxy/CustomerManagement?wsdl. - Double-click on the new project in the project tree.
- Navigate to the WS-Security Configurations tab.
- Within the WS-Security Configurations, navigate to the Outgoing WS-Security Configurations tab.
- Click on the + button to create a new outgoing configuration.
- Enter
UsernameTokeninto the Name cell and click OK. - Click on the + button below the new configuration to add a WSS entry.
- From the drop-down list, select Username.
- Click OK.
- Enter
osbbookinto the Username filed andwelcome1into the Password field. - Select PasswordText for the Password Type.

- Close the window.
- Open Request 1 for the FindCustomer operation.
- Replace the ? with 1 in the ID element.
- Run the test by clicking on the green arrow icon. A security error will be returned, because the WSS configuration is not yet used.
- Click the Aut button in the lower-left corner (marked red in the following screenshot):
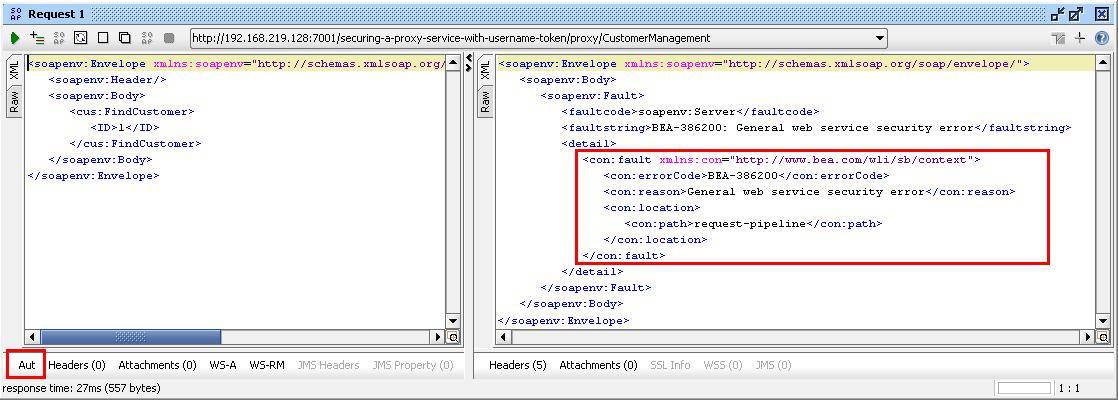
- Select UsernameToken in the Outgoing WSS drop-down list.
- Rerun the test and a valid response should be returned.