
In this recipe, we will implement reliable SOAP communication over JMS and not over HTTP. The only difference is that your request and response will be published on a queue. This way the request can't be lost (when it has JMS persistence with XA/QoS). The response will also be published on the queue and the client can consume this response.
For this recipe, we will use an OSB project with a proxy service that is based on a WSDL with a synchronous request/response operation. The SOAP message will be sent over JMS instead of HTTP. JDeveloper will be used to generate a test client:
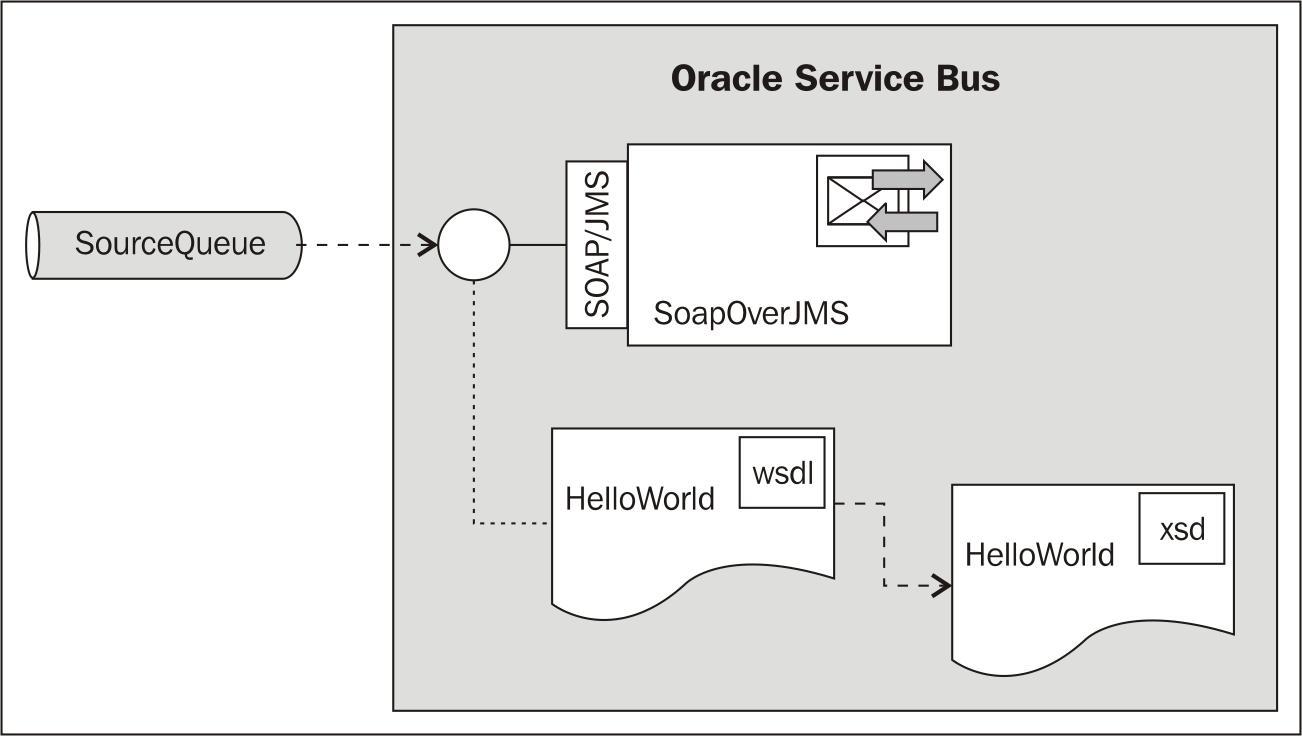
You can import the OSB project into Eclipse OEPE from chapter-10getting-readysending-soap-over-jms.
First we will need to change the proxy service to use the JMS instead of the HTTP transport. In Eclipse OEPE, perform the following steps:
- Open the SoapOverJMS proxy service.
- Click on the Transport tab.
- Choose jms in the Protocol field.
- The Endpoint URI must use a XA Connection Factory. The URI must look like this
jms://[OSBServer]:[Port]/weblogic.jms.XAConnectionFactory/SourceQueue - Navigate to the JMS Transport tab.
- Enable Is Response Required.
- Select JMSMessageID in the Response Pattern field.
- Select Text in the Response Message Type field.
- Click on the Message Flow tab.
- Add a Transport Header action after the Replace action:

- On the Properties of the Transport Header, choose Inbound Response from the Direction drop-down listbox.
- Click on Add Header.
- Select the Other option and enter
_wls_mimehdrContent_Typeinto the field. - Select the Set Header option to and click on Expression.
- Enter
text/xml; charset=utf-8into the Expression field and click on OK. - Deploy the project to the OSB Server.
Now let's test the service by implementing a simple Java client in JDeveloper. First we need to retrieve the WSDL of the OSB proxy service from the OSB server. In the Service Bus console, perform the following steps for saving the WSDL into a file:
- In the Project Explorer, select the
sending-soap-over-jmsproject. - Click on the
proxyfolder on the right. - Navigate to the SoapOverJMS proxy service and click on the Export WSDL icon (the third icon in the Actions cell).
- Click on Save.
- Save the
SoapOverJMS_wsdl.jarto a temporary folder.In JDeveloper, perform the following steps:
- Create a new application by selecting File | New.
- Enter
Genericinto the search field, select Generic Application, and click on OK. - Enter
SoapOverJmsinto the Application Name field and click on Next. - Enter
SoapOverJMSClientinto the Project Name field and click on Finish. - Right-click on the SoapOverJMSClient in the project navigator and select New.
- Enter
antin the search field, select Empty Buildfile (Ant), and click on OK. - Leave build.xml as the file name and click on OK.
- Open the build.xml and enter the following Ant script:
<project default="clientOSB"> <path id="weblogic"> <pathelement path="C:/oracle/MiddlewareJdev11gR1PS4/wlserver_10.3/server/lib/weblogic.jar" /> </path> <taskdef name="clientgen" classname="weblogic.wsee.tools.anttasks.ClientGenTask" classpathref="weblogic"/> <target name="clientOSB"> <clientgen wsdl="file:Helloworld.wsdl" destdir="src" packagename="osb.book.soap.jms" type="JAXRPC"/> <javac srcdir="src" destdir="classes" includes="osb.book.soap.jms/**/*.java"/> </target> </project> - Change the path to the
weblogic.jarso it matches with your environment. - Open the
SoapOverJMS_wsdl.jarfile that we just created and extract theHelloworld.wsdlandHelloworld.xsdinto theprojectfolder. - Right-click on the build.xml and select Run Ant Target | clientOSB.
- JDeveloper creates the Web Service proxy client code. Confirm that this was successful by checking the Ant Log tab for the BUILD SUCCESSFUL message.
- Right-click on the SoapOverJMSClient project and select Project Properties.
- In the tree on the left, navigate to Libraries and Classpath and click on Add Library.
- In the pop-up window select the WebLogic 10.3 Remote-Client library and click on OK.
- Close the Project Properties window by clicking on OK.
- Right-click on the SoapOverJMSClient project and select New.
- Enter
java classinto the search field, select Java Class, and click on OK. - Enter
TestServiceinto the Name field, enable the Main Method checkbox, and click on OK. - Add the following import statements to the
TestServiceJava class:import java.net.URISyntaxException; import java.rmi.RemoteException; import javax.xml.rpc.ServiceException; import javax.xml.rpc.Stub; import osb.book.soap.jms.HelloWorldService; import osb.book.soap.jms.HelloWorldServiceSoapHttpPortBindingQSService; import osb.book.soap.jms.HelloWorldServiceSoapHttpPortBindingQSService_Impl; import weblogic.wsee.connection.transport.jms.JmsTransportInfo;
Replace the main method by the following code:
public static void main(String[] args) throws ServiceException, URISyntaxException, RemoteException { HelloWorldServiceSoapHttpPortBindingQSService service = new HelloWorldServiceSoapHttpPortBindingQSService_Impl(); HelloWorldService port = service.getHelloWorldServiceSoapHttpPortBindingQSPort(); Stub stub = (Stub)port; String uri = "jms://[OSBServer]:[Port]?URI=SourceQueue"; JmsTransportInfo ti = new JmsTransportInfo(uri); stub._setProperty("weblogic.wsee.connection.transportinfo", ti); try { String result = null; System.out.println("start"); result = port.sayHello(); System.out.println("Got JMS result: " + result); } catch (RemoteException e) { e.printStackTrace(); } } - Replace
[OSBServer]and[Port]with the settings of the OSB server installation.Now let's test the Java class.
- Right-click on the
TestService.javaclass and select Run:
- The log window will show the result of the call as shown in the following screenshot:

SOAP over JMS works in the same manner as HTTP, but JMS will be more reliable. The JAX-RPC client in JDeveloper generates a request and puts it in a WebLogic queue. The proxy service consumes the request from the queue and executes the normal message flow. The proxy service publishes the response that is also on the queue and uses the value of the
JMSMessagId property of the request as the JMSCorrelationId. The client listens on the queue for the response message with this JMSCorrelationId.
SOAP over JMS has the following disadvantages:
- The WSDL is only accessible in the Oracle Service Bus console
- On the client, you need to change the endpoint
- Only the JAX-RPC framework supports JMS. JAX-WS only supports HTTP
- On the server, we need to change the transport of the proxy service to JMS and enable correlation