When IT departments talk about Active Directory, they usually think of servers, enterprise back-end application environments, infrastructure, or security. However, one of the hidden gems of Active Directory and Windows 2003 has been its capability to help the administrators of client systems (such as desktop, laptop, and mobile users) better manage and administer client systems from a centralized location and with common network tools. Windows Server 2003 enables administrators of client systems to select the appropriate method of administration to reduce or automate repetitive tasks and to provide task scalability to reduce the overall number of workstation visits or issues.
This chapter covers administrative tools and concepts that can be used to install and manage Microsoft Windows XP Professional workstations. Topics such as deploying desktops and keeping the operating system up to date are covered. Also, remote administration and remote application installation are described in this chapter. Many of the tools and concepts used in this chapter apply to Windows 2000 Professional workstations, but we assume that the desktop OS is Windows XP.
When it comes to deploying workstations in a Microsoft Windows networking environment, several options are available. You could load operating systems by starting with boot disks or by starting the installation from across the network using a command-line network client such as MS Client. Some options were adopted by large hardware distributors, but these options were too complicated and required many hours of testing; therefore, they were never adopted by small and medium-sized organizations that did not see the value in complicated installations. Windows 2000 and Windows XP continue to follow Microsoft’s record of providing several desktop deployment methods.
Installing Windows XP or Windows 2000 manually is always an option and probably the most frequently used method of installing the operating system. Many administrators and organizations consider imaging undependable or questionable. As a matter of fact, in previous versions of Windows operating systems, if a machine was installed using imaging software, it was always questionable and sometimes blamed for system corruption. One of the advantages of manual installation is that you always start with the clean base operating system to build upon.
To install Windows XP manually, insert the Windows XP bootable media and start the workstation. You might need to enter a key to boot from the CD, but after that the installation will start. The step-by-step installation instructions on the root drive of the Windows XP CD are clear and easy to follow.
A more automated method of installation is the unattended installation. This type of installation is possible because the installation questions are answered automatically using information stored in a setup or answer file.
An advantage of this approach is that the entire installation can be scripted and loaded on a CD. When you boot from this CD, the operating system installation commences. When applications are assigned using Group Policy, the workstation could be up and running automatically within a short time frame. The time to complete the unattended installation is close to the time required for a manual installation, but user error can be reduced and the installation does not need to be watched to keep the installation moving. The only user intervention necessary is starting the system from the bootable CD.
You can customize an unattended installation to support several types of installations and hardware configurations by specifying information in the installation configuration files.
Desktop images are copies of the running workstation in its current state. Only a few software vendors have developed software that has been used successfully to deploy Windows workstations using stored images.
Remote Installation Services (RIS) on Windows Server 2003 can be used to create and deploy Windows 2000 and Windows XP desktop images. Also, starting with Windows Server 2003, server-based images can be created and deployed using RIS. Remote Installation Services takes advantage of a few system preparation tools to enable you to automate and standardize desktop installations across the enterprise. RIS does have some client-side requirements and limitations, but even a basic installation with one image could greatly simplify desktop deployment.
Some of the advantages of using third-party imaging software are that you can compress data and create bootable images that can be split across multiple CDs. Also, the more advanced versions provide one-to-one (Unicast) and many-to-one (Multicast) modes.
Multicast technology provides the ability to send compressed and sometimes encrypted data to several clients using only a single stream of information. The technology itself is optimized and requires less network bandwidth than if the same number of clients were accessing the data stream individually. Multicast server and workstation imaging software allows administrators to take advantage of this technology to deploy images to a handful or hundreds of workstations on the local network or across the entire enterprise. The only catch is that each of the multicast clients must remain idle until all the clients have attached and are ready to receive the image. After all the clients are connected, the image can be pushed down on all the workstations simultaneously.
Windows Server 2003 includes a server and workstation imaging-deployment product called Remote Installation Services (RIS). First introduced in Windows 2000, the RIS deployment tools were somewhat limited and could be used only to deploy Windows 2000 Professional workstations. Starting with Windows Server 2003, server images can also be saved and deployed across the enterprise. This allows administrators to configure both server and desktop standard images to be used across the enterprise. Remote Installation Services is handy, but before you deploy desktops using this product, you should do some testing and planning.
Installing RIS on a Windows Server 2003 system is a fairly simple process, but planning how the RIS server will be used can help ensure a successful implementation. Considerations for RIS include deciding how many systems the RIS server should deliver installation images to simultaneously. Also, RIS client computers must support remote boot either with a bootup disk or using pre-boot execution (PXE) on compatible systems. Because RIS servers try to deliver the image to clients as fast as the network can handle, you must limit RIS server access to LAN clients to avoid having the RIS server saturate WAN links while imaging client computers.
Storage is always a big concern for imaging servers, and third-party imaging software stores each image in a separate file, which can take up a lot of storage space. Although these image files often compress fairly well, RIS stores images in their native file formats and replaces duplicate files with file pointers or links to save storage space. The technology used to optimize storage space by recognizing files used in different images is Single Instance Storage (SIS). SIS works by replacing actual duplicate files with junction points within the RIS image storage locations. This reduces the overall storage requirements of the RIS server, allowing for the creation of several custom images, including saving user desktop images to the RIS server as a means of recovery. To optimize performance, you should install RIS and RIS images on separate physical disks than the operating system to improve system image access.
An administrator with Local Administrator access can quickly install RIS. The RIS server must also be part of an Active Directory domain, and a DHCP server must be available on the network. To install RIS, perform the following steps:
Log on to the RIS server using an account with at least Local if not Domain Administrator access.
Choose Start, Control Panel.
Select Add/Remove Programs.
Select Add/Remove Windows Components.
Scroll down the list and check Remote Installation Services.
Click Next to install RIS and click Finish after the installation is complete.
Close the remaining open windows and reboot the server as instructed.
After the RIS server reboots, the service can be configured. Upon the initial configuration, you need to specify the storage location of the RIS server and choose some simple installation options. Also, during this process, the first installation image is created. This image is based on a clean OS installation of the particular operating system version. For example, a Windows 2000 Professional CD could be used for the first image on a Windows Server 2003 RIS server. To configure RIS, follow these steps:
Log on to the RIS server using an account with at least Local if not Domain Administrator access.
Choose Start, All Programs, Administrative Tools, Remote Installation Services Setup.
Read the information on the RIS Wizard welcome screen to ensure that the RIS requirements will be met for a successful implementation. Then click Next to continue.
In the next window, specify the local path where the RIS images will be stored. The folder cannot be on the system drive and must support enough space to store all the images. The installation path cannot be on the boot partition or the partition with the operating system loaded on it. After you specify the folder location, click Next to continue.
The initial settings window allows the RIS server to begin responding to client requests immediately. This option is disabled by default, but to allow the RIS server to start accepting client connections, check the Respond to Client Computers Requesting Service box and click Next to continue.
Now you must specify the location of the first image source files. This information will be used to create the first image on the server. If you’re using a Windows CD, specify either the root of the CD or specify the I386 directory of the CD for Intel-based system installations.
In the next window, you specify the image folder location. The default is the name of the systemroot folder of the particular operating system, such as WINNT or WINDOWS. Click Next to continue. In the next window, type in a Friendly Descriptive name and any Help Text for the image folder and click Next to continue.
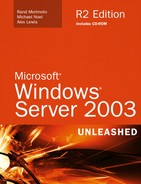
In the last window, review the specified settings, as shown in Figure 28.1, and click Finish to create the image.
After you click Finish, the RIS installation finishes and copies the first image installation files to the server. During this process, the unattended answer file must be created to allow the RIS server to automate part, if not all, of the installation. After this process is complete, you need to add two DHCP server scope options for clients to locate the RIS server.
After you complete the RIS server installation, you must add two DHCP scope options for clients to locate the RIS server. These settings include option numbers 066 and 067; these options are the boot server hostname and the bootfile name. The boot server hostname value is a fully qualified DNS name, and the bootfile name is simply Startrom.exe. To add these options, perform the following steps:
Log on to the DHCP server with Domain Administrator access.
Choose Start, All Programs, Administrative Tools, DHCP.
Expand the Local DHCP Server entry and select the appropriate scope.
Expand the scope and select Scope Options. If multiple scopes are used on this DHCP server and the RIS options need to be added to all scopes, select Scope Options to hold the objects.
Right-click Scope Options and select Configure Options.
Scroll down in the Available Options window to number 066, check the option named Boot Server Host Name, and enter the fully qualified domain name of the RIS server.
Scroll down and check the next setting, 067 Bootfile Name, and enter
RemoteInstallAdminI386Startrom.comto complete the DHCP updates for RIS. Click OK to close the Scope options.
For a remote client to access an RIS server, it must be able to access the network before it can locate the RIS server. RIS servers require client computers to support preboot execution (PXE) or network boot. Many workstations have this option, but you might need to enable this option or choose it at bootup before it can be used. For client workstations that do not support it, you can use the Remote Boot Floppy Generator (Rbfg.exe) to create a network boot floppy disk. Rbfg.exe is loaded on an RIS server and can be accessed in the %systemroot%System32Reminst folder. To create a boot disk, perform the following steps:
Log in to the RIS server using an account with Administrator access.
Insert a blank formatted floppy in the RIS server’s floppy drive.
Open Windows Explorer and browse to the c:windowssystem32 eminst folder to locate the Rbfg.exe file. If the file is not there, either this is not the RIS server or RIS has not yet been installed. If RIS has not been installed, skip to the “Installing RIS” section and complete the steps there before returning here.
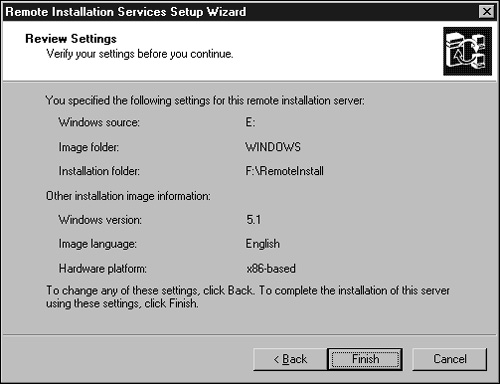
When the Microsoft Windows Remote Boot Disk Generator opens, click the Create Disk button to create a boot floppy. As the boot floppy is being created, you’ll see something similar to what is shown in Figure 28.2.
If the correct adapter is not on the list, you must create a boot disk in a different way. Search the network interface card (NIC) manufacturer’s documentation and Web site for driver details. What you need is a TCP/IP DOS-based driver that can use DHCP to get network configuration and execute a remote file on the RIS server to start the image selection process.
If you plan to use RIS or third-party imaging software to deploy Windows XP desktop images, you must take some steps to ensure that the images are created as problem free as possible. Depending on an organization’s goals of deploying a new desktop image or the goals of creating standard builds and deploying, using desktop imaging software may be very different between organizations, but the following sections cover steps that you should take for image creation regardless of the project goals.
Unless you’re creating an RIS image using only the Setup Manager Wizard and the installation media for a vanilla installation, you must install Windows XP and any additional updates and applications on a workstation. First, the operating system must be installed and patched to the latest service pack and post service pack release. This helps ensure operating system reliability and security by raising the installation to the latest build and locking down the known vulnerabilities.
After you update the OS, you should install and update Microsoft and third-party applications to the latest patch level. If necessary, open the applications to verify that all the installation steps have been completed, such as registering, customizing, or activating the software.
After the operating system and application software are successfully installed and configured, the desktop settings can be customized to meet your organization’s particular deployment needs. During this phase, you might enable or configure Windows XP programs such as Remote Desktop, Remote Assistance, or Automatic Update. If roaming user profiles are not used in your organization, you should configure the desktop settings, including screen resolution, desktop shortcuts, and Start menu options. After the desktop is configured, using the Administrator account, you can copy the user profile used to create the settings to the C:Documents and SettingsDefault User folder, assuming that the XP installation is on the C: drive.
Note
The Windows 2003 Resource Kit includes a utility called Delprof.exe that allows a network administrator to delete the profile of a network user. This tool can come in handy for an administrator who wants to clear off disk space on a system full of profiles, or the tool can be used to minimize the risk of profile-related information being compromised from a security perspective. The Windows 2003 Resource Kit is a free download for all network administrators that have legal licenses to Windows 2003. The add-on is available at http://www.microsoft.com/windowsserver2003/downloads/tools/default.mspx.
After the profile is configured, specific user rights should be configured using settings in the local security policy or through Group Policy settings. Local security and Group Policies are covered in detail in Chapter 15, “Security Policies and Tools,” Chapter 21, “Windows Server 2003 Group Policies,” and Chapter 29, “Group Policy Management for Network Clients.”
Often when administrators prepare a desktop image, many annoying problems are discovered after the image is deployed to the enterprise. For example, left-over mapped drives or local printers or application install points that exist only in the imaging lab remain in the Registry and cause confusion when an application needs to be updated or uninstalled. Something as small as leaving a window open while logging off the workstation before the user profile is updated to the default user profile can prove to be very annoying or look unprofessional after image deployment. To prevent the little problems that may have the end users, clients, or management personnel viewing your image deployment as a failure, be sure to deploy the images to a few pilot users who will be meticulous enough to alert you of these problems before the entire user base has to experience them.
Windows XP provides a few tools to simplify the desktop installation process by automating installation tasks. These tools are used to clear basic operating system configurations to create a generic image that can be used to deploy the Windows XP operating system.
To start, you should open installed applications, test their functionality, and configure the default user and all user profiles. Also, you should configure and optimize the OS and applications if you have not done that yet. After you configure and successfully test the desktop, you can use the Windows XP deployment tools to remove any unique operating system information and automate installations by creating information files used to answer installation questions.
The Setup Manager (setupmgr.exe) utility simplifies deployment of Windows XP desktops by using a wizard to create scripts that simplify the imaging of the operating system. Setup Manager performs the following tasks when you choose a specific deployment method:
Windows Unattended Installation—. Setup Manager can create an answer file called Unattend.txt to automate the desktop deployment, but it can also create the software distribution point if the CD is available and a destination path is specified.
SysPrep Install—. This choice creates an answer file called sysprep.inf to be used for images configured to run the MiniSetup Wizard specified when sysprep.exe was run on the workstation.
Remote Installation Services—. Setup Manager can be used not only to create the answer file Remboot.sif but also to create the image on the RIS Server from the CD. This means that you can get a basic image to the RIS server without ever installing Windows XP.
The System Preparation Tool, Sysprep.exe, is a bit different from the Setup Manager, which automates installation by answering installation questions, in that it is used on existing workstations to remove user-specific data such as registered software owner, network settings, and product key information. Using this file before imaging an existing workstation allows images to be customized after installation. This makes the image much more functional and flexible on how and where it can be installed.
To prepare a system for imaging, follow these steps to run sysprep.exe:
Log on to the Windows XP Professional workstation using an account with Administrator access.
To find sysprep.exe, insert the Windows XP CD, browse to the support folder, and locate the Deploy.CAB file. Extract all the files, one of which is sysprep.exe. Then double-click the sysprep.exe utility to start the process.
When sysprep.exe opens, a message states that some security modifications may be executed on the system. After you read and understand the security statements, click OK to continue. After a few moments, you will be prompted to shut down the system.
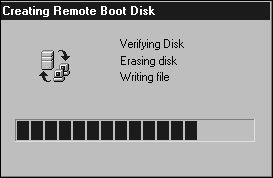
On the bottom of the page, change the Shutdown option to Quit, as shown in Figure 28.3.
Click the Reseal button to have SysPrep prepare the workstation for imaging.
A warning window appears stating that the computer SID will be regenerated after system shutdown. Click OK to complete the SysPrep process.

The Windows XP deployment tools are included on the Windows XP installation media. The deployment tools are stored within a file called Deploy.CAB. This file is located on the Windows XP CD in the SupportTools directory off the root of the Windows XP media. Simply extracting this file to a specified folder location gives an administrator access to the deployment tools and the supporting documentation.
When an RIS server is set up for the first time, a vanilla image can be created for Windows 2000 Professional, Windows XP Professional, or Windows Server 2003. Often images need to be deployed with software already installed and configurations already performed. When this is necessary, the image must be created using an existing preconfigured system from which to create the image. To avoid naming and IP address conflicts, you must first prepare the workstation for imaging using sysprep.exe. This utility “reseals” the system. This allows a single preconfigured image to be deployed out to different hardware; you also can create individual system names with a unique network configuration.
If you want to create a customized image of a compatible Windows system, the CD image must already exist on the RIS server. The system is ready to upload the image to the RIS server. To perform this task, use a utility called Riprep.exe. This file is located in the RemoteInstallAdminI386 folder on the RIS server. After you locate the file, copy it down to the machine you are imaging as follows:
Log on to the system you are imaging and run the Riprep.exe utility.
When Riprep opens, click Next in the Welcome screen.
On the next page, specify the hostname or DNS name of the RIS imaging server and click next. On the next page, specify the folder to copy the image to and then click Next.
Type in a Friendly Description and any Help Text (optional) and then click Next.
Stop any services listed in the following window by clicking Next. If any errors occur, review the riprep.log for details.
Review the Settings summary screen and then click Next and Next again to continue.
After the Riprep process is complete, click Finish.
When the SysPrep process is complete, the system is ready to upload the image to the RIS server. To perform this task, use a utility called Riprep.exe. This file is located in the RemoteInstallAdminI386 folder on the RIS server. After you locate the file, copy it down to the machine you are imaging as follows:
When Windows XP is to be deployed unattended or fully automated, you can use the Setup Manager utility to help automate the installation. To create an image using the unattended installation process, follow these steps:
Log on to the Windows XP Professional workstation using an account with Administrator access.
To find setupmgr.exe, insert the Windows XP CD, browse to the support folder, and locate the Deploy.CAB file. Extract all the files, one of which is setupmgr.exe. Then double-click the setupmgr.exe utility to start the process.
When setupmgr.exe opens, click Next on the welcome screen.
Select the option to create a new answer file and click Next to continue.
Select the option to create a Windows unattended installation and click Next.
Choose the correct operating system in the Platform section and click Next.
Choose the user interaction level, which asks how much the user will be able to configure during the installation. For most deployments, choose Provide Defaults or Hide Pages Often. These options either show all the installation settings but the values that are already populated, or installation pages that are completely configured are hidden from the system installation process.
Click Next to continue and then click Next again to create a new distribution folder.
On the next page, you specify whether the installation files will be copied from CD or from the network. Select the appropriate location and click Next when ready.
Select the local path indicating where to store the installation files and what the share name will be. Click Next to continue.
On the following screens, answer the appropriate installation questions and click Next until you have answered or skipped all the settings.
After you’ve either skipped or configured all the settings, click Finish.
On the next window, specify the location of unattend.txt, which will be used to transfer the information you just copied when an installation is started.
Click OK to save unattend.txt and copy the files to the specified storage location.
Note
You prepare a system for imaging Windows XP with third-party image software the same as you prepare a system using sysprep.exe. You can simply configure the system as you want it and run the sysprep.exe tool to prepare the system for imaging. If you need to create the image to save a user’s desktop system to an image, skipping sysprep.exe is the right thing to do.
When it comes to updating installation media, administrators sometimes choose not to update the CD or the I386 directory on the servers. This can become an issue when a restore is necessary because a lack of core installation files can prevent the successful installation of new server components or add-ins to the server. If your organization has the Windows media copied to an I386 subdirectory on the server and you perform a service pack update, make sure to slipstream the service pack’s latest file updates to the I386 subdirectory on the system so that the server-stored files are the same as the versions of the files loaded on the system. Service packs can be run with an -S switch, which slipstreams the necessary updated files to the server. Hotfixes cannot be updated on the installation media, so you can wait until the machine is installed and send the hotfixes down the wire.
Whether you create images using RIS or third-party imaging products, when post-installation procedures begin to be excessive or time-consuming, it may be time to update existing stored images. When Microsoft provides operating system service packs, it incorporates most of the fixes within the new service packs. During service pack installation, these previous fixes may be uninstalled automatically or the files may simply be overwritten. When this happens, it is possible to have both the service pack and all the original post service pack releases in the Add/Remove Programs listing. In the end, you can simplify troubleshooting operating system issues if only the original operating system installation and the well-tested service pack are installed.
The same principle should be followed when desktop applications have major release updates. A new image should be created with the latest patched applications to deliver the most reliable desktops.
To know when to update desktop images, follow these few simple rules:
Update images when the operating system has a new major release such as a service pack or if a new version is available.
Update images when desktop application software vendors release a major upgrade or software revision.
Update images when post-deployment tasks that can be automated extend the time necessary to complete desktop deployment.
Update images when hardware platforms change enough to require manual driver installations.
Following these few simple rules will help you manage desktop images to reduce administrative overhead.
When imaged desktops undergo a configuration change, make sure to update the image that will be used on all future system configuration builds. As administrator, you can manually install these updates on the workstations using local console or remote console software such as Windows XP Remote Desktop. You can also automate the updates by using scripts that leverage command-line installation options or by creating Microsoft installer packages and deploying the application using Group Policy.
Microsoft provides several ways for administrators to deploy a new platform service pack to the enterprise. The service pack can be installed manually using either local or remote control software. Also, because service packs come with an MSI package, the service pack can be deployed using Group Policies. Lastly, service packs can be run from a command prompt with special switches to make the installation run silently, without prompts or notifications, if necessary.
Hotfixes can be installed manually and individually, but they usually do not provide many more deployment options. Hotfixes can be deployed to the enterprise using the built-in command-line switches called from within computer startup or shutdown scripts in Group Policy. To simplify the installation of several Microsoft hotfixes and/or security updates, you can use a tool called Qchains.exe to install all the updates at one time to reduce the number of required reboots.
Auto Update has an option to let the server automatically locate, download, and install the latest operating system updates for a system. If the IT staff members want a more automated approach to IT management, they may choose to enable Auto Update so that it can automatically manage updates to the systems on the network. This is good for organizations to ensure that security updates are installed on all workstations.
The one issue with Auto Update is that if a security patch causes more problems on the system, it may need to be rolled back on several workstations. As a best practice, updates should be reviewed and tested before an automatic installation is performed on multiple systems. Install and test Auto Update on a single workstation to download updates and test the configuration to make sure it successfully accepted the updates. When testing is completed and the results are successful, the updates can be deployed manually, scripted using command-line switches, or packaged into Microsoft Installer software packages deployed using Group Policy.
Software Update Services (SUS) is a server option on Windows Server 2003 that enables organizations to control which updates are automatically downloaded and installed on the client workstation. SUS runs on a Windows Server 2003 (or Windows 2000) machine that is running Internet Information Services. Clients connect to a central intranet SUS server for all their security patches and updates.
SUS is not considered a replacement technology for existing software deployment solutions such as Systems Management Server (SMS) because it is limited to providing only operating system updates, not service packs or other software packages. SUS allows organizations to take control over the deployment of security patches as they become available. To learn more about SUS, refer to Chapter 12, “Server-Level Security.”
When managing desktops is the task at hand, finding a way to deploy the operating system and keep it up to date is just part of the necessary administration. Another equally important aspect of desktop management is managing the applications installed on the client workstations.
There are three main aspects of desktop application management: installing or deploying the application, configuring it, and updating it. Windows Server 2003 provides a few different ways to perform these tasks, and the IT staff can use the tools and services available on the Windows XP desktops and the software installation services offered in Group Policy to perform application management tasks on a per-workstation basis, or the tasks can be scaled up to manage the applications for a particular group of users or computers. The following list describes how Windows XP and Active Directory can be used to manage applications:
Application installation—. Applications can be installed on desktops using the software installation services provided in Active Directory Group Policy. Other methods include deploying the application using computer startup/shutdown scripts or user logon/logoff scripts. Lastly, applications can be installed manually either by visiting the workstation and using the local console or using remote control software such as Remote Desktop on Windows XP and Windows Server 2003 systems.
Application configuration—. Depending on the application that needs to be managed, Group Policy templates can be used to configure it. Most built-in Windows services and applications can be configured using Group Policy. For the rest of the application, per-system or even per-user configuration can be set using Group Policy to deploy new Registry keys or update existing Registry key values to provide the configuration. Also, user login scripts can be used to configure application settings.
Application updating—. Application updates can be installed using Group Policy or can be installed manually. Many software vendors provide several ways to deploy application updates using the tools available in Windows and Active Directory or using custom application management utilities. Refer to the release notes and readme files of your particular application to determine how it can be managed.
You can manage applications rather easily using Group Policy if you use the right tools. Applications can be deployed using the software installation services function of an Active Directory Group Policy. Applications can also be deployed from a command prompt using a computer or user-based script.
Deploying applications using the software installation services of Group Policy requires that the applications are packaged using a Windows Installer Package file (*.MSI). When you’re deploying applications to users, the package can be assigned to a user or the pack can be published. When you’re deploying applications to computers, the application can only be assigned, not published.
Assigned applications are installed automatically when the policy is applied to the computer or user. For users, published applications are listed in the Control Panel’s Add/Remove Programs applet. If an application is published to a user, she need only open the Add/Remove Programs applet and double-click the application for it to be automatically installed. Depending on how the administrator configures the application when defining the application deployment properties in Group Policy, the application can be deployed using elevated privileges and can be customized using Transform files, which are used to specify installation criteria normally answered during a manual installation.
The next example is creating a software installation package to publish the Windows 2003 Administration pack to all users in the Help Desk Security group in the domain. To do so, follow these steps:
Log on to a server with the Windows Server 2003 Administrative tools installed. Log in with an account that has the rights to upload files to a specific share folder and also has the rights to update the necessary Group Policy Object.
Insert the Windows Server 2003 media and browse the media until you locate the AdminPak.MSI file in the I386 directory.
Copy the Adminpak.MSI file to the network share location from where the installation will be pushed down. For this example, use \Server7software.
Choose Start, All Programs, Administrative Tools, Active Directory Users and Computers. If you cannot locate the correct console, open MMC.exe from the Start menu’s Run prompt and add the snap-in as necessary.
Select the domain, right-click it, and select Properties.
Select the Group Policy tab and then select the correct policy from the list. Because the domain policy does not apply to the Administrators group, best practice is to create a separate policy for settings that will apply to administrators who have other group memberships.
Click the Properties button to open the Group Policy property pages.
Select the Security tab and click Add. Type in the name of the Help Desk group and click OK.
Select the Help Desk group from the security list and click the Allow button for the Apply Policy permission.
Click OK to update the policy security.
Back in the domain’s Group Policy property page, select the policy and click the Edit button to open it.
In the policy, expand the Computer Configuration section and select Software Settings.
Expand Software Settings, right-click the Software Installation icon, and select New Package.
Browse to the location of the MSI file, select it, and click Open.
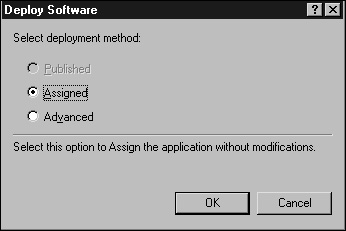
Because this package is being applied to Computer Configuration, select either the Assigned or Advanced option, as shown in Figure 28.4. If you choose the Assigned option, you can modify the Advanced properties later by selecting the package and changing settings on the package’s property pages.
For you to be able to use Group Policy software installation services, the application must be available for installation in a Windows Installer Package file. Many software vendors provide an installer file with the software, but for legacy applications the administrator must create the package file. Several third-party application packaging products are available. To find a list of packaging software, perform an Internet search and look for “MSI packager” or “Windows installer packager.”
When legacy applications cannot be packaged or when a particular application just needs to be installed on a handful of workstations, it may make the most sense to deploy these applications manually. Windows Server 2003 and Windows XP provide several ways for this task to be accomplished. As always, the administrator can install the application from the local system console, but that, of course, requires a visit to the workstation. To access the local console remotely to install applications, the administrator could use Remote Desktop to perform the operation individually or Remote Assistance if the connection is authorized by the end user.
To install applications remotely using Remote Desktop, the administrator needs to have Administrator group membership on the system. When the connection is made to an XP workstation, the logged-on user is logged out, so this option should be used only if the end user is notified beforehand so that he can save his data. To connect to an XP workstation using Remote Desktop, you simply open the remote desktop connection from the All Programs, Accessories, Communication menu, type in the fully qualified system name of the computer, and click Connect.
Using Remote Assistance, an administrator can aid an end user who needs to install software on her workstation but does not have the necessary rights. For example, the end user may need to install PDA software on her workstation. When this is the case, she can request remote assistance from the administrator. When the administrator connects, if the proper Remote Assistance settings are configured either in Group Policy or on the local workstation, he can take control of the console. The administrator can then open the Add/Remove Program applet from the Control Panel using the Run As option to specify an account with administrative privileges, which he can then use to install the software without requiring the user to log off.
For administrative tasks to be performed on a workstation, such as installing new hardware or configuring user profile settings that are not configured using Group Policy settings, administrators can use the tools provided with Windows Server 2003 and Windows XP. Remote Desktop can be used not only to install software remotely, but also to configure just about everything that could be performed from the local console. The only limitation is that the BIOS settings cannot be controlled. Consequently, if a remote reboot is performed, and the BIOS is configured to first boot from a floppy disk, the system may never restart if a disk is in the drive. In this case, a visit to the workstation will be required.
Starting with Windows Server 2003 and Windows XP, the Computer Management console can be used to perform several system-related software and hardware tasks remotely. New features include adding new hardware by scanning for hardware changes, adding local user accounts and local shares, and manipulating system services. This tool is very flexible for remote administration.
A significant add-on to Windows 2003 for client system administrators is the Remote Control Add-on for Active Directory Users and Computers. This tool provides an administrator the capability to right-click on a computer account in the Active Directory MMC and choose to remotely administer the system. The tool effectively launches a Terminal Services/Remote Desktop connection to the system.
The Remote Control Add-on for Active Directory Users and Computers is freely downloadable to all network administrators with legal licenses to Windows 2003. The add-on is available at http://www.microsoft.com/windowsserver2003/downloads/featurepacks/default.mspx.
Another tool that provides remote control access to client systems and servers is the Remote Desktop Connection tool that comes with Windows 2003 server and Windows XP workstations, or is free to download. Unlike the Remote Control Add-on for Active Directory Users and Computers, which requires launching the Active Directory Users and Computers MMC, the Remote Desktop Connection tool can be launched independently.
Once launched, a network administrator can remotely access and control any desktop or server that has Remote Desktop or Terminal Services enabled.
The Remote Desktop Connection for Windows 2003 is free to download for all network administrators with legal licenses to Windows 2003. The add-on is available at http://www.microsoft.com/windowsserver2003/downloads/featurepacks/default.mspx.
When it comes to desktop management in a Windows Server 2003 Active Directory environment, Microsoft has provided several administrative tools and options to simplify and scale these tasks. Using the Windows Server 2003 tools, along with the services included with a workstation platform such as Windows XP, gives administrators several options for desktop management that can completely remove the need to physically visit a workstation for anything other than deploying the initial workstation image.
Install Remote Installation Services images on separate physical disks than the operating system to improve imaging performance.
Make sure that the operating system is installed and patched to the latest service pack and post service pack release when creating desktop images.
Use Sysprep before imaging an existing workstation.
Select the MiniSetup and Reseal options only on machines built to be used as a template image system.
Update images when the operating system has a new major release such as a service pack or if a new version is available.
Update images when desktop application software vendors release a major upgrade or software revision.
Update images when post-deployment tasks that can be automated extend the time necessary to complete desktop deployment.
Update images when hardware platforms change enough to require manual driver installations.
Use Qchains.exe to simplify the installation of several Microsoft hotfixes and/or security updates and install all the updates at one time to reduce the number of required reboots.
Review and test updates before performing an automatic installation on multiple systems.