
Just visiting some Web sites, you will find it hard not to notice the option to use .NET Passports. .NET Passports allow organizations to service individuals, groups, and even entire companies online to provide event-driven information or store other personalized information. After a user creates a .NET Passport account, she needs to remember only her .NET Passport name (for example, her email address) and password to access multiple Web sites including commerce sites that use .NET Passport services. This feature provides single sign-in (SSI) functionality for users to access multiple Web sites, but it can also be extended to an organization’s intranet, Web-based mail system, and more.
.NET Passports are protected by encryption and strict privacy policies. A user can permit some or all of this information he provides to be sent to a particular Web site. For instance, a user signs onto a Web site using his .NET Passport. The user can then opt to provide additional information because this particular Web site is an e-commerce site that he trusts.
The .NET Passport SSI option enables organizations to provide consumers with an easy and secure way to sign in and make transactions on a Web site. Microsoft also has developed .NET Passport for Kids, which helps a Web site comply with the Children’s Online Privacy Protection Act (COPPA) standards. COPPA requires that operators of online services or Web sites obtain parental consent prior to the collection, use, disclosure, or display of children’s personal information.
Using passports on your own site or for a personal account provides numerous benefits. .NET Passport is designed for both consumers and businesses alike, and some of its many benefits are as follows:
.NET Passport provides convenient and quicker authentication service.
SSI keeps users from having to remember different usernames and passwords for different sites they visit.
.NET Passport allows users to easily connect to sites from various devices including, but not limited to, cell phones and Pocket PCs.
.NET Passport allows businesses to easily recognize customers and personalize their experience.
.NET Passport is versatile, allowing you to apply it to various access methods, including Active Directory and Web-based applications such as Outlook Web Access (OWA).
Organizations requiring tighter security can use a secondary layer of security (such as a four-digit personal identification number, or PIN, to accompany a password). The PIN cannot be stored on the local computer or the organization hosting .NET Passport services.
The .NET Passport service is one of many .NET services that Microsoft provides. As with any service that you want to add to your existing infrastructure, you will want to thoroughly test .NET Passports in a lab environment prior to implementing the service in a live production environment.
Because .NET Passports contain information about users, the information must be protected to ensure privacy and confidentiality. As a result, before you use the .NET Passport service, you must meet various Microsoft prerequisites to keep .NET Passport legitimate throughout the Internet. The following process is required before you implement .NET Passports on your site:
Create a passport account on Microsoft’s .NET Passport Web site (http://www.passport.com).
Review and adhere to the .NET Passport Privacy Policy located at http://www.passport.net/Consumer/PrivacyPolicy.asp and the Microsoft Statement of Policy at http://www.microsoft.com/info/privacy.htm. If you are planning to use .NET Passport for Kids, it is important to also review and adhere to the .NET Passport Kids Privacy Statement (http://www.passport.net/Consumer/KidsPrivacyPolicy.asp?lc=1033).
Obtain a Preproduction (PREP) ID to begin testing .NET Passport on your site. As mentioned earlier, you should always test this functionality before putting it into production.
When you’re developing a Web site with .NET Passport in the PREP environment (and in a live production environment), you must display your privacy policy. This policy should conform to Microsoft’s policies.
Prior to your site going live with .NET Passport, you must sign a contract.
After a site is issued a Site ID, an encryption key is sent to the site. The key is a shared secret between the site and the .NET Passport system (that is, the login server). This allows users to be authenticated and, equally important, it allows the site to obtain user authentication information.
Caution
Although rare, in some cases, upgrading from Microsoft .NET Passport Software Development Kit (SDK) version 2.1 to the Windows Server 2003 version of .NET Passport could potentially downgrade .NET Passport functionality. To minimize any possible effects from an upgrade, run IIS in 6.0 mode rather than IIS 5.0 compatibility mode. Whenever possible, perform a clean install of the Windows Server 2003 version of .NET Passport.
A PREP ID allows an organization to use .NET Passport on a test site before going live. Without the PREP ID, sites could not test the .NET Passport authentication. This PREP ID is for testing use only, so a live Site ID is required to be able to use the .NET Passport site in production.
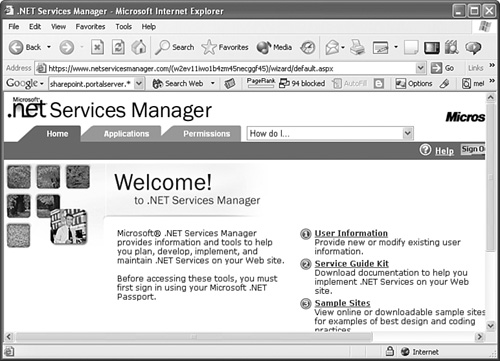
To obtain a PREP ID, go to the Microsoft .NET Services Manager Web site located at https://www.netservicesmanager.com, as shown in Figure 14.1.
At this point, you’re given the option to
Create a .NET Passport application for the development/test environment
Download information on how to implement various .NET Services
View sample sites
Obtain business-related information
Create and manage an application
To begin the registration process for obtaining a .NET Passport PREP ID, do the following:
Click the Create and Manage an Application link. If you haven’t signed in with a .NET Passport account, you’ll be directed to either log on or create a new .NET Passport account. Refer to “Working with .NET Passport Accounts” later in this chapter for information on creating a .NET Passport account.
After reading the terms and agreement, click the Accept Terms button to continue. This brings you to the User Information page, which asks for your contact information. You’ll also choose which notifications you want to receive.
On the Create and Manage an Application page, click Create Application.
On the Create Preproduction Application page, type in the name of the application and then click the Submit button.
Click the Add Service button and select the type of passport service(s) for your development/test site. You can choose from .NET Passport, Kids Passport with SSI, or Microsoft Alerts. Click the Next button when done to advance to the registration pages.
Depending on which selection you made, you have to fill out different registration information. In this example, the Web site features the .NET Passport option. On the General .NET Passport Information page, enter the appropriate information in the dialog boxes. The boldface areas such as Web Site Title, Domain Name, Default Return URL, and Privacy Policy Location are required information. When you’re finished, click the Next button so you can begin providing co-branding information.
Enter the appropriate co-branding information. The minimum required information is the co-branding image. Click Next to provide other .NET Passport-related information, such as registration return pages, and disable copyright, as shown in Figure 14.2.
On the next Web page, enter the .NET Passport SSI information. The Expire Cookie URL information is required. This is the location of the page that will delete all the cookies set by .NET Passport for the site.
If you selected Kids Passport, as in this example, enter the account removal and data URLs as well as the type of consent needed (limited or full consent).
Click the Submit button when done. The next screen provides the .NET Passport information for your site. The page displays the Site ID (for the preproduction environment), last modification date, status, and compliance rating.

Administrators must use the Passport Manager Administration utility, shown in Figure 14.3, to install and configure .NET Passports. This utility should be run after receiving the PREP ID.
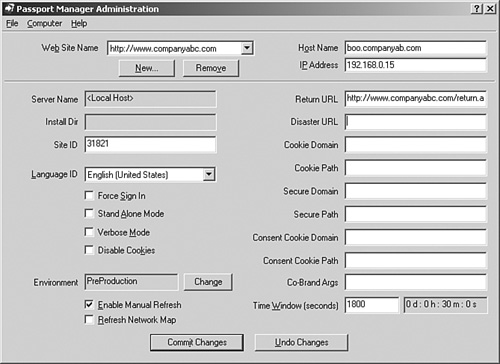
In previous versions of .NET Passport, the Passport Manager Administration utility was provided in the SDK, which also includes several tools and documentation to make implementing .NET Passports much easier. In Windows Server 2003, the Passport Manager Administration utility is bundled within the operating system.
To begin using the Passport Manager Administration utility, do the following:
For organizations with multiple servers, you can save the Passport Manager Administration utility configuration to a file that can be exported to another server. Select Save As from the File menu to save a Passport Configuration File (*.ppi).
For your site to acquire user authentication information from the .NET Passport system for use on the participating site, you must first download an encryption key. The encryption key gives a site authorization to receive user authentication information from the .NET Passport system.
To download an encryption key, do the following:
Go to the Microsoft .NET Services Manager Web site and sign in using .NET Passport.
Click the Applications tab and then click Manage Applications.
Select the application that you created earlier and then click the Next button.
Click the Download Key option, and then click the Request Key button. Microsoft then sends you an email containing the link to use to obtain the key.
On the Create Your Security Key page, shown in Figure 14.4, type in a four-digit or character security key twice and provide answers to the three questions of your choosing. It is important to remember your answers for the second part of obtaining your key. Click Continue when done.
Answer the three questions that you just provided answers for and then click Continue.
On the Security Key Sign-in page, enter the four-digit or character security key and click the Sign In button.
Scroll down the Download Key page and then select the operating system and Web server you plan to use.
Click the Download Key button. When prompted for the file download, click Save.

Microsoft provides the step-by-step directions for installing the encryption key on the Download Key page. However, for convenience, the directions are described here. The following directions assume that you have already set the correct PREP or Site ID and have downloaded the encryption key to the Web server:
Choose Start, Programs, Administrative Tools and open the Services snap-in. Then choose to stop the IISAdmin service. This will stop all other IIS-related services.
Choose Start, Run, and open the command prompt by typing
cmd.exe. Then go to the location where you downloaded the encryption key.Type
partner####_#.exe /addkey, where # is the PREP or Site ID.Type
partner####_#.exe /makecurrent /t 0.Restart the IISAdmin service and other IIS-related services that were stopped (for example, the World Wide Web Publishing service).
After thoroughly testing .NET Passport in a lab environment, you need to submit a request to obtain a .NET Services agreement. This agreement should be signed before you introduce the .NET Passport service in a production environment. You can make the request by sending email to [email protected]. It is better to request this agreement well in advance to prevent any possible interruption in service.
The .NET Passport application that you created on Microsoft’s .NET Services Manager Web site must also be submitted with compliance criteria before obtaining the production Site ID and encryption key. Note that you cannot use the PREP ID and encryption key from the development/testing environment.
To submit compliance criteria, perform the following steps:
Go to the Microsoft .NET Services Manager Web site and sign in using .NET Passport.
Click the Applications tab and then click Manage Applications.
Select the application you created earlier and then click the Next button.
Click Submit Compliance to roll your application into production.
Review the information on the Web page and then click Go to Manage Agreements.
At this stage, you can either request a Microsoft Services Agreement or request an Agreement Association. The first option is for those organizations that do not already have a signed Microsoft Services Agreement. After you have a signed agreement, however, you can choose the Request Agreement Association option to then be able to submit your application for compliance review.
.NET Passport accounts allow users to minimize the number of account IDs and passwords that they must remember. .NET Passport for Kids is a feature of .NET Passport SSI that allows parents to control how children’s profile information is collected, used, and shared on the Internet.
If an organization’s Web site already has an authentication mechanism, you must consider whether to convert any existing accounts or have .NET Passport co-exist with the current authentication. Lack of proper planning and design for this issue can significantly impact existing users or customers.
When a site wants to use .NET Passport as its primary authorization mechanism, it must convert its accounts to this service. All users log in to the site as they normally would and then are required to register for a .NET Passport and associate their current information with .NET Passport. Anytime thereafter, the users would use only their .NET Passport accounts.
Some sites may elect to keep current account information active, whereas new users or customers are required to use a .NET Passport account. Another alternative is to give users the option to either use .NET Passport or create a standard account.
Note
If sites use multiple authentication mechanisms and therefore two separate directories of information, the amount of administration and maintenance involved can increase substantially.
Alternatively, sites can introduce .NET Passport to users gradually. This approach allows coexistence but allows the sites to move forward with .NET Passport.
Users can create a .NET Passport account using one of four methods:
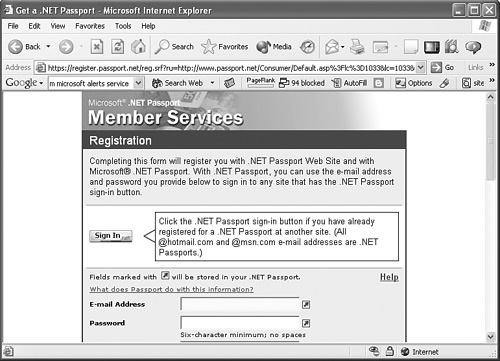
By registering at the .NET Passport registration page (http://www.passport.com), as shown in Figure 14.5
By registering at a participating site, which automatically redirects users to a Microsoft-hosted (and possibly co-branded) .NET Passport registration page
By registering for an email account on MSN Hotmail (http://www.hotmail.com) or through the MSN Internet Access ISP service, which automatically registers users for the .NET Passport SSI service
By registering using the Microsoft Windows XP .NET Passport Registration Wizard
Note
Signing up for a .NET Passport does not require a valid email address. Users can enter any email address in the form of someone@domain.com. Also, the password has a minimum required length of six characters.
There are only two required fields to create a .NET Passport: an email address and a password. However, participating sites may optionally choose to require additional fields, such as the following:
Accessibility Needs
Country/Region
Date of Birth
First and Last Name
Gender
Postal Code
State
Time Zone
Occupation
.NET Passport is not just about providing authentication to Web sites. Because it’s an integral part of Windows .NET and the Windows Server 2003 operating system, one of the purposes of .NET Passport is to integrate with other computers, devices, and services to deliver a much richer solution for users. This integration allows .NET Passport to seamlessly work with other Web-based services and applications.
An example of .NET Passport integrating with Web-based services and applications is using .NET Passport with Outlook Web Access (OWA). OWA is a feature of Microsoft Exchange that operates as an HTTP virtual server to provide feature-rich Outlook mail client functionality through the Web. Because OWA relies on IIS, simply changing the authentication mechanism to .NET Passport allows .NET Passport to be used instead of Basic Authentication.
.NET Passport supports Windows Pocket PC 2002 Phone Edition or higher and cell phones using Microsoft Mobile Explorer (MME) in HTML, i-mode, Wireless Access Protocol (WAP), or Handheld Device Markup Language (HDML). Some features are not supported due to screen size, screen resolution, and input mechanisms. Mobile devices do have access to
Registration
SSI
.NET Passport for Kids (except the consent process)
Sign out
Some sites may want or require extra security measures to be put into place to further protect account information. .NET Passport can be used with Secure Sockets Layer (SSL), which encrypts Web-related traffic between the client and the site. This protects against a hacker capturing and deciphering traffic between the user and the site.
Another security mechanism that can be utilized is to require users to enter a separate credential before signing in with their email addresses and passwords. This additional security mechanism is a security key and is similar to a personal identification number (PIN) that you use at an ATM.
When a user attempts to sign into a participating site that requires a security key, he will be directed to the .NET Passport registration page. The user will need to enter a four-character security key and then select and answer a minimum of three questions. These questions, called secret questions, will help to validate the user in case the user forgets the secret key. The secret key cannot be set to log on automatically, nor can it be stored on the user’s computer.
.NET Passport authentication begins when a user requests or is directed to the .NET Passport sign-in page. The user’s email address and password are verified against an entry in the .NET Passport database. After the user is authenticated, the .NET Passport PUID and .NET Passport profile information for that user are loaded.
The .NET Passport PUID and profile are used to create the following .NET Passport cookies:
As described earlier, in “Installing and Configuring .NET Passports,” a site must register itself, adhere to Microsoft’s privacy policies, and more before being able to obtain a .NET Passport user’s authentication information. It is important to note that a user’s email address and password are not shared with a participating site. A site receives user authentication information from the .NET Passport system using the encryption key provided by Microsoft. The encryption key is also used to encrypt the ticket and profile cookies and then returns the information to the return URL provided in the authentication request. Internet Explorer (IE) on the client machine then creates the three .NET Passport cookies.
At this point, the browser redirects the user to the participating site and the Ticket and Profile cookies are sent to the participating site. The participating site’s Passport Manager Administration utility manages cookie information, and the participating site can store or upgrade user information.
Any time a user signs out or the browser is closed, the .NET Passport system runs a script to delete all three temporary cookies from the participating site. This prevents others from using the cookies and potentially compromising security. If the user does not sign out or close the browser, the .NET Passport cookies will expire after a specified period of time controlled by the .NET Passport system or the participating site.
Although the .NET Passport system authenticates users, participating sites can use the encrypted .NET Passport Ticket and Profile data to generate the site’s own cookies in its own domain for that user. These newly created cookies are placed on the user’s machine and can be used only on the specific participating site. Participating sites can use this feature to personalize the user’s experience while visiting their sites. For example, a user’s profile and preferences can be stored on her machine so that the next time she connects to the participating site, the Web site’s content is personalized for that particular user.
As mentioned earlier, a secure channel can be established when a user connects to the .NET Passport sign-in page. When the connection is established using SSL, a user can sign in securely.
.NET Passport supports either Windows Server 2003 version of SSL or a third-party SSL certificate provider. The version of SSL bundled within Windows Server 2003 is a more efficient and faster implementation than previous versions of SSL. However, SSL is a processor-intensive process that can impede performance for higher-capacity Web sites. For this reason, you should consider using high-performance network interface cards (NICs) that also have the capability to offload SSL processing from the system processor(s). Doing so can significantly boost Web site response and performance.
Most users may not even be aware of the fact that SSL is being used to provide a secure communications channel by encrypting traffic between the users’ machines and the participating Web sites. SSL implementation is transparent, and it does not affect how users sign into the site.
.NET Passport services have been scrutinized, especially in terms of privacy, confidentiality, and security. Many safeguards have been put into place to ensure that none of these aspects are compromised. The safeguards examined so far are primarily technical in nature, but Microsoft has also committed to ensuring adequate safety measures and policies are in place as well.
Microsoft has many policies that must be adhered to before .NET Passport can be implemented. These policies include
.NET Passport Privacy Statement—. To read this policy on how Microsoft protects personal information while using the .NET Passport Web site and the .NET Passport Service at participating sites, go to http://www.passport.net/Consumer/_PrivacyPolicy.asp.
Microsoft.com Statement of Policy—. This set of policies is documented at http://_www.microsoft.com/info/privacy.htm. It states Microsoft’s blanket privacy policy in terms of how personal information is collected, used, controlled, stored, accessed, and secured.
.NET Passport Kids Privacy Statement—. Located at http://www.passport.net/_Consumer/KidsPrivacyPolicy.asp?lc=1033, this privacy statement describes the policies of .NET Passport and how it relates to .NET Passport for Kids. It then details the parental consent process and how it can be used to protect children.
Microsoft has based .NET Passport policies on the Fair Information Practices (FIP) recognized by a number of industry and government organizations, including the Online Privacy Alliance, the U.S. Federal Trade Commission, the European Union Directorate General, and the majority of domestic and foreign privacy advocacy groups.
These policies are structured based on notice, consent, access, security, and remedy and enforcement. In other words, Microsoft’s corporate policy, not just .NET Passport policies, is intended to provide the utmost security, privacy, and user control over personal information.
Throughout this chapter, the three .NET Passport services have been mentioned but the concentration has been on .NET Passport SSI. In the following sections, the other two services will be examined.
.NET Passport for Kids is an extension of the .NET Passport SSI service, and it complies with COPPA standards and requirements for protecting children. It requires participating sites to obtain parental permission prior to collecting, using, disclosing, or displaying a child’s information. This service protects children under the age of 13 from Web sites’ typical routine personal information retrieval.
Parents can also control consent levels for .NET Passport–participating sites using the .NET Passport for Kids service. Table 14.1 describes the levels of consent available to parents.
Table 14.1. .NET Passport for Kids Consent Levels
Consent Level | Consent Description |
|---|---|
Deny | The site or service cannot collect personally identifiable information from the child. The trade-off for setting this option is that some sites may not allow children to use the site if this option is chosen. |
Limited | The site or service can collect, store, and use the information it collects from the child. However, this information cannot be disclosed. |
Full | The site or service can collect, store, and use the information it collects from the child, and it can also disclose the information to a third party (individual or company). |
.NET Passport for Kids checks the profile (date of birth and country fields) to determine whether the child is protected by COPPA. If so, .NET Passport for Kids then checks the profile to determine the level of consent granted. Based on this information, the child is either allowed to use a participating site, or a notification is displayed informing the child that consent is required.
The .NET Passport service is provided at no cost to end users. However, organizations that want to add .NET Passport functionality and services to their own Web site must sign a three-year, nonexclusive service agreement. This service agreement ensures that an organization adheres to the specific guidelines regarding privacy and that the service’s integrity is kept.
Although testing the .NET Passport implementation is not a requirement, it is highly recommended. If an organization wants to test using the .NET Passport service, the .NET service agreement does not have to be signed.
Note
To request a .NET Passport service agreement, send an email to [email protected] or visit http://www.microsoft.com/licensing/. You will need to provide your organization’s contact information.
Full details on licensing costs, guidelines to follow, and more for an organization’s site are provided in an email that Microsoft sends after receiving the request.
.NET Passport services offer a convenient, easy, and secure way to consolidate usernames and passwords. Although the initial release of .NET Passports extended only from e-commerce sites to individuals, Windows Server 2003 provides the ability to establish client-to-network .NET Passport communications. .NET Passports provide centralized profile storage and a tracking mechanism that can be used for single sign-on authentication to multiple network services. No longer do users need to log on to their Web email server, then log on to their corporate intranet server, and then log on separately to their LAN or WAN network. .NET Passports simplify logon authentication and provide a way for organizations to synchronize user logon access to multiple network resources from a single logon account.
Use Windows Server 2003 Passports to keep users from having to remember different usernames and passwords for different sites that they visit, including your own.
Use .NET Passport to personalize the customer’s experience.
Implement .NET Passport for Web-based applications such as Outlook Web Access (OWA).
If your organization requires tighter security, use a secondary layer of security (such as a four-digit PIN to accompany a password).
Review and adhere to the .NET Passport Privacy Policy located at http://www.passport.net/Consumer/PrivacyPolicy.asp and the Microsoft Statement of Policy at http://www.microsoft.com/info/privacy.htm.
If you are planning to use .NET Passport for Kids, be sure to review and adhere to the .NET Passport Kids Privacy Statement (http://www.passport.net/Consumer/_KidsPrivacyPolicy.asp?lc=1033).
Build Windows Server 2003 Passport functionality from scratch whenever possible instead of upgrading from earlier versions of .NET Passport. Convert existing accounts to Windows Server 2003 Passports.
Use SSL with .NET Passports to provide additional security.