Subsystem for Unix-Based Applications as a Component of Services for Unix
</objective> <objective> </objective> <objective> </objective> <objective> </objective> <objective>Connecting Windows and NetWare Environments with Services for NetWare
</objective> <objective> </objective> <objective> </objective> <objective> </objective> </feature>In the past, Microsoft had a bad reputation for giving the impression that its technologies would be the only ones deployed at organizations. The toolsets available to co-exist in cross-platform environments were often weak and were provided mostly as a direct means to migrate from those environments to Microsoft environments. The introduction of Windows Server 2003, however, coincides with the maturation of several new co-existence technologies from Microsoft that allow for tight integration of Microsoft technologies with Unix, Novell, Oracle, and many other environments.
This chapter focuses on three major products: Services for Unix (SFU) 3.5, Services for NetWare (SFNW) 5.03, Microsoft Identity Integration Server (MIIS) 2003, and Active Directory Federation Services. Each one of these products works in combination with Windows Server 2003 technologies to provide for the transparent exchange of information between non-Microsoft and Microsoft environments.
This chapter introduces each environment and describes the various functionality available in each product. In addition, this chapter focuses on the specific integration issues that each product brings to Windows Server 2003 and provides for a high-level understanding of the ways each product can be used to enhance a cross-platform environment.
Microsoft has a long history of not “playing well” with other technologies. With Windows 2003, Microsoft introduced Services for Unix 3.5. With the dawn of Windows Server 2003 R2, Services for Unix (SFU) becomes core to the operating system, showing Microsoft’s commitment to interoperability. SFU is now available on the installation CD instead of as a downloadable feature pack, and its integration with Server 2003 R2 is seamless for the first time.
For many years, Unix and Windows systems were viewed as separate, incompatible environments that were physically, technically, and ideologically different. Over the years, however, organizations found that supporting two completely separate topologies within their environments was inefficient and expensive; a great deal of redundant work was also required to maintain multiple sets of user accounts, passwords, environments, and so on.
Slowly, the means to interoperate between these environments was developed. At first, most of the interoperability tools were written to join Unix with Windows, as evidenced by Samba, a method allowing Linux/Unix platforms to access Windows NT file shares. Microsoft’s tools always seemed a step behind those available elsewhere. With the release of the new Services for Unix tools in Server 2003 R2 Microsoft leapfrogs traditional solutions, such as Samba, and becomes the leader for cross-platform integration.
Long-awaited functionality such as password synchronization, the capability to run Unix scripts on Windows, joint security credentials, and the like were presented as viable options and can be now be considered as part of a migration to or interoperability scenario with Windows Server 2003.
Services for Unix has made large strides in its development. From initial skepticism, the product has developed into a formidable integration and migration utility that allows for a great deal of inter-environment flexibility. The first versions of the software, 1.x and 2.x, were limited in many ways, however. Subsequent updates to the software vastly improved its capabilities and further integrated it with the core operating system.
A watershed development in the development of Services for Unix was the introduction of the 3.0 version of the software. This version enhanced support for Unix through the addition or enhancement of nearly all components. Included with version 3.0 was the Interix product as well, an extension to the POSIX infrastructure of Windows to support Unix scripting and applications natively on a Windows Server.
Then, version 3.5 of SFU WCS released, which included several functionality improvements over SFU 3.0. The following components and improvements have been made in the 3.5 release:
Finally, we come to the Server 2003 R2–integrated version of SFU. Besides being slip-streamed directly into the operating system, some functional changes have been made. Most importantly, the structure of SFU has changed considerably. Here is the structure of major improvements for the R2 SFU offering:
NIS and Active Directory integration with scripts for populating Active Directory from a NIS database
Extended NIS interoperability including allowing a Windows Server 2003 R2 system to act as a NIS master in a mixed environment
NFS server functionality expanded to Mac OS X and higher clients
Subsystem for Unix Applications (SUA) allows a POSIX-compliant Unix application to be run on Windows Server 2003 R2, including many common Unix tools and scripts
Easier porting of native Unix and Linux scripts to the SUA environment
Services for Unix is composed of several key components, each of which provides a specific integration task with different Unix environments. Any or all of these components can be used as part of Services for Unix as the installation of the suite can be customized, depending on an organization’s needs. The major components of SFU are as follows:
Subsystem for Unix-based Applications (SUA)
Client for NFS
Server for NFS
Telnet Server
Telnet Client
Server for NIS
Password Synchronization
NIS Domains
Each component can be installed separately or multiple components can be installed on a single server as necessary. All components are available from the Add/Remove Window Components Wizard in the Control Panel. Each component is described in more detail in the following sections.
Services for Unix R2 interoperates with various flavors of Unix, but was tested and specifically written for use with the following Unix iterations:
Sun Solaris 7.x, 8.x, 9.x, or 10
Red Hat Linux 8.0 and later
Hewlett-Packard HP-UX 11i
IBM AIX 5L 5.2
Apple Macintosh OS X
Note
SFU is not limited to these versions of Sun Solaris, Red Hat Linux, HP-UX, IBM AIX, and Mac OS X. It actually performs quite well in various other similar versions and implementations of Unix and Linux.
Services for Unix has some other important prerequisites and limitations that must be taken into account before considering it for use in an environment. These factors include the following:
Server for NIS must be installed on an Active Directory domain controller. In addition, all domain controllers in the domain must be running Server for NIS.
Password synchronization requires installation on domain controllers in each environment.
Server for NIS must not be subservient to a Unix NIS Server—it can only be subservient to another Windows-based SFU server. This requirement can be a politically sensitive one and should be broached carefully, as some Unix administrators will be hesitant to make the Windows-based NIS the primary NIS server.
The Server for NIS Authentication component must be installed on all domain controllers in the domain in which security credentials will be utilized.
The installation of Services for Unix for Windows Server 2003 R2 is as simple as adding another Windows component. From the Control Panel, go to Add/Remove programs, and then Add/Remove Windows Components. The various parts that make up SFU are all available in their appropriate areas.
Note
You will need your Windows 2003 R2 installation CD to add each of the Services for Unix components.
The installation of Services for Unix is straightforward and uses the familiar Microsoft Add/Remove Windows Components Installation Wizard. After the prerequisites have been satisfied and the desired functionality has been identified.
To install SFU R2, perform the following steps:
Click the Start menu, and select the Control Panel.
Choose Add/Remove Programs.
Choose Add/Remove Windows Components in the left column.
Select Subsystem for Unix-based Applications, and click Next.
You’ll be prompted for the location of the CD or another location for the requested files.
The setup will prompt you to download the Utilities and SDK for Unix-based Applications, as shown in Figure 8.1. Click Yes to download the package.
Click Next through the first few screens, and then accept the license agreement.
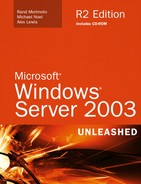
Enable setuid because this is an important function for many Unix applications. Also choose to set the default behavior to case sensitive if your Unix environment is case sensitive. These options are shown in Figure 8.2.
Click Finish for both screens, and the installation is complete. You will need to reboot for the components to become active.
To install the various Active Directory–related components, go to the Add/Remove Windows components menu.
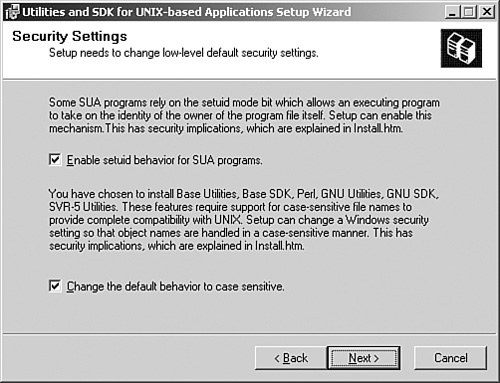
Select Active Directory Services, and then click Details. Select Identity Management for Unix (IDMU), and click Details again to drill down to the IDMU options. Select all three options for a full installation, as shown in Figure 8.3.
Click Next to begin the installation.
You will be prompted to locate the request files on the CD. After installation, click Finish to finish the installation. Finally, reboot for the components to become active.
To install the NFS components, again go to the Add/Remove Windows components menu.
The Microsoft Services for NFS are located under Other Network File and Print Services.
Select Details under Microsoft Services for NFS and choose the appropriate options for your installation (see Figure 8.4).


Note
The Utilities and SDK for Unix-based Applications is fairly large, approximately 180MB. You may download this package in advance to speed up the installation process. There are different packages for x86 and AMD architectures.
Once installed, the various functionalities can be tested in a lab environment or deployed into production.
Administrators familiar with the older versions of Services for Unix will notice one immediate change. Interix has been replaced with the Subsystem for Unix-based Applications. SUA is not an emulation product, and all applications and scripts run natively in the built-in POSIX subsystem of Windows Server 2003.
SUA fills the gap between development on Unix platforms and development in Windows. It was written to allow programmers familiar with Unix to continue to use the most familiar programming tools and scripts, such as grep, tar, cut, awk, vi, and many others. In addition, with limited reprogramming efforts, applications that run on Unix-based systems can be ported over to the Wintel platform, building on the low cost of ownership of Windows while retaining software investments from Unix.
SFU R2 further enhances the capabilities of the Unix subsystem. Performance increases for File I/O, pipe bandwidth, and overall response time have been noticeable, in some cases doubling in speed.
Administrators familiar with Unix environments will feel at home working with Interix as both the Korn and C shells are available, and both behave exactly as they would in Unix.
SFU also supports the single-rooted file system through these shells, which negates the need to convert scripts to support drive letters. The single-rooted file system allows for a great deal of functionality, allowing scripts written for Unix to more natively port over to a Windows environment.
SUA supports all common Unix tools and utilities, with all the familiar commands such as grep, man, env, pr, nice, ps, kill, and many others. Each tool was built to respond exactly the way it is expected to behave in Unix, as illustrated in Figure 8.5, and Interix users can build or import their own customizable tools using the same procedures that they would in a Unix environment.

Services for Unix R2 streamlines the sharing of information between Unix and Windows Server 2003, allowing users from both environments to seamlessly access data from each separate environment, without the need for specialized client software. Utilizing the Server for NFS and NFS Client allows for this level of functionality and provides for a more integrated environment.
Server for NFS acts as a Unix-standard NFS server. It provides disk space from any Windows-based computer on a network to NFS clients, translating their NFS requests to Windows SMB-based requests. No additional client software is necessary, and the Windows Server 2003 server acts and functions like a normal NFS-based Unix server for these clients. This is a great way to bring a standardized share format to a heterogeneous network as Unix and Apple have difficulties using CIFS.
The NFS Client component can be installed directly on Windows workstations to allow them to map to NFS exports on a network. The NFS servers can be viewed in the standard Windows Explorer, and no additional software is required on NFS servers. Windows authentication requests are sent to the NFS servers using the UID or GID of a user who is mapped using the User Name Mapping service in SFU. In addition, Unix NFS commands such as net and mount can be used directly from the client.
The goal of single sign-on, in which users on a network log in once and then have access to multiple resources and environments, is still a long way off. It is common for a regular user to maintain and use three or more separate usernames and associated sets of passwords. Services for Unix goes a long way toward making SSI a reality, however, with the User Name Mapping and Password Synchronization capabilities.
User Name Mapping allows specific user accounts in Windows Server 2003 Active Directory to be associated with corresponding Unix user accounts. In addition to mapping identically named user accounts, User Name Mapping allows for the association of user accounts with different names in each organization. This factor is particularly useful considering that Unix user accounts are case sensitive and Windows accounts are not.
User Name Mapping supports the capability to map multiple Windows user accounts to a single user account in Unix. This capability allows, for example, multiple administrators to map Windows Server 2003 Active Directory accounts with the Unix root administrator account.
Going hand in hand with the User Name Mapping service, Password Synchronization allows for those user accounts that have been mapped to automatically update their passwords between the two environments. This functionality, accessible from the IDMU MMC Console, as illustrated in Figure 8.6, allows users on either side to change their passwords and have the changes reflected on the mapped user accounts in the opposite platform.

As previously mentioned, Password Synchronization must be installed on all domain controllers on the Active Directory side because all the DCs must be able to understand the Unix password requests forwarded to them. In addition, Password Synchronization is only supported out of the box in the following Unix platforms:
Solaris 7, 8, and 9
Red Hat Linux 6.2, 7.0, and 8.0
HP-UX 11
All other flavors of Unix require a recompile of the platform, which is made easier by the inclusion of makefiles and SFU source code. SFU R2 also includes the encryption libraries, making it even easier to compile a customized solution.
For users who want their existing NIS servers to continue to provide authentication for Unix and Linux servers, the NIS Migration Wizard is not the best choice. A package of Korn shell scripts downloadable from Microsoft.com makes this process simple. The getusers.ksh script gets a list of all users in a NIS database, including the comment field. This script must be run with an account with the permission to run ypcat passwd. The makeusers.ksh script, which must be run by a user with domain admin privileges, imports these users to Active Directory. The -e flag enables accounts because by default the accounts are created in a disabled state. This is a perfect solution for migrations that require the existing NIS servers to remain intact indefinitely.
One of the main focuses of Services for Unix R2 was the ability to gain a better measure of centralized control over multiple environments. Tools such as an enhanced Telnet server and client, ActivePerl 5.6 for scripting, and a centralized MMC Admin console make the administration of the Services for Unix components easier than ever. Combined with the improved MMC 3.0 interface, it is easier than ever to manage mixed environments from the Windows platform.
Services for Unix uses two distinct and separate Telnet servers. The first, a Windows-based Telnet server, is essentially the same Telnet server that is included in Windows Server 2003 and Windows XP. The second Telnet server is controlled by the SFU inetd component, uses the SUA shell, and must be utilized separately from the Windows Telnet server. Each version of Telnet server supports NT LAN Manager (NTLM) authentication in addition to basic login that supports Unix users.
Microsoft has always been very good about offering utilities and services that migrate users off NetWare and onto the Windows network operating system (NOS). Interoperability with NetWare systems was not a high priority. Co-existence has become more streamlined since those days, however, with the development of the Gateway Services for NetWare (GSNW) and Services for NetWare (SFNW) utilities that make interoperability, as well as migration, more straightforward to accomplish.
Integration of a Windows environment with Novell network operating systems is simplified through the use of Gateway Services for NetWare, a robust integration product that allows Windows Server 2003 to integrate and share resources with Novell NetWare. GSNW provides for the following functional elements:
Windows Client access to file and print services on NetWare servers
NetWare Client service access to Windows file and print servers
Specific scenarios for GSNW include the following:
A Windows Server 2003 or Exchange server requires direct access to NetWare file or print services.
One circumstance in which this service would be required is the extraction of NetWare accounts from a server or the source extraction of accounts from a NetWare-hosted messaging system such as GroupWise.
A company is migrating desktop clients from a Novell-based network to a Microsoft Windows Server 2003 network.
The Microsoft-based clients that have been migrated over and no longer belong to the Novell network but require access to NetWare resources can access the NetWare resources through GSNW.
Services for NetWare (SFNW) 5.02 Service Pack 2 (SP2) provides companies with the tools to integrate or migrate Novell users and resources to Windows environments. SFNW provides the following tools:
The installation of SFNW is not without its caveats. First and foremost, MSDSS needs to be installed on a domain controller and the forest schema of Active Directory needs to be extended. Because forest schema changes are not to be taken lightly, this factor alone warrants consideration before the installation procedure. After the schema has been upgraded, the base program can be installed and the latest service pack applied. To install SFNW, perform the following steps:
Download or order SFNW 5.03 and run the MSSDS.MSI package from the media.
If the schema hasn’t been updated, a dialog box will appear indicating that the Schema Update Wizard will now start. Click OK to continue.
Click Next at the Welcome screen.
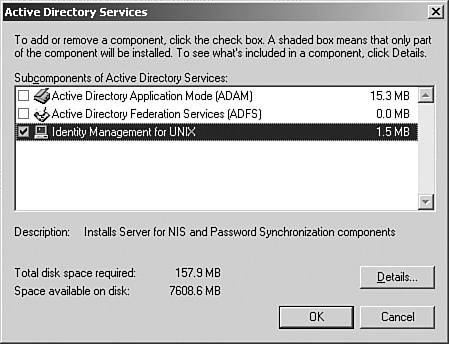
Setup will inform you that the AD schema will be extended, as illustrated in Figure 8.7. Click OK to extend the schema for MSDSS.
After the schema has been extended, click Finish.
At this point, make sure the schema extension gets replicated across the forest, either naturally or forcibly with the repadmin tool. After the schema extension has propagated, double-click on the msdss.msi package again.
Click Next at the Welcome screen.
Read the license, accept the terms, and click Next to continue.
Select Microsoft Directory Synchronization Services, as illustrated in Figure 8.8, and click Next to continue.
Enter the name and the organization and click Next.
Select Custom Install and click Next.
Select the desired options as illustrated in Figure 8.9 and click Next to continue.
After the installation completes, click Finish and then click Yes when prompted to reboot.


Services for NetWare is now installed and ready for configuration. The applications will be listed under the Administrative Tools menu, as illustrated in Figure 8.10.

File and Print Services for NetWare is a back-end service that allows a Windows server to emulate a NetWare File and Print Server. NetWare clients can connect to the file and printer shares as if they were connecting to a Novell server. Novell clients use the same user interface to access file and printer resources running on an FPNW server. Essentially, FPNW allows an FPNW server to spoof an existing NetWare server after it has been retired, allowing administrators the time to gradually migrate desktops over to the Windows environment.
Specific scenarios for FPNW include the following:
A company needs to retire an aging Novell 3.12 server without having to make any network configuration changes to the NetWare desktop clients. The Windows Server 2003 running FPNW would be configured with the same file and print services as the Novell 3.12 server.
A company is migrating from a Novell-based network to a Microsoft Windows Server 2003 network. During the migration, Novell-based clients that have not yet been migrated to the Windows Server 2003 network can access the file and print services that have already been migrated over to Windows Server 2003 through FPNW.
Microsoft Directory Synchronization Services (MSDSS) is a tool used for synchronization of directory information stored in the Active Directory and Novell Directory Services (NDS). MSDSS synchronizes directory information stored in Active Directory with all versions of NetWare; MSDSS supports a two-way synchronization with NDS and a one-way synchronization with Novell 3.x bindery services.
Because Active Directory does not support a container comparable to an NDS root organization and because Active Directory security differs from Novell, MSDSS, in migration mode only, creates a corresponding domain local security group in Active Directory for each NDS organizational unit (OU) and organization. MSDSS then maps each Novell OU or organization to the corresponding Active Directory domain local security group.
MSDSS provides a single point of administration. With a one-way synchronization, changes made to Active Directory will be propagated over to NDS during synchronization. Synchronization from Active Directory to NDS allows changes to object attributes, such as a user’s middle name or address, to be propagated. In two-way synchronization mode, changes from NDS to Active Directory require a full synchronization of the object (all attributes of the user object).
One of the key benefits to MSDSS is password synchronization. Passwords can be administered in Active Directory and the changes propagated over to NDS during synchronization. Password synchronization allows users access to Windows Server 2003 and NDS resources with the same logon credentials.
The MSDSS architecture is made up of the following three components. These components manage, map, read, and write changes that occur in Active Directory, NDS, and NetWare bindery services.
Session Manager—. The configuration of the synchronization parameters is handled by this component. For example, you could create separate sessions for different NDS containers that required different synchronization parameters.
Object Mapper—. Relates objects to each other (class, attributes, namespace, rights, and permissions) between the source and target directories.
DirSync Provider—. Changes to each directory are handled by a DirSync (read/write) provider. Light-weight Directory Access Protocol (LDAP) is used for Active Directory calls and NetWare NCP calls for NDS and NetWare binderies.
In addition to the core components of MSDSS, the session configuration settings (session database) are securely stored in Active Directory.
Specific scenarios for MSDSS would include the following:
A company is migrating directly from Novell to a Windows Server 2003 network. All network services such as DNS, DHCP, and IIS services are running on a single server. MSDSS can be used to migrate all users and files over to Windows Server 2003 after all services have been migrated.
A company is gradually migrating from Novell to a Windows Server 2003 network. The network services such as DNS, DHCP, and IIS are installed on multiple servers and sites. MSDSS can be used to migrate and synchronize AD and NDS directories during the migration.
The File Migration Utility is used to automatically manage the migration of files from NetWare file and print servers to Windows Server 2003 systems.
Integrated with MSDSS, FMU copies files while preserving the permissions and access control lists (ACLs) associated with each file. FMU copies the file permissions using a user-mapping file that matches an NDS user account with an Active Directory account. Through this mapping file created with MSDSS, files and the rights inherited or assigned in NetWare are calculated and maintained in the Windows network, preserving security and minimizing the time-consuming process of reassigning file rights and permissions. Without the mapping file, FMU will assign file permissions on all migrated files to the administrator.
Note
The File Migration Utility will directly map the effective rights of NetWare file folders and files to Windows based on the closest Windows security equivalent. Because NTFS Security does not exactly match with Novell Security, there are some approximations done in this process that should be understood.
In many of today’s business environments, it is common for many directories to be used to provide authentication for different environments or to provide enterprise-wide address books or contact information. To simplify data synchronization between different applications such as email, phone books, human resources databases, and payroll databases, an organization should use a metadirectory product such as Microsoft Identity Integration Server (MIIS) 2003.
MIIS is Microsoft’s metadirectory solution. A metadirectory can be considered a master directory that contains the most authoritative directory services data within an organization. In 1996, when the Burton Group (http://www.tbg.com) coined and defined the term, no products existed on the market. Since then, many companies have created their own version of a metadirectory, but each might have its own complicated setup and functionality.
The original version of Microsoft’s metadirectory solution was known as Microsoft Metadirectory Services (MMS). This version of the application was effective, but was extremely technical. Many components required customized scripting to function properly, and support for third-party products was minimal.
With the 3.0 release of the product came a change in branding, and Microsoft Identity Integration Server (MIIS) 2003 was born. MIIS introduced more of the metadirectory power that its predecessor possessed, and expanded on the capabilities by introducing built-in Management Agents to provide for synchronization to a wide variety of directories, as listed here:
Windows 2000/2003 Active Directory
Active Directory in Application Mode (ADAM)
Windows NT 4.0
Novell NDS and eDirectory
SunONE/iPlanet Directory
Lotus Notes and Domino
Microsoft Exchange 5.5
ERP
PeopleSoft
SAP
Microsoft SQL Server
Oracle
Informix
DSMLv2
Text files such as LDIF, CSV, delimited, fixed-width, and attribute value pairs
Other LDAP-compliant directories
One of the important new features of MIIS 2003 is the capability to allow users to reset their own passwords through a self-service Web page. This frees up a lot of help desk and security time formerly used to reset user passwords, as well as providing a more secure and private method of resetting the passwords.
Realizing the need for a “lite” version of MIIS, Microsoft made available the Identity Integration Feature Pack (IIFP), a free download from Microsoft that allows for metadirectory functionality between Active Directory, Exchange 2000/2003 Global Address List (GAL), and Active Directory in Application Mode (ADAM) forests. This version is as functional as MIIS, except for the fact that it only supports synchronization and provisioning between AD, and not to the other supported directories of MIIS. If you only need to synchronize between two or more AD forests, however, IIFP is perfect for the job. IIFP can be downloaded from one of the links on the MIIS Web site at Microsoft at http://www.microsoft.com/miis.
MIIS and the IIFP require the use of a back-end Microsoft SQL Server 2000 database. This database is used to store configuration information and the person-objects stored in the metaverse. The database can be located on a dedicated MIIS server, or it can be on an existing SQL Server box. All of the maintenance and administrative needs of any other SQL database exist for the MIIS databases as well.
Organizations that have many different directories and need to keep information synchronized between these directories need a metadirectory product such as MIIS. MIIS provides a single interface for administrators to access the different directories and to configure how the directories will synchronize and/or replicate with one another, through the metadirectory. Before discussing MIIS any further, an understanding of some key terms is required.
Management agent (MA)—. An MIIS management agent is a tool used to communicate with a specific type of directory. For example, an Active Directory management agent allows for MIIS to import or export data and perform tasks within Microsoft Active Directory.
Connected directory (CD)—. A connected directory is a directory that MIIS communicates with using a configured MA. An example of a connected directory could be a Microsoft Exchange 5.5 directory database.
Connector namespace (CS)—. The connector namespace is the replicated information and container hierarchy extracted from or destined to the respective connected directory.
Metaverse namespace (MV)—. The metaverse namespace is the authoritative directory data created from the information gathered from each of the respective connector namespaces.
Metadirectory—. Within MIIS, the metadirectory is made up of all the connector namespaces plus the authoritative metaverse namespace.
Attributes—. Attributes are the fields of information that are exported from or imported to directory entries. Common directory entry attributes are name, alias, email address, phone number, employee ID, or other information.
MIIS can be used for many tasks but is most commonly used for managing directory entry identity information. The intention here is to manage user accounts by synchronizing attributes such as login ID, first name, last name, telephone number, title, and department. For example, if a user named Jane Doe is promoted and her title is changed from manager to vice president, the title change could first be entered in the HR or Payroll databases, and through MIIS management agents, the change can be replicated to other directories within the organization. This ensures that when someone looks up the title attribute for Jane Doe, it is the same in all the directories synchronized with MIIS. This is a common and basic use of MIIS referred to as identity management. Other common uses of MIIS include account provisioning/deprovisioning, or the automatic centralized creation and deletion of user accounts and group management.
MIIS 2003 comes with many built-in management agents to simplify an MIIS implementation. These agents are used to configure how MIIS will communicate and interact with the connected directories when the agent is run. The type of management agent chosen depends on what type of directory is being connected.
When a management agent is first created, all the configuration of that agent can be performed during that instance. The elements that can be configured include which type of directory objects will be replicated to the connector namespace, which attributes will be replicated, directory entry join and projection rules, attribute flow rules between the connector namespace and the metaverse namespace, plus more. If a necessary configuration is unknown during the MA creation, it can be revisited and modified later.
After creating a management agent, run profiles must be created to define how the management agent will perform. Options include Full Import, Delta Import, Export Apply Rules, and Full Import and Re-Evaluate Rules. This allows MIIS administrators to give finer administrative privileges to run agents without compromising data integrity—for example, if only an import run profile was created. If you only have to import a profile, the management agent would import the desired directory objects and attributes from the connected directory to the respective connector namespace. The data in the connected directory would never be modified.
Installation of MIIS 2003 is straightforward because Service Pack 1 for MIIS eliminated the need to install MIIS on SQL Server 2000 Enterprise edition. Instead, it can be installed on either Standard or Enterprise Edition. To install, perform the following tasks:
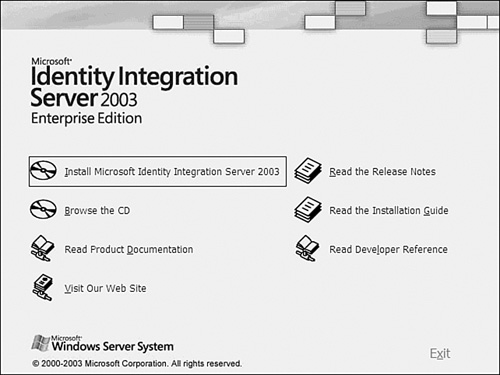
Insert the MIIS CD and launch the setup by clicking on Install Microsoft Identity Integration Server 2003, as illustrated in Figure 8.11.
At the Welcome screen, click Next to continue.
Read the license agreement and select I Agree. Click Next to continue.
Select Complete Installation and click Next to continue.
Indicate where the SQL Server is located. If it is local, accept the defaults as indicated in Figure 8.12 and click Next to continue.
Select a service account that MIIS will use and click Next to continue.
Select the Groups that will be created for MIIS as illustrated in Figure 8.13 and click Next to continue.
Click Start to begin the installation.
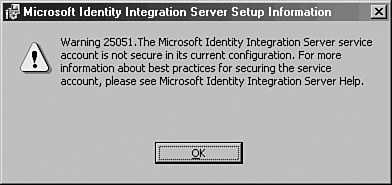
A security warning dialog box similar to the one shown in Figure 8.14 may appear. If it does, click OK to continue. Security for the service account should be reviewed.


At this point, MIIS should be installed and ready for the configuration of management agents, run profiles, and other necessary components for identity management.
MIIS is a very capable and powerful tool. With the right configuration and some fancy scripting, it can be configured to perform an incredible variety of automatic tasks. Today’s environments are rife with directories, which increase the amount of administration required to create accounts, delete accounts, and update user information manually. MIIS can greatly ease these requirements, improving administration and security. The next section focuses on some of the most valuable capabilities of MIIS and how to effectively use them.
MIIS can be used for the most basic and easiest configurations. For example, MIIS can be used to synchronize identity information between accounts in different directories. Identity information could include names, email and physical addresses, titles, department affiliations, and much more. Generally speaking, identity information is the type of data commonly found in corporate phone books or intranets. To use MIIS for identity management between Active Directory and an LDAP directory server, follow these high-level steps:
Install MIIS 2003.
Create a management agent for each of the directories, including an Active Directory management agent and an LDAP agent.
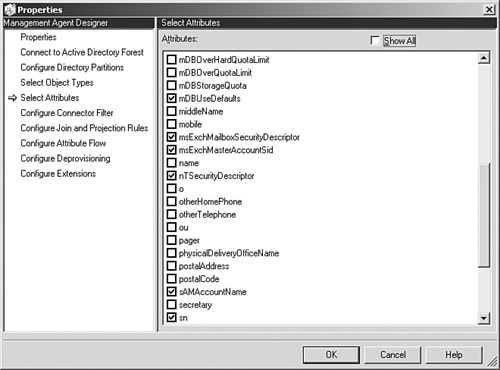
Configure the management agents to import directory object types into their respective connector namespaces, as shown in Figure 8.15.
Configure one of the management agents—for example, the Active Directory MA—to project the connector space directory objects and directory hierarchy into the metaverse namespace.
Within each of the management agents, a function can be configured called attribute flow to define which directory object attributes from each directory will be projected into the respective metaverse directory objects. Configure the attribute flow rules for each management agent.
Configure the account-joining properties for directory objects. This is the most crucial step because it will determine how the objects in each directory are related to one another within the metaverse namespace. To configure the account join, certain criteria such as an employee ID or first name and last name combination can be used. The key is to find the most unique combination to avoid problems when two objects with similar names are located—for example, if two users named Tom Jones exist in Active Directory.
After completely configuring the MAs and account joins, configure management agent run profiles to tell the management agent what to perform with the connected directory and connector namespace. For example, perform a full import or an export of data. The first time the MA is run, the connected directory information is imported to create the initial connector namespace.
After running the MAs once, they can be run a second time to propagate the authoritative metaverse data to the respective connector namespaces and out to the connected directories.

These steps can be used to simplify account maintenance tasks when several directories need to be managed simultaneously. In addition to performing identity management for user accounts, MIIS can also can used to perform management tasks for groups. When a group is projected into the metaverse namespace, the group membership attribute can be replicated out to other connected directories through their management agents. This allows a group membership change to occur in one directory and be replicated to other directories automatically.
Account provisioning in MIIS allows advanced configurations of directory management agents, along with special provisioning agents, to be used to automate account creation and deletion in several directories. For example, if a new user account is created in Active Directory, the Active Directory MA could tag this account. Then, when the respective MAs are run for other connected directories, a new user account can be automatically generated in those other accounts.
The provisioning and deprovisioning process in MIIS can be an extremely useful tool in situations where automatic creation and deletion of user accounts is required. For example, a single user account can be created in an HR PeopleSoft database, which can initiate a chain-event of account creations, as illustrated in Figure 8.16.
In addition to creating these accounts, all associated accounts can be automatically deleted through a deprovisioning process in MIIS. By automating this process, administration of the multitude of user accounts in an organization can be simplified and the risk of accidentally leaving a user account enabled after an employee has been terminated can be minimized.
The following high-level example demonstrates the steps required to set up simple account provisioning. In this example, a connected Windows NT domain is connected to MIIS. Any user accounts created in that domain has corresponding Exchange Server 2003 mailboxes created in a separate Active Directory forest.
Install MIIS Enterprise.
Configure a management agent for the connected Windows NT 4.0 Domain.
Configure the NT 4.0 MA so that the attributes necessary to create a resource mailbox flow into the metaverse.
Configure the attribute flow between the NT MA attributes and the MIIS metaverse, as illustrated in Figure 8.17.
Configure an MA for the Active Directory domain in the Exchange Resource forest.
Ensure that the Active Directory MA attributes that MIIS will need to create the mailbox are set similarly to the settings noted in Figure 8.18.
Using Visual Studio .NET 2003, configure a custom Rules Extension DLL to provide for the automatic creation of a mailbox-enabled user account in the resource forest. In this case, the DLL must use the
MVExtensionExchangeclass in the script.Install this rules extension DLL into the metaverse, as illustrated in Figure 8.19.
Configure Run Profiles to import the information and automatically create the mailboxes.


The example described previously, although complex, is useful in situations in which a single Exchange Server 2003 or Exchange 2000 forest is used by multiple organizations. The Security ID (SID) of the NT Domain account is imported into the metaverse and used to create a mailbox in the resource forest that has the external domain account listed as the Associated External Account. Through a centralized MIIS implementation, the Exchange resource forest can support the automatic creation of resource mailboxes for a large number of connected domains.
MIIS is a versatile and powerful directory synchronization tool that can be used to simplify and automate some directory management tasks. Due to the nature of MIIS, it can also be a very dangerous tool because the management agents can have full access to the connected directories. Misconfiguration of MIIS management agents could result in data loss, so careful planning and extensive lab testing should be performed before MIIS is released to the production directories of any organization. It is often wise to contact certified Microsoft solution providers/partners to help decide whether MIIS is right for your environment, or even to design and facilitate the implementation.
Windows Server 2003 R2 introduced Active Directory Federation Services (ADFS). ADFS is a single sign-on solution for web applications, allowing for the authentication of users across multiple directories, such as separate AD forests or Active Directory in Application Mode (ADAM) instances. By managing web-based login identities and tying them together, through Windows login authentication, organizations can more easily manage customer access to web-based applications without compromising internal security infrastructure.
ADFS is managed from an MMC Console, shown in Figure 8.20, that can be installed on a Windows Server 2003 Server R2 Enterprise Edition system.

ADFS is not a replacement for technologies such as MIIS 2003 and/or the IIFP. Instead of synchronizing identities across various directories, ADFS manages login attempts to web applications made from disparate directories. It is important to understand this concept because ADFS and MIIS perform different roles in an organization’s environment.
ADFS is composed of three different server components as follows:
Federation Server—. A Federation server is the main ADFS component, which holds the Federation Service role. These servers route authentication requests between connected directories.
Federation Proxy Server—. A Federation Proxy Server acts as a reverse proxy for ADFS authentication requests. This type of server normally resides in the DMZ of a firewall and is used to protect the back-end ADFS server from direct exposure to the untrusted Internet.
Web Server—. The Web Server component of ADFS hosts the Web Agent component and manages authentication cookies sent to a web server application.
Each of these components can be individually installed in an ADFS structure, or they all can be installed on the same system.
Installing ADFS on a Windows Server 2003 R2 requires several key prerequisites:
Windows Server 2003 R2 Enterprise Edition or DataCenter Edition
IIS 6.0
ASP.NET 2.0
.NET Framework 2.0
10MB of free disk space for setup
A Secure Sockets Layer (SSL) certificate installed on the default Web site of the server
When the prerequisites have been satisfied and all necessary components, such as ASP.NET 2.0 and IIS 6.0, have been installed, ADFS can be installed via the following process:
Ensure that the prerequisite services, such as IIS and ASP.NET 2.0, have been installed on the server.
Go to Start, Control Panel, Add or Remove Programs.
Click on Add/Remove Windows Components.
Select Active Directory Services by clicking on the text (do not check the box), and click the Details button.
From the list of services, select Active Directory Federation Services by checking the box. Note that by clicking Details you can select which particular components of ADFS, such as the Federation Service Proxy and Web Agents, you want to install on a server. The default is to install only the Web Agents and the Federation Service.
When the dialog box in Figure 8.21 pops up and warns you about the dangers of installing ASP.NET 2.0, click Yes.
When ADFS is selected, as shown in Figure 8.21, click OK to continue.
When prompted to enter the Federation Service information, as shown in Figure 8.22, select the default and click Next to continue.
Click Finish to finalize the installation.


ADFS works by inputting information about connected partners, such as AD forests or ADAM orgs, and inputting specific partner and application information. Each set of information can be inputted by running the various wizards installed by ADFS as follows:
Add Resource Partner Wizard—. This wizard enables you to to manually create or automatically import resource partners by using an XML file. Resource partners contain information about the specific web-based applications that users can access.
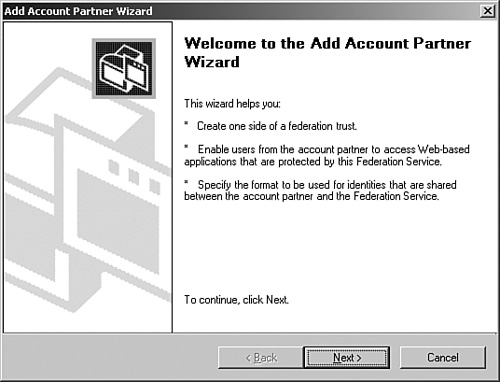
Add Account Partner Wizard—. This wizard, shown in Figure 8.23, adds the information about specific account partners, which are connected security token issuers such as domain controllers.
Add Applications Wizard—. This wizard adds specific claims-aware applications to ADFS.
By entering the information about the various web-based applications, and which directories and identities are to be granted access, ADFS can provide for seamless sign-on capabilities among various directories. It can be a valuable asset for an organization that wants to share corporate information with trusted partners, without exposing their valuable internal assets to unnecessary exposure.
Integration of key Microsoft technology with non-Microsoft environments is no longer an afterthought with the maturation of the three major products detailed in this chapter. Proper utilization of Services for Unix, Services for NetWare, and Microsoft Identity Integration Server 2003 can help to lower the total cost of ownership associated with maintaining multiple platform environments. In addition, these technologies bring closer the lofty ideal of bringing multiple directory environments under a single directory umbrella through the realization of single sign-in, password synchronization, and other key functionality that integrates directories with Windows Server 2003.
Use Microsoft Identity Integration Server for identity management and the provisioning of accounts.
Be cautious when upgrading the AD schema to support MSDSS with Services for NetWare.
Be aware of the differences between NetWare file permissions and NTFS security permissions, and how the File Migration Utility will compensate for those differences.
Use Active Directory Federation Services (ADFS) to manage single sign-on web-based applications across multiple AD forests and ADAM implementations.
Use the free Identity Integration Feature Pack when you only need to synchronize between AD forests.
Only install Server for NIS if the Windows Server is not subservient to any Unix NIS servers.
Use the Subsystem for Unix-based Applications to replace legacy Unix scripts and run them in a native Windows environment.
Install Server for NIS only on an Active Directory domain controller to enable domain-level authentication from NIS to AD.
Install the Client for NFS and Gateway for NFS components on different systems.
Install the Server for NIS Authentication component on all domain controllers in the domain in which security credentials will be used.