
The concept of a centralized repository of hardware- and software-related information for a system isn’t new, but it was perfected starting with Windows 95. This central repository was called the Registry. The Registry was designed to overcome the limitations of .ini and .dat files used in previous Microsoft operating systems.
Since its initial implementation, the concept behind the Registry and its purpose haven’t undergone a tremendous amount of change. It remains a database containing hardware, operating system, policy, file association, and application configuration information. It also houses information on users who log on to the system. As you can tell, the Registry is involved in almost every aspect of the system. Because of its involvement, you need to have a solid understanding of the Registry, how to manage and maintain it, and how to secure it from unauthorized access.
Regrettably, the Registry’s capabilities and uses are rarely fully understood by system administrators, much less end users. This is partly because of the Registry’s complexity and also because of the fact that many users are somewhat intimidated by the warning messages about modifying the Registry. Although it is true that modifications can have disastrous effects on the entire system, Registry changes occur more often than you realize. Most of these changes take place through the GUI, but some system configurations can happen more efficiently either through a manual Registry modification (instead of going through a series of dialog boxes) or only through a manual change.
The Windows Server 2003 Registry is not a piece of the operating system to take lightly. Because Windows Server 2003 relies greatly on the Registry to function, it is critical that you understand the Registry’s approach to system configuration. This chapter serves to give you the necessary information to manipulate the Registry so that you maintain system reliability and performance. Overall, this chapter focuses on the following four key topics related to the Windows Server 2003 Registry:
Understanding the Registry’s structural design
Properly using the tools available to manage and maintain the Registry
Adequately protecting the Registry
Backing up and restoring the Registry
The Windows Server 2003 Registry is a well-organized database containing an assortment of hardware-, software-, and user-related information. Its basic structure is hierarchical with multiple configuration layers. These layers or levels are grouped from the top down by hives, keys, subkeys, value entries, and finally the actual value for a given configuration parameter. A value entry is a parameter within the key or subkey, and a value is the specific value for the parameter.
At the topmost level of the Registry’s organization is a root key commonly referred to as a hive. There are five hives within the Registry, as shown in Figure 20.1, and they are all permanent (that is, they are hard-coded within Windows Server 2003). Because these hives are hard-coded, you can’t delete, modify, or add another hive.

Table 20.1 lists and describes each of these hives.
Table 20.1. The Five Registry Hives and Their Content
Registry Root Key (Hive) | Content Description |
|---|---|
Current hardware configuration information. | |
File associations and OLE information. | |
Information about the user currently logged on, such as desktop settings and network connections. | |
Local user account information. Information on each user is stored in a separate subkey. | |
HKEY_LOCAL_MACHINE | System configuration information and parameters, such as hardware, software, and security settings. |
Coincidentally, some of the hives are also subkeys of other hives and are linked to one another. These hives and their corresponding linked paths are listed in Table 20.2.
The next organizational level is a key. Each key contains value entries or values and can also have subkeys branching off it. Those subkeys can then be considered keys for the configuration information branching off it.
The Windows Server 2003 Registry is stored in two separate places: in memory and on disk. At startup, the entire Registry is loaded into paged, pooled memory so that Windows Server 2003 can quickly retrieve information.
It’s also stored in various files located within the %SYSTEMROOT%System32Config directory. You’ll also notice the .sav and .log files in this directory. They serve as backup files for the Registry.
The HKEY_LOCAL_MACHINE hive contains a variety of information pertaining to hardware devices (for example, memory, bus types, device drivers, and more) and the software installed on the system. As you can see in Figure 20.2, the hive contains the following five subkeys:
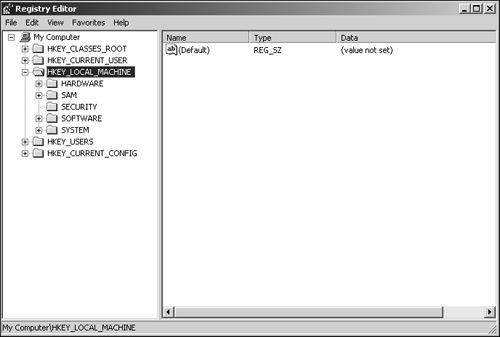
These five subkeys are explained in the following sections.
As the name implies, the HARDWARE subkey contains all the hardware information for the system. When the system starts up, information is built about the hardware, and then at shutdown this information is wiped away. Therefore, the HARDWARE subkey is volatile.
NTDETECT.COM is in charge of gathering all information on the hardware. After it obtains the information, it passes that information to the HARDWARE subkey. The following are some examples of the hardware components that it detects:
Adapter type
Bus type
Communication ports
Floppy disks
Keyboard
Mouse
Video
There are four subkeys within the HARDWARE subkey. These subkeys are also populated with information gathered from NTDETECT.COM. The four standard subkeys are the following:
HARDWAREACPI—. This subkey is for the ACPI hardware and software interface specification that supports Plug and Play as well as advanced power management (APM).
HARDWAREDESCRIPTION—. This subkey contains hardware descriptions.
HARDWAREDEVICEMAP—. This subkey includes devices to device driver mappings.
HARDWARERESOURCEMAP—. This subkey contains resource mappings that the devices use (such as physical memory ranges).
The SAM subkey, shown in Figure 20.3, is similar to the HKEY_LOCAL_MACHINE SECURITY subkey in that it contains valuable information. By default, this subkey is locked down to the point that it’s inaccessible to users via the Registry Editor. It stores local users and groups, along with access permissions for files and folders.

Because of the security-sensitive information contained in the SECURITY subkey, it too is locked down tightly to protect the information. This subkey is, by default, inaccessible through the Registry Editor.
The information within this key pertains to users, groups, access permissions, and also includes application and device driver–related information. The actual content of this subkey is determined whether or not you’re still in Mixed mode with Windows NT 4 as a domain controller.
Application-specific information including, but not limited to, path statements, licensing, and executable paths is stored in the SOFTWARE subkey. Because this subkey resides under the HKEY_LOCAL_MACHINE key, the configuration information is applied globally (that is, systemwide). This is an important point because these configurations differ from those located in HKEY_CURRENT _USERSoftware for individual users.
Within this subkey, you’ll also find various other subkeys relating to the applications that are installed on the system. For example, under HKEY_LOCAL_MACHINESOFTWARE Microsoft, you can find the configurations and version numbers of all the Microsoft-installed software.
Another sensitive subkey that is very important to Windows Server 2003 is the SYSTEM subkey. The majority of the information stored in this subkey is the following:
Control set configurations—. The control set configuration pertains to the data that is needed to control the system boot process. This information is associated with current and prior control sets. The current control set defines the system profile, while its subkeys provide more detail, such as the computer name, the services running on the system, and instructions for Windows Server 2003 in case of a system crash.
Windows Server 2003 setup information—. This information contains various Windows Server 2003 setup parameters, such as OSLoaderPath and SystemPartition.
Disk subsystem configuration—. The disk subsystem configuration information pertains to the devices, volumes, RAID settings, and more. The Disk Management snap-in uses this information to display the disk subsystem information.
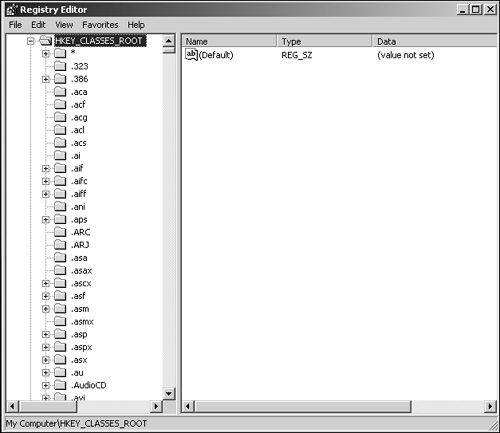
Although HKEY_CLASSES_ROOT is considered a hive, it’s actually an alias for the key HKEY_LOCAL_MACHINESOFTWAREClasses. This key stores all file associations, information regarding shortcuts, OLE, and much more. The file association basically points to the appropriate application that will execute when you use a file with that specific extension. Also, particular icons are associated with a particular file type. So, for example, when you view files in Windows Explorer, you can see a document (.doc) with a Microsoft Word icon. When you open that file, Microsoft Word is launched and opens the file. Some of the file associations are shown in Figure 20.4.
The HKEY_CURRENT_USERSoftwareClasses alias was first introduced and implemented in Windows 2000 to enhance support for user-based settings. This feature is called per-user class registration. It provides more flexibility and customization by allowing applications to define associations per user as needed. In other words, a system with multiple users can have different application settings for each individual.
The HKEY_CURRENT_CONFIG is yet another hive that aliases another subkey. This time it references HKEY_LOCAL_MACHINESYSTEMCurrentControlSetHardware Profiles Current. If you check this reference, you’ll notice that there really isn’t any particularly useful data in this subkey because it’s really just a pointer to a numbered subkey that has the current hardware profile.
As you would expect, the data contained within this hive is hardware profile–related information. Windows Server 2003 systems use hardware profiles by default, and you can add more depending on the hardware configuration changes you’ll have. For the most part, mobile users will have more than one profile.
The HKEY_CURRENT_USER is a unique and dynamic hive. It’s unique in that it contains information on the currently logged-on user and more specifically maps to HKEY_USERS<SecurityID>, where the SID represents the user. It’s dynamic because each time a user logs on, the key is refreshed and built from scratch.
The information contained within this key varies depending on the particular user logging in. Generally speaking, it includes information such as user preferences (keyboard mappings, desktop settings, network drive connections, application-specific preferences, and much more). In the case where the user logs on to the system for the first time, a default user profile is used.
There are several subkeys underneath the HKEY_CURRENT_USER hive, including, but not limited to, the following subkeys:
AppEvents
Console
Control Panel
Environment
Identities
Keyboard Layout
Printers
Session Information
Software
Unicode Program Groups
Volatile Environment
The HKEY_USERS subkey represents the currently loaded user profiles. It contains a subkey for each user, but only two subkeys for the user currently logged on and the default user profile appear. The three loaded profiles are the following:
.DEFAULT—. During startup, this is the default profile used before a user is logged on to the system. In other words, if no one is logged on to the system, this is the only profile in use.
<SecurityID>—. Also known as the SID, this profile identifies the user currently logged on.
<SecurityID_Classes>—. This profile represents all the class information for the user currently logged on.
Each user profile is loaded from the disk subsystem, not from the Registry itself. The default location of the profiles is located in %SystemDrive%Documents and Settings<user_name> or %SystemDrive%Documents and SettingsDefault User.
Windows Server 2003 predecessors were configured with two versions of the Registry Editor: REGEDIT.EXE and REGEDT32.EXE. Each one had its own strengths, but it was inconvenient at best to have to use both versions depending on what you set out to do. Fortunately, Microsoft has done away with using two versions. The best of both versions is now incorporated into a single Registry Editor. Both executables (REGEDIT.EXE and REGEDT32.EXE) still exist, but they launch the same utility, like the one shown in Figure 20.5. With Windows Server 2003’s single Registry Editor, you can directly modify the local or remote system’s Registry, set key permissions, and more.

The Registry Editor enables you, the administrator, to modify the Registry. For example, you can add keys or subkeys, change parameter values, and much more. Because you have so much control over the Registry, it’s important that you back up the Registry before making any modifications. This will help prevent accidental Registry corruption or, in the worst case, a system crash. For more information on how to back up the Registry, refer to the section “Backing Up the Registry” later in this chapter.
You can add a key in almost every area within the Registry. Some exceptions include the following:
At the Registry’s root level
At the root level of certain hives (such as HKEY_LOCAL_MACHINE and HKEY_USERS)
Within the HKEY_LOCAL_MACHINESECURITY (by default)
To add a value to a specific key, right-click the key (in the left pane) and select one of the values listed in Table 20.3. The type of value you select determines the type of information for the value.
Table 20.3. Various Value Types
Sometimes you may need to modify a particular value to increase performance, add functionality, and so on. To change a value, follow these steps:
Searching the Registry used to be a task handled primarily by regedit, but now that functionality is built into this single Registry Editor. To search for a key, value, or data, perform the following steps:
Within the Registry Editor’s left pane, select My Computer.
Select Find from the Edit menu.
In the Find dialog box, type the key name, value name, or data value that you want to search for.
Choose what to look for (such as keys, values, data) and whether to match whole strings only.
Click Find Next to start the search.
Just like the Favorites menu within Internet Explorer, the Registry Editor’s Favorites menu allows you to save links to particular locations within the Registry. When you save a link to the Favorites menu, the next time you need to revisit the key, you can quickly jump to the location using a bookmark.
To connect to a remote Registry, perform the following steps:
Open the Registry Editor by entering
regeditorregedt32at the command prompt.Select Connect Network Registry from the File menu.
In the Select Computer dialog box, like the one shown in Figure 20.6, type the computer name into the window.
Click Check Names to verify the computer name that you entered is correct.
Click OK to connect to the remote Registry.

After you connect to the remote Registry, you can modify its HKEY_LOCAL_MACHINE and HKEY_USERS hives just as you would the local machine’s Registry.
The information contained within the Registry is vital to the reliability, stability, and performance of the system. Protecting the Registry is therefore critical to the system’s operation.
Microsoft has done a much better job setting secure default permissions in Windows Server 2003 than it did with its previous operating systems. Registry permissions are no exception. There is limited access to the Registry even for system administrators. For example, the HKEY_LOCAL_MACHINESAM and HKEY_LOCAL_MACHINESECURITY keys give administrators only read and write DAC access by default.
If your system requires tighter access controls than the default permissions, you can set them accordingly from within the Registry Editor. Registry permissions are configured on a per-key basis, but subkeys can inherit permissions from parent keys. Setting Registry key permissions is similar to setting permissions to files and folders within the NTFS file system. To set Registry key permissions, perform the following steps:
Within the Registry Editor, right-click the key for which you want to modify permissions and select Permissions.
The most common permission attributes used are displayed on the Permissions for <key> window. Specify Allow or Deny for the Full Control, Read, or Special Permissions settings.
If you want more granular control, click the Advanced button to display the Advanced Security Settings for <key>. Select the permissions that the key requires.
You can set numerous permissions within the advanced security settings for a particular key, including the following:
In some cases you may want to control remote access into a system’s Registry. You can do this by setting permissions in the HKEY_LOCAL_MACHINESYSTEMCurrentControlSetControlSecurePipeServerswinreg key. By default, only administrators, backup operators, and the LOCAL SERVICE have access permissions to connect from another system.
You may want to change the default permissions when you want only specific administrators or backup operators to have access. In this case, you could remove the default Administrators and Backup Operators groups and replace them with specific user accounts.
Auditing the Registry may be beneficial in your network environment for security reasons, troubleshooting, or just general observation. No matter the reason, the auditing capabilities with Windows Server 2003 are very powerful and flexible.
Two essential steps must take place before you can begin auditing the Registry. First, you must enable successes or failures either through a Group Policy Object (GPO) or a local policy (it’s disabled by default). For more information on GPOs, refer to Chapter 21, “Windows Server 2003 Group Policies.” The next step after enabling auditing is to specify what Registry keys to audit and to what extent from within the Registry Editor.
To enable auditing through a GPO, perform the following steps:
Open Active Directory Users and Computers from the Start, Administrative Tools menu.
In the right pane, right-click the domain and select Properties.
Click the Group Policy tab.
Select the Default Domain Policy object or a specific GPO that you want to use for auditing.
Click Edit and then expand to Computer Configuration, Windows Settings, Security Settings, Local Policies, Audit Policy.
Double-click the Audit object access setting.
Check the Define These Policy Settings box and then check either Success or Failure.
Click Apply and then OK to close the GPO editor.
To enable auditing through the local policy, follow these steps:
Open Local Security Policy (or Default Domain Controllers Security Setting) from the Start, Administrative Tools menu.
Expand Local Policies and select Audit Policy.
If the Define These Policy Settings box isn’t already checked, do so and then check either Success or Failure.
Click on Apply and then OK to close the GPO editor.
Now you’re ready to specify what to audit within the Registry. To begin auditing the Registry, perform the following steps:
Within the Registry Editor, right-click the key that you want to audit and select Permissions.
Click the Advanced button to display the Advanced Security Settings for <key>. Select the permissions that the key requires.
Select the Auditing tab and click the Add button.
In the Select User or Group dialog box, enter the users or groups that you want to monitor. For example, you can type
authand then click Check Names to populate the Authenticate Users group.Click OK. This will bring up the Auditing Entry for <key> dialog box.
Select Successful and/or Failed for each access to audit. Note that checking Successful or Failed for Full Control will enable all other accesses.
Check the Apply These Auditing Entries to Objects and/or Containers Within This Container box only if you want to minimize what you are auditing.
Click OK three times to return to the Registry Editor.
Close the Registry Editor.
After you’ve established auditing on the Registry, you can examine the results in the Event Viewer, like the events shown in Figure 20.7. Auditing is a security-related event, so any auditing events are written to the security log.

Windows Server 2003’s self-sufficiency spills over into what’s needed to maintain the Registry. Little is needed to maintain the Registry, but the few things you can do will make the overall system more robust.
In previous versions of Windows, the operating system limited the size of the Registry. This limit was based on the paged, pooled memory availability and its size. Beginning with Windows XP, this limitation has been removed.
Registry files are now mapped in the computer cache rather than the paged, pooled memory. Windows Server 2003 keeps an eye on the Registry size, which means that you no longer have to specify Registry sizes in the virtual memory settings. In fact, you don’t even have a Registry size option in the virtual memory settings.
Although Windows Server 2003 relinquishes much of the Registry size responsibility, you need to be aware of two important considerations. First, it’s important that you keep an adequate amount of free space available on the system partition. Generally, all drives should have at least 25% free space at all times.
The second consideration is routinely defragmenting all drives on the system. This will allow the system to operate efficiently and keep the Registry size in check.
Many configuration and technical details are contained within the Registry’s hierarchical structure. The actual contents more than likely change every day. In addition, any time you add, modify, or remove an application, service, or device driver, the majority (if not all) of those changes are mirrored within the Registry.
As you can imagine, the changes that the Registry undergoes can leave it fragmented just like any other database structure would go through. Other times, Registry entries may contain invalid data or may still exist long after a component was removed. Often this is a result of poor programming or insufficient utilities rather than Windows Server 2003.
Although application reliance on the Registry is lessening because of the Windows .NET development framework, many applications and utilities still don’t properly interact with the Registry, especially when it comes to uninstalling the application or device driver. It’s important to note here that applications are singled out more so than hardware components because the Registry’s hardware inventory process is dynamic.
Like any other database, the leaner the Registry is, the more robustly and efficiently it can operate. The Windows Server 2003 Registry must be kept clean, which means that periodically the Registry should go through spring cleaning to remove invalid data and remnants.
Most applications come bundled with an uninstall utility that attempts to remove itself, its data, and any Registry entries that it created. For those applications that do not, you are faced with removing the application by hand. This is undesirable and painstaking at best. Manually removing these rogue application entries also can introduce the unnecessary risk of damaging the Registry.
Several years ago, Microsoft developed a small utility called RegClean. The essential function behind this utility was to remove the clutter (such as invalid or rogue entries) from the Registry. This tool isn’t officially supported on the Windows 2000 or Windows Server 2003 platforms, but independent testing has shown successful results. If you plan on using this utility, it is highly recommended that you extensively test it in a lab environment to ensure its compatibility.
You can use other utilities both within Windows Server 2003 and third-party tools to assist you in removing clutter and keeping the Registry lean and mean.
Through the Add/Remove Programs applet, shown in Figure 20.8, available from the Control Panel, Windows Server 2003 provides its own way of removing applications. Most applications can be installed and removed through this applet. Although the applet may appear to be useful in keeping the Registry free of clutter, it usually just kicks off an application’s uninstall utility.

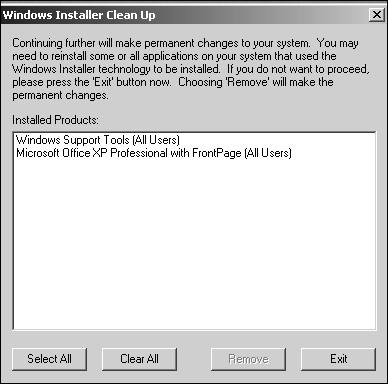
The Windows Installer Cleanup Utility is designed exclusively to remove Registry entries from applications that were installed using the Windows Installer. It doesn’t delete application files or remove shortcuts; it deletes only the application’s Registry entries. This utility is installed on your system after you install the Windows Server 2003 support Tools. When you double-click the deploy.cab file, it will automatically install several utilities in the Administrative Tools folder on your system.
MSICUU, shown in Figure 20.9, can also be used to return to the system state prior to an abrupt termination or failed application installation using the Windows Installer.
After you install the Support Tools from the Windows Server 2003 CD, follow these steps so that you can use MSICUU:
The command-line version of MSICUU is the Windows Installer Zapper utility, also commonly known as MSIZAP. MSIZAP has a little more functionality than the MSICUU GUI utility, such as removing folders in addition to Registry entries. It also can change access control list (ACL) permissions and remove rollback information.
MSIZAP has the following syntax:
MSIZAP [*] [A] [P] [T {product code}] [!]where
* removes all folders and Registry entries, adjusts shared DLL counts, and stops the Windows Installer service.
T removes all information for the product code specified.
P removes the In-Progress subkey from the Registry.
S removes rollback information.
A changes ACLs to Admin Full Control.
! forces a Yes response to any prompt for the user.
Whenever you’re planning backup and recovery strategies, it’s extremely important that you include the Registry. It’s also important to back up the Registry before you begin any modifications so that if you accidentally delete a value or key, you can quickly recover.
Routinely backing up the Registry is crucial to the system’s well-being. If it becomes corrupted either directly or indirectly, it can cripple the entire system. Backups give you a near fail-safe way to minimize downtime and keep the system operating as efficiently as possible.
Windows Server 2003 comes with reliable backup utility called Backup Utility (ntbackup.exe), shown in Figure 20.10. To access it, choose Start, Programs, Accessories, System Tools. Backup Utility is very similar to the one provided with Windows 2000, with one exception: You use the Automated System Recovery (ASR) feature rather than create an Emergency Repair Disk (ERD). The reason for this change is simply because the information needed to repair a system can’t squeeze onto a floppy disk.

Backing up the Registry with Backup Utility couldn’t be any easier. All you need to do is select the System State Data option. This will back up the Registry along with AD, the SYSVOL directory, system files, boot files, COM+ class registration, and cluster-related information. As you back up the system state data, the Registry files are also automatically saved in the %SYSTEMROOT%RepairRegback directory.
Automated System Recovery replaces the ERD functionality in Windows Server 2003. The principles are similar to the former recovery mechanism (that is, ERD), but the implementation is quite different. To begin using the ASR, start Backup Utility and choose the ASR option on Backup Utility’s opening screen, like the one shown in Figure 20.11. Microsoft recommends using ASR as a last resort only. You should always try recovering the system with the Last Known Good or Safe Mode Boot options.

By choosing the ASR option, you initiate the ASR Wizard, which automatically backs up the system state, services, and disk configuration information. It uses a floppy disk to contain information about the ASR and the ways to restore the information but then uses other media to actually back up the data. This doesn’t mean that it backs up data files that you’ve created; this just means that it backs up the system state data and the other information mentioned earlier.
You should restore a system using ASR only after you’ve exhausted all other recovery procedures. It’s not that the process is difficult, but it can take a considerable amount of time. You start the ASR recovery by booting off the Windows Server 2003 CD and then pressing F2 during the text portion of setup. Then you place the ASR floppy into the floppy drive when prompted. Then you’ll need to follow other instructions on the screen for your specific system.
The Windows Server 2003 Registry Editor allows you to save individual keys by exporting the keys to a registration (.reg) file. This file can later be used to import Registry information into the Registry.
Note
It’s recommended that you save a Registry key before attempting to modify that key. If a mistake was made, the registration file could quickly and easily repair the key.
To save a key or subkey using the Registry Editor, right-click the key or subkey that you want to save and select Export. Then specify the filename (with a .reg extension) and the location. Finally, click Save to save the Registry key.
The Registry Editor has a little-known command-line option to quickly and easily export data from the Registry. By running regedit /e <c:outputfilename.reg> within the command prompt, you can export the entire Registry.
You can restore a previously saved Registry key in two ways: double-clicking or importing a registration file. The first choice is fairly obvious; all you need to do is locate the .reg file and then double-click it to be able to populate the information into the Registry.
To restore a previously saved key by importing the key, perform the following steps:
As you can see, the Registry contains a plethora of information regarding the Windows Server 2003 system all in a centralized location. This information is critical to the well-being of the system. Therefore, the Registry should be handled with the best of care. This includes properly maintaining the Registry, routinely backing up the Registry, and knowing how to properly manipulate its configuration.
Because you have so much control over the Registry, it’s important that you back up the Registry before making any modifications. This will help prevent accidental Registry corruption or, in the worst case, a system crash.
Use the Registry Editor’s Favorites menu to save links to particular locations within the Registry.
Control remote access into a system’s Registry by setting permissions in the HKEY_LOCAL_MACHINESYSTEMCurrentControlSetControlSecurePipeServers_ winreg key.
Increase the maximum log size if Registry auditing is enabled.
Manually delete application files and shortcuts after using the Windows Install Cleanup utility.
Whenever you’re planning backup and recovery strategies, be sure to include the Registry.