
NOW that you have learned about web content management (WCM) in Chapter 12 this chapter discusses the Microsoft SharePoint features that can help with compliance, records management, and eDiscovery. In today’s world of technology, organizations are increasingly subject to state and federal regulations that govern the retention of electronic records, including what records must be retained and how readily records should be accessible to regulators. In addition to the rules and regulations that some organizations must comply with for legal reasons, organizations have found that defensive business practices also call for good data management to protect the organization from potential litigation. This chapter focuses on the compliance features in SharePoint, the planning process for records management, and how to use SharePoint for eDiscovery.
What is compliance? Compliance is the state of being in accordance with federal and regional authorities and their requirements. In other words, compliance is when organizations have regulations that they must abide by according to their specific industry, such as HIPAA/HITECH, DOD 5015, Section 508, WCAG 1.0/2.0, and SOX. The three most common sets of regulations used today are the Health Insurance Portability and Accountability Act (HIPAA), the Health Information Technology for Economic and Clinical Health Act (HITECH Act), and SOX (Sarbanes-Oxley Act).
In 1996, the Health Insurance Portability and Accountability Act (HIPAA) was enacted by Congress for the healthcare industry in response to issues faced with health care coverage, privacy, security, and fraud. Before HIPAA, rules and regulations varied by state and by organization, and there was no standard authority for the enforcement of fraud and abuse protections applied to state and federal health care programs. With the increasing use of electronic technology, Congress recognized a need to establish security and privacy standards due to the risk of potential abuse or compromise. HIPAA requires organizations that have access to personal health information to adopt security policies to safeguard the confidentiality of patients’ data. The access to this data must be monitored by the organization and must be controlled, as well as have an audit trail available for regulators.
In 2009, another act was introduced, called the Health Information Technology for Economic and Clinical Health Act. The HITECH Act became part of the American Recovery and Reinvestment Act of 2009 (ARRA), which stated that beginning in 2011, healthcare providers were offered financial incentives for demonstrating meaningful use of electronic health records. The HITECH Act widens the scope of privacy and security protections available under HIPAA. It also increases the potential liability for noncompliance and provides more enforcement.
In 2002, Congress introduced legislation called the Sarbanes-Oxley Act (SOX), which requires businesses operating in the financial industry to maintain documentation through a set of internal controls that prove the effectiveness of its reporting systems. SOX applies to publicly traded companies. It requires business owners and executives to sign off on internal controls as defined by standard operating procedures (SOPs), and the SOPs define the controls that the business puts in place to meet the requirements.
Two key sections of SOX help define these requirements:
Section 302. Requires executives to sign off directly on financial statements.
Section 404. Requires all internal controls and SOPs are documented along with evidence of assertions made in the SOP. It requires all documentation be adequately audited and reviewed.
The compliance features in SharePoint Server 2013 have been extended to sites. Retention policies can be created and managed in SharePoint and the policies can be applied to SharePoint sites and any Microsoft Exchange Server 2013 team mailboxes associated with the sites. For example, compliance officers may create policies that define:
The retention policy for the entire site and Exchange Server 2013 team mailbox (if one is associated)
What causes a project to close
When a project should expire
The two main drivers for compliance in SharePoint are records management and eDiscovery.
Before we talk about records management, we must first talk about records. What is a record? Well, the first thought that may come to mind is a round disk made from vinyl plastic that sound was recorded on, which is now a thing of the past. As vinyl records are now part of vintage collections, records in another sense are still produced. A record is a document or other electronic or physical entity serving as evidence of an activity or transaction performed in an organization that requires retention for a period of time. Records management is the practice of maintaining records from the time of their inception to the time of their disposal in accordance with applicable laws. Records management is the process by which an organization defines what type of information needs to be classified as a record, whether it be a physical or electronic document, an email message, or some other form of digital information that serves as evidence of an activity or transaction performed by the organization.
Records management is also the process by which an organization:
Determines how to handle the active documents that will become records while they are being used and determines how the documents should be collected once they are declared records
Determines the retention period for each record to meet legal, business, and regulatory requirements
Researches and implements technological solutions and business processes to ensure that the organization complies with the records management requirements
Performs records-related tasks, such as locating and protecting records that are related to external events, such as lawsuits, or handles disposing expired records
Records management systems help the organization demonstrate compliance with regulatory obligations, help protect organizations legally, and increases organizational efficiency by promoting the disposition of out-of-date items that are not records. Who is responsible for determining which documents and other electronic or physical items are records? Records managers, lawyers, and compliance officers are the ones responsible, and they help ensure that documents are retained for the appropriate period of time by carefully categorizing all enterprise content within the organization. Figure 13-1 illustrates the records management application process.

A records management system typically includes the following features:
Content analysis. Describes and categorizes content that becomes records, provides the source locations, and describes how content will move to the records management application
File plan. Indicates for each record where they should be retained as records, the policies that get applied, the retention period time, how they are disposed, and who is responsible for managing them
Compliance requirements document. Defines the rules that the organization must follow to ensure compliance and which methods are used to ensure participation by the organization
Method for collecting inactive records. Collects from all record sources (such as servers, email systems, and file systems)
Method for auditing active records. Determines the method for auditing records when the records are active
Method for capturing records’ metadata. Determines the method for capturing the metadata and audit history for records
Process for holding records. Determines the method to follow when events occur, such as litigations
Process for monitoring and reporting the records handling. Ensures that employees within the organization are filing, accessing, and managing the records according to defined policies and processes
This section describes an example of a records management planning process to help ensure that the SharePoint Server records management system you implement will achieve the organization’s record management goals. The following steps outline the records management planning process.
The compliance standards that must be followed depend on the type of industry. A compliance requirements document should explain the purpose of the organization’s compliance program and its benefits, and the essential components should identify the legal or business criteria to which the compliance plan must adhere. The document should also include the metrics or other objective criteria that will be used to measure the effectiveness of the compliance plan and the formal policies that represent the organization’s internal statement of the regulatory rules that must be followed. In addition, the compliance requirements document should include specifications for ongoing training for employees and the guidelines for the roles and involvement in the compliance process. For some organizations, it may also be practical to carry out a formal compliance audit at regular intervals to ensure that the records management plan is meeting its objectives.
When developing a records management plan, it is important to consider who is responsible for the various roles involved in the creation and implementation of the records management solution.
Some of the common roles defined are:
Compliance officers and records managers. These employees categorize the records in the organization and run the records management process.
Compliance officers are often lawyers who are associated with the legal department of the organization. They are responsible for understanding and interpreting the rules and regulations that the organization must follow. The compliance officers also develop the formal compliance policies that will be implemented, and because they are the primary authors, they will be the ones to perform the internal auditing and monitoring when necessary to ensure that the organization is following the records management plan.
Records managers are responsible for developing the file plan that applies the compliance requirements to the data specified as records. The records managers may be senior staff members or members of the legal department who have a thorough understanding of the organization’s business practices and workflow. They are the ones responsible for configuring the document libraries and retention rules in the SharePoint Records Center site. Records managers should be part of the design of the records management solution.
IT personnel. These employees implement the systems that support records management. The SharePoint administrators will be responsible for the installation and configuration of the SharePoint servers that provide the records management services to the enterprise.
Content managers. These managers work on the teams that create the content that will be designated as records and are the ones who ensure that their teams follow the records management practices.
Records managers and content managers survey document usage in the organization to determine which documents and other items will become records. This step is done before creating a file plan.
Once the records managers and content managers analyze the content and determine the retention schedules, the file plan is developed. File plans can differ from organization to organization. The file plan is a written document or set of documents that generally describe the kinds of items the organization determines to be records, specifies where they will be stored, describes the retention time, and provides other information, such as who is responsible for managing them. Table 13-1 lists the common file plan elements.
Table 13-1. File plan elements
Purpose | |
Record type | The classification of the item. Each record type corresponds to a set of typical documents or messages that need to be tracked and managed the same way. |
Required fields | Additional information that will be required when a document is submitted into the repository. |
Retention | The length of time the document will be retained. |
Disposal | How the document will be handled or disposed when the item expires. |
Audit | Whether access to the document will be tracked and logged along with the types of actions on the document that have to be logged. |
It is important to understand the difference between documents that are retained as records and documents that are retained in an archive. Archived information is not classified as a record after the period of time the record must be retained has expired. Normally at this point, the expired information is usually transferred to tape backup or printed out and placed in long-term storage with the expectation it will be kept mainly for historical purposes. Unless it is electronic, expired archived data is generally not readily available for search and retrieval and is not expected to be required for legal discovery or current research. However, even though it is not required, the legal discovery process can request any information deemed appropriate for the matter at hand that provides the reason that expired data should be properly archived. If you have ever called your doctor’s office and asked for information older than six years, chances are that the information is not readily available and the office has to request the retrieval of the information from where the data is archived. The most common form of backup the medical industry uses is tape backup for archiving expired information.
Identifying the kinds of records Determining which type of active documents in your organization might be declared as records requires the collaboration of records managers, lawyers, compliance officers, and content managers. Even if your enterprise is not in a highly regulated industry, there are general laws that may obligate your enterprise to keep records. Along with general business laws, you must evaluate the legal requirements specific to your enterprise. Most likely, your enterprise is doing some form of records management and has filled most of the records management roles that you need, and you might already have a taxonomy of records.
To determine what are considered records in your organization, follow these steps:
Understand the legal obligations and business needs of your enterprise.
Analyze how active documents are used in a collaborative effort across the divisions of the organization.
Develop a list of the kinds of documents that should become records, such as documents related to employees’ benefits or to product research and development.
Categorize the records. Records in the same category often have the same retention periods and other similar policies applied.
Note
A Records Category worksheet template is available in Microsoft Excel format at http://go.microsoft.com/FWLink/p/?LinkID=179987&clcid=0x409.
Creating information management policies Information management policies are sets of rules governing the automated management of the documents. This includes how long a document should be retained and which actions on the document should be applied. Each rule in an information management policy is called a policy feature. The records managers are the ones who configure the policies in the records management system to reflect the file plan requirements.
The two recommended approaches for implementing polices into a document repository are the following:
Create individual policies for each document library if the requirements are unique to the content in each library.
Create site-collection policies to cover an entire set of record types and apply them to several document libraries as needed. One policy can be applied for an entire document library or, if multiple content types are configured for the document library, then you can apply a separate policy for each content type.
After creating a policy, it is implemented by associating it with a site collection, content type, list, or library in SharePoint. The association to the content type, list, or library can be accomplished by the following three methods:
Site collection policy. Associate the policy features with a site collection policy and then associate the policy with a content type, list, or library.
Content type policy. Associate a set of policy features directly with a content type and then use the content type for one or more lists or libraries. Content type policies can be specified within a content type hub so that the policies will follow the content types down into the consuming locations.
List or Library policy. Associate a set of policy features directly with a list or library when multiple content types are not configured for the list or library.
Note
A policy feature may use one or more policy resources that provide functionality to a policy feature. An example would be a custom policy resource for a barcode policy feature could be used to generate a unique barcode value for a document.
Completing the file plan Once the records have been identified and the record categories sets have been determined, you can now complete the file plan by providing additional information about each kind of record. The following is the additional information that must be indicated:
What is the retention time for each record?
How will the records be disposed when the retention period ends?
Who is the primary records manager for the records?
What is the media the records will be stored in?
Develop retention schedules for each record type, determining when a record is no longer active, how long it should be retained after it is no longer being used, and how the record should be disposed of.
To improve the document management policies that have been implemented, it is important to evaluate and ensure that the required policies for the document repositories are being applied by the organization.
Determine if an archive will be created, if the records will be managed in place, or if a combination of both will be used. Based on the desired file plan, design the record archive or determine how to use the existing sites to contain the records. Define content types, libraries, policies, and metadata (when required) that determine the routing location for a document.
After the file plan has been developed and the records management solution has been designed, the next step is to plan how active documents in the organization will become records. In SharePoint Server 2013, there are two ways you can manage records: managing the records in an archive or managing the records in the same document repository as active documents. The in-place approach is when a document has become a record in the same document repository, the record remains in place but SharePoint now manages the record. For example, a document may have a retention policy that when it becomes a record, it can no longer be edited. Another approach is hybrid in nature, such as keeping records in place with active documents for three years and then moving the records to a records archive once the project is complete.
Should the records be managed in a records archive or managed in place? The answer to this question varies per organization, and there are some considerations to help determine the answer. Consider the following when trying to determine if records should be managed in a separate Records Center site or in the same collaboration site in which the document is created:
Is the collaboration site governance appropriate for managing records? Is your industry subject to regulatory requirements mandating that records be separated from active documents? Should the site collection administrator of the collaboration site be trusted to manage a site containing records?
How long will the SharePoint collaboration site be used? If the records have to be kept longer than the project, then selecting an in-place records management strategy means that the collaboration site must be maintained even after the project is over.
Will the project members need continual access to the documents once they become records? If so, then an in-place records management strategy would be the more desired approach in this situation.
Are record managers responsible for all information regardless of whether they are active or not, or are they responsible for just records? If they are responsible for just the official records, then having a separate Records Center site might be the better option.
The differences between what can be done with records in a Records Center site and records managed in place may help determine what is better for your organization. Table 13-2 describes the differences between a records archive and in-place records management.
Table 13-2. Differences between a records archive and in-place records
Factor | Records archive | In-place records |
Managing record retention | Content organizer automatically puts new records in the correct folder based on metadata in the archive’s file plan. | There may be different policies for records and active documents based on the location or current content type. |
Restricting which users can view records | Yes. The records archive specifies the permissions for the record. | No. The permissions do not change when a document becomes a record; however, you can restrict which users can edit/delete records. |
Ease of locating records (for records managers) | Easier because all records are in one location. | Harder because records are spread across multiple SharePoint sites. |
Maintaining all document versions as records | The user must explicitly send each version of a document to the records archive. | Automatic if versioning is turned on. |
Ease of locating information (for team collaborators) | Harder; however, a link to the document can be added to the site when the document becomes a record. | Easier. |
Clutter of collaboration site | The site contains only active documents. | The site contains active and inactive documents (records). However, views can be created to display only records. |
Ability to audit records | Yes. | Dependent on the audit policy of the site. |
Administrative security | Records managers can manage the records archive. | Site administrators have permission to manage records and active documents. |
Table 13-3 details the differences between the two that may affect how IT resources are managed.
Table 13-3. Resource differences between a records archive and in-place records
Factor | Records archive | In-place records |
Scalability | Relieves database size pressure on sites containing active documents. | Maximum site-collection size reached sooner because it contains both records and active documents. |
Ease of administration | Additional provisioning work for separate sites or farms. | No additional site provisioning work beyond what is already needed for the sites that have active documents. |
Storage | Records can be stored on different media. | Records and active documents are stored together. |
The section provides information on the techniques that can be used to declare and convert active documents to records.
Creating records manually Users can declare a document to be a record manually in one of the following ways:
In-place records management. If in-place records management is enabled on a document library, then users can explicitly declare a document in the library to be a record by editing the document’s compliance details.
Records archive. If there is a connection to a Records Center site, then users can send documents to the Records Center site manually by using the Send To command. Depending on how the connection to the Records Center site is configured by the farm administrator, documents can either be copied, moved to the Records Center site, or moved to the Records Center site with a link to the document maintained from the document library where it originated.
Note
Manually sending records to the Records Center site is not practical for large-scale solutions; however, you can still use it to supplement other methods of creating records.
Defining a policy A retention policy can be defined that declares a document to be a record or sends a document to a Records Center site at a specified time. Policy actions occur automatically, and users do not have to start the action.
Two policy actions that relate specifically to managing records are:
Transferring a document to another location. If a connection to a Records Center site exists, a policy can be created that sends documents to the Records Center site, and the policy also specifies whether to copy, move, or move and leave a link in the document library which it was moved from.
Declaring a document to be an in-place record. If in-place records management is enabled for the site, a policy can be created that declares a document to be a record. A custom action can also be created by custom developers using the SharePoint object model. If in-place is used, the site can contain both active documents and records, and you can specify different retention policies for both. For example, a policy can be created that declares an active document to be a record three years after the document is created, and a second policy is created that deletes the record seven years after it has been declared a record.
Creating a workflow If SharePoint Server 2013 is being used for both active document management and records management, custom workflows can be created to move documents to a records archive. A workflow can be created either in Microsoft SharePoint Designer or through a Microsoft Visual Studio workflow that contains an action to send a document to a Records Center site. Other action items can also be included, such as the workflow sends an email message to the document’s author requesting approval and then sends the document to the Records Center site once it is approved.
Using custom solutions If external document management systems are being used, you can plan and develop custom solutions that move the content from the systems to the records archive.
Determine if you will manage email records within SharePoint Server 2013 or manage email records within the email application itself, such as Exchange.
If the SharePoint social media features are being used within the organization, determine what blogs, wikis, and My Sites content will become records.
Document your records management plans and processes to communicate the required practices. Also, documenting will help verify the organization is performing the required records management practices. The records management guidelines, implementation plans, and metrics on effectiveness may have to be produced if your organization becomes engaged in a records-related litigation.
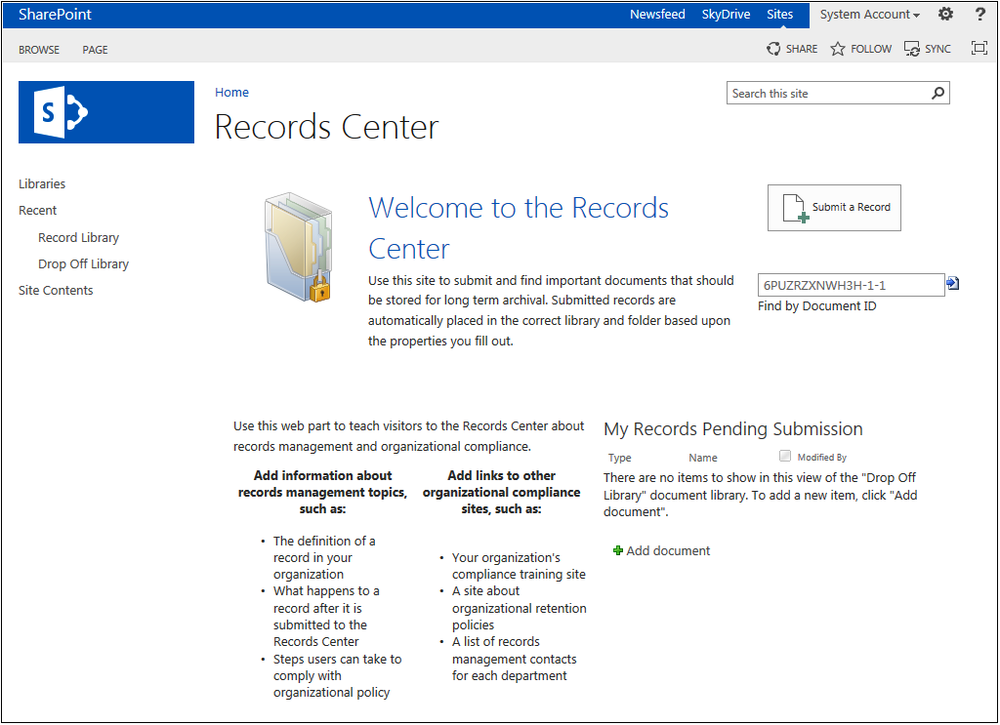
The Records Center site template is intended to serve as a central repository in which an organization can store and manage all records. The Records Center supports the entire records management process, from records collection to the disposition of the records. In SharePoint 2010, the site template was updated with new functionality, such as the Content Organizer to route incoming documents, which gave records managers faster access to common tasks and actions.
When you create a Records Center site, the following site-collection features are enabled:
Disposition approval workflow. Manages document expiration and retention by allowing participants to decide whether to retain or delete expired documents.
Document ID service. Assigns IDs to documents in the site collection, which can be used to retrieve items independent of their current location.
Document sets. Provides the content types required for creating and using document sets. Create a document set when you want to manage multiple documents as a single work product.
In-place records management. Enables the definition and declaration of records in place.
Library- and folder-based retention. Allows list administrators to override content type retention schedules and set schedules on libraries and folders.
SharePoint Server Enterprise. Features such as InfoPath Forms Services, Visio Services, Access Services, and Excel Services Application are included in the SharePoint Server Enterprise license.
SharePoint Server Standard. Features such as user profiles and search are included in the SharePoint Server Standard icense.
Site policy. Allows site collection administrators to define retention schedules that apply to a site and all its content.
In addition, the following site features are enabled:
Content organizer. Creates metadata-based rules that move content submitted to this site to the correct library or folder.
Following content. Enables users to follow documents or sites.
Hold. Tracks external actions such as litigations, investigations, or audits that require you to suspend the disposition of documents.
Metadata navigation and filtering. Provides each list in the site with a Settings page for configuring that list to use metadata tree view hierarchies and filter controls to improve the navigation and filtering of the contained items.
SharePoint Server Enterprise. Features such as Visio Services, Access Services, and Excel Services Application are included in the SharePoint Server Enterprise license.
SharePoint Server Standard Site features. Features such as user profiles and search are included in the SharePoint Server Standard license.
Team collaboration lists. Provides team collaboration capabilities for a site by making standard lists, such as document libraries and issues, available.
Workflow Task content type. Adds the SharePoint 2013 Workflow Task content type to the site.
Follow these steps to create a Records Center site:
From Central Administration, click Application Management located in the left navigation.
Under Site Collections, click Create Site Collections.
In the Web Application drop-down list, select the desired web application you want to use to create the Records Center site, as shown here.
Input the Title and Description (optional), as shown here.
For the Web Site Address, select the desired drop-down path or click the Define Managed Paths link to create a new managed path, as shown in the following graphic.
Note
For more information on managed paths, visit http://technet.microsoft.com/en-us/library/cc261845.aspx.
In the Template Selection, click the Enterprise tab and select Records Center, as shown here.
Assign at least one Site Collection Administrator for the site, as shown here, then scroll down to the bottom and click OK.


Note
Because the site collection is going to be a Records Center site, it is recommended that the Quota Template property be set to No Quota. It is also recommended to use a separate database for the Records Center site collection for ease of management, which includes maintenance, growth monitoring, and business continuity.
To access the dashboard in the Records Center site, follow these steps:
In the browser, open the newly created Records Center site (such as http://contoso/recordscenter).
Click the Site Settings icon, and then click the Manage Records Center link, as shown here.
Proceed with all necessary steps to configure your Records Center site. Configure tasks and set up Content Organizer Rules based on your file plan.

A connection is a path used for sending documents to a Document Center or Records Center site and is created by a farm administrator. The farm administrator configures the connection to copy, move, or move the content and leave a link in the source site collection. This section provides the details of creating, modifying, and deleting connections from a web application to a SharePoint 2013 Document Center or Records Center site.
Creating a connection To create a connection, ensure that you have the appropriate permissions to continue with these steps. If you are not a farm administrator, then your farm administrator can follow these steps to configure the connection on your server farm:
From Central Administration, click General Application Settings.
Under External Service Connections, click Configure Send To Connections, as shown here.
From the Configure Send To Connections page, select the Web Application that contains the Records Center site.
In the Tenant Settings area, leave the Allow Sites To Send To Connections Outside Their Tenancy option checked (as shown in the graphic on the next page) to allow the site to send content to other tenants on the farm.
The Send To Connections list will automatically have New Connection listed and selected, as shown here. If other connections have been created, then all connections will show up in the list.
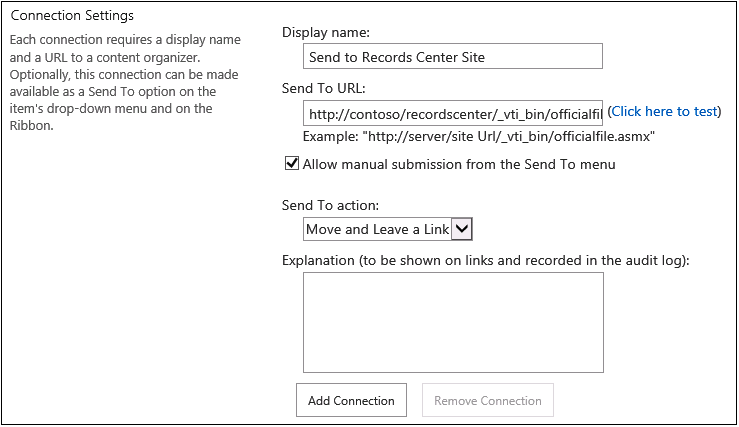
In the Connections Settings section, set the Display Name and the Send To URL.
Leave the Allow Manual Submission From The Send To Menu checked if you want to allow manual submission.
In the Send To Action drop-down list, select the desired option:
Copy. Select this option to create a copy of the document and send the copy to the destination repository.
Move. Select this option to delete the document from its current location and move the document to the destination repository. Users will no longer be able to access the document from its original location.
Move And Leave A Link. Select this option to delete the document from its current location, move it to the destination repository, and leave a link at the current location indicating that the document has been moved. When a user clicks this link, a page will appear that displays the URL of the document and the document’s metadata.
In the Explanation (To Be Shown On Links And Recorded In The Audit Log) multiline text box (shown here), type the information to be added to the audit log when users send a document using this connection.
If you selected Move And Leave A Link, the page that appears when the user clicks the Send To link will also display the explanation.
Click Add Connection to create the connection.
Notice that the new connection is now in the Send To Connections list.
Configure or add any additional connections, and once finished, click OK.


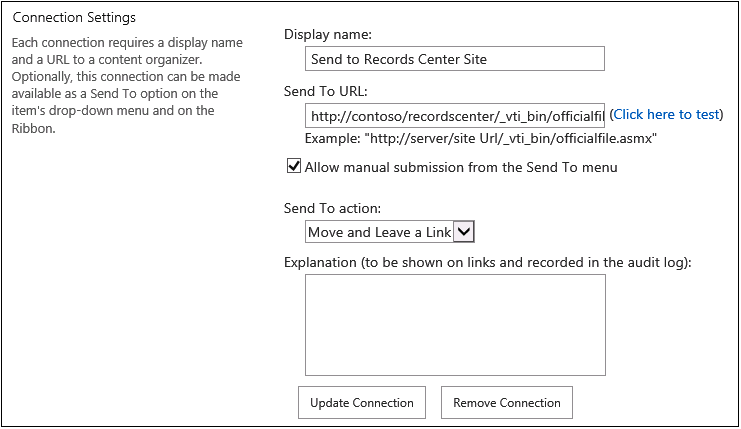
Modifying connections To modify the connection, follow these steps:
From Central Administration, click General Application Settings.
Under External Service Connections, click Configure Send To Connections.
In the Web Application drop-down list, select the desired Web Application that contains the site collections that use this connection.
In the Send To Connections list, select the connection you want to modify.
Modify the settings, and then click Update Connection, as shown in the following graphic.
Click OK.
Deleting connections To delete a connection, follow these steps:
From Central Administration, click General Application Settings.
Under External Service Connections, click Configure Send To Connections.
In the Web Application drop-down list, select the desired Web Application that contains the site collections that use this connection.
In the Send To Connections list, select the connection you want to modify.
Click Remove Connection to delete the connection.
Click OK.
What is eDiscovery? eDiscovery is the process of collecting and analyzing content in electronic format for record managers and litigators. eDiscovery typically requires searching for documents, websites, email messages, file servers, and other sources, and then collecting and acting on content that meets criteria for a legal case.
eDiscovery in SharePoint 2013 helps reduce the cost and complexity of discovery in the following new ways:
eDiscovery Center. A central SharePoint site used to manage the preservation, search, and export of content stored in Exchange across Exchange servers and in SharePoint across SharePoint farms
SharePoint in-place hold. Preserves entire SharePoint sites and protects all documents, pages, and list items within the site but allows users to continue to edit and delete preserved content
Exchange in-place hold. Preserves Exchange mailboxes and protects all mailbox content through the same UI and APIs used to preserve SharePoint sites
Query-based preservation. Allows users to apply query filters to one or more Exchange mailboxes and SharePoint sites and restricts the content that is on hold
eDiscovery works by using Search Services applications (SSAs) to crawl SharePoint farms. SSAs can be configured many ways for eDiscovery. The most common way is to have a central Search Services farm that crawls multiple SharePoint farms. This one Search Service can be used to crawl all SharePoint content or used to crawl specific regions, such as all SharePoint content in the United States.
To crawl, the eDiscovery Center uses a proxy connection to query and send preservations to SharePoint sites in other SharePoint farms. When a hold is initiated, Hold actions are created and passed to the Search Service. In the case of Exchange, the Hold action is immediately federated to the Exchange server. This triggers an asynchronous Hold operation on the Exchange side in which the status will not be immediately known. In the case of SharePoint, the Hold actions are stored in the content database. The source system/farms have the “Preservation Processing” Timer Job, which runs periodically and retrieves the hold commands from the Search server. For the intended sites, it updates the metadata, marking them as Hold. The eDiscovery Center has a timer job that periodically refreshes the status of the pending actions. After the various source systems have acted on the hold commands and updated the status in the Search Service, the eDiscovery Center will reflect the updated status.
Note
To learn more about SharePoint Search, see Chapter 19.
Site holds preserve content on the site level, so when you preserve a site, its lists and subsites are preserved. If you preserve a site collection, all subsites, documents, lists, and pages within the site collection are preserved. To hold a site, create a Discovery Case in the eDiscovery Center.
The eDiscovery Center site collection is used to perform discovery actions. It allows the ability to create cases (which are SharePoint sites) to identify, hold, search, and export content from Exchange mailboxes, SharePoint sites, and file shares for civil litigation or investigations.
Follow these steps to create an eDiscovery Center site collection:
From Central Administration, click Application Management located in the left navigation.
Under Site Collections, click Create Site Collections.
In the Web Application drop-down list, select the desired web application that you want to use to create the site.
Input the Title and Description (optional).
For the Web Site Address, select the desired drop-down path or click the Define Managed Paths link to create a new managed path, as shown here.
In the Template Selection, click the Enterprise tab and select, eDiscovery Center as shown here.
Assign at least one Site Collection Administrator for the site, as shown here, then scroll down to the bottom and click OK.


To create an eDiscovery case, follow these steps:
In the eDiscovery Center site, click Create New Case.
Type a Title and Description (optional) for the case.
In the Web Site Address, type the last part of the URL you want for the case (such as Contoso vs Adventure Works), as shown here.
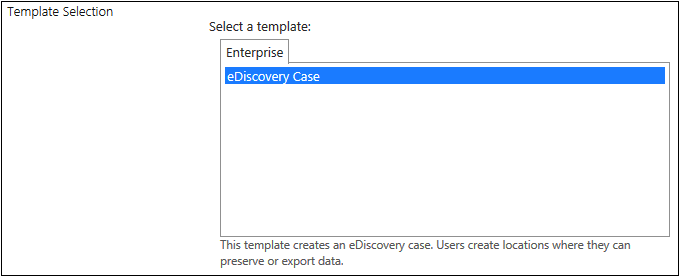
Under Select A Template, click eDiscovery Case, as shown here.
For the User Permissions, select whether to keep the same permissions as the parent site or use unique permissions.
If specific people need access to this case but not to other cases, choose Use Unique Permissions.
Change the Navigation settings if desired, and then click OK.

To add a source to an eDiscovery case and place it on hold, follow these steps:
In the eDiscovery Center, open the case you want to add a source to.
Click eDiscovery Sets and then type a name for the eDiscovery set.
Next to Sources, click Add & Manage Sources.
In the dialog box, under Mailboxes, type the account names or email addresses for the Exchange mailboxes.
Under Locations, type the URL or file share address for the content that you want to use as the source.
Any content that you include must be indexed by Search.
Click Save.
Under Filter, type any keywords that you want to use to narrow down the source.
To narrow content by a date range, enter the Start Date and End Date.
To limit results to the author of a document or list item or to a specific sender of email messages, type the names or email addresses in the Author/Sender box.
To limit results to a specific Exchange domain, type the name in the Domain box.
Click Apply Filter.
Click Enable In-Place Hold.
Click Preview Results to verify that you’ve selected the right content.
Click Save.
When content is placed on hold, it is preserved, but users can still continue to work on it. The state of the content at the time of the preservation is recorded so that if a user modifies or deletes the content, the original version is preserved and is still available.
Preserving content is similar to placing the content on hold with the following enhancements:
Documents, list items, pages, and Exchange 2013 mailboxes can be preserved.
Preservation is done at the site level, and preserving a site preserves the content of the site.
Users can continue to work on the preserved content because an original version at the time of the preservation still exists.
Users with the permission to perform eDiscovery can access the original version of the preserved document.
The entire site or mailbox does not have to be preserved. You can define specified queries for the preservation scope to preserve only the content that matches the query.
The eDiscovery Download Manager is an application used to export the results of an eDiscovery search and can export all the content associated with a case to produce to authorities. The format of the export is compatible with the Electronic Discovery Reference Model standard.
In this chapter, you learned about the integrated records management features of SharePoint that can help your organization store and protect business records based on industry compliance requirements. You also learned about the eDiscovery Center site collection and features that can help organizations place content on hold during litigation or investigations, conduct queries, and export content. Now, even if your organization may not require a SharePoint solution that follows some type of industry standard compliance, you can still benefit from the records management features for other options, such as setting up policies and rerouting documents based on metadata to prevent users from creating or uploading content to the incorrect lists or libraries. The next chapter focuses on the business intelligence capabilities in SharePoint 2013, along with the software requirements for implementation.