
Active Directory Preparation
Microsoft Lync Server 2013 heavily leverages Active Directory. This results in tight integration across the Microsoft stack, including Microsoft Exchange and Microsoft SharePoint Server. However, first Active Directory must be prepared before installation can begin. All the Active Directory preparation steps can be performed in either the Deployment Wizard GUI or the Lync Server Management Shell, a customized version of PowerShell. This chapter reviews both methods.
The first step is to ensure that your Active Directory environment meets the minimum requirements for Lync Server 2013. The requirements are outlined here:
• All domain controllers in the forest where Lync Server 2013 will be deployed must be Windows Server 2003 SP2 or higher.
• All domains where you deploy Lync Server 2013 must have a functional level of Windows 2003 native or higher.
• The functional level for the forest must be Windows 2003 native or higher.
After the Active Directory prerequisites have been met, the next step is to extend the Active Directory schema to support Lync Server 2013. The schema preparation process adds new classes and attributes to Active Directory that are required for Lync Server 2013. This process must be run as a user that is a member of the Schema Admins group and is a local administrator on the server that holds the Schema Master FSMO role.
Note
To run the preparation steps from another domain member server other than the Schema Master, ensure that the remote registry service is running and the appropriate registry key is set on the Schema Master. In addition, the Active Directory Remote Server Administration Tools (AD DS) feature must be installed on the server where the preparation steps will run.
To extend the Active Directory schema using the Lync Server Deployment Wizard, as shown in Figure 5.1, follow these steps:
1. From the Lync Server 2010 installation media, run Setup.exe.
2. Click Prepare Active Directory.
3. For Step 1: Prep Schema, click Run.
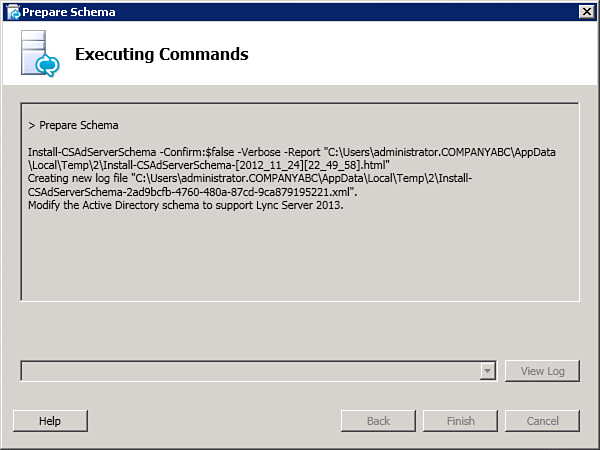
4. At the Prepare Schema screen, click Next. You’ll see the Management Shell command that is being executed, as shown in Figure 5.2.
5. Ensure that the process was successful and click Finish to close the window.
6. Ensure that the information has replicated to all domain controllers before continuing to the next step.

To prepare the Active Directory schema using the Lync Server Management Shell, open the shell and run the Install-CsAdServerSchema cmdlet. The proper syntax for the command is Install-CsAdServerSchema -LDF <full directory path where the ldf files are located>. For example
Install-CsAdServerSchema -LDF "C:Program FilesMicrosoft Lync Server 2013DeploymentSetup"
The Lync Schema extension process adds the following attributes to Active Directory. The first two are flagged MayContain for every user account.
• msExchUserHoldPolicies—Shared with Exchange 2013 and will already be in place if the schema has already been extended for Exchange 2013. It is a multivalue attribute that holds identifiers for user hold policies applied to a given user account.
• msRTCSIP-UserRoutingGroupId—Defines the SIP routing group ID. The SIP routing group ID defines which Front End Server a user will register to.
• msRTCSIP-MirrorBackEndServer—Used to store the information for the mirrored SQL Server backend used by the front-end pool.
The next step is to prepare the Active Directory Forest. This process must be run by a user of the enterprise admins group or domain admins for the root domain. Forest preparation creates global objects and sets the appropriate permissions and groups to complete the installation process. Note that in a new deployment the global settings are automatically stored in the Configuration partition. If you are upgrading from an older version of Lync Server, you can still store the settings in the System container as was standard during previous versions’ installation. However, although it is not a requirement, it is recommended to move the global settings container from the System partition to the Configuration partition as part of the Lync Server 2013 installation process.
The Deployment Wizard should still be up from the preceding step. If not, run setup.exe and it will pick up where you left off. Follow these steps to prepare the forest:
1. For Step 3: Prepare Current Forest, click Run.
2. At the Prepare Forest screen, click Next. You’ll see the Management Shell command that is being executed, as shown in Figure 5.3.
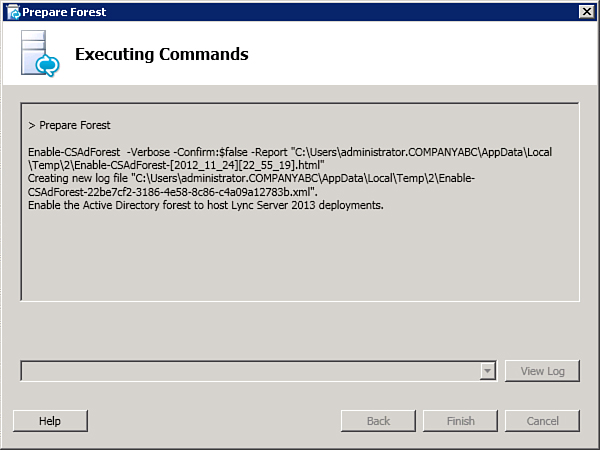
3. Ensure that the process was successful and click Finish to close the window.
4. Ensure that the information has replicated to all domain controllers before continuing to the next step.
To prepare the Active Directory Forest using the Lync Server Management Shell, open the shell and run the Enable-CsAdForest cmdlet. The proper syntax for the command is Enable-CsAdForest -GroupDomain <FQDN of the domain to create the universal groups>. For example
Enable-CsAdForest -GroupDomain companyabc.com
The final step is to prepare the active directory domain or domains. You’ll need to run this in every domain where you plan to deploy Lync Server 2013. This step will add to universal groups the necessary ACEs (access control entries). As in the two previous steps, this can be done through the Lync Server Deployment Wizard or the Lync Server Management Shell.
Using the Deployment Wizard, perform the following steps. Note that if you closed the Deployment Wizard you’ll need to run setup.exe again.
1. For Step 5: Prepare Current Domain, click Run.
2. At the Prepare Domain screen, click Next. You’ll see the Management Shell command that is being executed, as shown in Figure 5.4.

3. Ensure that the process was successful and click Finish to close the window.
4. Ensure that the information has replicated to all domain controllers before continuing to the next step.
To prepare an Active Directory domain using the Lync Server Management Shell, open the shell and run the Enable-CsAdDomain cmdlet. The proper syntax for the command is Enable-CsAdDomain -Domain <current domain FQDN> -GroupDomain <FQDN of the domain where the Universal groups were created>. For example
Enable-CsAdDomain -Domain companyabc.com -GroupDomain companyabc.com
Note
Note that the PowerShell method is the only way to perform the domain preparation steps when only 32-bit domain controllers are available.
Following is a list of Active Directory Administration groups created by the preparation processes. They are referenced throughout the book and are good to be familiar with.
Service groups:
• RTCHSUniversalServices—Includes service accounts used to run Front End Server and allows servers read/write access to Lync Server global settings and Active Directory user objects.
• RTCComponentUniversalServices—Includes service accounts used to run conferencing servers, Web Services, Mediation Server, Archiving Server, and Monitoring Server.
• RTCProxyUniversalServices—Includes service accounts used to run Lync Server Edge Servers.
• RTCUniversalConfigReplicator—Includes Lync servers that participate in Central Management Store replication.
• RTCSBAUniversalServices—Grants read-only permission to Lync server settings and allows for the configuration of survival branch appliance devices.
Administration groups:
• RTCUniversalServerAdmins—Allows members to manage server and pool settings.
• RTCUniversalUserAdmins—Allows members to manage user settings and move users from one server or pool to another.
• RTCUniversalReadOnlyAdmins—Allows members to read server, pool, and user settings.
• RTCUniversalGlobalWriteGroup—Grants write access to global setting objects for Lync Server.
• RTCUniversalGlobalReadOnlyGroup—Grants read-only access to global setting objects for Lync Server.
• RTCUniversalUserReadOnlyGroup—Grants read-only access to Lync Server user settings.
• RTCUniversalServerReadOnlyGroup—Grants read-only access to Lync Server settings. This group does not have access to pool-level settings, only to settings specific to an individual server.
• RTCUniversalSBATechnicians—Grants read-only permission to the Lync Server configuration, and members of this group are placed in the local administrator group of the survivable branch appliance during installation.
Forest preparation then adds service and administration groups to the appropriate infrastructure groups, as described here:
• RTCUniversalServerAdmins is added to RTCUniversalGlobalReadOnlyGroup, RTCUniversalGlobalWriteGroup, RTCUniversalServerReadOnlyGroup, and RTCUniversalUserReadOnlyGroup.
• RTCUniversalUserAdmins is added as a member of RTCUniversalGlobalReadOnlyGroup, RTCUniversalServerReadOnlyGroup, and RTCUniversalUserReadOnlyGroup.
• RTCHSUniversalServices, RTCComponentUniversalServices, and RTCUniversalReadOnlyAdmins are added as members of RTCUniversalGlobalReadOnlyGroup, RTCUniversalServerReadOnlyGroup, and RTCUniversalUserReadOnlyGroup.
Forest preparation also creates the following role-based access control (RBAC) groups:
• CSAdministrator
• CSArchivingAdministrator
• CSBranchOfficeTechnician
• CSHelpDesk
• CSLocationAdministrator
• CSResponseGroupAdministrator
• CSPersistentChatAdministrator
• CSServerAdministrator
• CSUserAdministrator
• CSVoiceAdministrator
• CSResponseGroupManager