Apart from requiring the user to authenticate themselves to the proxy service, we can also enforce that a message be encrypted and signed using the message protection policies. In this recipe, we will enable the message protection to guarantee message integrity through digital signature and message confidentiality through XML encryption.
For this to work, we need to have te public key of the server certificate.
For this we will use the same simple OSB project as in the previous Securing a proxy service using Username Token authentication recipe.
Import the getting-ready project into Eclipse from chapter-11getting-readysecuring-a-proxy-service-with-message-protection.
The steps to execute in this recipe are the same as in the previous Securing a proxy service using Username Token Authentication recipe, only another policy needs to be selected. In the Eclipse OEPE, perform the following steps:
- Open the CustomerManagement.proxy in the
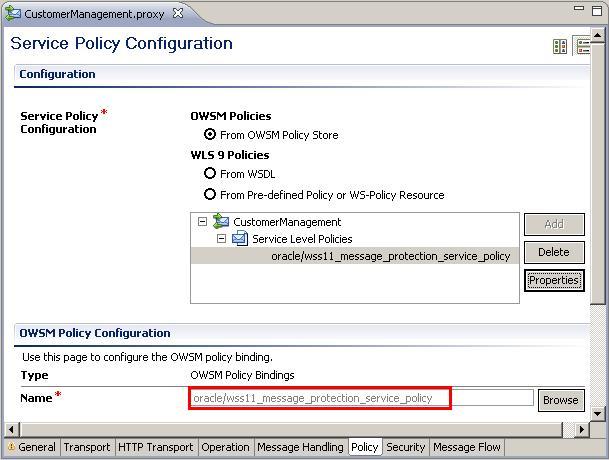
proxyfolder of the securing-a-proxy-service-with-message-protection project. - Navigate to the Policy tab.
- Enable From OWSM Policy Store.
- Click Service Level Policies, which will enable the Add button.
- Click Add and the OWSM Policy Configuration window will open.
- Click Browse.
- In the Select OWSM Policy window, we need to choose a security or management policy.
- Enter
*message_protection_service*in the Name field and click Search. - Select the oracle/wss11_message_protection_service_policy from the list of policies.
- Click OK.
- The message protection policy will be displayed in the Policy tab of the proxy service

- Save the project and deploy it to the OSB server.
Instead of
oracle/wss11_message_protection_service_policy, we could also useoracle/wss10_message_protection_service_policyon this proxy service.In the Service Bus console, perform the following steps for testing the service:
- Navigate to the CustomerManagement proxy service (in Project Explorer, click on the securing-a-proxy-service-with-message-protection project and then on the
proxyfolder) and click on the Launch Test Console icon (the bug). - Click on Execute (the value passed in the ID does not have an effect; the answer of the proxy service is hardcoded).
- We may get an error because we have not defined a certificate.
- Click Back to specify the username and password
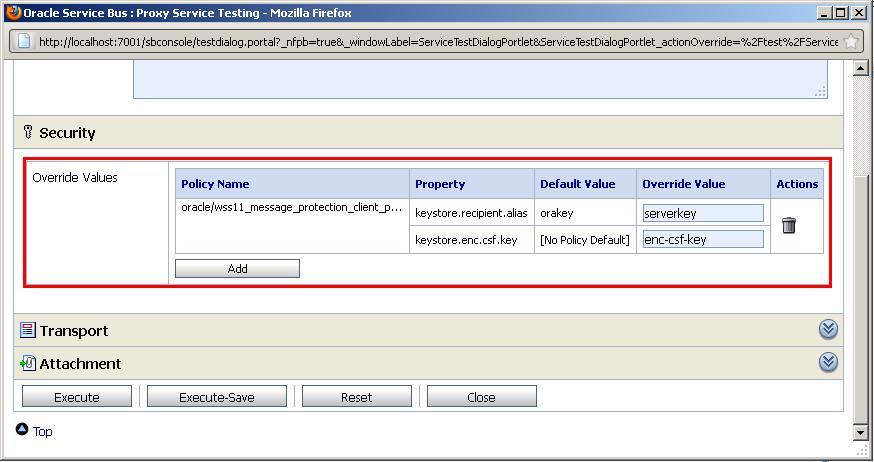
- In the test console, scroll down until the Security area is visible.
- Enter
serverkeyinto the Override Value field for the property keystore.recipient.alias. - Enter
enc-csf-keyinto the Override Value field for the property keystore.enc.csf.key. - Click Execute.

- The test should now work and a valid response should be returned by the proxy service. The test console also shows the SOAP headers passed in the request message with the encrypted key.
With the message protection policy, the public key of the server is used to encrypt the SOAP body. OWSM will use the private key of the server to decrypt the SOAP body.
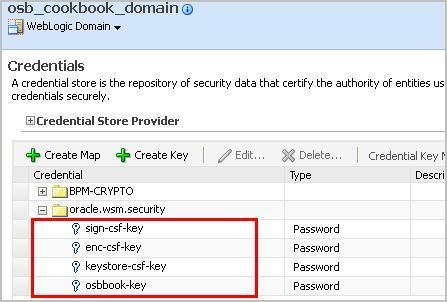
The CSF keys used in the Service Bus test console match the entries we have sn when setting up the credential store (WebLogic Domain | Security | Credentials)

Policies can also be directly manipulated on the OSB server through the OSB console.
To remove the old policy and add the new one for the message protection used in this recipe, perform the following steps in the Service Bus console:
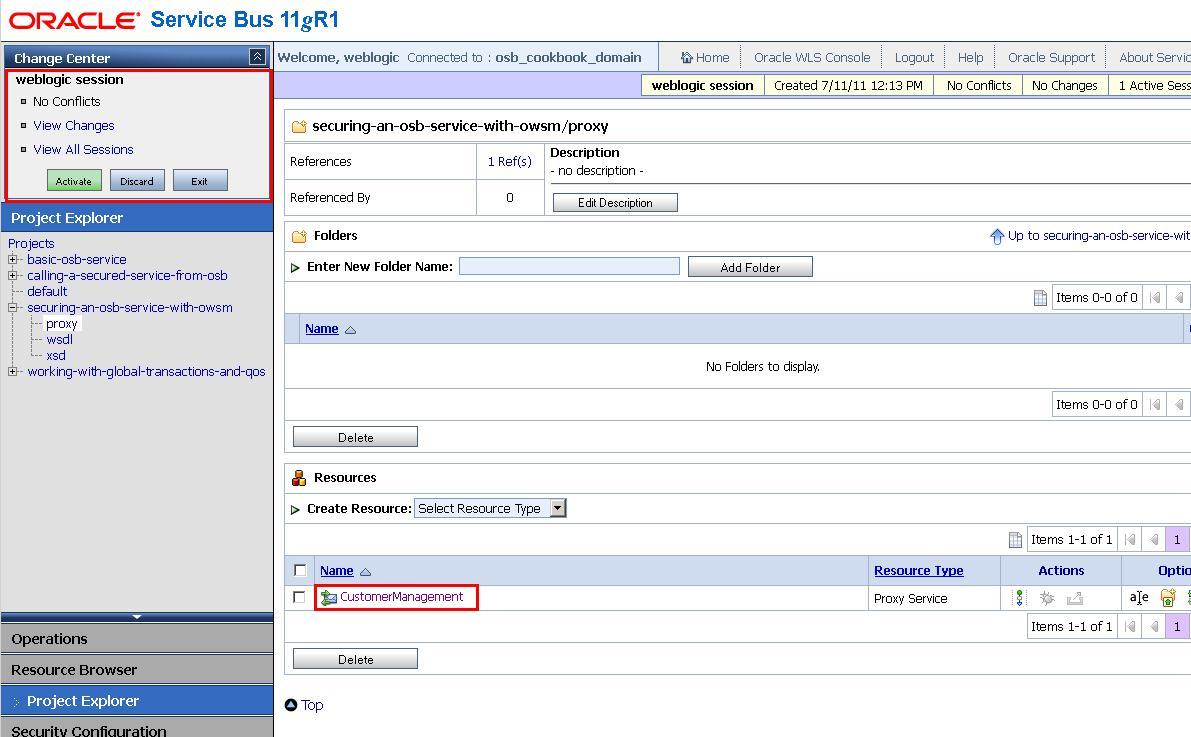
- Click on the Project Explorer.
- Click on the securing-a-proxy-service-with-username-token project.
- Click on the
proxyfolder. - Click on Create in the Change Center in the upper-left corner, to start a new change session.
- Click on the CustomerManagement proxy service.

- Navigate to the Policies tab.
- Click on the garbage bin icon to delete the
oracle/wss_username_token_policyservice-level policies. - Click Add.
- The Select OWSM Policy window is shown.
- Enter
*message_protection_service*into the Name field of the Search section and click Search. - Select oracle/wss11_message_protection_service_policy and click Submit.
- Click Update.
- Click Activate in the Change Center section to apply the changes.
- Enter
Replaced wss_username_token_policy by message_protection_service_policyinto the Description field to document the change and click Submit.
