4
BASIC AUDIO EDITING
Once you have installed Soundtrack and transferred your first project or file, the next step is to help you orient to the interface and general editing workflow. The best news is that many of the keyboard shortcuts and layout characteristics follow Final Cut. While there are things which are very different in terms of both design and functionality, there are enough similar items that you won’t be completely lost.
Project Types

Figure 4-1 An Audio File project.
Before we even get to the interface, you need to know about the two different types of projects in Soundtrack. The first is the Audio File project, which allows you to open and edit a single file. There are no tracks to move clips around on and no mixer to adjust levels using faders. An Audio File project might consist of an AIFF audio file (see Chapter 10 for more on audio file types), Wave, or the .STAP file, which is proprietary to Soundtrack Pro. When you first save an Audio File project, you have the choice to save it as an Audio File project or as one of the other audio file types. The greatest benefit of saving it as an Audio File project is that all of the editing and processing added to the file is remembered in an Actions List that is saved with the file and can be recalled at a later time. The biggest problem is that the Audio File project can only be used by Soundtrack, Final Cut, and Logic Pro and not on other software platforms.

Figure 4-2 A multitrack project.
The second type of project is the multitrack project. This looks like what you are familiar with in Final Cut and resembles the Timeline view of a sequence. You can have multiple clips that can be moved all over the place. Multitrack projects and Audio File projects are also integrated together. You can double-click on a clip that is in the timeline of a multitrack project and it will be opened in a new project tab as an Audio File project. If you want to use an Audio File project on the timeline of a multitrack project, you need only drag and drop it in and it appears in exactly the same way as all of the other clips. The biggest difference in the way you will likely use these depends on which Send to Soundtrack function that you use. If you send a clip in Final Cut to Soundtrack, it will open as an Audio File project. If you send the entire sequence then it will open as a multitrack project. Over the course of a project, you will undoubtedly use both quite often.
General Interface
Soundtrack is designed with a simple default layout. It never takes more than a single mouse click or keyboard shortcut to access each tab, window, or specialized tool. In fact, the majority of the features can be accessed from the default single application window. Instead of using a system with various windows that are all disconnected, Soundtrack uses a single window that has a center section with three additional panes and a number of tabs in each pane.

Figure 4-3 Active tabs in the default layout.

Figure 4-4 Cramped mixer tab.
One of the biggest issues with this system is screen space on a laptop system because using several of the important windows in a tab-style interface means that you will have very little room to work efficiently. The primary feature to help with this involves saved layouts. There are two that come preprogrammed in Soundtrack, but it is possible to save custom layouts. This is handy when setting up a custom workspace. A critical part of creating custom layouts is pulling tabs out of panes to make them free-floating windows. These can be expanded to full screen which allows detailed editing and mixing functionality. Once you create a custom layout, use the Window > Save Layout … option to save the layout. One feature that is lacking here is the ability to recall layouts using keyboard shortcuts, beyond the two default layouts which are recalled using the function keys F1 and F2.
Default Panes
The center section of Soundtrack cannot be hidden or closed and represents the projects themselves. If you are working in an Audio File project, then the waveform is shown here. If you are working in a multitrack project, then the tracks containing the audio clips are shown here. You can have multiple projects open using multiple tabs. To switch between projects that are open, click on the tab of the project that you want to see.
The tools are visible immediately above this section. The panes to the right are typically more managerial in nature. You can browse your hard drives, search for Apple Loops, save favorite locations, meter your outputs, and set and meter your recording inputs. The panes on the left house the video, projects settings, and a few tabs that show information about tracks, effects, and restoration tools. The bottom pane is where the Mixer, Audio Bin, File Editor, Multitake Editor, and Conform tools are by default. The following section briefly describes each pane in order to provide you with enough information to navigate. Each section is described in a multitrack project context with the File Editor tab representing what the audio file project looks like because of their similarities.
As we go through the panes, the important aareas will be emphasized and less time spent on areas that are of less consequence; while every area plays a role in Soundtrack, often there are two or three areas that do the exact same thing and it becomes messy if we spend the same amount of time explaining each one. The other thing to keep in mind is that I will be going through these panes and tabs based on the default window layout. In each pane there are various tabs which can be clicked-and-dragged to different tab areas, both within their original panes and onto other panes. You can also re-order tabs by clicking-and-dragging. One useful aspect of this is the ability to remove a tab from any pane so that it becomes free floating. Once the pane is free, it can be closed or expanded to full screen. To retrieve the default layout, press F1 on your keyboard.

Figure 4-5 Center section with two open projects.
Dave’s Video Editor Perspective
Cycle Region
The In and Out points on the Final Cut timeline constitute a good analogy of what cycle selection is in Soundtrack. With the timeline window active you create In points (I) and Out points (O) to insert precise locations on your timeline where you will be making an edit. Then, if you do an overwrite edit, it will only impact the portion of the timeline identified within the boundaries of those points. I also use these points on the timeline to activate other tools. For example, I might use the Blade tool to create an edit point. If snapping is active, the playhead will snap to these In and Out points and then I can take the Blade tool and cut the clip at these points if needed.

Figure 4-6 Center section items.
The Center Section
The center section is the primary area in Soundtrack. The tracks can only be accessed in the center section. There is also a track for the video in this section. There is a ruler section (where you can set a cycle region for looping), a time code display, and above the ruler there is a global view that shows the entire project at a single glance. You can drag the box on the Global view to move the viewable area of the tracks below. Above the Global view is a group of important tools and other options.

Figure 4-7 Tools.
The left set of items includes buttons for the primary editing tools (see Figure 4-7).
- The Arrow tool lets you select clips and automation points, which you can then move around.
- The Timeslice tool can make selections on the timeline that are not limited to individual tracks and/or whole clips. You can select contiguous portions of both clips and tracks and apply selection-specific processes. That means that you can select half of a clip with this tool and place an effect on it (similar to placing an audio filter on half a clip in Final Cut, which isn’t possible without cutting the clip into parts).
- The Blade tool cuts individual regions into smaller sections.
- The Blade All tool cuts all regions across all of the tracks.
- The Lift and Stamp tools store various pieces of information on a special clipboard that can be used to paste onto other clips.
- The Scrub tool lets you click-hold-and-drag on clips in the timeline to hear the audio from the clip.
- The first dropdown menu sets the automation mode (see Chapter 9 regarding mixing).
- The Nudge menu lets you set the amount of nudge.
- The Project Sample Rate menu lets you choose between the sample rates available. If you have a sequence from Final Cut, this is set for you and will match the Final Cut sequence sample rate.
- The next two buttons determine how clips interact with each other. If the first is set, then clips will cross-fade when they are placed on each other. If the second option is set, overlapping files will cause the lowest file in the stack to be deleted. When you click-drag a file onto another file, the moving file takes precedence and the non-moving file loses whatever portion is overlapped.
- The last set of options determines what happens to rubber-banded audio automation when clips are moved. In Soundtrack, automation rubber banding is attached to the track/timeline and not to the clips themselves. You can choose to have the automation move with clips that occupy the same track and timing by selecting the option here. You may need to toggle this quite often when editing because sometimes you may want the automation to slide with the clips, and at other times not.
The Video Tab

Figure 4-8 The video tab.
The video tab is the place where an imported video will play back. It can be quite small here, but in most cases that is okay because you will be working primarily on audio. You can choose the video zoom level using the dropdown menu. If you want to use an external monitor or an additional cinema display, there is a preference panel (Video Out) that provides these options.


Figure 4-10 The Project tab.
You can choose any available device and also choose to make it quarter frame, which helps with larger files by making them play back at a lower resolution. I use a FireWire interface that has video outputs on it as the primary method of viewing video. The option shows up in Soundtrack as DV out FireWire (Digital Video Codec). The catch here is that the video will need to be converted to DV format for it to work. If you are using Soundtrack on the same computer as your original Final Cut session, you should be able to use the same interface (if any) that you were using in Final Cut. If you want to go full screen on your computer, the easiest way is to pull the Video tab off its pane and click the Expand button in the upper left corner.
The Project Tab
The Project tab is the place where you can view project settings and store metadata about the project. This tab is split into six sections.
- The first section is a collection of information about the project file. This information is similar to that shown by pressing Command + I in the finder; it will show you the date created and modified, the size, and the file path. This can be useful when trying to find out if you are working on the correct version of your project.
- The second section is the pull up/pull down section. This is a required function for all serious audio post-production software packages, but is not something that will normally be used in Soundtrack. For a good explanation of this concept see Tom Holman’s book, Sound for Film and Television (Butterworth-Heinemann, 1997). The reason you will probably not use this feature is that it deals with audio that is connected with a film project that has been converted to video for an offline edit that will end up being broadcast. For major projects shot on film and going to a substantial broadcast, audio post is typically completed in Pro Tools or Nuendo. But, Soundtrack is ready for any task and would do just as good a job. It is safe to say that HD (high definition) video has changed much of the way the post process is completed for smaller projects and independent films.
- The third area is called Properties and deals with additional attributes of the project. For sequences not originated in Final Cut or loaded with a video clip, you can independently set the time code rate. You can also set the initial project time code location and change the ruler units. The other data in this section are for information and cannot be altered.
- The Project File Management section allows you to set whether or not imported files are collected into the project on the hard disc. I recommend turning this off in most cases, especially if you are in a closed environment and will not be taking your project to another computer. If you plan on changing systems, turning this on will ensure that you have all of your files. You can always turn this on later, following it with a save to pull all of your files into one place. The reason I recommend leaving this is off is to prevent large-scale duplications of imported files. This can really eat away at your storage space. The Create Media toggle determines whether or not any edited media is stored at the location set in the Preferences or in a folder created in the project directory. I leave this set to follow the Preferences because I am in the habit of setting the media and scratch locations at the beginning of each project. I could easily have gotten used to setting the media location to be with the project file.
- The Metadata section follows standard media metadata conventions. This includes everything from an episode picture to the names of the various people who worked on the project.
- The last section is to do with music and sets the initial tempo, time signature, and key.
Details
This tab changes its content based on the items that are in the current selection. It may reflect the entire project or a specific clip. When no clips are selected, you can numerically set the Cycle Region (loop feature) and Timeslice border values. If you

select a clip, a lot of information appears based on the selection. This metadata-style information includes:
- Name;
- Position;
- Duration;
- Offset;
- Measurement unit;
- Color;
- Enabled/disabled;
- Locked/unlocked;
- Transposition (for Apple Loops);
- l Clips speed (for Apple Loops);
- General file information, properties, and metadata;
- Music information (Apple Loops information).
Effects

Figure 4-12 The Effects tab.
This is a tab where audio effects can be added to the various tracks. They are not added to individual clips, but to every clip that lives on the track. When you add an effect by selecting it and clicking the + button (or by double-clicking the effect) the effect will be placed on the track that is selected in the center section, which is why it is important to make sure you have the correct track selected in the first place. Once an effect is activated, it will appear in the effects list below the list of effects and the graphic interface of the effect will appear on the screen. The graphic interfaces for audio plug-ins have become a little out of control lately, with people tending to subconsciously think that a pretty plug-in also sounds pretty. Nothing could be further from the truth. Often a sleek interface is a cover-up for an average-sounding effect. In the effects list on the Effects tab, you can expand each plug-in’s parameters and view/edit them textually.

Figure 4-13 Effect parameters.
Clicking on the Advanced button will open the graphic interface and the check boxes on the right side of the list enable automation. This is one area in which the editor who is familiar with Final Cut will feel at home. A list of adjustable parameters is often much easier to use, but the graphic interfaces do offer advantages of their own (see Chapters 5 – 7).
Tracks
The Tracks tab is useful when you want to see an overview of all of the current tracks. While this is useful, if you need to do this with limited screen space, the Mixer tab in the bottom pane is much more useful and displays the same basic information. The only highlight of the Tracks tab is the ability to set various groups. In the Groups area, you can select all tracks and then, when you adjust a level or a pan, all tracks will change together. You can also select all tracks in the mixer by clicking on the first and then shift-clicking on the last to select all tracks. This forms a temporary group until the selection is released.
Figure 4-14 The Tracks tab.
Analysis
The Analysis tab includes a set of helpful audio analysis and restoration tools. These tools include:
- Click/Pop – analyzes the audio signal looking for portions of the audio that experience a sharp rise and fall in level, creating a click or pop.
- Power Line Hum – analyzes the audio signal looking for low frequencies that match power line hum. It also can remove the resonate frequencies or harmonics of the fundamental hum.
- DC Offset – analyzes the audio signal looking for DC offset, which is a very low frequency that pushes the audio off the center axis.
- Phase – analyzes the audio for phase problems. Phase problems almost always involve a stereo file, or a mono file that has been converted from a stereo file. It tests for potential problems in a stereo file that has channels that have consistently opposite waveforms. If one channel’s waveform has peaks and valleys that are opposite to those of the other channel of the pair, the resulting audio if summed together would have partial or complete cancellation. For broadcast purposes, this could mean that dialog would disappear if heard through an older black and white mono television (they still exist!).
- Clipped Signal – analyzes the audio for portions that are too loud and that stay at the maximum level for a period of time. While Soundtrack offers to fix the clipped signal, it is impossible for it to make it perfect and it often sounds wrong. Clipping is most often caused in production when the sound is recorded to the camera with no dedicated sound person. If the levels are set too loud and no one notices, they will max out the microphone inputs and the signal will look like a straight line at the top of the scale. This often results in unusable audio.
- Silence – analyzes the audio for portions that are either completely silent or where the ambient noise falls below a set threshold. This is identified for informational purposes only.

The basic functionality of the Analysis tab is documented in Chapter 13 as well as on the DVD. Use the analysis tools sparingly because too much processing will likely damage your audio worse than the original problems.

Analysis tools demo.
Actions
This is an interesting portion of Soundtrack because it represents a major difference in thinking between video editors and ‘traditional’ audio editors. The Actions List keeps track of all effects applied to clips on the time-line. You can rearrange the effects in the list, edit the parameters, and deactivate them without deleting them. Most video editors immediately feel at home with this functionality because it mirrors what is possible in Final Cut. Audio engineers who are used to working in programs such as Pro Tools are often surprised by the functionality and are inevitably envious. Pro Tools doesn’t have a feature like the Actions List. You can process clips in Pro Tools, but you cannot access a detailed history and make changes after the fact without going through a lot of trouble. The Actions List also keeps track of edits and almost every ‘action’ taken on the selected clip.

Figure 4-16 Actions tab.
In addition to the obvious strengths of the Actions List, you can also do a few other really useful things. If you Control + click on an action in the list a dialog appears offering additional options, as follows:
- Edit the settings of the action.
- Re-select the portion of the clip affected by the action (the first selection of the action that took place with the original processing).
- Change the portion of the audio in the action by selecting a different portion of the clip and choosing the Set Selection for … option. The action is reprocessed using the new selection instead of the old one. This is useful if you are using noise reduction and are just reducing a portion of a clip’s noise. Once you process the audio file, you may find that you did not have enough of the file selected. Instead of starting over, go to the Actions List for the clip and, after making a larger selection of the clip, Control + click the action and choose Set Selection for … The larger selection will now include the noise reduction.
- Delete the action.
- Flatten audible actions. This is similar to flattening in Photoshop; all actions that are active will be rendered into the file itself. This is useful because then the file can be pulled into other programs without having to worry about the Soundtrack session format.
- Flatten all actions, which renders all audible actions into the file and removes the inactive ones from the list.
- Play without actions. This allows you to hear the original file with no actions active. This is a great way to hear how much you have done to the audio file.
- Play all actions. This re-activates all actions.
- A/B the last two actions in the list. A/B is a reference to comparing two effects to see which one works best for the task at hand. The A/B option only works when there is more than one effect, and it allows you to compare the last two in the list.
When you are working with an audio file project you can use real-time effects just as with a multitrack project. In order to save the file, these effects need to be converted to actions using the Render to Action option in the Process menu. If you try to save without rendering, a dialog appears warning that the effect will not be heard. The Actions tab is also explained in Chapter 13.

Figure 4-17 The Warning dialog.
The Bottom Pane
By default, there are five tabs in the bottom pane. These five require a bit more room horizontally than the rest, so it makes perfect sense to include them here.
File Editor

Figure 4-18 The File Editor tab.
The File Editor enables the editing of audio files in the context of the multitrack project. It shows you the file that is currently selected on the timeline above. This is similar in function to opening an audio clip as an audio file project. The File Editor has several flexible tools.

Figure 4-19 The File Editor tools.
- The Arrow tool is the same tool as used in the timeline and in Final Cut. It selects things.
- The Frequency Selection tool is used in conjunction with the Spectrum view, as described below.
- The Pencil tool provides editing capabilities when zoomed in closer to the audio data. The File Editor allows you to zoom in on the audio until you can see each sample. In most post-production audio sessions, the audio sample rate will be 48 000 Hz. This means that there are 48 000 pieces of audio data each second. With the Pencil tool, you can zoom in until you are working with 1/48 000 of a second and draw new curves. This is useful for fixing clicks and pops.
- The Audio Stretch tool is a personal favorite. You can use this to expand or compress audio timing without changing the file’s pitch. See Chapter 13 for a detailed explanation of how to do this.
- The Zoom tool allows you to zoom in to and out from the audio using the Option key as a modifier.
- The Scrub tool lets you click-and-drag on the audio to hear how it sounds. The speed of the sound varies depending on how fast you drag. This is useful for finding the exact point at which you wish to edit.
- The Link button links the selection in the File Editor with the Cycle selection on the ruler. This means that if you make a selection in the File Editor, the Cycle selection (In and Out points on the timeline) will adjust to match.
- The Solo button and accompanying fader allow you to solo the clip (and adjust its level) while muting all other files. This gives you some sonic privacy while editing.
Dave’s Video Editor Perspective
Sub-Frame Editing
For some new video editors it is not obvious why you might choose to do your audio editing in any application other than Final Cut. What may not be understood, however, is that Final Cut works at the frame level, meaning that you can only zoom into your timeline or audio waveform to a single frame. That may be okay for some situations, but it will be limiting at points when you need to do more precise fine-tuning. Some may be thinking that they don’t see when they could possibly need more precision than a 30th of a second; however, when you start to hear clicks and pops or you cannot find the clean-out point of a sentence, you will fully understand the power of being able to get in to an audio clip at 48 000 samples per second. This is a fine-tuning capability that just does not exist in Final Cut Pro. Further, it is a good example of what an audio engineer can actually do for your sound that may not be obvious to the video editor/filmmaker.
The buttons on the right side of the File Editor tab do two things. The first button takes any selection you have in the editor and pastes a copy at the current playhead position on the time-line, but only on the selected track. This is very useful for copying sound effects to new locations without messing with the old location. It is also very efficient because you can select only the portion of the sound you want to copy to the new location by simply selecting the segment, lining up the playhead, and pressing this button. The other two buttons switch the view of the File Editor between Waveform view and Frequency Spectrum view.
Figure 4-20 Additional tools.
Frequency Spectrum View
For those of you new to audio, this view can be very intimidating. There is a practical look at using it in Chapter 13, but I want to take some time to explain it in greater detail here. The Waveform and Frequency Spectrum views display similar file information. Instead of displaying the audio as amplitude (level) on the vertical scale and time on the horizontal scale like the Waveform view, the Spectrum view shows time horizontally, frequency on the vertical scale, and the amplitude (level) using various color schemes. The primary difference between the two views is that Spectrum is the only view that shows frequency. The real power of the Spectrum view is that you can edit the spectrum using the Frequency Selection tool. This tool is able to select rectangle-shaped portions of the Spectrum view and either delete, change gain using the Process menu option, or copy/paste data. It can be used to select portions of noise or rumble and then simply delete them. There is a demonstration of this on the DVD and a sample file you can work with while watching the examples. You can right-click on the Spectrum view to open a dialog which allows you to customize the view settings. These options are outside the scope of this book, but are briefly demonstrated on the DVD.

Figure 4-21 Frequency Spectrum view.

The Frequency Spectrum view explained.
The Multitake Editor

Figure 4-22 The Multitake Editor.
This is a tool used primarily for editing recorded ADR. Chapter 13 includes sections on both recording ADR and using the Multitake Editor. The basic premise of the Multitake Editor is that, if you loop record an audio file in Soundtrack using the Cycle selection on the ruler, the files will all be stored in a single clip that can be edited after the fact. The files appear as lanes and, once you split them into sections using the Blade tool, you can use the Arrow tool to pick between the different takes. Any portion that is selected will be automatically placed on the top level so you can hear it when it plays. This is an efficient tool that make editing ADR very easy.
Conform
The Conform functionality in Soundtrack is used to transfer sessions and updated sessions between Soundtrack and Final Cut. It is explained in detail in Chapter 3.
The Mixer
The Mixer is at the heart of audio routing in Soundtrack. You can mix levels, add track-based effects, and see the entire project at a glance. Most video editors stay clear of the Mixer and opt for a more Final Cut Pro-style experience. The Mixer can definitely be confusing when it is used for the first time, but it offers a lot of flexibility. See Chapter 9 for an in-depth exploration of the Mixer and the final mix stage of the project.
The Bin
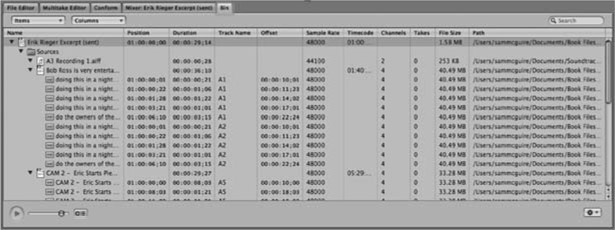
Figure 4-23 The Bin.
The Bin is the file management portion of Soundtrack. All open projects appear in the Bin along with all files that are a part of the open projects. You can see all of the available data about each project and file, including:
- Name;
- Position;
- Duration;
- Track name;
- Offset;
- Sample rate;
- Time code;
- Channels;
- Takes;
- File size;
- Path;
- Annotation;
- Author;
- Copyright;
- Tempo;
- Time signature;
- Key;
- Scale;
- Looping;
- Beats;
- Instrument;
- Genre;
- Hint quality;
- Project;
- Scene;
- Take;
- Tape;
- Circled;
- Ch. Index;
- Ch. Name;
- Note.
You may notice a wide range of metadata items available, including the newly integrated iXML standard. The Bin provides search capabilities as well as full integration with the timeline. You can Control + click on any file and choose from the following items:
- Show in Finder – useful when tracking down files.
- Reveal in Browser – shows the file in the Soundtrack browser.
- Replace selected clips with … – switches one file for another.
- Open in Editor – opens the file in an audio file project.
- Reconnect – lets you reconnect media that has lost its reference.
- Remove Unused – useful for cleaning up the Bin.
- Spot to Playhead – places the selected clip on the timeline at the playhead on the selected track.
- Spot to Timeline … – places the clip on the selected track at a specific time code reference set, in a dialog that appears once you choose this option.
- Show in Timeline – moves the view of the timeline to show you the clip’s current location.
- Rename – renames clips.

Figure 4-24 Bin view options.
The Bin shows four types of items: files, clips, markers, and podcasts. These four items can be toggled between visible and invisible, thus enabling you to keep the Bin visually organized.
The Right Pane
The right pane has five tabs that focus around either project metering or file browsing.
Meters
Figure 4-25 The Meters tab.
The Meters tab shows you the levels of the outputs of Soundtrack. The meters themselves span the entire range of audio (- infinity to + 6). While you should check this to keep an eye on general levels, it is recommended that a separate and more detailed level meter be placed on your master track. This is critical when working on projects destined for broadcast, because the specific levels are critical. This tab also shows the highest peak level, the amount of the level, and the time it was reached. This is useful information when trying to discover problems. You can reset the peak data using the Reset button.
Recording

Figure 4-26 The Recording tab.
The Recording tab provides access to the audio inputs to Soundtrack. It has level meters showing how loud the input signal is, and has the ability to set the input information for each track. See Chapter 13 for a step-by-step explanation of how to record audio. There are many different audio interfaces and video interfaces that handle audio, and so you may have to refer to the manufacturer’s documentation to get things set up with OS X, but, once you do, it is almost guaranteed to work with Soundtrack.
Browser
The browser is your link to the Finder. Here, you can view your volumes and network locations. The button on the top right can be switched between your computer and your home directory. The popup menu in the bottom right corner provides several options for placing files from the Finder into your project. These closely resemble the options in the Bin.

Figure 4-27 The Browser tab.
Search
The Search tab is in the Apple Loops browser. You can find Apple Loops here to use in your project. Due to the complex nature of music, it is way outside the scope of this book to explain how to create musical arrangements and temp music tracks. What I have done is to create a couple of DVD demos to help you to become oriented with this complex portion of Soundtrack. See also Chapter 13 for information on the search functionality of the Search tab.


Apple Loops explained.
Favorites
This tab is a place to set favorite locations so that you can easily find files. The way to create a favorite is to use the browser, Control + clicking a file, and choosing Add to Favorites.
Transport
Figure 4-29 The transport.
The transport is a permanent part of the Soundtrack interface and cannot be removed. It offers a number of useful options, including:
- A master level control (linked to the master level in the timeline and mixer);
- A Sum to Mono button (this has been fixed since Soundtrack Pro 2, in which it caused speaker and ear damage);
- Timecode entry for playhead position;
- Record button;
- Play from Beginning button;
- Rewind to Beginning button;
- Previous Frame button;
- Play button;
- Next Frame button;
- Fast forward to end;
- Cycle activate;
- MIDI sync, to sync Soundtrack to a MIDI time code source for transport control or another synchronization task. The preferences for this are in the Preferences window under Synchronization;
- Time code selection length.
Audio Editing
Now that we have made it through the interface, it is time to look at the editing process. Editing audio is most likely the biggest part of what you will be using Soundtrack for. All personal biases aside, Soundtrack is not the industry standard audio mixing tool. You will not see it being used in the majority of audio post-production facilities for mixing purposes. In fact, since you cannot buy it by itself, Apple has set it up as an appendage to its other Pro applications: Logic and Final Cut. That being said, Soundtrack is an excellent audio editor. It is better at audio editing than the more-used Logic Pro 9, which is why it is bundled with Logic and is fully integrated into it as a closer than typical external audio editor. You can select a region in Logic, press a key command, quickly begin editing the file in Soundtrack, press Save (nothing else is required), and the file is updated on the Logic timeline with the normal metadata and Actions List items saved as part of the file. Why create such close integration if Soundtrack is not better at editing than Logic? I can say that, as a result of personal experience, I wish Logic had the editing capabilities of Soundtrack. If it did, I would use Logic for everything! If Pro Tools had the same capabilities as Soundtrack, I would switch back to Pro Tools. As it stands, I use Soundtrack, Nuendo, and Sonar because they all have very advanced and similar clip-based editing capabilities that lend themselves well to post-production editing. Of those three, Nuendo has the best mixing capabilities, with Sonar and Soundtrack taking a back seat; but, Pro Tools is still used the most and has excellent mixing capabilities.
The Basics
The good news is that editing in Soundtrack is very similar to editing in Final Cut. In order to explain the editing process in as efficient a way possible, I have broken it down into various tasks. On the companion DVD there is an example session with about 30 seconds of material. The following tasks are designed so that you can load the example session and follow along.

Project file.
The Process Menu
The Process menu is the primary place to add effects directly to the clips. The menu is split into seven sections, each with a different focus. Let’s go over a task from each section.

Figure 4-30 The Process menu.
Process > Effects > EQ > Channel EQ
You will need to select an entire clip on the timeline, a portion of a clip using the Timeslice tool, or any portion of a file in the File Editor tab. Selecting a clip only processes the visible section of the file and not the handles under the edges. If you look at Figure 4-31, you will see the portion of the file in the File Editor that is visible as it is highlighted. The gray bar at the top that looks like a connected pair of markers indicates the specific clip boundaries. If you look to the left, you will see a group of other gray bars. These represent other clips on the timeline that share the same root file, but different clip definitions. This is a powerful way to see the entire file.

Figure 4-31 Processing with EQ.
If you process a single clip on the timeline, only the portion selected will be changed. If you open the File Editor and choose the entire file, you can process everything. This is useful because you can add the same effect to all clips from the same camera angle, even if it is cut up all over the place.
Once you have set the EQ to alter the sound, press Apply. This adds an action to the Actions List and changes the selected portion of the file. You can always edit the EQ settings by double-clicking the action item.
Process > Fade In
The next section in the Process menu (see Figure 4-30) contains some basic editing options, including:
- Fade In – creates a fade across the entire selection;
- Fade Out – creates a fade across the entire selection;
- Normalize … – raises the volume of the clip to a set level;
- Adjust Amplitude … – raises the volume of the clip by a set amount;
- Silence – replaces the selection with silence;
- Invert – inverts the waveform of the selection (changes phase by 180 degrees);
- Reverse – reverses the direction of the selection.
These options alter the file non-destructively, and each can be changed or deleted in the Actions List. For example, if I wanted to create a short fade at the beginning of a file to help it enter without a click or pop, I would use the following steps:
- Use the Timeslice tool to select the edge of a clip;
- Choose Fade In from the Process menu.
The fade is then created.
Of all of the options in this section, the fades are the ones that have a preferred alternate method of implementation. You can use the Arrow tool on the timeline to create fades on the edges of clips by hovering in the upper left/right corner of the clips and then click-dragging into the clip. This creates a fade with similar results to the Process menu fade. The reason that you might want to use the Process menu fade is that it can fade any portion of an audio clip, including portions not on the edge of a clip. Using clip fade on the timeline only fades the audio in that specific clip, while a Process menu fade is applied to all clips sharing the root file. Let’s go through that process as well because it demonstrates several nice editing functions.
- Use the Blade tool to cut a piece off the end of a clip (Figure 4-32a).
-
Use the Arrow tool while pressing the Option key to click-and-drag a copy of the clip. Now there should be two copies of the small clip (Figure 4-32b).
- Use the Timeslice tool to select the edge of only one of the clips (Figure 4-32c).
- Use the Fade In option from the Process menu to make the clip fade in.
- Notice that both clips fade in in exactly the same way (Figure 4-32d).

If you have a bunch of clips that share the same source file and you want to process them all, it is very easy to do. If you have a bunch of clips that share the same source file but you are not sure where they are on the timeline or you don’t want to process them all in the same way, then you should use process effects sparingly or tell Soundtrack to make the clips independent.
Dave’s Video Editor Perspective
Adding Fades with the Arrow Tool
I am a pretty careful editor and try to do as much of my fine-tuning in Final Cut as possible, because it’s the software I am most familiar with. Also, I want to minimize the busy work I have my audio engineer doing. So, I listen carefully to all my edits when I am fine-tuning and approaching picture lock. I add many cross-fades to my timeline to reduce the harsh edits. I am applying a recurring effect, and therefore I have created a ‘favorite’ audio dissolve of two frames so I can quickly apply dissolves with a keyboard shortcut. However, I like options. There are times I prefer to work in the timeline because Final Cut has a very intuitive timeline. That being said, the one thing that I envy from the Soundtrack interface is the ability to add fades using the Arrow tool. If I could click and drag to create fades in Final Cut, it would give me another option to speed up my process of editing.
New File from Selection
![]() To take a clip and make it independent from all other clips on the timeline, all you need to do is select the clip and choose File > New > File From Selection. The clip’s audio is copied into a new audio file and saved in your Edited Media Location, as set in the Preferences. This new clip will retain the actions in the Actions List, but will be independent.
To take a clip and make it independent from all other clips on the timeline, all you need to do is select the clip and choose File > New > File From Selection. The clip’s audio is copied into a new audio file and saved in your Edited Media Location, as set in the Preferences. This new clip will retain the actions in the Actions List, but will be independent.
Process menu > Insert > Silence
This is one way to create audio content without recording. If I have a file that is too short to fill a gap in the audio, I add extra time using the Insert function and then use the Add Ambient Noise function to make it sound natural. The easiest way to create a new blank file is to create a new audio file project in the File menu and then use the Insert Silence function from the Process menu to give the file some length. One other option is to import an audio file and then delete its contents. The main reason for doing this, if it is done at all, is that the Add Ambient Noise function only works on pre-existing audio files.
Noise Reduction, Ambient Noise, and Equalization Matching

Figure 4-33 The Noise Reduction dialog.
Noise reduction, ambient noise, and equalization matching are explained in Chapter 13. They work much like all of the other Process menu items but are more specialized. Over the course of a large project I used to use them rarely. With Soundtrack 3 I am using them more often, especially since the Noise Reduction tool has gotten a lot better. The noise print used in the process has a higher resolution and so it does a better job pulling out the noise. The Ambient Noise tool is one that I have always had a hard time with because there are no parameters. Normally I use another track with a piece of ambient noise on it that I can copy and paste, cross-fade, and process to fit correctly. The Ambient Noise tool takes a sample and adds it in, but there is no guarantee that it will sound right. I still avoid this tool most of the time, but have used it occasionally with success when I had a really consistent and long piece of ambient noise. Equalization matching is another really great idea that I only rarely use because spectrum matching is something that takes a good ear and is not an automatic process. When I do use it, it gets me to a good starting point and I use an equalizer to finish the job. See Chapters 6 and 13 for more on this.
Dave’s Video Editor Perspective
Finding Ambient Noise
If you can hear the absence of sound in your edit, it is probably a bad edit. You need to fill that spot with ambient sound or room tone. As a video editor and a filmmaker I have had numerous occasions when I needed to add some ambient noise to a track, to either hide something or fill in a dead spot on my timeline. What I’ve found is that recording room tone tends to be something a film crew neglects to acquire. So, what do we do as editors? We waste time trying to locate a dead space between words. We look at audio waveforms, we scan through the media, and sometimes we can find something usable. However, more often than not, we find something that has a background sound in it so, when we need several instances of the sound to make it long enough to fill the blank spot, you can actually hear that ambient sound looping and it may sound awkward and/or unrealistic. It’s a waste of time and can be very frustrating, and it often provides unsatisfactory results. Please, take the time and make the effort to record room tone. It will save you time and money in the editing room. As a video editor, you want to be focused on storytelling and natural progression. When you are wasting time looking for room tone, you are taken out of the process. Soundtrack can help alleviate this problem, but you’ll do it better if you get the room tone on location.
Process > Edit Channels
This section of the Process menu is grayed out most of the time and usually only applies to audio file projects. If you want to work on files that need channel re-ordering, double-click the file to open it as an audio file project. In Figure 4-31 you’ll notice that the clip on the timeline looks like a mono file, but in the File Editor it has four channels, three with audio. That is because the original footage came from a source with four audio channels and all four were captured into Final Cut. At some point, the other channels were either split out to other tracks or deleted from the sequence. The File Editor looks at the original file and not just what is visible on the timeline. Once I double-click the file and open it as an audio file project, I can go to Process > Edit Channels. The reason for doing this would be to switch between microphones on a clip or to fix a clip that was somehow re-ordered somewhere else (such as QuickTime, where you can re-order audio tracks in the Properties dialog).

Figure 4-34 Edit channels.
In the dialog that appears, you can re-order the channels, delete a channel, and add channels. Another thing to consider while working on multichannel files in either the File Editor or in an audio file project is that you can select channels independently using the Command key.
Other Items
The rest of the Process menu was explained above in regard to the Actions List. One thing I like about the Process menu is that I have rarely ever wished there were more I could do. The system has been well thought-out and is fairly well implemented. Of all of the options, my only comment is that Add Ambient Noise should not have to have audio present to work and should be able to create extra portions of files, but since I use it so little it is probably not a big issue.
Editing in the Timeline and Using Menu Options
The timeline is an important part of the editing process. This is where the clips live and you can use a lot of different tools to achieve your editing objectives. The one thing we are not going to cover here is automation, because it is covered in Chapter 9.
The Selection Tool (Arrow)
The Arrow tool is all-purpose. Even though the tool is technically called the Selection tool, I prefer Arrow, because the keyboard shortcut is A and that helps me remember how to access it in the easiest way. With this tool you can select files and move them around, but it also does a lot more and can be used in the following ways:
- Click in the upper corner to add fade to the edges of clips;
- Click at the side of the clip to trim clips’ edges;
- Hold shift while trimming to limit trimming to the edges of other files
- Hold Command + Option while dragging the file to slip the contents of an audio file;
- Hold Shift while dragging clips onto other clips to maintain the same time code position – make sure you press Shift before dragging because it will keep the time position only after it is pressed;
- Use in conjunction with the Multipoint video HUD (see Chapter 13);
- Use in conjunction with the Snap feature.
Snapping
Let’s explore the snap options in the timeline. You can turn snap on or off by navigating to View > Snap and you can set the snap grid in View > Snap To. The Snap option is important when lining things up on the timeline. You can snap to ruler settings, other items on the timeline (edits), and markers. One important distinction to be made concerns the overall project time base. Soundtrack projects can be measured either in seconds (time code) or beats (musical measurements). This is determined in the Project tab by choosing either Seconds or Beats from the Ruler Units menu. Unless you are working on a musical project, I recommend leaving this as seconds. Either way, the snap options change depending on the project time base. When snap is active, you can always hold the Command key to bypass its effects. You can also activate the snap by pressing the Command key.
Dave’s Video Editor Perspective
Snapping
Something I do often in Final Cut is toggle snapping on and off. The shortcut is the N key (the same as in Soundtrack). Sometimes snapping is a hindrance and at other times it is a necessity, and because it varies from moment to moment I am constantly turning snapping on and off. The novice editor often will make the mistake of trying to drag the playhead to the edit point on the timeline to add media to this point, or to make some adjustment. The problem with eyeballing it is that if you’ve expanded or reduced the size of your timeline (something else we do frequently when editing) you may be off by several frames and not know it because the timeline is compressed to show the whole edit across the entire window. Then you make the edit, and unknowingly you have a flash frame that you’ll have to fix later. The canvas window will show you a little icon to let you know when you are on the edit line, but, if your snapping is off, you may have to scrub back and forth trying to find that point. Snapping is great for making the timeline snap to the edit point and should be a part of your workflow. At other times you might need to drag the playhead through your timeline to find spots in your edit that are not on an edit point, and the snapping will prevent you from finding that spot. Here you would need to deactivate snapping by hitting the N key. The name of the game is efficiency and accuracy so that you can be creative and inventive.
The View Menu
The View menu is a good place to become acquainted with the different zooming capabilities. Having a good grasp of the various zooming options is critical to editing and, for beginners, it is almost as important as actually listening to the sound. Using visual cues can be a useful crutch when in a situation when there isn’t a good listening environment or there is loud background noise. The one thing that can never be replaced by careful listening is the blending of ambient noise from mismatched tracks. One zoom in particular is an eye opener for most video editors who are working on their own audio, and that is the Waveform Zoom In/Out. This makes the waveform graphic bigger just as a level boost would, but without the boost. Zooming in like this allows you to see what is in the softer portions of the sound. I don’t recommend using this all of the time, but it can help you catch any issues that might be living in the softer sections of your sound. There are also many other zoom features that let you do everything from zooming on a selection to changing the track height.

Figure 4-35 The View menu.

Figure 4-36 Low waveform zoom.

Figure 4-37 High waveform zoom.
Dave’s Video Editor Perspective
Waveform
Final Cut Pro has a Waveform view that I use often. One example of how I use it is when I need to identify a clean edit of a word or sentence. It is not uncommon for the subject on camera to speak fast and to move on to another thought without taking a breath. It may be difficult to find that edit point if you are simply trying to stop the playhead at that point or scrub one frame at a time to find the correct spot. I’ve found that if I open the audio in the viewer, by double-clicking an audio clip on the timeline, I can then zoom in and find the spot a little more easily. Also, once you double-click a clip on the timeline, it will open up a version of the clip that is associated with the clip in the timeline, and not the browser. This will be indicated by the sprocket holes that you’ll see right below the preview image in that window. They are telling you that, if you make any changes in the viewer window now, your timeline will be affected. So, if you make a new Out point or In point in the viewer window, it will update that edit point in the timeline. Also, once you’ve got that waveform window open, you’ll see a red line. This line represents your volume level. It’s much bigger than it is on the timeline so, if you are making level adjustments with the rubber band feature, you’ll have a large window to work with. There is also a pan line that will allow you to visually make alterations with the Pen tool just as you do with the volume level line.
Another waveform tool in Final Cut that can be helpful is the ability to see the waveform in the timeline window. If you go to User Preferences > Timeline Options you can enable Show Audio Waveforms. This will create a visual waveform on your timeline that may help you to see the audio and thus assist in identifying important parts of your sound. There are certainly times when I will turn this function on, but I find it bothersome to leave it on all the time. The problem with leaving it on is that every time you resize the timeline or move the playhead to a part of the timeline outside the current view it takes a few seconds to redraw those waveforms, and requires that you wait until it is finished before you can continue editing. It gets bothersome, so I turn it off once I’ve used it to locate the audio I was looking for.
Markers
Markers are often used as a tool to make the editing process more efficient. Scoring markers, which are a source of information about, for example, specific areas in which the edit might require attention, transfer from Final Cut. These cannot be deleted in Soundtrack, but Soundtrack has the ability to create it own markers. The available types of markers include time markers (green), beat markers (purple), and an end-of-project marker (red). Each marker is assigned to a frame number, but the time and beat markers can be assigned a region length. When a marker is selected, the Details tab in the left pane shows the properties for the marker and you can add a duration. Once a duration has been set, you can adjust the length on the ruler above the timeline and moving

Figure 4-38 Markers.
the marker’s handles will snap to an active snap setting. Also in the Details tab, you can type a name for the marker. This makes markers a great tool for making notes, setting locators on sections that need work, keeping track of picture items that need sound effects, and any other documentation needs that you might have. Markers are also useful for adjusting the tempo of a project to fit the needs of an Apple Loop. See the DVD for an example of how this works.

Scoring with markers.
The Clip Menu
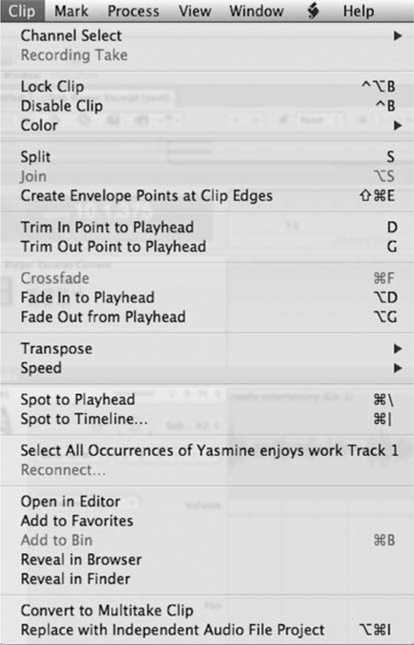
Figure 4-39 The Clip menu.
The Clip menu has a number of options that affect the editing process on the timeline. Also, note that Control + clicking on a clip in the time-line will bring up a nearly identical set of options. Following are the items that are in the Clip menu:
- Channel select – allows you to switch the currently visible audio file channel with others in the audio clip. If you have an audio file with four channels and only one is being used, you can switch with any of the four.
- Recording Take – allows you to switch between takes loop-recorded using a cycle region (see Chapter 13).
- Lock Clip – locks the clip to prevent further editing /moving.
- Disable Clip – turns the clip off and prevents it from playing.
- Color – lets you change the color of the clip, which is useful for organizational purposes.
- Split – lets you split the currently selected clip and also lets you split a clip into three sections when using the Timeslice tool and creating a selection on a clip. The clip is split at the edges of the selection.
- Join – connects two pieces of a clip that were separated, but not two unrelated clips.
- Create Envelope Points as Clip Edges – Envelopes is the Soundtrack equivalent of audio level key frames (rubber banding) in Final Cut (see Chapter 9 for more on automation).
- Trim and Fade options – these next few options allow you to trim and fade the edges of clips up to the point where the playhead is.
- Transpose and Speed – these options only work with Apple Loop files.
- Spot – these options are explained above in the File Editor section.
- Select All Occurrences of … – is a way to select all other clips that share the exact same root file.
- Reconnect … – allows you to reconnect lost media.
- Open in Editor through Reveal in Finder – these are self explanatory.
- Convert to Multitake Clip – converts the clip into a multi-take clip that can be edited using the Multitake Editor (see Chapter 13).
- Replace with Independent Audio File Project – this is another option for making a shared clip a new file for individual editing.
When right-clicking, there is a very nice feature called Replace with Related File. This provides a list of other files with similar names that can be used to replace the currently selected file.
The Edit Menu
The last area we are going to cover in this chapter is the Edit menu, but you should already be familiar with most of these options from Final Cut. Video editors are usually masters of the ripple cut. Since the video is hopefully locked (at least it won’t be changed during the audio editing by the audio editor) you won’t have to use ripple deletes very often. When I record a non-sync voiceover, I may use the ripple delete when tidying up the audio. However, the most interesting option in the entire menu is the Adjust Selection to Zero Crossing. One reason why audio edits often have pops is because an edit point may have taken place while the waveform is in the middle of a curve. When that is pushed up against another clip, the waveforms may be totally different and the speakers simply cannot handle the sudden change from one to the other. One typical way to fix this is to use a cross-fade, which transitions the files together and thus the jump is smoothed over. Another way is to make edits at a place where the waveform crosses the center axis. If both audio files are cut like this, when they are pushed together there is no sudden jump. Sometimes, when the audio content is still extremely different, there might still be a cross-fade required.

Figure 4-40 The Edit menu.
Adjust Selection to Zero Crossing takes any selection you make in the File Editor tab and adjusts the edges to line up with zero crossing points. In most cases, changing the selection to hit zero crossings happens at a sub-frame point and will not throw off the sync, but it can remove a moment of audio and thus leave a gap in the ambient noise. Most often, a cross-fade is the best answer to clips and pops.

Figure 4-41 (a) Selection at non-zero crossing. (b) Selection moved to zero crossing.

Heads up display (HUD) demo.
Heads Up Displays
The heads up displays (HUDs) are a useful feature in Soundtrack that I use in every project. Information about these is located in Chapter 13; however, because they are useful for editing, I wanted to give them a mention and indicate that there is a short demo on the DVD.
Summary
The tools of editing that are available in Soundtrack have been explained in this chapter, along with some common techniques. For further explanation of the process of editing in a variety of audio situations, see the audio post-production section in Chapter 2, in which David Bondelevitch does a great job of explaining the overall process. Now you can take the tools explained in this chapter and the following chapters and begin the editing process. For better or worse, audio editing is often just as time-consuming as the picture edit, and the problems encountered are often even worse. Soundtrack is able to help with many of them, and mastering these editing tools will give you the best shot at success.