Now, set the MyWCF.EasyNorthwind.Client project as the startup project, and press F5 to start it. Note that if you start it in non-debugging mode by pressing Ctrl+F5, you will have to start the host application first, or set the solution to start with multiple projects, as we did in one of the previous chapters.
You will see the main window for the test client. Enter a valid product ID and click Execute to get the product details.

You will also notice that another dialog box has popped up, warning that we can't debug the host.

This is because we haven't enabled the debugging setting for the host application. Just click OK to close this dialog box, or you can modify the debugging setting to true in the web.config file, under the MyWCF.EasyNorthwind.Host project:
<compilation debug="true">
Note that after you change the above line in the web.config file in the host application, and when you rebuild the solution, you will get two messages in the Error List window.

This is because the client application configuration file is referencing the host application project, so after the host application is updated, the client configuration file will be updated automatically. However, the client application project does not depend on any other project. So, if you rebuild any other project, Visual Studio won't rebuild the client application. The client is independent of the server projects. Visual Studio keeps all project dependencies in the solution's, Property Pages. You can open this window via menu option View | Property Pages or Project | Properties, while the solution item is selected in the Solution Explorer.

At the beginning of this section, we tested this service with a valid product ID. Now, follow these steps to test the service with an invalid product ID:
- Enter an invalid product ID. You will get a No product found fault exception.

- Enter a string as the product ID. When you click the Execute button, you will get an invalid format exception.

-
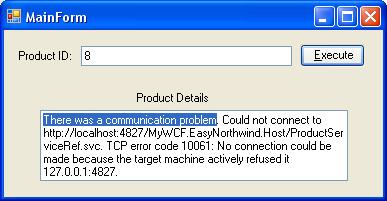
And finally, if you shut down the host server (right-click on the little ASP.NET Development Server icon (
 ) on your task bar, and select Stop), or if you start the client without starting the host server, you will get a communication exception.