
Now that we have the WCF service ready, we need to create a host application to host it, and a test client to test it. We will use the Service Factory to model the Host, and then customize it in subsequent sections. Once we have finished creating the host and test applications, we will test the WCF service. We will see how LINQ to SQL can help us to enhance the WCF service. Note that many steps here are very similar to those described in Chapter 8, so you can refer to that chapter for more information and screenshots if necessary.
First, we need to model the host application, and generate a test client to test the WCF service. We will use this test client to test the normal get and update operations of the service, and then test the concurrent update control of the service.
Follow these steps to model the host application and the test client:
- Add a new Host Model to the solution model project, with the name LINQNorthwind.
- Add a New Host Application to the LINQNorthwind Host model, with the name LINQNorthwindHost, select WCF Extensions as the Implementation Technology, and select MyWCF.LINQNorthwind.Host as the Implementation Project.
- Add a New Service Reference of LINQNorthwind ProductService to the LINQNorthwind host application, with the name ProductServiceRef, and change this reference's Enable Metadata Publishing property to True.
- Add a New Endpoint for the Host application, with the name ProductEndpoint.
- Validate the model, and generate the Host application from the model.
- Change the Host website MyWCF.LINQNorthwind.Host to use static port number 8080.
- Add a New Client Application to the Host model with the name LINQNorthwindClient, select WCF Extensions as the Implementation Technology, and select MyWCF.LINQNorthwind.Client as the Implementation Project.
- Add a New Proxy to the test client, with the name LINQNorthwindProxy, and select ProductEndpoint for its Endpoint property.
- Validate the model, and generate the client from the model. Don't forget that you will need to start the host application before you can generate the client application code.
Now that we have the Host application, and the test client generated, we will customize the client application to test the new WCF service.
First, we would need to customize the test client to call the WCF service to get a product from the database, so that we can test the GetProduct operation with LINQ to SQL.
To simplify the process, we will customize the main form just as we did in Chapter 8. So, the main form should be as shown in the following screenshot:

And the event handler of the Execute button should be as follows:
private void ExecuteButton_Click(object sender, EventArgs e)
{
ProductServiceContractClient client = new ProductServiceContractClient();
GetProductRequest request = new GetProductRequest();
string result = "";
try
{
request.ProductID = Int32.Parse(SearchText.Text.ToString());
Product product = client.GetProduct(request);
StringBuilder sb = new StringBuilder();
sb.Append("ProductID:" + product.ProductID.ToString() + "
");
sb.Append("ProductName:" + product.ProductName + "
");
sb.Append("QuantityPerUnit:" + product.QuantityPerUnit + "
");
sb.Append("UnitPrice:" + product.UnitPrice.ToString() + "
");
sb.Append("Discontinued:" + product.Discontinued.ToString() + "
");
sb.Append("LastUpdateVersion:" + product.lastUpdateVersion. ToString());
WCF serviceGetProduct functionality, implementingresult = sb.ToString();
}
catch (TimeoutException ex)
{
result = "The service operation timed out. " + ex.Message;
}
catch (FaultException<ProductFault> ex)
{
result = "ProductFault returned: " + ex.Detail.FaultMessage;
}
catch (FaultException ex)
{
result = "Unknown Fault: " + ex.ToString();
}
catch (CommunicationException ex)
{
result = "There was a communication problem. " + ex.Message + ex.StackTrace;
}
catch (Exception ex)
{
result = "Other excpetion: " + ex.Message + ex.StackTrace;
}
txtResult.Text = result;
}
As you can see, this is almost identical to the code given in Chapter 8, except that the formatting of the property UnitPrice is a little different here. This is because LINQ to SQL has defined this property as System.Nullable<decimal>, and we have to change the data type of this property in the data contract from Decimal to Decimal?.
We have also added the LastUpdateVersion to the displayed text, so that we know the version of the record in the database.
Before you build this test client, you need to add the following using statements to the class:
using MyWCF.LINQNorthwind.Client.LINQNorthwindProxy;
using System.ServiceModel;
Next, we need to modify the client program to call the UpdateProduct operation of the web service. This method is particularly important to us, because we will use this method to test the concurrent update control of LINQ to SQL. We will also need it to explain the distributed transaction support of WCF in the next chapter. As this functionality was not implemented in Chapter 8, we will explain how to implement it in detail in this section.
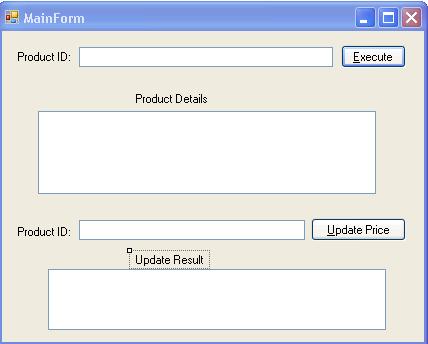
First, we need to add some more controls to the form. We will modify the form UI as follows:
- Open the file MainForm.cs in the MyWCF.LINQNorthwind.Client project.
- Add a label with text Product ID.
- Add a textbox named txtProductID.
- Add a button named updateButton with text&Update Price.
- Add a label with text Update Result.
- Add a textbox control named txtUpdateResult.
The form should now appear as shown in the following screenshot:
Now, double-click the Update Price button, and add the following event handler method:
private void updateButton_Click(object sender, EventArgs e)
{
ProductServiceContractClient client = new ProductServiceContractClient();
GetProductRequest getRequest = new GetProductRequest();
string result = "";
try
{
// first get the product from database
WCF serviceUpdateProduct functionality, implementinggetRequest.ProductID = Int32.Parse(txtProductID.Text. ToString());
Product product = client.GetProduct(getRequest);
// then update its price by 1
product.UnitPrice += 1;
// submit to database
UpdateProductRequest updateRequest = new UpdateProductRequest();
updateRequest.Product = product;
result = client.UpdateProduct(updateRequest).ToString();
}
catch (TimeoutException ex)
{
result = "The service operation timed out. " + ex.Message;
}
catch (FaultException<ProductFault> ex)
{
result = "ProductFault returned: " + ex.Detail.FaultMessage;
}
catch (FaultException ex)
{
result = "Unknown Fault: " + ex.ToString();
}
catch (CommunicationException ex)
{
result = "There was a communication problem. " + ex.Message + ex.StackTrace;
}
catch (Exception ex)
{
result = "Other excpetion: " + ex.Message + ex.StackTrace;
}
txtUpdateResult.Text = result;
}
Inside the Update Price button even handler listed above, we first get the product from the database, then just update its price by 1, and submit it back to the database. As you can see, we didn't do anything specific about the concurrent update control of the update, but later we will explain how LINQ to SQL inside the WCF service handles this for us.
As we did in the previous chapters, here too, we will capture all kinds of exceptions and display appropriate messages for them.