
Now that we have the service ready, we need a host application to host it, and a client application to test it. But if you open the Host or Client folders in the solution, you will see that they are not completed. We have to do some extra work to make them work.
Service Factory does not use WCF Service Host to host the service. Instead, it chooses to use the ASP.NET Development Server to host the service. It also creates a separate host application, so that the service projects and the host application are stored in separate folders.
The test client Service Factory created for us is a Windows application, with a text box and a Execute button in it.
Service Factory also supplies a host model that we can use to model the host and client applications. Next, we will use this model to generate the basic host and client applications. We will host the EasyNorthwind WCF service in this new host application, and test it with the new test client.
Follow these steps to model the host application:
- In the Solution Explorer, right-click on the EasyNorthwind Models item.
- Select Add | New Model from the context menu
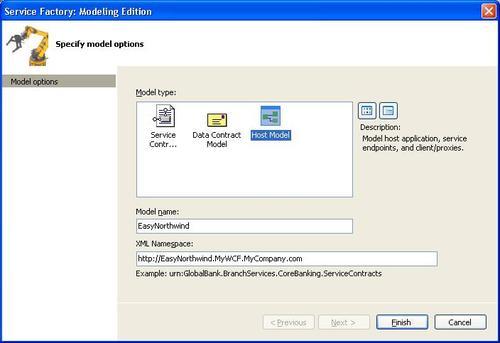
- On the pop-up dialog window, choose Host Model as the Model Type, enter EasyNorthwind as the model name, and enter
http://EasyNorthwind.MyWCF.MyCompany.comas the XML namespace - Click Finish
Now, the Host Model diagram should open up on your screen. As this model is empty, we can't do anything with this diagram. We first have to add a host application to the model to enable it.
Follow these steps to add a host application to this host model:
- The Host Explorer should have opened now on the right-hand side (if not, or you just closed it, select menu item View | Other Windows | Host Explorer to open it now). From the explorer, right-click on the Host Model item, and select Add New Host Application from the context menu.

- Now, in the Properties window, change the name of the new host application from HostApplication1 to EasyNorthwindHost, select WCF Extensions as the Implementation Technology, and select MyWCF.EasyNorthwind.Host as the Implementation Project.

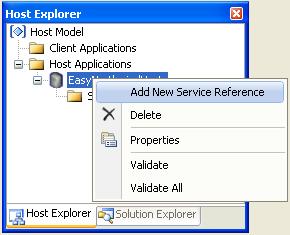
- In the Host Explorer, right-click on the EasyNorthwinHost item, and select Add New Service Reference from the context menu.
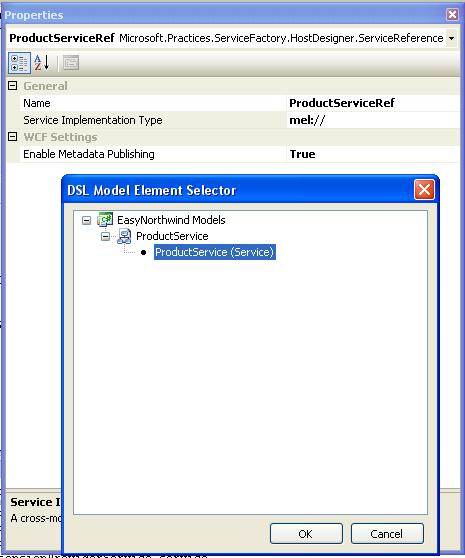
- From the Properties window, change the name of the new service reference from ServiceReference1 to ProductServiceRef. Change Enable Metadata Publishing to True, and select EasyNorthwind ModelsproductServiceproductService as the Service Implementation Type.
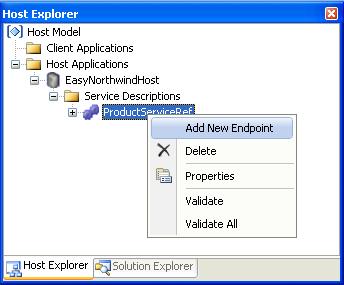
Now that we have the host application created, and the service reference added, we need to define an endpoint for it. Later, in this chapter, the test client will communicate with this endpoint to test the service.
Now that we have finished modeling the host application, we will generate the source code for the host application from this host model.
But before we can generate the source code for the host application, we need to validate this host model. You can do this from the Host Explorer, or from within the Host Model diagram.
- From the Host Explorer, you can right-click on the ProductServiceRef, and select Validate All from the context menu.
- You can also validate the model from the Host Model diagram by clicking on the link, Validate Model (the ProductServiceRef must be selected in the Host Explorer in order to see this link).

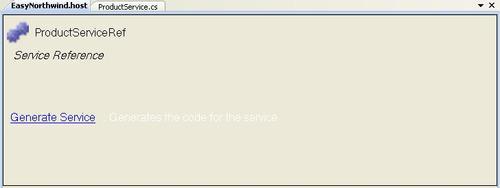
- Now, click on the link Generate Service. This will generate the service reference file
ProductServiceRef.svc, populate the configuration fileweb.config, and copy all of the service related assemblies to thebindirectory. All of these files are under the folderD:SOAwithWCFandLINQProjectsEasyNorthwindMyWCF.EasyNorthwindTestsMyWCF.EasyNorthwind.Host. - Before we go onto model the client application, we need to change one property for the host application. In the Solution Explorer, select D:...MyWCF.EasyNorthwind.Host project, change its use dynamic ports setting to False, and enter 8080 as the port number.
The host application has now been generated. Next, we will create the test client application. We will use this test client to test the service.
As with the host application, Service Factory also allows us to create a test client from the host model. First, we need to follow these steps to add a client application to the host model.
- Open the Host Explorer. If it is blank, just double-click on the EasyNorthwind.host item in the Solution Explorer under the EasyNorthwind Models folder.
- Right-click on Host Model and select Add New Client Application from the context menu.
- In the Properties window, change the name of the new client application from ClientApplication1 to EasyNorthwindClient, select WCF Extensions as the Implementation Technology, and select MyWCF.EasyNorthwind.Client as the Implementation Project.
- Right-click on the EasyNorthwindClient item, and select Add New Proxy from the context menu.
- Select the new proxy, and change its name from Proxy1 to EasyNorthwindProxy. Then right-click on it, and select ProductEndpoint for its Endpoint property.
The final Host Explorer looks like this:

We have added the test client to the host model and added a reference to the endpoint of the service. Next, we will generate the source code for the test client from this model.
In this section, we will use Service Factory to generate the proxy classes of the WCF service for the client application. In one of the previous chapters, we used the tool SvcUtil.exe to generate the proxy files manually. Here, Service Factory will do this job for us. After we have generated the proxy files, we will customize the test client to call the service in the next section.
Follow the steps below to generate the proxy files:
- First, we need to start the host application. Open the Solution Explorer, right-click on D:...MyWCF.EasyNorthwind.Host under the MyWCF.EasyNorthwindTests
folder, and select Build Web Site from the context menu. Right-click on it again, and select View in Browser. The ASP.NET Development Server will be started, and a browser will open to show all of the files under the virtual folder MyWCF.EasyNorthwind.Host. - Now, open the Host Explorer, and click on the EasyNorthwindProxy item under the EasyNorthwindClientProxies folder. Then, in the Host Model diagram, click on the Generate Proxy link. The Add WCF Service Reference dialog box will pop up.
- In the Add WCF Service Reference dialog box, accept all of the default settings, and click Next. Service Factory will now download the metadata of the service, and list all of the endpoints for the service. Accept ProductEndpoint, click Next, and then click Finish to close the window.

This will generate the service reference file, EasyNorthwindProxy.cs, and populate the configuration file, app.config. These two files are under the folder: D:SOAwithWCFandLINQProjectsEasyNorthwindMyWCF.EasyNorthwindTestsMyWCF.EasyNorthwind.Client.
Note
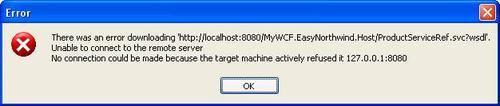
If you haven't started the host application, when you click Next, you will get an error saying "can't download metadata".
You can now build the client project, to make sure there is no build error.