
13. Style Sheets
Creating and applying style sheets
A style sheet is a set of paragraph or character formatting specifications. Whatever text is selected when you click a style sheet on the Style Sheets palette (or execute its equivalent shortcut) is formatted instantly. But style sheets aren’t used just for the initial formatting; they’re also used for updating formatting. If you modify a style sheet, all the text with which it is associated will update instantly. Each project can contain up to 1,000 style sheets, and they are available to all layouts within the project.

Prevent carpal tunnel syndrome: Use style sheets to apply repetitive type specifications quickly. Paragraph style sheets are used in this illustration. A character style sheet is illustrated on the next page. In some other applications, style sheets are simply called “styles.”
Using style sheets will relieve you from zillions of hours of tedious styling and restyling, freeing you to concentrate on more exciting tasks. And here’s another benefit: When you use style sheets, you can rest assured that your typography is consistent, whether you’re working on a small brochure or a huge, multifile book. Every single character in this book was styled via a style sheet. Enough said?
Every new paragraph style sheet automatically has a default character style sheet associated with it that defines its character attributes. You can also create independent character style sheets ![]() . If you’re unsure of the difference between paragraph and character style sheets, see “What’s the difference?” on the next page and study the illustrations on page 238.
. If you’re unsure of the difference between paragraph and character style sheets, see “What’s the difference?” on the next page and study the illustrations on page 238.

![]() A character style sheet was used to style the words “not” and “my.”
A character style sheet was used to style the words “not” and “my.”
To create a style sheet the easy way
- For a paragraph style sheet, select one or more words in a paragraph and apply any character or paragraph attributes, such as font, point size, type style, color, horizontal scaling, tracking, indents, leading, space after, H&J, horizontal alignment, tabs, rules, etc. that you want to be part of the style sheet. We will refer to this as the “sample” paragraph.
or
For a character style sheet, select and style a word or a string of words.
- With the paragraph or text string still selected, choose Edit > Style Sheets (Shift-F11), then choose New: Paragraph or Character
 .
.
or
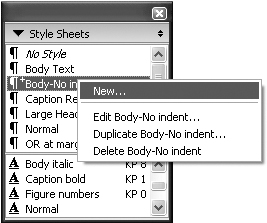
Control-click/Right-click the paragraph (or character) style sheet area of the Style Sheets palette and choose New from the context menu
 . Control-click/Right-click the paragraph or character area of the Style Sheets palette, then choose New from the context menu.
 - Type a descriptive name for the new style sheet (
 , next page).

- Optional: Press Tab to move the cursor to the Keyboard Equivalent field. Then press a function key, or press a numeric keypad key with or without a modifier (Cmd, Option, Shift, or Control or any combination thereof in Mac OS X; Ctrl, Shift [Fkey only], Ctrl+Alt [keypad only], or Ctrl+Alt+Shift [keypad only] in Windows).
- Optional: To apply successive paragraph style sheets automatically as you input text, you can link one style sheet to another. To do this, choose from the Next Style menu. When you press Return/Enter as you input text in your layout, the Next Style sheet will apply automatically to the next paragraph you type. The Next Style has no effect on existing paragraphs.
- Click OK and then, if you’re back in the Style Sheets dialog box, click Save to exit. Apply the new style sheet to the sample paragraph, if you like, and to any other paragraphs (see the next page). Two other methods for creating a style sheet are described on page 235.

A character style sheet contains only character attributes: font, type style, point size, color, shade horizontal/vertical scale, tracking, baseline shift, ligatures, and OpenType features. A character style sheet can be applied to one or more characters. In this book, the step numbers (2., 3.), figure numbers (![]() ,
, ![]() ), boldface words, and the word TIP were styled using character style sheets.
), boldface words, and the word TIP were styled using character style sheets.

Typesetting bulleted lists or numbered paragraphs is a snap: Use a paragraph style sheet for the body text and then a character style sheet for the bullet or number.
To apply a style sheet
- Display the Style Sheets palette (Window > Style Sheets or F11).
- Choose the Content tool.
- To apply a paragraph style sheet, click in a paragraph or select a series of paragraphs.
or
To apply a character style sheet, select the text you want to reformat.
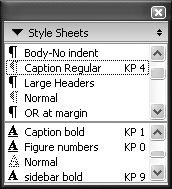
- Click a paragraph style sheet in the top portion of the Style Sheets palette . The selected paragraph(s) will reformat instantly.
To apply a style sheet, click its name on the Style Sheets palette or use the keyboard shortcut, if any, that was assigned to it. The shortcuts are listed on the palette.
or
Click a character style sheet in the bottom portion of the Style Sheets palette. The selected text will reformat instantly.
or
Press the keyboard equivalent for the style sheet you want to apply, if one was assigned to it. The equivalents are listed on the Style Sheets palette.
or
Choose a style sheet from Style > Paragraph Style Sheet or Style > Character Style Sheet.
or
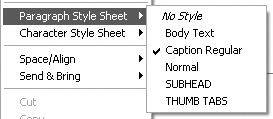
Control-click/Right-click the text in your layout; when the context menu appears, choose a style sheet from the Paragraph Style Sheet or Character Style Sheet submenu
. Or Control-click/Right-click your text and choose a style sheet from the context menu.

Local formatting
Local formatting is fomatting applied independently of a style sheet. If you insert the cursor in or select locally styled text, a plus sign will appear on the Style Sheets palette next to the name of the style sheet that’s associated with that paragraph.
You’ll also see a plus sign next to a paragraph style sheet name if the text your cursor is in has both a paragraph style sheet and a character style sheet applied to it.
A fast way to create a variation on an existing style sheet is to duplicate it, and then edit the duplicate. Unlike a Based On style sheet (which is described on page 240), there is no linkage between a duplicate style sheet and the original from which it’s generated.
To create a style sheet by duplication
- On the Style Sheets palette, Control-click/Right-click the style sheet you want to duplicate, then choose Duplicate [style sheet name] from the context menu .
Control-click/Right-click a style sheet name, choose Duplicate [style sheet name] from the context menu, then click OK.
or
Choose Edit > Style Sheets (Shift-F11), click a style sheet, then click Duplicate
. - The Edit Paragraph (or Character) Style Sheet dialog box will open, and you’ll see that the word “copy” was added to the style sheet name. Edit the name, if desired.
- Edit the new style sheet (see the next page).
- Click OK, then click Save, if necessary.


Tip
Remember, style sheets are available to all the layouts in a project.
There’s nothing to stop you from creating a new style sheet from scratch without clicking in a sample paragraph—it just takes longer.
To create a style sheet from scratch
- Choose Edit > Style Sheets.
- Choose New: Character or Paragraph.
- Enter a name for the new style sheet.
- Follow steps 2–3 on the next page to assign character and paragraph attributes to the style sheet. Use the Edit button in the General pane to specify character attributes or select a character style sheet to embed.
To edit a style sheet
- Open the Style Sheets palette, click in any text box to activate the palette, Cmd-click/Ctrl-click the style sheet you want to edit, then click Edit.
or
Choose Edit > Style Sheets (Shift-F11), click the style sheet you want to edit, then click Edit
. To narrow (or expand) the number of style sheets on the list, choose a category from the Show menu.or
Control-click/Right-click a paragraph style sheet on the Style Sheets palette and choose Edit [style sheet name] to go directly to the General pane of the Edit Style Sheet dialog box. Or do the same for a character style sheet to go directly to the Edit Character Style Sheet dialog box
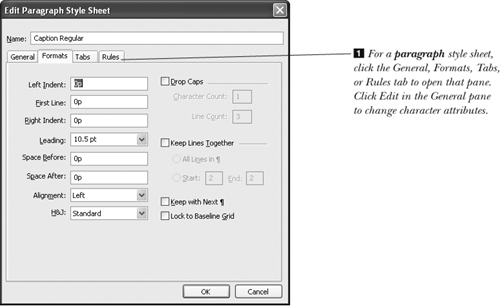
. Control-click/Right-click a paragraph style sheet and choose Edit [style sheet name] to go straight to the General pane of the Edit Paragraph Style Sheet dialog box. Or do the same for a character style sheet to go straight to the Edit Character Style Sheet dialog box. You can edit only one style sheet at a time using this method, but it’s speedy. - For a paragraph style sheet, use the General pane of the Edit Paragraph Style Sheet dialog box to rename the style sheet; to assign or change its keyboard equivalent or embedded character style sheet; or to assign a Next Style to it. To modify the style sheet’s character attributes (e.g., the font or color), click Edit; to modify its paragraph formatting, click the Formats tab (, next page); to add, delete, or modify tabs, click Tabs; or to add, delete, or edit a rule, click Rules.
or
For a character style sheet, modify character attributes in the Edit Character Style Sheet dialog box (
, next page). For a character style sheet, change the Name, Keyboard Equivalent, Based On, Type Style, Font, Size, Color, Shade, Opacity, Scale, Track Amount, Baseline Shift, Ligatures, or OpenType attributes in the Edit Character Style Sheet dialog box.
 - Click OK to exit the Formats, Rules, or Tabs pane (click OK twice if you’re in the Character Attributes dialog box), then click Save, if necessary. Text that the style sheet was previously applied to in any layouts within the project will reformat instantly!


Tip
If the currently selected text has more than one style sheet applied to it, the ![]() or
or ![]() symbol next to those style sheets will be dimmed (
symbol next to those style sheets will be dimmed (![]() ).
).
Applying style sheets by example

![]() A drop cap is added to the paragraph style sheet. Then, using a character style sheet, the drop caps are colored 30% gray and changed to the Adobe Garamond Expert font.
A drop cap is added to the paragraph style sheet. Then, using a character style sheet, the drop caps are colored 30% gray and changed to the Adobe Garamond Expert font.
![]() Finally, the font in the run-in subhead character style sheet is changed to Bodoni Poster and the font in the body text paragraph style sheet is changed to Gill Sans. Now that style sheets have been assigned to all the text, making changes will be a snap!
Finally, the font in the run-in subhead character style sheet is changed to Bodoni Poster and the font in the body text paragraph style sheet is changed to Gill Sans. Now that style sheets have been assigned to all the text, making changes will be a snap!
A default character style sheet is automatically embedded into every paragraph style sheet. In fact, a paragraph style sheet’s character attributes are derived from a character style sheet. You can change the individual character attributes of the default character style sheet for its associated paragraph style sheet (choose a different font or point size, for example).
If you want to change multiple character attributes for a paragraph style sheet all at once, you can embed a different or new character style sheet into it. The same character style sheet can be embedded into multiple paragraph style sheets.
This means, however, that if you change the specifications for a character style sheet, the character attributes for any paragraph style sheets into which it is embedded will update accordingly. And similarly, if you edit the character attributes in a paragraph style sheet, the character style sheet that’s embedded into it will also update accordingly. If this seems like too much to keep track of, ignore this page and leave Default as the choice on the Character Style menu!
To embed a character style sheet into a paragraph style sheet
- Choose Edit > Style Sheets (Shift-F11).
- Click the paragraph style sheet that you want to embed the character style sheet into.
- Click Edit.
- From the Character Style menu, choose an existing character style sheet .
or
Choose New
, type a name for a new character style sheet, choose character attributes, then click OK. - Click OK to exit the Edit Paragraph Style Sheet dialog box.
- Click Save.

One degree of separation: Based On
When one style sheet is based on another style sheet, the two remain associated. The Formats, Tabs, Rules, and Character Style options from one style sheet (which we’ll call the “child”) are derived from a second style sheet (the “parent”). If the parent style sheet is modified, any child style sheets that are based on it will also change—with the exception of any specifications that are unique to the child style sheet. This is different from duplicating or embedding, which we discussed earlier.
If you’d like to try this option, choose a style sheet in Edit > Style Sheets, click Edit, then in the Edit [Paragraph or Character] Style Sheet dialog box, choose a parent style sheet from the Based On menu. For example, you could create a style sheet called Drop Cap that’s based on a Body Text style sheet, and then, in the Drop Cap style sheet, turn on the automatic Drop Cap option in the Formats pane ![]() . If you then change the Body Text style sheet (change the font, size, etc.), those changes will also occur in the Drop Cap style sheet.
. If you then change the Body Text style sheet (change the font, size, etc.), those changes will also occur in the Drop Cap style sheet.

Using Find/Change to apply or change style sheets
To apply a style sheet to text using Edit > Find/Change (Cmd-F/Ctrl-F), uncheck Ignore Attributes on the Find/Change palette, enter a text string and/or choose character attributes on the Find What side of the palette, choose from the Style Sheet menu on the Change To side of the palette, then click the appropriate buttons at the bottom of the palette (see pages 298–302).
To use Find/Change to replace one style sheet with another on a case-by-case basis, choose both a Find What style sheet and a Change To style sheet. (If you were to delete and replace a style sheet in the Style Sheets dialog box instead, all occurrences of the style sheet would change.)
What’s Normal?
The Normal paragraph and character style sheets are the default style sheets for all newly created text boxes. If the Normal style sheet is modified with a project open, text with which the Normal style sheet is associated will update just in that project.
If the Normal paragraph or character style sheet is modified when no projects are open, the modified style sheet will become the default for future projects. Similarly, any new style sheet that’s created when no projects are open will appear automatically on the Style Sheets palette of future projects.
Managing style sheets
Appending style sheets
To append style sheets from one project to another, follow the instructions on pages 49–50. Or to append a style sheet the quick-and-dirty way, drag or copy and paste a text box that contains text to which the desired style sheet has been applied from a library or from another project into the current project—the applied style sheet will copy along with the item (as long as its name doesn’t match a style sheet already present in the target project. We did say quick and dirty, didn’t we?).
Tip
The report produced by the Collect for Output command (File menu) includes a list of style sheets in your document. Also, a number of XTensions are available that will generate printed reports of the style sheet specifications used in a project ![]() , as well as other data such as fonts, colors, H&Js, print styles, preferences, and picture files. Take a look at OfficialReport XT or Printools XT from Badia Software, or BureauManager from CompuSense Ltd.
, as well as other data such as fonts, colors, H&Js, print styles, preferences, and picture files. Take a look at OfficialReport XT or Printools XT from Badia Software, or BureauManager from CompuSense Ltd.

![]() This list of style sheet specifications was generated by a third-party XTension.
This list of style sheet specifications was generated by a third-party XTension.
If you delete a style sheet that’s currently being used in your project, a dialog box opens automatically that you can use to choose a replacement style sheet. If you don’t choose a replacement style sheet, the No Style (no style sheet) option will be applied by default. When you apply No Style, the text formatting will not change.
To delete a style sheet
- On the Style Sheets palette, Control-click/Right-click the style sheet you want to delete and choose Delete [style sheet name] from the context menu .
Control-click/Right-click a style sheet and choose Delete [style sheet name] from the context menu.
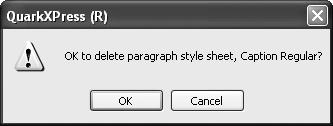
- If the style sheet you’re deleting is not currently being used in your project, click OK .
2 If this prompt appears, click OK.
If the style sheet is currently being used in your project, a prompt will appear. From the “Replace with” menu, choose a replacement style sheet or choose No Style, then click OK
. If this prompt appears, from the Replace with menu, choose a replacement style sheet or choose No Style.Note: If you choose a replacement style sheet, any local formatting in the text will be preserved. If you choose No Style and then apply a new style sheet, on the other hand, all local formatting will be removed.


Tip
You can undo the deletion of a style sheet.
Tip
The Normal style sheets can be edited, but they can’t be deleted.
Tip
The method described above is the fastest one for deleting one, or even a few, style sheets. If you have to delete a whole slew of them, though, a faster method is to choose Edit > Style Sheets (Shift-F11), Cmd-click/Ctrl-click (or Shift-drag through) the style sheets you want to delete, then click Delete. Respond to any prompts that appear (as in step 2, above), then click Save.
To delete all unused style sheets
- Choose Edit > Style Sheets (Shift-F11).
- Choose Show: Style Sheets Not Used .
Choose Show: Style Sheets Not Used.
- Shift-drag upward or downward through the style sheet list to select all or some of the names.
or
Click a style sheet, then Shift-click the last style sheet in a series.
- Optional: Cmd-click/Ctrl-click any style sheets that you don’t want to delete.
- Click Delete.
- Click Save.

Tip
This strategy is helpful for cleaning up a project that is littered with many unused style sheets. Ideally, the Style Sheets palette lists only those style sheets actually required for that project.
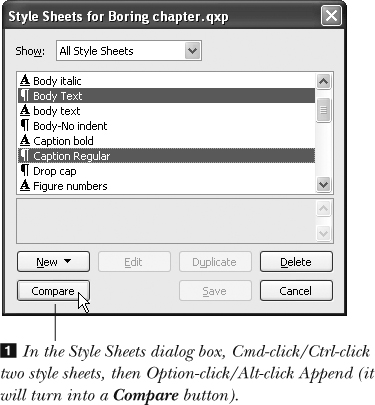
To compare two style sheets
- Choose Edit > Style Sheets (Shift-F11).
- Cmd-click/Ctrl-click the two paragraph style sheets or two character style sheets that you want to compare . You can’t compare a paragraph style sheet with a character style sheet—they’re like apples and oranges....
- Option-click/Alt-click the Append button—it will turn into a Compare button. The Compare [Paragraph or Character] Style Sheets dialog box will open . Any specifications that differ between the two style sheets will be listed in boldface.
Differences between the two style sheets are listed in boldface.
- Click OK when you’re finished, then click Cancel.

Tip
You can’t compare style sheets from different projects using this method. You could append style sheets from one file to another, though, and then compare them once they’re both in the same file.