
As described in Chapter 3, Introduction to Oracle Enterprise Repository, all the users in OER must belong to a project and a department. It is therefore very important before doing the OER initial configuration to have good understanding of your company's organizational structure. In the case of Weir & Bell Telecoms' Governance implementation, it was decided to simplify the departmental structures to simplify OER setup. Therefore, only two main departments were created as follows:
Furthermore, as OER supports role-based authorization, the following roles were defined:
- *User: It is the default OER role and provides limited access to OER including viewing and submitting Assets, viewing projects, and the generation of reports.
- *Business Analyst: Members of the business analysis community responsible for defining requirements such as functional specifications and use cases.
- *Advance Submitter: This role is usually assigned to system users created for the Asset Builder or the different Harvester.
- *Registrar: The role assigned to the users who are responsible for accepting or rejecting Asset submissions.
- *Access Administrator: This role allows the creation of users and the assignation of different access permissions to them.
- *Registrar Administrator: Similar to the Registrar role, however, this role allows Types to be managed using the Type Manager.
- *Project Administrator: This role allows users to manage projects including assigning users to projects and generating reports.
- *System Administrator: This role allows system settings to be modified.
- Third-Party Consultant: A read-only account that allows third-party consultants to discover and submit Assets for specific projects only.
In the case of the Weir & Bell Telecoms' Governance implementation, most of the user roles required were available out-of-the-box. Do note that as described in Chapter 3, Introduction to Oracle Enterprise Repository, OER access settings are highly configurable and more complex RBAC configurations are supported.
Tip
Section 4, Configuring Advanced Role-based Access Control of the OER Configuration Guide provides a detailed description on how to configure OER to support more complex use cases: http://docs.oracle.com/cd/E14571_01/doc.1111/e16580/rbac.htm
Note that OER supports the use of external identity sources such as the LDAP directories, for example, MS Active Directory or OID as the master repository for users and roles. In the case of Weir & Bell Telecoms, it was decided not to integrate with the corporate LDAP (which was an AD domain) because of the size of this system and the fact that it would take around five working days for a change to be made in this directory. Instead, as the number of OER users was limited (a maximum of 20 users initially), it was decided to use a local identity store. Note that the decision as to whether or not to use an external identity source depends on each individual implementation. In some cases it might make sense but in others, such as the example used in this book, it might not be required.
Tip
For further information on how to configure OER to authenticate from external sources, please refer to Section 3, Configuring Oracle Enterprise Repository to use External Authentication tooling of the OER Configuration Guide: http://docs.oracle.com/cd/E14571_01/doc.1111/e16580/extauth.htm
Once the organization and access requirements have been identified, the next step is to create the departments as follows:
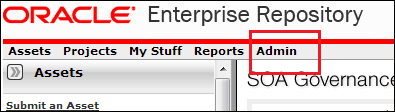
- Log into OER as admin and click on the Admin menu, which is located on the upper right-hand side of the home page:
- Once in the administration page, click on the Departments menu located on the left panel. This will expand the departments menu and will display some of the actions available:
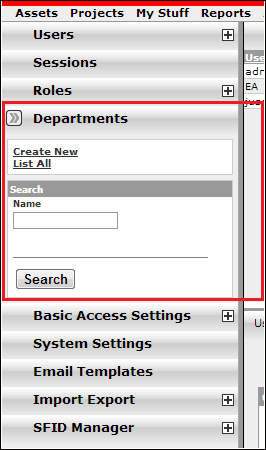
- Once you are on this page, click on the List All link to list all the available departments:

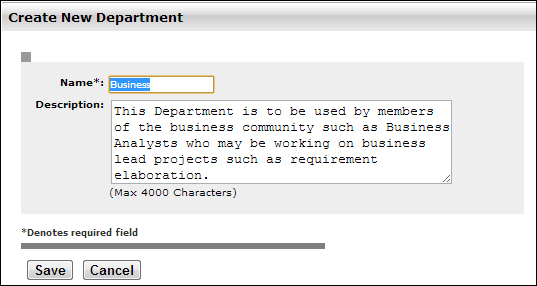
- In this particular example, the department IT already exists, however the Business department has to be created. To create a new department, click on the Create New link located on the left panel under the Departments menu. This link will open up a popup window in which the details of the new department can be added and saved:
Now that all the departments exist within OER, we must ensure that all the roles identified are also available.
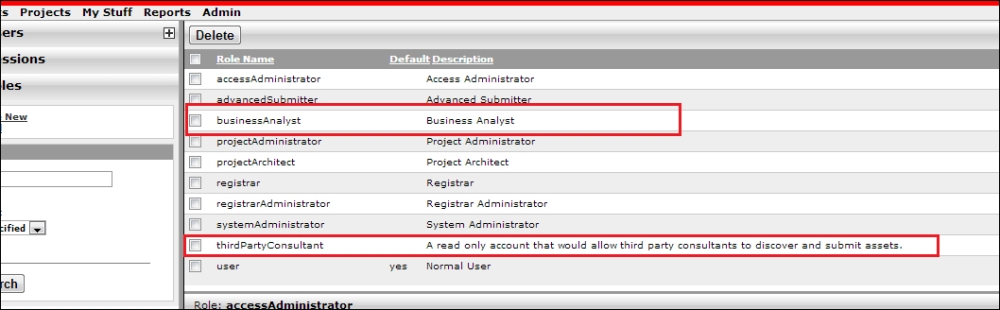
As discussed earlier in this section, OER comes with some pre-defined user roles. However, the Business Analyst role as well as the Third-Party Consultant role are not available by default and therefore have to be created.
- Roles are managed within the same administration page under the Roles menu located on the left panel:

- New roles can be created by clicking on the Create New link under the Roles menu. Once clicked, a popup window will open and details of the new role can be added and saved:
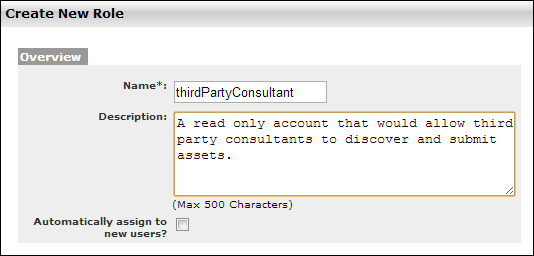
For this particular example, you can see that we followed a different convention with the name. This is a recommended practice to avoid conflicts with external identity stores if these are ever used.
- Once all roles have been created they can be listed by clicking on the List All link under the Roles menu. All roles created should appear on the list:
Once all the missing roles are created, access restrictions to the roles must be assigned.
Access restrictions are assigned to roles within the same administration page under the Basic Access Settings menu located on the left panel:
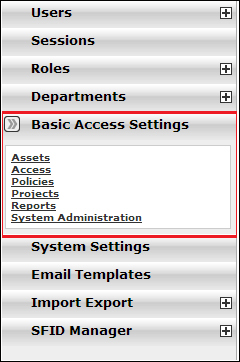
Through this menu, a user who is a member of the accessAdministration role can set the basic access settings for the OER roles. In this menu, there are five links that provide different access restrictions to OER:
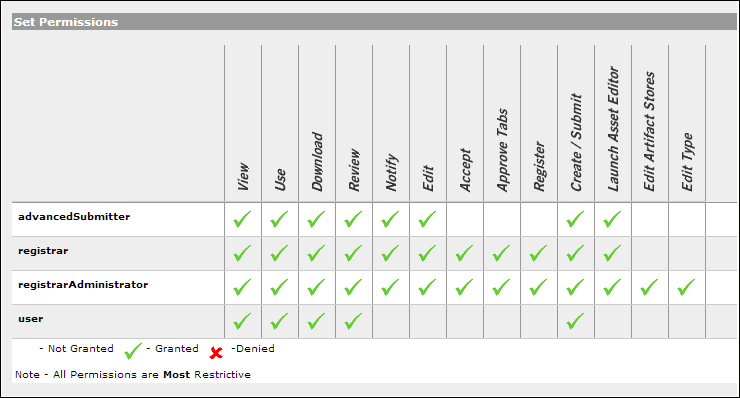
- Assets: This defines the different access restriction for asset-related tasks and functionalities such as the Asset page, Asset Editor, Asset Stores, and Type Manager, amongst other asset-related functionality. For example, to allow a user to view, edit, and submit Assets, the user must belong to a role which has been granted the View, Edit, and Create/Submit permissions through this link. The following is a sample snapshot of a basic access configuration made on the Assets link:
- Access: This defines the different access restriction for the administration page excluding the System Settings and Email templates menus. Usually, only the administration roles are granted access-related permissions. The following is a sample snapshot of a basic access configuration made on the Access link:

- Policies: This defines whether a user is allowed to apply a policy to other Assets. Policy permissions are usually granted to Architects so that they can configure standard policies that should be applied. By default, no role has been granted with policy access permissions. However, this can easily be achieved as follows:
- Click on the Edit button located on the upper right-hand side:

- When the popup window opens, select the option Show all available Roles. This will allow all the available roles to be displayed in the window. Then tick the box on the role that will be granted with Apply Policy permissions. In our example, it is the Project Architect role that is given such permissions:

- Click on the Edit button located on the upper right-hand side:
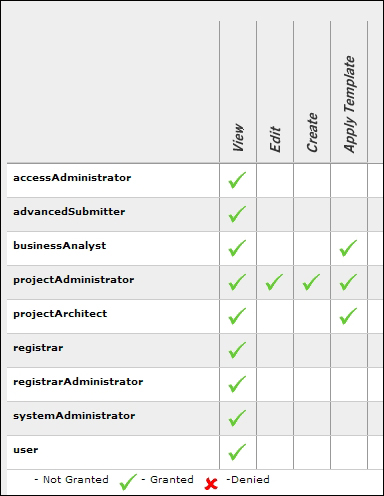
- Projects: This defines the different access restriction for the Projects page and applying templates to projects. The following is a sample snapshot of a basic access configuration made on the Projects link:
- Reports: This defines the view access restriction for the Reports page. The following is a sample snapshot of a basic access configuration for Assets. In our example, all the users have been granted with the View reports permission.

- System Administrators: This defines the view access restriction for the System Administration and Email Template menus within the administration page. The following is a sample snapshot of a basic access configuration for systemAdministrator:

Tip
For a detailed description of the Basic Access Control option, refer to Section 4, Configuring Advanced Role-based Access Control of the OER Configuration Guide at http://docs.oracle.com/cd/E14571_01/doc.1111/e16580/rbac.html.
The Third-Party Consultants role has to be configured such that the users belonging to this role can only see and action Assets for specific projects. There are many examples for which these complex access configuration requirements are needed. An obvious one is the case of external consultancies being tasked with the delivery of specific projects. In this case, the external consultancy will have its own Architects, Designers, and Developers and therefore will require access to OER. In this scenario, Weir & Bell Telecoms was concerned that external consultants would have visibility of all its internal Assets registered in the repository. The solution offered was to limit the external consultant's visibility of Assets exclusively to those available for the project they are working on. Furthermore, any submission or creation of new Assets by external consultants should undergo approval of the Project Architect.
Basic access settings do not support the implementation of access restrictions to individual Assets and therefore, complex access settings are required in order to restrict external consultants from having access to Assets other than the ones they require for a specific project. The following is an example of how to perform the configuration of roles to enforce such restrictions.
Firstly, a basic Submit/Create role which could be assigned to the external consultants should be created. This will extend the default user role and allow creation/submission of Assets into OER.
- As described in the preceding lines, this can be done in the administration page by clicking on the Create New link of the Roles menu that is located in the left pane:

To be consistent with the naming convention used, the role was named
userCreateSubmit. - Now the following Basic Access Settings need to be applied to the role. This can be done by clicking on the Assets link available within the Basic Access Settings menu. Click on the Edit button within this page and a popup window will open that will allow the modification of asset restrictions:

- On the popup window, select the option Show all available Roles so that all the roles are displayed. Then on the newly created role,
userCreateSubmit,assign permissions as shown: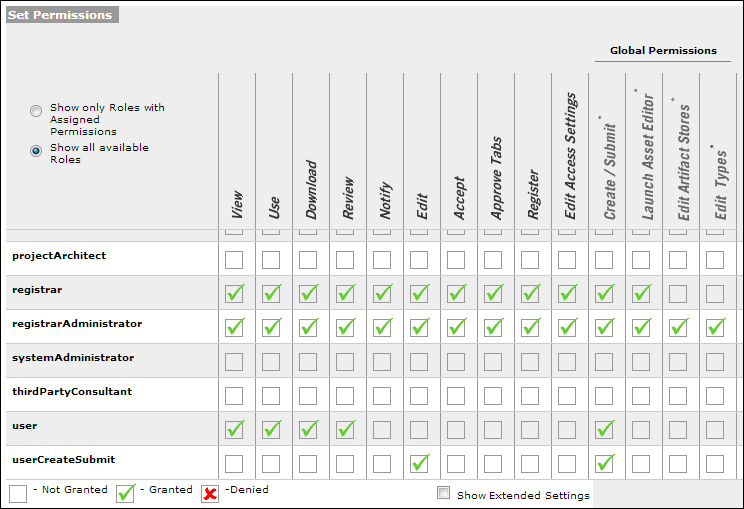
As shown in the preceding screenshot, only two permissions were granted: Edit and Create / Submit. This is because the remaining permissions are already available in the default role User.
The second step is to enable Complex Access Settings in OER. This feature is not enabled by default when installing OER.
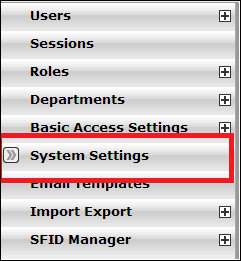
- Log into OER with an admin account and go to the administration page. Once you are on this page click on the System Settings menu:
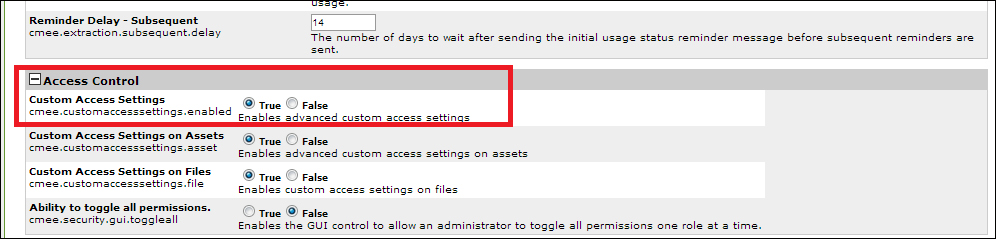
- Once the System Settings Page loads, scroll down to the Access Control option and set the Custom Access Settings setting to True:
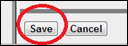
- Click on Save located at the bottom of the screen to save the changes:
- Once done, the Custom Access Settings menu should appear on the left pane on refreshing the administration page:
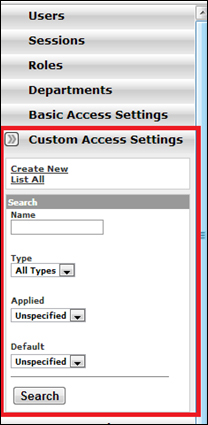
- By default, no Custom Access Settings are available in OER. To create a new custom access, click on the Create New link as shown in the preceding screenshot.
A popup window will open so that the details of the new Custom Asset Settings can be entered:
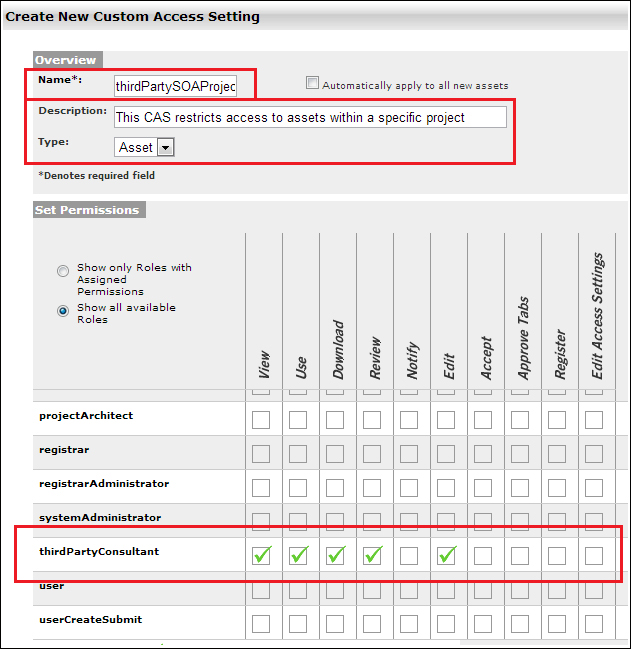
In this example, the name of the Custom Access Setting is set to
thirdPartySOAProjectAssetsand has been granted with View, Use, Download, Review, and Edit Assets permissions. The naming convention employed reflects the fact that this custom access restriction is used to limit third-party company's SOA Project Assets only.
Now that the custom setting has been created, the next step is to create a project and assign a project profile to it with the Custom Access Settings applied to it.
A project profile in OER is a type of compliance template. As described in Chapter 3, Introduction to Oracle Enterprise Repository, compliance templates are used to communicate the Asset requirements to internal or external project teams. For our scenario, a project profile will be used to enforce the complex access setting thirdPartySOAProjectAssets so that the users of this project can only access Assets from within the project.
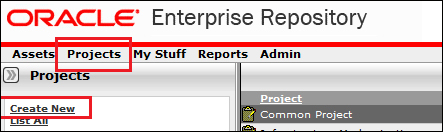
In OER, projects can be created from the Projects Page as follows:

The screen properties are as follows:
- Name: The name of the Project. In this example, we called it as the project
SOAProjectXYZ. - Description: A brief description of the project.
- Estimated Development Hours: The total estimated hours. This is the field which is particularly important as it will be used by the reporting features of OER in order to calculate costs and other factors.
- Start Date: The date when the project starts.
- Department: The department that owns the project.
- Status: Open or closed.
- Categorizations: Default categorization.
- Users: Project Leaders and users of the project. Project Leaders differ from users in that they will have elevated rights to a project.
- Related Projects: Any relationship with other projects. For example, this could be a child project within a large program of work or it could be a standalone project as in this example.
A project profile acts as a bill of materials. It provides information about services to be used, process templates, and other project specific Assets.

The project profile will then be submitted and a workflow process initiated. The Asset will have to be accepted and registered by a user that belongs to the role Registrar.
As we are logged on as admin, we can directly review and register this Asset. This can be done as follows:
- Go to the My Stuff page. On the Assignee dropdown, select Unassigned and click on Search. Once the results are displayed on the main page, select Project Profile from the Asset Type dropdown, and click on the Filter button:

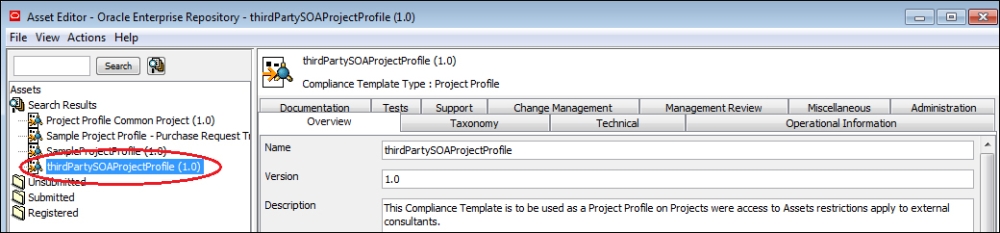
- All the Assets of the type Project Profile will be listed. Click on thirdPartySOAProjectProfile so that the Asset details are displayed on the button page.
- In the Asset details section, click on the Edit button to open the Asset Editor window.
Tip
As Asset Editor is a Java Web Start application, it has to be opened through a
registrartool.jnlpfile. When the Edit button (or any other link or button aiming to open the Asset Editor) is clicked, what will happen in fact is that the JNLP file will be downloaded and opened automatically if the user has allowed the browser permissions to do so. Otherwise, it will be necessary to double-click on the JNLP file once it has been downloaded. - Once the Asset Editor application has opened, the quickest way to find the project profile is by doing an Advanced Search. Click on the Advanced Search button (located next to the Search button) and then, from the Asset Editor Advanced Search window, select Project Profile from the Type dropdown and click on OK:

When all the Assets of type project profile show up on the left menu, select the relevant project profile and all the details of the Asset will appear on the right-hand side:
- Assets can be accepted and registered from the Administration tab. Select this tab and click on the Accept and Register buttons Project Profile:

Tip
Note that the Approval/Registration Workflows will be covered in greater detail in Chapter 6, Asset Lifecycle and Workflow.
Custom Access Settings can also be applied from the Administration tab by selecting an item from the Available settings box and applying it to profile as demonstrated in the following screenshot:

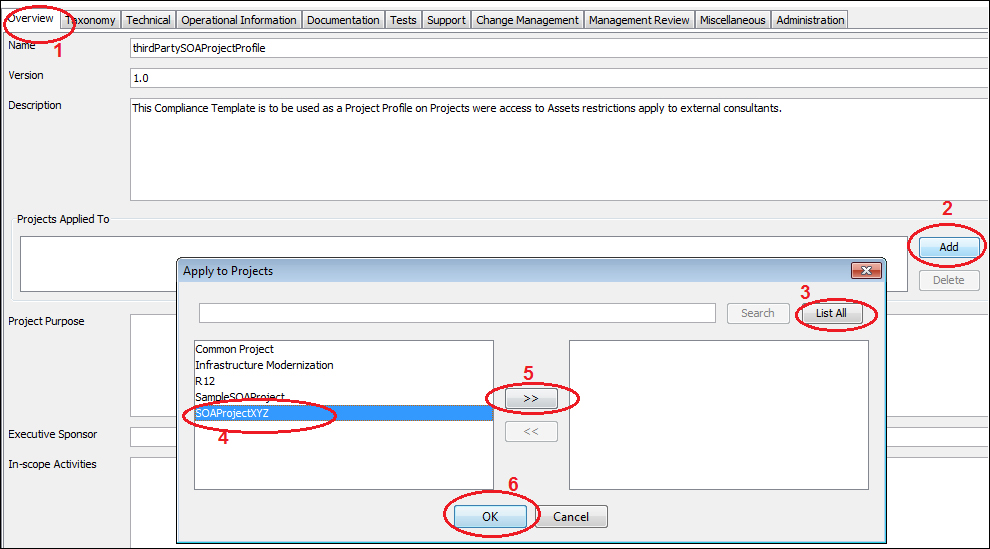
The project profile can be applied to the desired project(s) from the Overview tab by clicking on the Add button within the section Projects Applied To and then by selecting the desired projects and clicking on Ok:
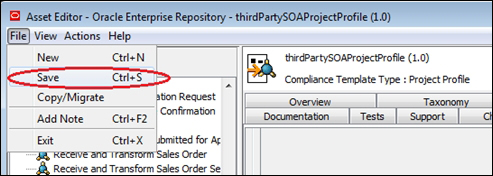
Once all the desired changes have been made to the Asset, save all the changes by selecting the Save option from the File menu:
Once the departments, roles, access settings, project profiles, and projects have been configured, we can start adding user accounts into OER.
Tip
Note that it is possible to add users before the initial configuration is done, however it is not desirable and not recommended. Some of the main reasons are because users might be given the wrong role and/or access restrictions, as these might have not yet been defined if users are added before the configuration analysis is done.
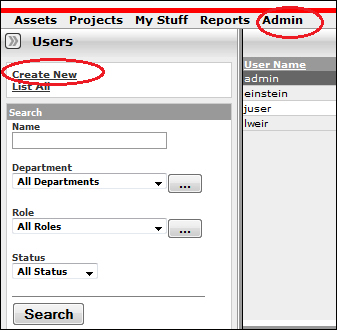
Users are managed in the Administration page from the Users menu located on the left pane. From this page, users can be created, listed/searched, and modified (including the assigning of roles) by an Access Administrator.
As described earlier, Weir & Bell Telecoms had a requirement to restrict the visibility of Assets to third-party consultants Assets to the project to which they are assigned.
In the previous section, we described how to create a role named thirdPartyConsultant to which the custom access settings thirdPartySOAProjectAssets were applied. Furthermore, we created a default role named userCreateSubmit that extends the User role by granting Edit and Create/Submit permissions. Lastly, we showed how to assign the thirdPartySOAProjectAssets custom access setting to project profile which could be assigned to any project that requires third-party consultants.
The relevant roles must then be assigned to the users for which restrictions apply. This is done as follows:
- From the Users menu, click on the Create New link:
- On the popup window, enter the user details in the Overview section:
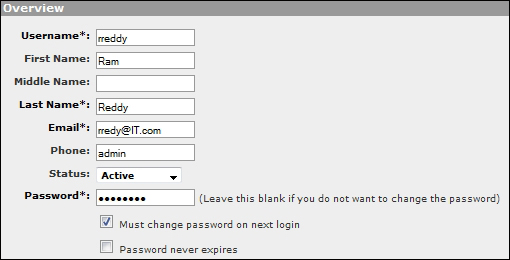
- Assign the roles
thirdPartyConsultantanduserCreateSubmitto the user as shown in the following screenshot: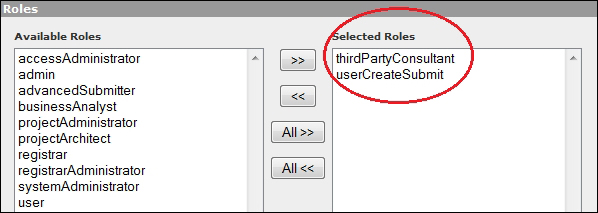
- Assign the relevant Departments and click on Save:

Verify that the user has been set up properly as follows:
- Create a similar user following the same steps previously described (however with dummy details). Take a note of the username and password used.
- Log into OER using the user's credentials.
- The first thing that should appear after login is the Change Password page. Enter the new password and click on Change Password:

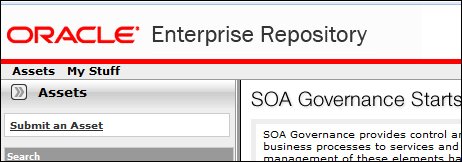
- After changing the password, the user should be redirected to a very limited home page that has only two items in the main menu: Assets and My Stuff:
- Do a search and check that only the Assets associated with the project appear in the search results:
Follow similar steps to create all the users needed for your OER implementation. Ensure that all the users have been assigned the correct roles and restrictions by creating sample users when required and accessing OER to check that access settings were properly configured.