Composing E-mail
Composing and sending e-mail is a snap with Mail. To begin sending that world-changing memorandum, do the following:
1. Click the New Message button in the toolbar, which looks like a piece of paper with a pencil writing on it.
2. In the New Message window, type the e-mail address of the person you want to receive your message in the To field, as shown in Figure 10.15. To send a copy of the e-mail to other folks, type their addresses in the Cc field.

10.15 Putting together the perfect e-mail.
3. Type the topic of your e-mail in the Subject field.
4. Select the account from which you are sending the e-mail, as well as the SMTP server you want to use to send the e-mail, by using the pop-up menus in the From menu.
5. You can click the Customize button on the left (looks like a small rectangle containing three lines stacked next to a tiny downward-pointing arrow), and choose whether any other fields, such as Priority, should appear in the New Message window.
6. Type the content of your e-mail and click the Send button (the one that looks like a paper airplane) in the upper-left corner.
7. Congratulate yourself for being a full-blown member of Internet society. Just like the toolbar in the main Mail window, the toolbar in the New Message window can be modified to suit your style. With a New Message window open, choose View→Customize Toolbar to arrange, remove, or add items to enhance your productivity.
Using Stationery
One of the coolest features in Mail for Mountain Lion is the ability to customize e-mails with Stationery. Stationery is preformatted e-mails that Apple provides with Mail. This feature can transform any ordinary e-mail into a stunning creation. To use Stationery, follow these steps:
1. Open a New Message window.
2. Click the Show Stationery button (looks like a small rectangle containing a piece of paper) in the upper-right corner of the toolbar.
3. Browse the topics listed on the left of the Stationery field (underneath the Subject field and immediately above the e-mail content window), as illustrated in Figure 10.16, and select the Stationery that is appropriate for your message.
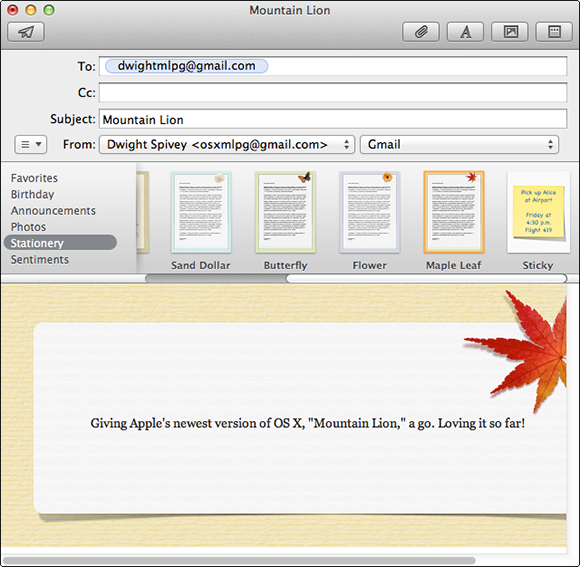
10.16 Create beautifully formatted e-mails with Stationery.
4. Customize the content of your e-mail by dragging and dropping your own images into the image placeholders (if any), and type your own text in the preformatted text fields.
Adding attachments
Sometimes you want to e-mail a picture or send along an accompanying document with your message; these additions are called attachments. To add an attachment to your e-mail, follow these steps:
1. Open a New Message window and type the addresses of your recipients.
2. Click the Attachment button (the one with the paper clip) in the toolbar.
3. Browse your trusty Mac for the file you want to attach, select it, and then click Choose File. If you are sending a picture from your iPhoto or Photo Booth libraries, click the Photo Browser button (icon looks like a mountain with the moon next to it) in the toolbar, click and drag a picture from the Photo Browser window, and drop it into the body of the e-mail. You can also simply drag-and-drop items, such as pictures (as shown in Figure 10.17), into the body of your e-mail to attach them.
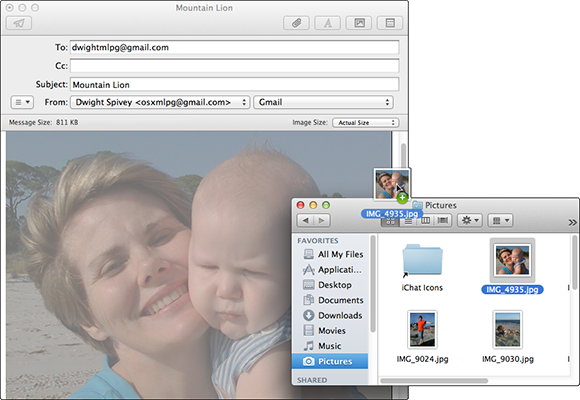
10.17 Drag and drop your picture into an e-mail.
Formatting content
Add a little pizzazz to your message by customizing its fonts and colors. To format an e-mail, follow these steps:
1. Open a New Message window.
2. Type the text of your e-mail.
3. Highlight the text you want to format.
4. Click the Show formats bar button (the icon looks like the letter A) in the toolbar, and then select the font you want to use. You can alter the font typeface and size, underline the text, change the font color, add a shadow to the text and modify it, and even rotate the text.