
When you pay or are being paid, you need to register the transaction in your system, no matter what method you have used. To do so, you use the Cash Receipt Journal window or the Payment Journal window. Both work the same way, but the Payment Journal can also be used to print checks. To post a payment, you need to inform:
- The customer that is paying you
- The bank account that they used to make the payment
- The invoice that is being paid
- Consider the following example:
Imagine that customer 20000, Selangorian Ltd. has paid us for invoice 103032, which was due on 02/09/2017. Let's follow the steps needed to post the payment:
- Access the Cash Receipt Journal window from
Journals/Cash Receipt Journals. - Select the BANK section and double-click on it.
- Create a new line on the journal with the following information:
Posting Date
Document Type
Document No.
01/26/2017
Payment
This gets filled by a series number.
- To indicate the customer that is paying:
Account Type
Account No.
Description
Customer
20000
This gets filled with the customer name. You can change it.
- To indicate the bank account that the customer used to pay us:
Bal. Account Type
Bal. Account No.
Bank Account
WWB-OPERATING. This is the code that identifies the bank.
- To indicate the invoice that is being paid:
Applies-to Doc. No.
103032
When you click on this field, a page opens showing you all the pending entries for the customer. Select one.
- Once you select a pending entry in the Applies-to Doc. No. field, the rest of the fields in the journal line get filled automatically: Amount and Applies-to Doc. Type. After completion, you will end up with something like this:

- Post the transaction.
If you do not know which invoice is being paid, you can leave the Applies-to Doc. No. field blank and apply the payment to the invoice later on.
The Payment Journal window has a nice feature called suggest vendor payments. This process creates the payment lines for you according to certain conditions, such as the following:
- It only includes invoices due until a date of your choice
- You can specify a maximum available amount for payments, so it will only suggest payments up to that amount
- You can prioritize vendors when you have a specific available amount so that the most important vendors are always paid first
- It will not process invoices that are on hold
However, this process only suggests, which means that you can modify whatever is needed before actually posting the payments.
On the Payment Journal, you can also print checks to use them as a payment method for your vendors.
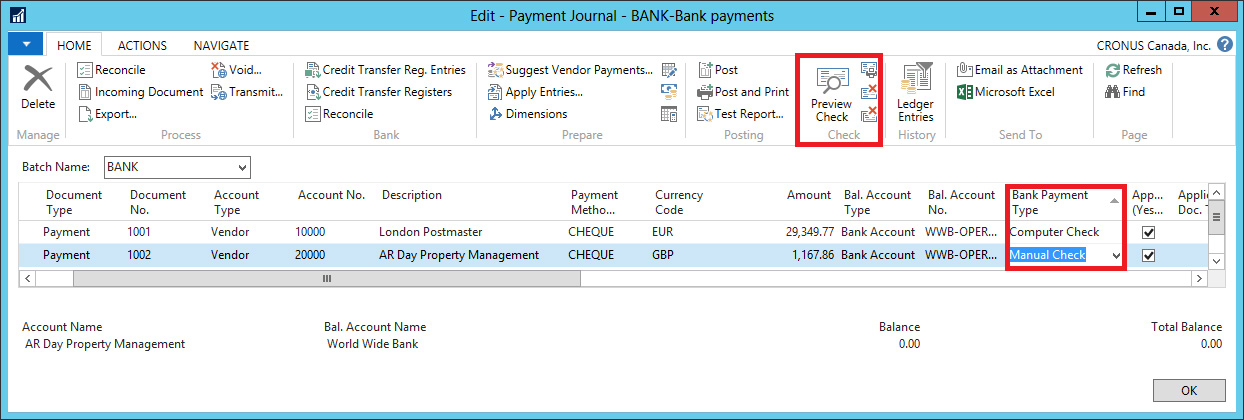
When there are one or more computer checks in your Payment Journal, you have to print them using the corresponding actions on the ribbon. The system will not allow you to post the payment if the checks have not been printed. However, you do not have to print anything if you have selected Manual Check, which means that you have created your check manually and just want Dynamics NAV to keep track of it. The posting of the journal will create check ledger entries.