
Using Photo Booth
Apple has moved the old-fashioned photo booths — the kind that we used to cram ourselves into with our friends on Friday nights at the mall — to our Macs. Simple as it is, there are still a few features that could use an explanation. When I purchase something new, I’m one of those people who actually like to read the instructions and learn what all the buttons and gadgets are for. Hence, my insistence on covering the Photo Booth features shown in Figure 12.12.
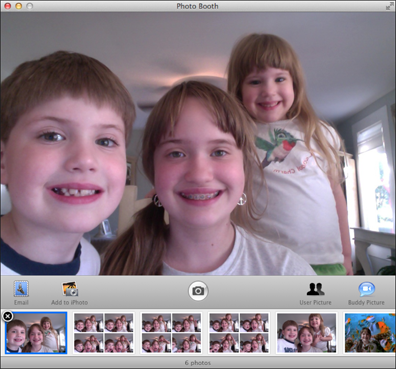
12.12 The main Photo Booth window in Snapshot mode.
Taking snapshots
Any kind of picture that you take with Photo Booth is considered a snapshot, whether it’s a still picture or a video. You can take three kinds of snapshots: Single still picture, four quick snapshots (which are much more fun than you might think), and video. Use the snapshot-type buttons under the bottom-left corner of the viewer window to select the kind that you want to take.
Taking a single snapshot
Single snapshots (or still pictures) are so easy to take, it’s ridiculous. Follow these steps:
1. Click the single still picture button under the bottom-left corner of the Viewer window.
2. Position yourself in front of the Mac camera so that your image fits inside the Viewer window.
3. Click the Camera button.
4. Photo Booth begins its countdown from 3, flashes, and then takes the picture. That’s it!
Taking four quick snapshots
Taking four quick snapshots lets you create different poses in rapid succession. Follow these steps to try it out:
1. Click the four quick snapshots button in the middle under the bottom-left corner of the Viewer window.
2. Position yourself in front of the Mac camera so that your image fits inside the Viewer window.
3. Click the Camera button to begin the countdown. Get into your first pose before the first flash goes off.
4. After the first flash, immediately change to your next pose and continue to do that through all four pictures. You have only about a second between snapshots, so you have to move quickly. When all four snapshots are taken, you see a preview of your images, similar to Figure 12.13.
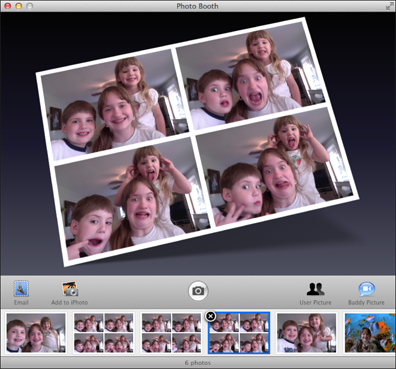
12.13 A preview appears in the viewer window so that you can see your four-up handiwork.
Creating a video snapshot
To create some movie magic in Photo Booth, follow these steps:
1. Click the video button on the right under the bottom-left corner of the viewer window.
2. Position yourself in front of the Mac camera so that your image fits inside the viewer window.
3. Click the Camera button to begin the countdown.
4. Begin your video after the flash goes off.
5. When finished, click the Stop button.
Viewing your snapshots
All your snapshots are stored in the Thumbnail bar at the bottom of the Photo Booth window. You can scroll through the list of snapshots by clicking the right and left arrows on either side of the bar.
To view a snapshot, click it in the Thumbnail bar and it displays in the Viewer window. To find a snapshot on your Mac, right-click (or Control+click) the snapshot in the Thumbnail bar and then select Reveal in the Finder. A Finder window opens, displaying the location of the file on the hard drive.

You can access your snapshots without opening Photo Booth each time you need them. Photo Booth stores snapshots in the Photo Booth Library package, which resides in the Pictures folder of your home folder (Hard drive/Users/your account name/Pictures/).
Using special effects
You’ve only seen the tip of the Photo Booth iceberg. Photo Booth can do something the old photo booths at the mall could only dream of: add awesome special effects and backdrops!
Adding effects to Snapshots
To use visual effects like filters or distortions for your snapshots, follow these steps:
1. Position yourself in front of the Mac camera so that your image fits inside the Viewer window.
2. Click Effects to see the cool filter effects shown in Figure 12.14.
3. Click the right arrow next to Effects to see the distortion effects, like those shown in Figure 12.15.
4. Select the effect you want to use by clicking it and then click the Camera button to take the picture.

12.14 The filter effects available in Photo Booth. You gotta love X-Ray!

12.15 The distortion effects are a blast to play with!
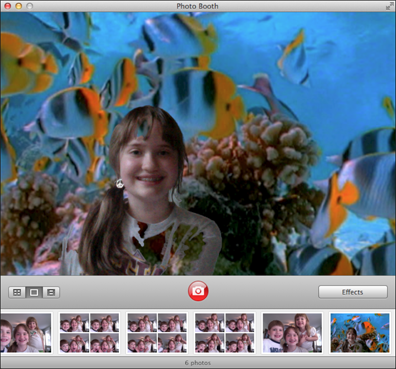
Adding a Video backdrop
Video backdrops are really neat to use. They place a moving video of some exotic location behind you so that it appears as if you’re really there. Impress family and friends by creating a video of yourself in front of the Eiffel Tower, swimming with the fishes, or flying through the clouds!
Here’s how to do it:
1. Position yourself in front of the Mac camera so that your image fits inside the Viewer window.
2. Click Effects.
3. Click the right arrow next to Effects twice until it brings you to the video backdrops.
4. Select the backdrop you want to use.
5. Step out of the frame when prompted until you see the backdrop you chose in the Viewer window.
6. Move into the frame of the Viewer window and click the Camera button to make your video, as shown in Figure 12.16.
12.16 Her hair isn’t even wet!
Adding custom backdrops
My favorite feature of Photo Booth is the ability to use my own photos and videos as backdrops. To create a custom backdrop, follow these steps:
1. Click Effects and then click the right arrow next to it three times to see the Custom Backdrop window.
2. Drag and drop a picture or video from the Finder, iPhoto, or iMovie into one of the Drag Backdrop Here windows.
3. Select the new backdrop to use it for your picture or video.
Using your pictures and videos
What to do with all these great snapshots you’ve been taking? You can save your snapshots in iPhoto if you like, e-mail them to family and friends, or use them to represent you in an online chat session.
Click the snapshot you want to use in the Thumbnail bar. Notice in Figure 12.17 that when you open the snapshot in preview mode, you now have access to the Sharing button. Click the Sharing button to do one of the following:
![]() Send an e-mail with the selected picture attached.
Send an e-mail with the selected picture attached.
![]() Send an instant message with the picture attached.
Send an instant message with the picture attached.
![]() Tweet the photo.
Tweet the photo.
![]() Add the photo to your Flickr account.
Add the photo to your Flickr account.
![]() Add the picture to iPhoto.
Add the picture to iPhoto.
![]() Set the photo as your account picture.
Set the photo as your account picture.
![]() Set the photo as your Messages buddy picture.
Set the photo as your Messages buddy picture.

You can print from Photo Booth just as you can from any other application. To print your snapshots, choose File→Print or press ![]() +P. When the Print dialog opens, click Show Details and choose one of the options in the Photo Booth pane. You can print the picture normally, or you can print proof sheets (either several different sizes of the same picture on the same page or eight pictures of the same size).
+P. When the Print dialog opens, click Show Details and choose one of the options in the Photo Booth pane. You can print the picture normally, or you can print proof sheets (either several different sizes of the same picture on the same page or eight pictures of the same size).
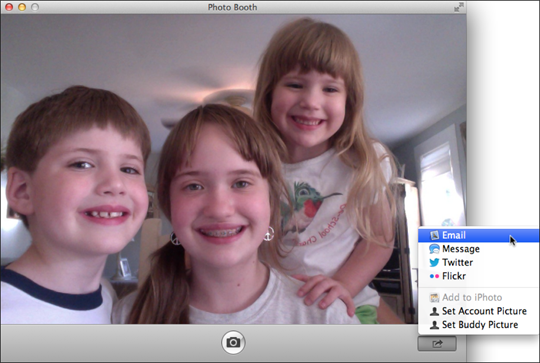
12.17 Select how to use your snapshot by clicking one of the options under the viewer window.