
IN THIS CHAPTER
Repeating data on a page
Dreamweaver Technique: Applying a Repeat Region
Selectively showing and hiding areas
Moving from record group to record group
Using Application objects for instant recordset navigation
Dreamweaver Technique: Establishing Recordset Navigation
Navigating recordsets with Flash buttons
With the power to access the data of the world—or at least your part of it—comes great responsibility. As a Web page designer you determine how best to present that information. Not only does this include the surrounding look-and-feel but also how the data itself is structured. How many records should you show at once? One? Ten? All? How should the user navigate from one group of records to another? What should the user see when there are no more records to display? Obviously, there are no definitive answers to these questions; each response must take into account the intent of the page, the type of data involved, and the audience for that data. This chapter can't give you precise solutions for every Web application, but it does give you the tools to devise your own resolutions.
The Web is, almost by definition, a hotbed of constantly changing technologies. It can be frustrating when you are introduced to a technology, such as Dreamweaver's Flash buttons, and you cannot utilize its full potential. For instance, you have had no easy way to use Flash buttons to navigate recordsets—at least, not until now. The final section in this chapter describes a technique for combining the functionality of Dreamweaver's recordset navigation bar with the coolness of animated (and possibly sound-enabled) Flash buttons.
What makes a Web page into a Web application? Connectivity to a data source by itself does not make a Web application—after all, you're merely setting up the possibility for data integration, not actually utilizing it. Some would say that it is the power to programmatically control the display of the data that is at the heart of an application. Dreamweaver handles this conditional display of data primarily through its Server Behaviors panel. You can, for example, opt to display the data—or any other page element—only if certain conditions are met, such as an empty recordset. Before you look at the options for showing and hiding data conditionally, first examine what is perhaps the most commonly used Dreamweaver server behavior: Repeat Region.
After establishing a data source connection and defining a recordset, Dreamweaver displays all the available fields in the Bindings panel. Regardless of how many records are contained in the declared recordset, you see only one record when you drag one or more fields onto your page and preview the file. To see multiple records from the same recordset on a single page, you can apply the Repeat Region server behavior.
The Repeat Region server behavior is very straightforward and extremely flexible. After selecting the dynamic data and any surrounding code you'd like to repeat, you specify the number of repetitions—you also have an option to display all the records in the recordset. The key phrase in the previous sentence is "and any surrounding code." If you select only the dynamic data itself, the data is repeated one record after another. You have to include some HTML element to enable the repeated data to appear separately, as on a different line. Some of the most commonly used separation elements and their HTML tags are:
Line break:
<br>Paragraph:
<p>...</p>Table row:
<tr>...</tr>Table data:
<td>...</td>Unordered or ordered list item:
<li>...</li>
For the Repeat Region to work correctly, you must select both the opening and the closing tags that surround the dynamic data, as shown in Figure 21-1. The surest way to do this is to place your cursor on the dynamic data and choose the surrounding element from the tag selector.

Figure 21-1. To automatically number your data, apply a Repeat Region to the <li> tag within an ordered (or numbered) list.
To implement a Repeat Region, follow these steps:
Select the dynamic data and surrounding code that you would like to repeat.
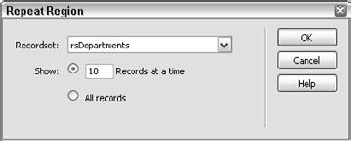
From the Server Behaviors panel, click Add (+) and select Repeat Region from the list. The Repeat Region dialog box, shown in Figure 21-2, appears.
Choose the recordset you want to work with from the Recordset drop-down list.
If you want to present a subset of the recordset, enter the number of records you want to display in the Show: Records field.
The default is to show 10 records at a time. You can change that value to anything you like if you select the Show: Records option.
If you want to display every record in the recordset, choose the Show: All Records option.
Click OK when you're finished.
Tip
To test your implementation, make sure that the View
Although all the repeated elements are displayed on the screen, only the initial element within a Repeat Region can be altered. If you change the initial element's formatting, you must click the Refresh button from the Live Data toolbar to apply those changes to the other elements; this holds true even if you have Auto Refresh enabled.
Multiple Repeat Region server behaviors may coexist on the same page, extracting data from either the same recordset or a different one. However, if you use the same recordset again, you need to reset it so that Dreamweaver is extracting from the beginning. To do this, locate the second Repeat Region server behavior in the code by selecting its entry from the Server Behaviors panel and switching to Code view. Above the first line of server code, add the code appropriate to your server model (substitute the name of your recordset for rsMine):
ASP <%rsMine.MoveFirst() %> JSP <%rsMine.first() %> PHP <? mysql_data_seek($rsMine, 0) ?>
Note
ASP.NET and ColdFusion handle this for you. If you start a new <asp:repeater>, it starts from the beginning again, and the same holds true for ColdFusion <cfoutput> blocks based on your recordsets.
If you do not insert the resetting code, the second Repeat Region picks up where the first one left off. For example, if 10 records are displayed in the initial Repeat Region, the second Repeat Region starts with the 11th record. If you chose all records for the first Repeat Region, nothing is shown in the second Repeat Region.
Now that you know how to do this by hand, it's time to show you the quick way (I know it's cruel, but everyone has to learn the hard way first). Dreamweaver offers a fast and simple way to add a table of records with a Repeat Region in just one step. Choose Insert
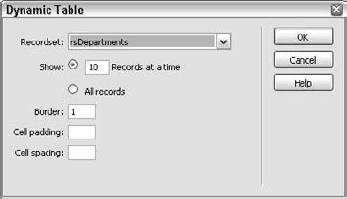
Figure 21-3. Use the Dynamic Table Application object to add dynamic lists of tabular data quickly. You can save lots of time by skipping the tedious task of adding all your dynamic text manually.
This dialog box has just a few options:
Recordset: Choose the recordset you want displayed in your table.
Show: Choose whether to show a limited number of records or all records. This adds a regular Repeat Region to your field, just as you did earlier in this section.
Table attributes: Specify your table border, cell padding, and cell spacing.
After you click OK, the table contains the field names in the first row, the data items in the second row, and a Repeat Region wrapped around the second row, as shown in Figure 21-4.

Figure 21-4. With the results from the Dynamic Table Application object, you simply change the basic table formatting and the table headings, and you're done.
Applying a Repeat Region
Repeat Region is one of the most frequently used server behaviors. In this Technique, you apply a Repeat Region server behavior to a previously created table row so that multiple data records can be displayed.
From the Techniques - Dynamic site (established in Chapter 18), expand the 20_Managing_Data folder and open the
managing_data_startfile for your server model.If you followed the Technique in the previous chapter, you'll recognize this page. There is, however, one small difference: an additional recordset has been added to illustrate an important concept.
Place your cursor in the row of dynamic data by selecting any of the inserted fields, such as rsAgents.agentPhone.
From the Tag Selector, choose the
<tr>tag.Choosing the
<tr>tag ensures that the entire row of data will be repeated.From the Server Behaviors panel, click Add (+) and select Repeat Region from the list.
When the Repeat Region dialog box opens, choose rsAgents from the Recordset list.

You must be sure to select the recordset you want to repeat; if you were to leave the default choice, rsProperties, no additional data would be displayed.
Leave the default Show 10 Records at a time option, and click OK.
In Dreamweaver's Design view, a thin border appears around the row along with a tab indicating the Repeat Region.
Test your newly applied server behavior by choosing View


Alternatively, you can click the Live Data view icon in the Document toolbar.
Choose View
Save your page.
In the next Technique, you see how to add elements to the page to indicate which records are currently displayed and to navigate through a larger recordset.
In the rush to push a site live, designers often pay too little attention to the user experience. When you are designing static Web pages, it's especially easy to lose sight of the importance of the user interface. However, with dynamic pages—where user interaction often determines what's on the page—an intuitive, reactive design helps to focus the audience on the content, rather than the engine driving the content. Dreamweaver provides a set of server behaviors that enable you to show or hide any area of the page dynamically: the Show Region server behaviors.
The six Show Region server behaviors are as follows:
Show Region If Recordset Is Empty
Show Region If Recordset Is Not Empty
Show Region If First Record
Show Region If Not First Record
Show Region If Last Record
Show Region If Not Last Record
Tip
Don't let the terminology throw you: Although they are all called Show Region server behaviors, you can just as easily use them to hide an area.
Dreamweaver's capability to conditionally hide or reveal areas of the page is extremely helpful for smoothing the user experience. For example, suppose you have a Web application that shows all 23 items in a particular recordset, 5 at a time, with Next and Previous links (see Figure 21-5). The record navigation controls enable users to page through the recordset, forward and backward. When they reach the final record, the Next and Last buttons should be hidden; when they're on the first record, the Previous and First buttons should be hidden. I've used Show Region If Not Last Record to hide the Next button and Show Region If Not First Record to hide the Previous button.
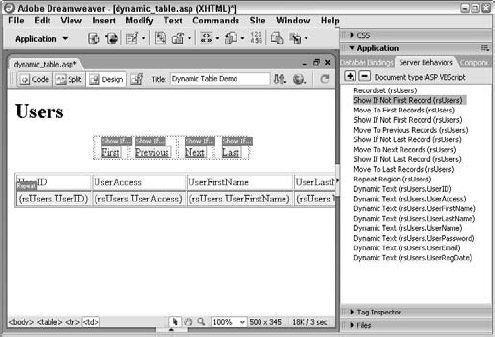
Figure 21-5. Use Dreamweaver's Show Region server behavior to display or hide navigation buttons, depending on the dynamic data shown.
To apply a Show Region server behavior, follow these steps:
Select the page area you would like to conditionally show.
From the Server Behaviors panel, click Add and select one of the server behaviors from the Show Record submenu. The dialog box for the specific Show Record server behavior you chose is displayed, like the one shown in Figure 21-6. The dialog boxes for all the Show Record server behaviors are identical.
From the Recordset list, select the recordset on which to base the Show Record condition.
Click OK when you're done.

Typically, the Show Region server behaviors are used in pairs. Apply a Show Region If Not First Record server behavior to a Previous Record link—it hides the link when the user is on the first record. Similarly, apply a Show Region If Not Last Record server behavior to the Next Record link to cause the link to disappear when the last record is called.
Only the first two Show Region server behaviors—Show Region If Recordset Is Empty and Show Region If Recordset Is Not Empty—can be applied to a page without any preconditions. The other four Show Region server behaviors require that one other type of server behavior be present on the page: the Recordset Paging server behavior. The Recordset Paging server behaviors act like VCR controls, adding a link that, when selected, displays the first, last, next, or previous set of records. The Recordset Paging server behaviors are covered in more detail in the next section.
So far in this chapter, you've seen how to repeat dynamic data and how to hide and display data and other page elements programmatically. Now it's time to put some real interactive controls into the hands of your Web application users. Dreamweaver includes a set of server behaviors that enable users to page through your recordset much as if they were flipping the pages of a catalog.
You can approach Dreamweaver's record navigation through two avenues: One is a do-it-yourself route, and the other lets Dreamweaver do most of the work for you. To better understand how record navigation works, examine the piece-by-piece approach first.
As mentioned earlier, Dreamweaver includes a set of Recordset Paging server behaviors to control navigation within a recordset. Again, the application is straightforward: Select the text or image you'd like to serve as a trigger and attach the appropriate server behavior. When selected, the trigger fires the server-side code that retrieves the chosen record. If a Repeat Region is inserted on the page, the next or previous group of records is displayed.
You can find five server behaviors under the Recordset Paging submenu:
Move To First Record
Move To Previous Record
Move To Next Record
Move To Last Record
Move To Specific Record
Note
Move To Specific Record is most often used in conjunction with a search routine or a master-detail application.
As noted, you can use either text or images as your controls. Navigation links, such as those shown in Figure 21-7, may include rollovers or other client-side behaviors. You can even use Flash buttons to trigger recordset navigation; see the section "Navigating Recordsets with Flash Buttons" later in this chapter for a detailed explanation of how it's done.
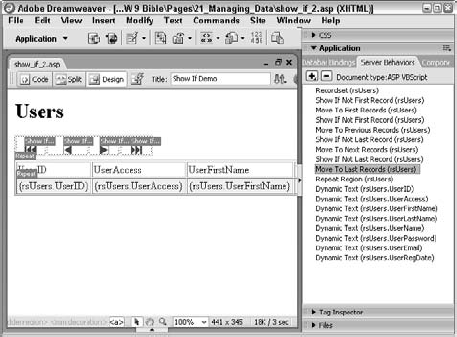
Figure 21-7. You can use images—with or without rollovers—to navigate through a recordset with Dreamweaver's Recordset Paging server behaviors.
Note
You don't need to add an initial or placeholder link to your image or text. When the Recordset Paging server behavior is applied, the link is written for you.
To create recordset navigation links, follow these steps:
Select the text or image to which you'd like to attach the server behavior.
From the Server Behaviors panel, click Add. Choose the desired behavior from the Recordset Paging submenu. The appropriate Recordset Paging dialog box appears. If you've made a selection, it's highlighted in the Link list; otherwise, a new text link is created, as shown in Figure 21-8.
Make sure that the selection in the Link list is the link you want.
Choose the recordset you want to work with from the Recordset drop-down list.
Click OK when you're finished.
Repeat steps 1 through 5 to add more recordset navigation elements.

Note
Record navigation is done within a particular recordset; you can't link one recordset to another using the Dreamweaver server behaviors or Application objects.
After you've added your navigation controls, you may want to take the next step toward a more complete user interface by adding Show Region server behaviors to ensure that the controls are displayed only when they serve a purpose. For example, if you have a navigation element that moves to the last record of a recordset, you probably want to attach a Show If Not Last Record server behavior to the trigger.
Although the process for setting up a single navigation control is fairly simple, you'd have to perform that process four times (as well as attach four additional server behaviors) to accomplish what the Recordset Navigation bar does in one operation. The recordset navigation bar is one of Dreamweaver's Application objects—one that can take the drudgery out of a repetitious implementation. All the Application objects are accessible through either the Insert
The Recordset Navigation Bar Application object serves the following purposes:
Adds four links to the page in a borderless, single-row table: First, Previous, Next, and Last. The links may be either text or graphics.
Attaches the appropriate Recordset Paging server behavior to the four links.
Inserts a Show Region server behavior to each of the links:
Show If Not First Record is added to the First and Previous record links.
Show If Not Last Record is added to the Next and Last record links.
Centers the table on the page and sets the width to 50%.
What's even more impressive about this list of functions is that they are implemented with a single command, which, in turn, references a very simple dialog box, as shown in Figure 21-9.

Figure 21-9. The Recordset Navigation Bar dialog box offers a choice between text links or graphics.
Here's how it works:
Choose Insert
Select the data you want to control from the Recordset list.
To create a series of text links, choose the Display Using Text option.
To use graphics to trigger the navigation, choose the Display Using Images option.
Warning
You must save the page if you select the Display Using Images option. Dreamweaver copies images from the Shared/Dreamweaver/Images folder when you choose this option, and the page into which they are being inserted must be saved to store the images properly in the site. They are stored in the same folder as the page containing them.
Click OK.
After the recordset navigation bar has been inserted, you can adjust the text or images in any way you see fit. The text may be styled or modified, and you can even swap out the images—by changing the src attribute—for other graphics.
Another Application object inserts the text and all the server behaviors necessary to identify the records currently being viewed. By default, the syntax used by the Recordset Navigation Status Application object is:
Records First_Record_Shown to Last_Record_Shown of Total_Records
This syntax works perfectly for Web applications that use a Repeat Region server behavior to show multiple records. When viewed through the browser, the recordset navigation status output looks like this:
Records 5 to 10 of 37
If you're displaying one record at a time, you can adjust the Application object code inserted so that it is similar to the following:
Record First_Record_Shown of Total_Records
Like the recordset navigation bar, the recordset navigation status Application object works with only one recordset at a time:
Choose Insert
Select the data you want to control from the Recordset list.
Click OK when you're finished.

Establishing Recordset Navigation
In this Technique, you make sure your site visitors get a complete picture of the data you're displaying by adding two Dreamweaver Application objects: Recordset Navigation Status and Recordset Navigation Bar.
Open the
managing_data_startfile for your server model previously worked upon.The first task is to extend the table to accompany the objects.
Place your cursor in the first row of the table next to any of the header labels, such as Leading Agent.
Press Ctrl+M (Command+M) to insert a new row above the current row.
You need to merge the second and third cells of the top table row to make room for the Application objects. Select the two cells above Office Phone and Cell Phone and, from the Property inspector, click Merge Cells.
To insert the first Application object, place your cursor in the first cell of the top row and, from the Application category of the Insert bar, click Recordset Navigation Status.
When the Recordset Navigation Status object opens, choose rsAgents from the Recordset list and click OK.

Dreamweaver inserts the dynamic code for your server model that, at runtime, will specify which records are currently being viewed.
Now add the capability to move through a recordset. Place your cursor in the second cell of the top row and, from the Insert bar's Application category, choose Recordset Paging: Recordset Navigation Bar.
In the Recordset Navigation Bar dialog box, choose rsAgent from the Recordset list, leave the default Display Using Text option and click OK. The Recordset Navigation Bar table, along with all the necessary server behaviors, is added to the page.
Test your page by clicking Live Data View.

You'll see one of the results from inserting one of the objects—the Recordset Navigation Status—but not the other. Because the returned recordset contains fewer than the number of records set to be displayed by the Repeat Region server behavior, 10, the automatically applied conditional server behaviors hide the recordset navigation bar. It is, however, ready to be displayed should the recordset ever expand beyond the set value.
When you're done, exit Live Data View by clicking its icon again and save your page.
Flash buttons are an excellent Dreamweaver tool for adding lively navigation aids to your Web page, but they're intended for page-to-page linking, not recordset navigation. However, with a little additional work, you can adapt standard or custom Flash buttons to control Dreamweaver's Recordset Paging server behaviors.
Flash buttons are actually Adobe Generator Templates that, when processed by Dreamweaver, become Flash movies. As a Generator Template, the link information is compiled into the Flash movie and is not accessible for server-side processing—a necessity for moving from one record to another. Enabling Flash buttons to control recordset navigation requires four main components:
Server-side code for moving from record to record
A JavaScript call from the Flash button
A JavaScript function in the
<head>of the documentA hidden field variable in a form
The first requirement is actually the easiest because Dreamweaver provides the necessary server-side code. The following sections lead you through the entire process.
Before you can begin the specific steps for converting the Flash buttons for your use, some preliminary work needs to be done. First, make sure that you have added your recordset and any necessary fields. You can always add more fields from the Bindings panel later, but it's good to have one or two in the page to test the navigation buttons.
Next, add the server-side code. You can accomplish this in one of two ways: Either enter some text and attach a Recordset Paging server behavior to it, or use Dreamweaver's recordset navigation bar from the Insert
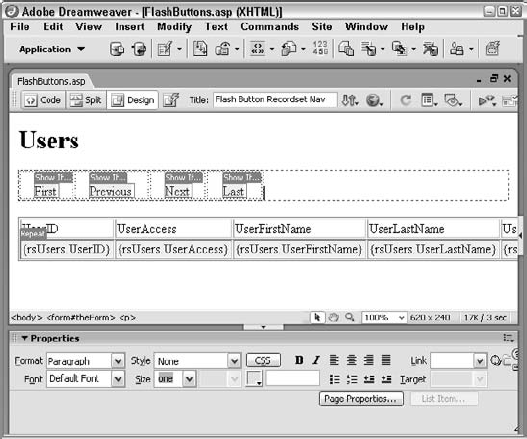
One final bit of prep work before you add the Flash buttons: Add a form to your page if one is not already present. If you like, give it a unique name; one convention you might try is to identify the forms on your separate pages with the name theForm. The form may enclose the other elements, as shown in Figure 21-11, or be separate.
Tip
To enclose the recordset navigation bar, first select the table that holds the navigation elements. Then press Ctrl+T (Cmd+T) twice to open the Quick Tag Editor in Wrap mode, and enter the following code:
<form name="theForm">
You can, of course, substitute your own name for the form for "theFom". Press Enter (Return) to confirm your code change; Dreamweaver automatically adds the closing </form> tag.
Now you're ready to insert your Flash buttons. Note one small difference between the regular Flash buttons and the ones used in this section. In your version, you call a JavaScript function rather than link to another page.
Note
If you're not familiar with Flash buttons, be sure to look over Chapter 25 to understand their basic usage and learn how to use Flash MX or better to create your own custom buttons.
To insert your modified Flash button, follow these steps:
Note
If you're already familiar with Flash buttons, skip to step 7.
Make sure that the current document has been saved. If you're working on a new document, Dreamweaver requires that you save it before adding a Flash button.
Choose Insert
Select a button type from the Style list. The previews shown in the Sample area are live demonstrations and play as designed when moused-over or clicked. There's one exception: No sounds are played in preview; you have to preview the Flash button in the browser to get the full effect.
If appropriate, enter custom text in the Button Text field. The Button Text field is physically limited to 50 characters, although probably your text will be shorter. Certain symbols, such as those in the Control group, ignore the text and font settings.
Select a typeface from the Font drop-down list if appropriate. The fonts listed are TrueType fonts found on your system. Most of the button templates have a preselected font and text size. If you do not have the preselected font on your system, a small alert appears at the bottom of the dialog box.
Enter the desired font size if appropriate, in points, in the Size field.
Enter a JavaScript call to a function that sets the recordset navigation in the Link field. For this example, you can use the functions
moveNext(), movePrev(), moveFirst(), andmoveLast(). For a button that moves to the next record, the entry into the Link field reads as follows:javascript:moveNext();
Leave the Target field blank.
If the Flash button is to be placed on a page or in a table with a background color other than white, select the Bg Color swatch to choose an appropriate background. Alternatively, enter the hexadecimal color number or standard color name directly in the Bg Color text field.
Enter a path and filename for the Flash button file. If you like, you can use the suggested default name in the site root, or click the Browse button to choose a different location.
Click Apply to insert the button at the cursor location on the page.
Click OK when you're finished.

The JavaScript function names listed in the steps here may be changed to whatever you like. However, be sure to use the same names as the actual functions when you insert them in the code, as described in the next step.
As JavaScript functions go, the functions referenced in the Flash Button Link field are as simple as they get—with just one line of code each. When executed, each of the JavaScript functions does the same thing: It sets the current URL to a value specified in a hidden form variable. You set the form variables in the next step.
Although there are four variations—one for each type of recordset navigation—the basic function looks like the following:
function moveNext() {
    document.location.href=document.theForm.nextHidden.value
}
The function name—here, moveNext()—is arbitrary, but note that it matches the function name specified in the Flash button setup. The reference to the hidden form variable is also specific to this code—again, you can name the variables whatever you like; just ensure that the names match the code in the function.
This code uses the following four functions:
function moveNext() {
document.location.href=document.theForm.nextHidden.value
}
function movePrev() {
document.location.href=document.theForm.prevHidden.value
}
function moveFirst() {
document.location.href=document.theForm.firstHidden.value
}
function moveLast() {
document.location.href=document.theForm.lastHidden.value
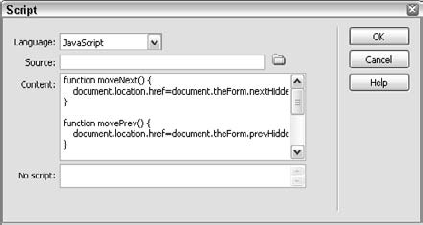
}If you're totally unfamiliar with writing JavaScript, you can use Dreamweaver's Script object to insert the code. However, make sure that the code goes in the <head> section of the document. Use the following steps to accomplish that:
Choose View
Choose Insert
Select JavaScript from the Language list.
Enter the desired functions into the Content text area. You can enter as many of the functions as you'd like, or all of them.
Click OK when you're finished.
If you're more familiar with JavaScript, you can enter the functions directly through Dreamweaver's Code view. The functions can be inserted into an existing <script>...</script> tag pair, or you can create your own. Next, you add the final piece of the basic puzzle: the hidden variables.
Step 4: Insert the hidden variables
Whenever a Recordset Paging server behavior is applied, whether manually or automatically by inserting an Application object, Dreamweaver writes a bit of server-side code in the href attribute of the <a> tag surrounding the trigger element. It is this code that you must make accessible for the Flash button to work properly as a recordset navigation tool.
The server-side code varies from server model to server model but, in essence, it's quite similar. For example, here's the code inserted when a Move To Next Record server behavior is applied:
<cfoutput>#CurrentPage#?PageNum_rsEmployees=#Min(IncrementValue(PageNum
_rsEmployees),TotalPages_rsEmployees)##QueryString_rsEmployees#</cfoutp
ut>
<%# Request.ServerVariables("SCRIPT_NAME") %>?rs_currentPage=<%#
rs.CurrentPage + 1 %>
To keep this code accessible for server-side processing—and viable for the JavaScript function to use—it must be embedded in a hidden variable form element. After the code is transferred, the temporary recordset navigation elements previously inserted can be deleted. Here's how to accomplish this task, step by step:
Select the text link that matches the recordset navigation intended for your Flash button.
You can start anywhere because you're eventually going to add Flash buttons for all your recordset navigation moves.
From the Property inspector, select and copy the value of the
hrefattribute, using the keyboard shortcut Ctrl+C (Command+C) or the context menu.Position your cursor anywhere in the form, and choose Insert
In the Hidden Field Property inspector, change the name from the default
hiddenFieldto a unique name. This name must be the same as the one used in the JavaScript function. You might want to create a name for form elements by first describing what the element relates to, followed by the type of form element. For example, the four hidden fields used in recordset navigation are calledfirstHidden, lastHidden, nextHidden, andprevHidden.In the Value field of the Property inspector, paste the copied code as shown in Figure 21-14.

Figure 21-14. The Hidden Field form element acts a conduit to the JavaScript function, passing the processed server-side value, which, in turn, is called by the Flash button.
Repeat steps 1 through 5 for every Flash button recordset control intended for the page.
After you've added all the hidden fields needed, you're free to delete the temporary recordset navigation text links. One way to do this is to place your cursor inside of the text link, right-click (Control+click) the
<a>tag in the Tag Selector and choose Remove Tag.
Your Flash button is now recordset-navigation ready. Test your page by using Dreamweaver's Preview in Browser feature.
Tip
Remember: If the folder for your testing server is on a different machine or in a different location from your local site root, you must transfer all the dependent files—including the SWF files used by the Flash buttons—before the Flash buttons work correctly.
To make the Flash button interface as intuitive as possible, add Show Region server behaviors to the various buttons, as detailed in the "Showing and Hiding Page Elements" section earlier in this chapter and shown in Figure 21-15.

To be part of an effective Web application, dynamic data can't just be displayed; it has to be designed. Dreamweaver, through a variety of server behaviors, gives you the power to selectively repeat page elements as well as show them programmatically. Data design is an important aspect of integrating the server side with the client side. As you look for ways to manage the data in your Web applications more effectively, remember the following points:
Dreamweaver's Repeat Region server behavior can help you to show as much of the data on a single page as you desire. Repeat Region server behaviors are usually applied to table rows, but they can also be used with line breaks, paragraphs, list items, or any other HTML element.
It's often necessary to show data only if a certain condition is met. Dreamweaver handles these operations through a variety of Show Region server behaviors. With these tools, you can also selectively display any element—text, graphic, or dynamic data—on the current page.
After you have the capability to display a portion of your data, you must navigate the recordset. Dreamweaver's Recordset Paging server behaviors can show the next or previous record (or group of records, if the Repeat Region server behavior is used), as well as quickly navigate to the first or last record of your data.
Recordset navigation can be integrated in several ways. You can add each building block (the graphics or the text, the server behaviors, and so on) by itself, or you can accomplish the same task in one operation by using a Dreamweaver Application object. Depending on the Web application, you might find it quicker to insert and modify the recordset navigation bar Application object rather than build your own, step-by-step.
You can convert Flash buttons to act as recordset navigation aids. The step-by-step section details the necessary modifications.
In the next chapter, you learn how you can use Dreamweaver's Live Data view to enhance your workflow and test your application under a variety of circumstances.