
IN THIS CHAPTER
Building a behavior: The basics
Working with the Document Object Model
Exploring the Dreamweaver API
Streamlining your code with common functions
Accessing useful behavior techniques
The technology of Dreamweaver client-side behaviors is open. Anybody with the requisite JavaScript and HTML skills can write a behavior. To talk about writing a behavior, however, is a bit of a mistake. You never actually touch the event portion of the behavior—you work only on the action file. To help the creation process, Dreamweaver provides a comprehensive Extending Dreamweaver document, which covers all the custom functions, JavaScript extensions, and the Document Object Model (DOM) that Dreamweaver recognizes.
The functionality and implementation of behaviors in Dreamweaver have greatly expanded since the original release. By incorporating a much broader DOM, Dreamweaver can now read and affect virtually any element on the current HTML page. You can even use behaviors to open other existing documents or create new Web pages from scratch. Perhaps more importantly, the JavaScript API (that is, the set of JavaScript functions built into Dreamweaver) is extremely comprehensive, offering over 600 functions affecting virtually every area of extensibility.
This chapter covers the primary features pertaining directly to behaviors, but the majority of the JavaScript API is beyond the scope of this book. Before you delve into the nuts and bolts of behavior building, here's an overview of the process for creating a behavior.
Writing a behavior is not so complex when you take it one step at a time. To create a behavior from scratch, just follow these six basic steps:
Define the behavior: A behavior is an automatic method for incorporating a particular JavaScript function. The best way to begin building a behavior is to write—and, of course, debug—that function. When you create the Dreamweaver behavior, the function is incorporated into the behavior's action file.
Create the action file: One of the key functions in Dreamweaver behaviors is, aptly enough,
behaviorFunction(), which inserts your function into the<head>section of the Web page. Dreamweaver enables you to include multiple functions as well as single ones.Build the user interface: As you look through the standard Dreamweaver behaviors, you see a dialog box that acts as the user interface in all but a few instances. The user interface that you create is based on HTML forms and is alternatively referred to as a parameter form and seen by the user as a dialog box.
Apply the behavior: Both an event and an action are required to make up a behavior. The
applyBehavior()function ties the new function to a specific tag and event.applyBehavior()also passes the necessary arguments to the function in the<head>section.Inspect the behavior: From a user's point of view, building a Web page is often a trial-and-error process. You try one setting and if it doesn't work, you try another. To modify settings for a particular behavior, the user double-clicks the behavior name to reopen the dialog box and change the settings. The
inspectBehavior()function handles the restoration of the previous values to the parameters form for easy editing.Test the behavior: The final step, as in any software development, is testing. You need to try out the new behavior in a variety of Web browsers and debug it, if necessary (and believe me, it's always necessary).
To demonstrate the process of creating a behavior, the next few sections take you through a real-world example: the construction of a Set Layer Z Index action by Massimo Foti, esteemed Dreamweaver/Fireworks maven and extension developer (see www.massimocorner.com).
Note
The behavior used in this example was developed when Dreamweaver referred to absolutely positioned <div> tags styled inline were called layers rather than AP elements, hence the title of the extension. The code of the behavior also reflects this earlier naming convention.
Although it's easy to change the depth of an AP element—its Z index—in the design phase, having an AP element pop to the front is also a desirable dynamic effect. Massimo has designed a cross-browser behavior that enables Web designers to control AP element depth interactively. Set Layer Z Index is a relatively simple but elegant behavior and, as such, perfect for understanding how behaviors, in general, are constructed.
Note
Dreamweaver includes a standard behavior—Change Property—that can also change the Z index of an AP element, but it doesn't work across browsers. To get the same effectiveness as Massimo's behavior, you'd have to apply Change Property twice: once for Netscape browsers and again for Internet Explorer.
Behaviors are born of need, desire, or a combination of both. After repeating a single operation a thousand times, you probably find yourself thinking, "There's got to be a better way." The better way usually automates the process. In the case of inserting JavaScript functions into Web pages, the better way is to create a behavior.
Starting from this vantage point already accomplishes the first phase of behavior creation: defining the behavior. If you were to add the necessary code to a single page to change the Z index of an AP element dynamically, it would look like the following code.
Note
The lines appearing in boldface type in the following code are the key parts of the file: the function in the <script> section (the action) and the runtime function call attached to the text link (the event). After being tested in several browsers, the function is judged to be sound and can be made into a behavior.
<html> <head> <title>Set Layer Z Index, Massimo Foti</title> <meta http-equiv="Content-Type" content="text/html; charset=iso-8859-1"> <script language="JavaScript"> <!--function tmt_LayerIndex(theTarget, theValue) {if (document.layers) {target = eval(theTarget);target.zIndex = theValue;}if (document.all) {eval("theTarget=theTarget.replace(/.layers/gi, '.all')");eval(theTarget + ".style.zIndex = theValue");}}//--> </script> </head> <body bgcolor="#FFFFFF"><a href="#" onClick="tmt_LayerIndex('document.layers['backLayer']','4')">Click to Bring Layer to Front</a><div> <p>Front Layer</p> </div> </body> </html>
When you define your behavior in this manner, you learn the arguments you need to generalize. In this example, two exist: theTarget and theValue. Ideally, your action should be flexible enough to enable any argument to be user-defined. Here, two attributes, at most, are taken in through your parameter form and passed to the function.
After you've created and tested your function in Dreamweaver, save it. I've found it helpful to go back to the original file as I build my action and verify that I have everything in working order.
Note
To look at the Set Layer Z Index behavior code in full, check out the Chapter 34 Examples folder on the DVD that accompanies this book. If you'd like to install the Set Layer Z Index behavior, use the Extension Manager (Help
In the next phase of behavior creation, you build the skeleton of the action file and begin filling in the necessary JavaScript functions. Each action file must have, at a minimum, the following four functions:
canAcceptBehavior()—Determines if the behavior should be available. If it is not available, the entry in the Add Action (+) drop-down list is not selectable.behaviorFunction()—Inserts the general function in the<head>section of the Web page.applyBehavior()—Attaches the runtime function to the selected tag and inserts the chosen event.inspectBehavior()—Enables the user to reopen the parameter form and make modifications to the original settings.
Note
One of the easiest ways to start an action file is to adapt one that is already built. You can open and modify any of the existing Dreamweaver standard action files, as long as you remember to use the File
Behaviors and other extensions can include external JavaScript files through the <script language="javascript" src="script.js"></script> construct. All the Dreamweaver behaviors take advantage of this facility. Its key benefit is to enable easy sharing of JavaScript code among different functions. Although you can still combine the user interface and JavaScript aspects of a behavior in one file, the standard practice is to store the parameter form instructions in the HTML file, such as Play Sound.htm, and the JavaScript in a JS file with an identical name, such as Play Sound.js. You can link to an external JavaScript file to make commonly used functions accessible in the script.
Here are the steps to follow in the initial behavior-creation phase:
Choose File

Choose Modify
Choose File
Switch to Code view, open the Code inspector, or use your favorite text editor to work on the code for your new action.
Note
It's best to work on the parameter form—the user interface—in Dreamweaver's Design view and, if your function code is extensive, work on your JavaScript file in Code view.
Insert the code to include external JavaScript in the
<head>of the document. For this example, Massimo's uses a series of his own JavaScript functions—and borrows one or two of Adobe's—in three separate files:<script language="javascript" src="../../../Shared/Tmt/Scripts/TMT_doc.js"></script> <script language="javascript" src="../../../Shared/Tmt/Scripts/TMT_strings.js"></script> <script language="javascript" src="../../../Shared/Tmt/Scripts/TMT_UI.js"></script>
Enter a new
<script language='javascript'>...</script>tag pair in the<head>section of the document.Open your original function test file.
Copy the function from the original file to the new behavior file. In our Set Layer Z Index example, the function
tmt_LayerIndex()is copied.Warning
Make sure that your behavior name is unique. Whenever you first open the Behaviors panel, Dreamweaver checks to see if multiple function names exist. In the case of repetitive function names, Dreamweaver recognizes the earlier file, but not the later one.
Add the following functions to the body of the
<script>tag:function canAcceptBehavior() { return true; } function behaviorFunction() { return tmt_LayerIndex; } function applyBehavior() { return ""; } function inspectBehavior(msgStr) { }
Only one function, behaviorFunction(), is completed at this time; the rest are placeholders for required functions that you'll code later.
Tip
The behaviorFunction() returns just one function. tmt_LayerIndex. behaviorFunction() can, however, return multiple functions. For more on this capability, see the section "Dreamweaver Behavior Techniques" later in this chapter.
After you lay out the basic behavior structure, the next step is to define when the behavior can be used. You use the canAcceptBehavior() function for this step. If the behavior has no special requirements—such as needing one or more images on the page—you can leave the canAcceptBehavior() function as is. The sample behavior uses AP elements, so the behavior should be available only if AP elements exist on the current page. To check for AP elements, use this code:
function canAcceptBehavior() {
  var nameArray = getObjectRefs("NS 4.0","document","LAYER");
  return (nameArray.length > 0);
}
Here, if the Dreamweaver function getObjectRefs() finds any AP element objects, the nameArray length is greater than zero, and the canAcceptBehavior function returns True; otherwise, False is returned, and the behavior name in the Add Action (+) list of the Behaviors panel is dimmed and inactive.
The user interface of a behavior is a parameter form, constructed with HTML form elements. The number and type of arguments required by your completed function are the key indicators of what to include in your action's parameter.
In the Set Layer Z Index example, the function requires two primary arguments: theTarget and theValue. The interface must enable the user to choose the target parameter—the AP element being affected—and the value of the Z index. To be useful, the action should list all available AP elements by name.
Note
Dreamweaver recommends using a specific DOCTYPE statement for different types of extension user interfaces (UIs). For example, when creating a dialog box, you should use: <!DOCTYPE HTML SYSTEM "-//Adobe//DWExtension layout-engine 5.0//dialog">. For more information, look up DOCTYPE in the index of Extending Dreamweaver documentation.
All user interface constructions are contained in the <body> section of your HTML action file. You can use Dreamweaver's Design Editor to create and modify your form quickly.
Note
Many Web designers use tables to line up the various form elements; if you use this approach, be sure to place the table inside the form and not the other way around. Although you can insert a form in the cell of a table, you are limited to entering form elements in that cell—and you return to no structure at all.
To create your user interface, follow these steps:
Open your HTML action file in Dreamweaver.
In Design view, choose Insert
For better alignment, place a table inside your form by choosing Insert
Enter your form elements as needed. Be sure to name each one individually (with the exception of a radio-button grouping) for JavaScript purposes. Be sure to use JavaScript-friendly names: no spaces or special characters and always start the name with a letter.
Note
As with Dreamweaver objects, you don't see the OK, Cancel, and Help buttons that appear when the parameter form is actually used. Dreamweaver displays these buttons to the upper-right part of your interface.
The interface for the Set Layer Z Index action, as shown in Figure 2-1, uses a drop-down list form element to list all available AP elements and a text box to get the desired Z index from the user.

Note
In Dreamweaver CS3, the term layer was replaced by the more appropos term, AP element. This extension was developed for an earlier version of Dreamweaver and uses the older terminology; the functionality remains the same.
The Main panel uses a drop-down list and a text box to gather the user input. The last part of setting up the user interface requires a function that initializes the interface and sets the cursor in the right field. To complete this task, you use the initializeUI() function. For the Set Layer Z Index action, all the AP elements in the current page must be displayed in the drop-down list. To display the AP elements in this way, the initializeUI() function includes a number of specialized functions:
function initializeUI() {
   var niceNamesArray;
   //Get all the layers available including parent frames
   //Then turn those objects references into nice names
   niceNamesArray = niceNames(getAllObjectRefs("NS 4.0","LAYER"),TYPE_Layer);
   //Populate the select element
   populateSelect("LAYER_LIST",niceNamesArray);
   //Set focus on textbox
   findObject("Z-INDEX").focus();
   //Set insertion point into textbox
   findObject("Z-INDEX").select();
}
Massimo combines Adobe functions and his own to initialize the dialog box. The Adobe-designed niceNames() function changes JavaScript object references such as document.layers['onLayer'].document.theForm to a more readable format such as form "theForm" in layer "onLayer". The result of the niceNames() function then is used to fill a drop-down list via Massimo's own populateSelect() function, found in the DW_UI.js file included in our opening step. The remaining two lines that start with the findObject() function are used to place the user's cursor in the text field when the dialog box opens—a nice touch that demonstrates Massimo's professionalism. Both niceNames() and findObject() are found in the external JavaScript files included earlier.
Finally, you need to attach the initializeUI() to <body> with an onLoad event in the HTML file. Locate the <body> tag and amend it so that it reads as follows:
<body onLoad="initializeUI()">
Now you can write the code that links your function to a specific tag and event. You can think of this process in three steps:
Making sure that the user entered information in the right places
Organizing the user's parameter-form input into a more usable format
Returning the runtime function call
All these steps are executed in the applyBehavior() function, whose placeholder you included in your action file.
You gather information from an action's parameter form in the same way that you gather data from a custom object. Using the same techniques discussed in Chapter 33, you receive the input information and usually convert it to local variables that are easier to handle. The number of variables is equal to the number of arguments expected.
Tip
Potentially, if any of the input from the parameter form might be sent out to a Web server—say, as a URL or a file—you encode the text string so that UNIX servers can read it. Use the built-in JavaScript escape() function to convert space and special characters in the URL to UNIX-friendly strings. The companion unescape() function reverses the process and is used in the inspectBehavior() function.
To build your applyBehavior() function, follow these steps:
Declare the necessary variables inside the function:
var layersArray, layerIndex;
var argString = "";
Get an array of AP elements from the document:
layersArray = getAllObjectRefs("NS 4.0","LAYER");Put the index of the AP element selected in the drop-down list into a variable:
layerIndex = findObject("LAYER_LIST").selectedIndex;The next two lines put the chosen parameters (the AP element name and the z-index value) into an argument string, one after another, separated by a comma:
argString += "'" + getNameFromRef(layersArray[layerIndex]) + "',";
argString += "'" + findObject("Z-INDEX").value + "'";
Return the runtime function call, incorporating the variables. The
applyBehavior()function must return a complete string. Enclose the argument variables within single quotes. If you use any internal quotes, they should be preceded by (escaped with) a backslash, as in:"or'.return "tmt_DivIndex(" + argString + ")";
In the actual behavior, it's a good idea to add error checking to prevent the user from entering something other than an integer in the z-index field.
Note
Check the code in the Examples folder of the DVD to see how Massimo handled this issue.
Only one more step remains before you're ready to begin testing your action.
Now it's time to add the inspectBehavior() function to the JavaScript file. Basically, this function is called when the user double-clicks the action in the Behaviors panel. It restores the information already entered through the parameter form and enables the user to change the parameters. In many ways, inspectBehavior() can be considered the reverse of the applyBehavior() function: Rather than reading the form and writing the information to the Web page, inspectBehavior() reads the information and writes it back to the form.
Interpreting the user-input string of information from a form is referred to as parsing the string. Dreamweaver offers several built-in functions to aid the parsing process, most of which are collectively called with extractArgs(). The extractArgs() function is a good example of the powerful code snippets available in the Dreamweaver MX 2004ConfigurationShared folder.
Another key function used in inspectBehavior() is findObject(). The findObject() function—Massimo calls it "the smartest piece of JavaScript ever written"—returns an object when you give it the object's name. Sounds simple, but consider that an object (such as a form text field or AP element) can be almost anywhere in the realm of the document DOM. A search can be a daunting prospect without this invaluable function. Here, findObject() is initially used to get the Layer_List object, the drop-down list in the dialog box, which is populated programatically. After the string arguments are in an array, they can be extracted and placed back in the parameter form.
To write the inspectBehavior() function, follow these steps:
Declare several basic variables:
argArray, layerMenu, layersArray, menuLength, andfound.var argArray,layerMenu,layersArray,menuLength,found;
Use the
extractArgs()function to separate the arguments passed inmsgStrand set them equal to a variable,argArray:argArray = extractArgs(msgStr);
Get the drop-down menu object by using
findObject():layerMenu = findObject("LAYER_LIST");Examine the user's document, find all the AP elements, and put them in an array:
layersArray = getAllObjectRefs("NS 4.0","LAYER");Now you're ready to loop through all the AP elements on the page and look for the name of the one passed in the argument. After you find that AP element, select it, and its z-index is displayed in the other field of the dialog box (if the z-index was passed in with the arguments).
for(var i=0;i<menuLength;i++){
      if(getNameFromRef(layersArray[i]) == argArray[1]){

             layerMenu.selectedIndex = i;
             found = true;
             break;
      }
}
if(argArray[2]){
       findObject("Z-INDEX").value = argArray[2];
}
The complete inspectBehavior() function, with a little added error checking, looks like the following:
function inspectBehavior(msgStr){
   var argArray,layerMenu,layersArray,menuLength,found;
   argArray = extractArgs(msgStr);
   layerMenu = findObject("LAYER_LIST");
   //Get all layers references including parent frames
   layersArray = getAllObjectRefs("NS 4.0","LAYER");
   menuLength = layerMenu.options.length;
   //Loop through all the <select> options
   for(var i=0;i<menuLength;i++){
      //If the layer reference is same as the argument, got the layer

      if(getNameFromRef(layersArray[i]) == argArray[1]){
         layerMenu.selectedIndex = i;
         //Set the flag and stop looping
found = true;
break;
}
}
//If the layer is not found, alert!
if(!found){
alert(argArray[1] + " could not be found")
}
//Populate the rest of the UI with remaining arguments
if(argArray[2]){
findObject("Z-INDEX").value = argArray[2];
}
}Tip
This example is a fairly simple inspectBehavior() function. Keep in mind that the more input you allow from your user, the more complicated it is to restore the information through this function. As with many aspects of building behaviors, one of the best ways to construct your inspectBehavior() function is by examining the code of working examples provided in the Adobe-built behaviors, as well as examples contributed by other developers.
Testing and debugging is the final, necessary phase of building an action. To test your behavior, follow these steps:
Quit and restart Dreamweaver.
Insert an image or a link in a blank Web page.
Select the element to use as your trigger.
Open the Behaviors panel.
Select the Add Action (+) button, and choose your desired behavior.
Fill out the parameters form as required. Your action's name appears in the Actions column, as shown with the Set Layer Z Index example in Figure 2-2.
Change the event by clicking on the currently assigned event and then selecting onClick from the drop-down list.
Double-click the action to verify that your prior choices have been restored.
Test the output of the extension in various Web browsers.

Warning
When you first select an event to add, Dreamweaver examines all the actions in the Actions folder. If a problem is found, such as two files having the same function name, you are alerted to the conflict, and the list displays only the older file. You have to correct the problem with the other action and restart Dreamweaver before the file appears in the list again.
If your action is intended for distribution and not just your own personal use, you should expand your testing considerably, especially on the user-interface side. As the action programmer, you know what values are expected, and you also know—often subconsciously—how to avoid the pitfalls into which a new user may easily stumble. Be especially mindful of accepting input through a text box. Unless you're just passing a message to be displayed onscreen or in the browser status bar, you often have to validate the incoming text string: Is it a number, a word without any special characters, a single name? And so on. Telling the user to enter a number in a particular range doesn't guarantee correct results.
Note
If you intend to distribute the extension publicly, do not assume that it will work in all Dreamweaver versions (MX, MX 2004, 8 and so on) and platforms (Windows, Mac). Always test on different platforms/versions before distributing!
Finding a bug is every programmer's least favorite moment—but getting rid of that bug can be the best. Basic JavaScript debugging techniques, including using the alert() function to keep track of variables, are without a doubt your first course of action. With its built-in JavaScript interpreter, Dreamweaver can give you error messages in the same manner as a browser. Dreamweaver's error handling is very good—with many error messages pointing directly to the problem code.
If the errors are severe enough to stop Dreamweaver from recognizing your action file as such, the file is not listed in the Action drop-down list until the problem is resolved. Generally, this situation means that you must restart Dreamweaver after each modification until the problem is resolved.
After you debug the minor errors and modify the code, follow these steps to make changes without restarting Dreamweaver:
First, open your action file, make the necessary changes, and re-save the file.
Assign your action to a tag and open the behavior's parameter dialog box. Without entering any parameters, click Cancel to close the parameter box.
Remove the action from the Actions column by selecting the Delete button.
Reassign your action, and Dreamweaver loads the new version.
Tip
Remember, JavaScript is case-sensitive: The variable myVar is not the same as myvar or MyVar or MYVAR; the function doSomething() is not the same as dosomething() or DoSomething(); and so on. If you get a message that a variable or function cannot be found, make sure that you have spelled the variable/function name exactly as it is defined.
To help developers create behaviors, Adobe provides the Extending Dreamweaver documentation. Extending Dreamweaver is the background documentation of the various functions available for building behaviors. As such, it provides a useful framework for discussing the underpinnings of Dreamweaver behaviors and how you can use the extensions and built-in functions. The Extending Dreamweaver documentation can be found by choosing Help
Although Extending Dreamweaver covers all types of Dreamweaver extensions, behavior developers are interested in three main sections: the Dreamweaver Document Object Model, the Dreamweaver JavaScript API, and Behaviors. If your behavior is intended to interact with Fireworks, you want to study the Fireworks Integration API section. The more you understand about the various components and their included functions, the more flexibility you have in building your behaviors.
Warning
The material in this section is intended for programmers familiar with JavaScript and, as such, is fairly advanced.
JavaScript is an interpreted programming language that addresses elements in the browser and on the Web page in a hierarchical fashion. To access the properties of any object on the page, JavaScript employs a Document Object Model (DOM). The DOM breaks down the page into successively smaller parts until each element and its specific properties are identified.
Dreamweaver integrates a subset of objects, properties, and methods from the W3C DOM Level 1 with a subset of properties from the Internet Explorer 4.0 DOM. The resultant Dreamweaver DOM also includes some useful features not implemented in either of the other DOMs.
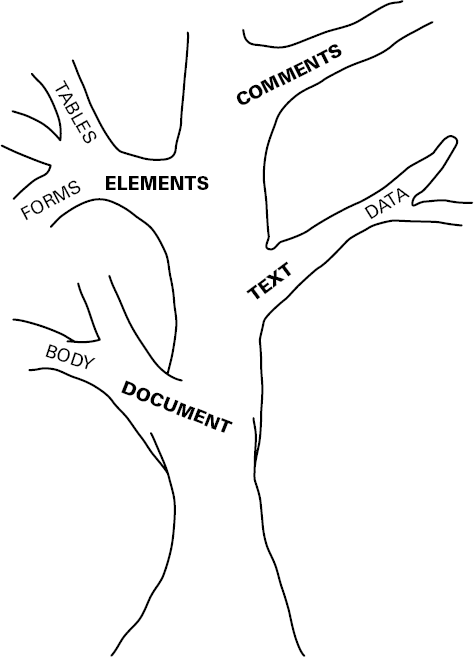
Dreamweaver's DOM makes available, or exposes, virtually every element on a Web page. The DOM is often described using a tree metaphor, with the HTML document as the trunk. Instead of regarding the <head> and the <body> as the major branches, however, Dreamweaver's DOM, like the W3C DOM, uses four separate branches, or nodes, to divide the document:
DOCUMENT_NODE—Enables access to objects directly relating to the overall documentELEMENT_NODE—Contains references to all tags in the HTML documentTEXT_NODE—Describes the contiguous block of text within tagsCOMMENT_NODE—Represents the comments within an HTML document and the text strings they contain
Just as one tree branch can lead to another, nodes can contain other nodes. For example, an AP element can contain a table that holds table rows that, in turn, hold table data. One node containing another is said to be in a parent-child relationship, and a node that cannot contain any other nodes is referred to as a leaf node because it is incapable of supporting any more branches. Figure 2-3 illustrates the node concept.
When referencing a specific tag, the DOM syntax goes from the most general to the most specific. For example, suppose you want to find out what a user entered into a specific text field, a property called value. You need to start from the document itself and work your way down through the form and text box objects, as follows:
var theText = document.formName.textboxName.value;
The DOM dictates what properties are accessible and in what form. Not all properties and methods are supported. You can't, for instance, directly reference the value of a button in a form. Instead, you have to assign that value to a hidden or other text field and access that value.
Note
The portion of the DOM relating directly to forms and form elements is discussed in Chapter 33.
The same rules of use and the same restrictions for implementing forms in objects apply, likewise, to implementing forms in behaviors. Additionally, the Dreamweaver DOM addresses other major objects as outlined in Table 2-1. Read-only properties are marked with an asterisk (*); otherwise, properties can be both read and set.
Table 2-1. Dreamweaver DOM Properties
Property | Nodes | Returns | Description |
|---|---|---|---|
* Read-only | |||
| all | Node.DOCUMENT_NODE Node.ELEMENT_NODE Node.TEXT_NODE Node.COMMENT_NODE | Returns the node of the specified selection |
| all | string (HTML tag), document object, or null | Returns |
| DOCUMENT_NODE | parent window object | Returns the JavaScript object corresponding to the document's parent window |
| all | NodeList | Returns a |
| DOCUMENT_NODE | HTML tag of current document | Returns the JavaScript object corresponding to the HTML tag of the current document |
| DOCUMENT_NODE | BODY tag of current document | Returns the JavaScript object corresponding to the BODY tag of the current document |
| DOCUMENT_NODE | file://URL | Returns the file://URL for the current document |
| ELEMENT_NODE | IMG TABLE | Returns the HTML name (in CAPS) for the current tag |
| ELEMENT_NODE | grey #33CC66 | Returns the value of the specified tag attribute |
| ELEMENT_NODE | for <p>Hello <i>world! </i></p> p.innerHTML would return: Hello <world!> | Returns the HTML source for a tag, without the tag code itself |
| ELEMENT_NODE | for <p>Hello <i>world!</i><p> p.outerHTML would return: <p>Hello <i>world!<i></p> | Returns the HTML source for a tag, including the tag code |
| TEXT_NODE COMMENT_NODE | "J. Lowery" where the tag reads <p>J. Lowery</p> | Returns the text string contained within a contiguous block of text or a comment |
Methods, in programming, are functions attached to a particular object, such as the document object. Dreamweaver includes several methods in the DOM to help manipulate the HTML page. With the node structure, you can apply these methods to the current document, frameset, frame, or selected object.
Using these methods, your behaviors can inspect the current page and, if desired, change or even delete any attributes found. Table 2-2 outlines the methods contained in the Dreamweaver DOM.
Table 2-2. Dreamweaver DOM Methods
Method | Nodes | Returns | Description |
|---|---|---|---|
| all | true or false | Determines if current selection has children |
| DOCUMENT_NODE ELEMENT_NODE | NodeList | Returns a |
| ELEMENT_NODE | string or null | Gets the translated value of the specified attribute; used in conjunction with Dreamweaver translators |
| ELEMENT_NODE | true or false | Determines if the tag has translated attributes; used in conjunction with Dreamweaver translators |
| ELEMENT_NODE | string or null | Gets the value of the specified attribute |
| ELEMENT_NODE | nothing | Sets the specified attribute to a specified value |
| ELEMENT_NODE | nothing | Deletes the specified attribute |
The Dreamweaver JavaScript API is vast, with more than 600 custom JavaScript functions, enabling the savvy behavior programmer to use JavaScript to accomplish almost any task that the user can perform in Dreamweaver. Although in-depth discussion of the Dreamweaver JavaScript API is beyond the scope of this book, I strongly recommend that behavior programmers take the time to familiarize themselves with what this deep API has to offer.
The JavaScript API functions are grouped into the following categories:
Assets panel functions | Live data functions |
Behavior functions | Menu functions |
Clipboard functions | Path functions |
Code hints functions | Print functions |
Command functions | Quick Tag Editor functions |
Conversion functions | Report functions |
CSS Styles functions | Results window functions |
Data source functions | Selection functions |
Enablers | Server behavior functions |
External application functions | Server model functions |
File manipulation functions | Site functions |
Find/Replace functions | Snippet panel functions |
Frame and frameset functions | Source view functions |
General editing functions | String manipulation functions |
Global document functions | Table editing functions |
History functions | Tag Editor and tag library functions |
HTML style functions | Tag Inspector functions |
JavaScript debugger functions | Timeline functions |
Keyboard functions | Toggle functions |
Layer (AP element) and image map functions | Toolbar functions |
Translation functions | |
Layout environment functions | Window functions |
Library and template functions |
Behavior programmers may find the API functions under Behavior, File Manipulation, Global Document, Path, Selection, and String Manipulation to be of particular interest.
The Dreamweaver engineers didn't stop with the aforementioned JavaScript APIs; they created additional APIs for file input/output, source control integration, JavaBean management, design notes, Fireworks integration, Flash objects, and more. Extending Dreamweaver has basic documentation about them all.
To make the behavior programmer's life a little easier, I've included coverage of some of the most often used API functions. Although the following sections are in no way exhaustive, they do give a good example of how API functions work in Dreamweaver in general and in behaviors in particular.
Note
The Dreamweaver API functions have a prefix of dreamweaver, dom, or site. The dreamweaver prefix can also be abbreviated as dw as in dw.getDocumentDOM(). The dom functions refer to the DOM of a document returned by the getDocumentDOM() function (as explained in the following section). The site functions refer to selections in the Site panel.
The getDocumentDOM() function is the starting point for many Dreamweaver JavaScript manipulations. It returns the entire DOM for the specified document, thus enabling the document to be read and manipulated. Generally, getDocumentDOM() is used in this fashion:
var theDom = dreamweaver.getDocumentDOM("document");theDom holds the DOM of the current document and, by extension, everything connected to it.
Tip
Because many behaviors require repeated access to the DOM, it's good practice to assign it to a global variable (such as theDOM) early on in your script.
After you have accessed the document DOM in this manner, you can request more specific information. If, for example, you want to examine the <body> of the current document, you can code it this way:
var theDom = dreamweaver.getDocumentDOM("document");
var theBody = theDom.body;
You could also use JavaScript dot notation to shorten the code:
var theBody = dreamweaver.getDocumentDOM("document").body;The getDocumentDOM() function requires one argument, sourceDoc, which refers to the source document. The argument must be one of the following:
"document"—Sets the reference to the current document. Although the"document"argument can be used from anywhere to read the DOM, any edits applied using it must ultimately be called from within theapplyBehavior(), deleteBehavior(), orobjectTag()functions—or any function in a command or Property inspector file."parent"—Sets the source document to the parent of the current document. This argument is generally used to determine if a document is within a frameset, like this:var frameset = dreamweaver.getDocumentDOM("parent"); if (frameset) { ... do code ... }"parent.frames[number]"or"parent.frames['framename']"—To access another document in the frameset of which the current document is a member, use one of these two argument forms. The first,"parent.frames[number]", is usually used when the names of the current frames are unknown or to cycle through any number of frames. The second,"parent.frames['framename']", is applied in specific cases where the names of the other frames are known and modifications are made to those frames only.URL—Occasionally, the behavior builder references existing documents, either locally or on the Web. Using a URL—either absolute or relative—as an argument enables you to retrieve information on almost any document you can specify. When using a relative URL, such as this one from Dreamweaver's
Untitled Documents.jsfile, the URL is relative to the location of the behavior or other extensibility file:var curDOM = dw.getDocumentDOM('../../Templates/Default.html'),
Note
Whenever API functions require the DOM object, such as the dom.getSelection() function and others discussed in the following sections, you must first get the DOM of the current document. In all the examples that follow, the variable theDOM is understood to have been established early on, like this:
var theDOM = dreamweaver.getDocumentDOM("document");How a behavior performs is quite often dictated by what tag the user selects prior to attaching the behavior. The getSelection() function is the first step toward getting all the information necessary to control the behavior based on a user selection. I emphasize first step because this function returns the selection in the form of byte offsets in memory. A byte offset is a number that points to a memory address. In the case of the getSelection() function, the two byte offsets that are returned mark the beginning and end of the selection in memory. For example, you open a new page in Dreamweaver, type in a phrase such as The Key Points, and then select the first word, The. If you used the getSelection function like this:
var selArray = theDOM.getSelection();
alert(selArray);
the alert box would return 161,164, which denotes the beginning byte (161) and the ending byte (164) offset of the selected word, The. If your beginning and ending byte offsets are the same (as in 164,164), nothing is selected. This fact comes in handy when you want to make sure that the user has selected something before proceeding. To examine what is contained within the byte offsets returned by the getSelection() function, you use the offsetsToNode() function, explained later in this section.
Just as getSelection() retrieves the memory offsets of the current selection, the setSelection() function sets a new pair of memory offsets and thus a new selection. The setSelection() function takes two arguments: offsetBegin and offsetEnd.
setSelection() is most often used to restore a user's selection after various document manipulations have taken place. In this example, the selection is first stored in a variable via getSelection() and then, after much document modification, restored by setSelection:
var currSelection = theDOM.getSelection();
// document altering code goes here
theDom.setSelection(currSelection[0],currSelection[1]);
Note
If the new setting does not conform to a valid HTML selection, such as the attributes within a tag, the selection expands to include the entire tag.
You can also use setSelection to deselect anything on the page after completing a behavior. All that's required is that the two arguments be equal. Using the preceding example, this code
theDOM.setSelection(currSelection[1],currSelection[1]);
places the cursor after the previous selection, whereas
theDOM.setSelection(currSelection[0],currSelection[0]);
places it before the selection.
The offsetsToNode() function serves as a translator, converting the byte memory offsets retrieved by getSelection() into readable data. For this reason, you often see the following code combination:
selArr = theDOM.getSelection();
selObj = theDOM.offsetsToNode(selArr[0],selArr[1]);
where getSelection() returns the array of the selection and the object referenced by that array. As indicated, offsetsToNode() takes two arguments: offsetBegin and offsetEnd, usually expressed as the initial (0) and next (1) array elements.
After you've used offsetsToNode to get the selected object, you can examine or manipulate it. For example, in the custom Replicator command (included on the DVD that accompanies this book), I used offsetsToNode to see if the selection made is appropriate (text only) and, if it is not, I call a help function:
var offsets = theDOM.getSelection();
var selObj = theDOM.offsetsToNode(offsets[0],offsets[1]);
if (selObj.nodeType != Node.TEXT_NODE) {
  helpMe2();
}As the name indicates, nodeToOffsets() is the inverse of offsetsToNode(). Instead of converting memory offsets to an object, nodeToOffsets takes an object reference and returns its memory offsets. This is useful when you manipulate a substring of the selection, usually text.
For example, in the custom command Change Case (included on the DVD that comes with this book), after the selected object is retrieved via getSelection and offsetsToNode, nodeToOffsets expresses it in an array that can be uppercased or lowercased at the click of a button. Here's a fragment of the code from the custom upperCase() function:
var theDom = dreamweaver.getDocumentDOM("document");
var offsets = theDom.getSelection();
var theNode = theDom.offsetsToNode(offsets[0],offsets[1]);
if (theNode.nodeType == Node.TEXT_NODE) {
  var nodeOffsets = theDom.nodeToOffsets(theNode);
  offsets[0] = offsets[0] - nodeOffsets[0];
  offsets[1] = offsets[1] - nodeOffsets[0];
  var nodeText = theNode.data;
  theNode.data = nodeText.substring(0,offsets[0]) +
    nodeText.substring(offsets[0], offsets[1]).toUpperCase() +
    nodeText.substring(offsets[1], nodeText.length);
}
Because nodeToOffsets returns two memory offsets, you can use these as the arguments in setSelection to choose an object on the page. If, for instance, you wanted to select the first link on the page, you use the code as follows:
var theDom = dreamweaver.getDocumentDOM("document");
var theLink = theDom.links[0];
var offsets = theDom.nodeToOffsets(theLink);
theDom.setSelection(offsets[0],offsets[1]);
The getTokens() function is often used in the inspectBehavior() function because it does such a good job of parsing a string. A token is a group of text characters that does not contain any of the specified separators. Generally, the separators in a function are the parentheses that surround the arguments and the commas that separate them. The getTokens() function takes two arguments—the string to be parsed and the separators—and puts the results in an array. For example, note the following string:
doGroovoid('false','Fanfare-Arrival'),To extract the two arguments from this statement, use the getTokens() function as follows:
getTokens("doGroovoid('false','Fanfare-Arrival')","'(),");If you set this function equal to an array called argArray, you get the following results:
argArray[0] = 'doGroovoid';
argArray[1] = 'false';
argArray[2] = 'Fanfare-Arrival';
Usually the first element of the array, the function name, is ignored.
The getElementRef() function is used to gather browser-specific references to a particular object and place them into an array.
The getElementRef() function takes two arguments: The first argument is either NS 4.0 or IE 4.0, which references the Netscape and Internet Explorer formats, respectively; and the second argument is the tag being examined. The string returned puts the specified tag in the format of the named browser. If, for example, getElementRef() is used to get the object reference to a specific AP element in Netscape terms, like
var theObjNS = dreamweaver.getElementRef("NS 4.0", tagArr[i]);the variable, theObjNS, is set to something like
document.layers['newLayer'];
On the other hand, the same AP element, in Internet Explorer terms, like this:
var theObjIE = dreamweaver.getElementRef("IE 4.0", tagArr[i]);returns a string like document.all.newLayer1.
Both getElementRef() and getObjectRefs() return browser-correct references for both browsers for the following tags: <a>, <area>, <applet>, <embed>, <select>, <option>, <textarea>, <object>, and <img>. Additionally, references for the tags <div>, <span>, and <input> are returned correctly for Internet Explorer, as <layer> and <ilayer> are for Netscape. Absolutely positioned <div> and <span> tags are also returned correctly for Netscape, but others return the message "cannot reference <tag>".
Warning
Naming objects and AP elements is often critical in JavaScript, as it certainly is with getElementRef() and getObjectRefs(). Dreamweaver can't return references for unnamed objects; instead, it gives you an "unnamed <tag>" message. Furthermore, Dreamweaver can't handle references to a named object if it is in an unnamed AP element or form. To help with the naming task, Dreamweaver automatically assigns a name attribute to forms and an ID attribute to AP elements as they are created.
The getBehaviorTag() function returns the tag selected to implement the current behavior. The getBehaviorTag() function can also be incorporated into the behavior setup code to steer the user in the appropriate direction.
The getBehaviorTag() function returns the entire tag—name, attributes, values, and any text selected—exactly as it is written (capitalization, spaces, and so on). In most situations, you need only the relevant portion of the tag, its name (img), for example. You can find the relevant portion of a tag by using JavaScript's indexOf() method to search a string (the entire tag) for a specified substring. The following code looks to see if the tag selected for the behavior is an <img> tag. If it's not, the code alerts users to what's required:
function initializeUI() {
  // uppercase the tag to make indexOf() searching easier
  var theTag = dreamweaver.getBehaviorTag().toUpperCase();
  if (theTag.indexOf('IMG') != −1)) {
    // Behavior UI initialization goes here
  }
  else {
    alert("This behavior requires you select an IMAGE to proceed.");
  }
}
Note
Using the initializeUI() function to block access to a behavior is different from using the canAcceptBehavior() function to block access. With the getBehaviorTag() technique, the user is informed of the problem, rather than simply denied access.
Another method to discover which tag is selected for the invoked behavior is the getBehaviorElement() function. The major difference between this function and the getBehaviorTag() function is that the former returns the DOM reference to the tag, whereas the latter returns the tag itself. After you have the DOM reference of the behavior tag, you can uncover a terrific amount of information about the tag and its attributes.
Like getBehaviorTag(), getBehaviorElement() is most often used to determine if the user has selected an appropriate tag for the chosen behavior. If the tag is inappropriate, a helpful message can be displayed to guide the user to a better option. The getBehaviorElement() function returns either a DOM reference or null. getBehaviorElement() returns null in the following circumstances:
The function was not invoked from a script called by the Behaviors panel.
The behavior called is part of a timeline.
The function was invoked from a script called by
dreamweaver.popupAction().The function was invoked as part of a Behaviors panel that is attaching an event to a link wrapper (
<a href="#">...</a>), and the link wrapper has not yet been created.The function is called outside of a behavior.
The following example assumes that the required tag must be an embedded plugin that is visible on the page:
function initializeUI() {
  var theTag = dreamweaver.getBehaviorElement();
  var tagGood = (theTag.tagName == "EMBED" &&
theTag.getAttribute("HIDDEN") == null);
if (tagGood) {
// Behavior User Interface code goes here
}
else {
alert("This behavior can not be applied to hidden plug-ins");
}
}The browseForFileURL() function enables the user, instead of entering an entire path by hand, to locate a file via a dialog box. You can specify whether you want an Open, Save, or Select style dialog box, as well as the label in the title bar. You can even enable the Preview panel for images. No matter which options you choose, the browseForFileURL() function returns the pathname of the file expressed as a file://URL.
The browseForFileURL() function follows this syntax:
browseForFileURL('Open'|'Save'|'Select', 'Title Bar Label', true|false);The first argument, either Open, Save, or Select, specifies the type of dialog box. The Select File dialog box displays additional local root information in its lower portion. The second argument is displayed in the title bar of the dialog box; if you don't want to insert your own title, you must specify an empty string '' (two single quotes, with nothing in-between) for the argument, as in this example:
browseForFileURL('open','',false);The final argument is a Boolean and indicates whether the Preview dialog box for selecting images is to be displayed. If no title bar label is given and the Preview dialog argument is true, the title displayed is Select Image Source.
The browseForFileURL() function is generally called by a secondary function that is triggered by an onClick event attached to a Browse button. The Browse button, in turn, is next to a text field that enables the user to enter the path by hand. Typically, this secondary function is called browseFile() and takes one argument, fieldToStoreURL. For instance, the code for a Browse button often reads as follows:
<input type="text" name="textFile">
<input value="Browse..." type="button" name="button"
       onClick="browseFile(document.theForm.textFile.value)">
The browseFile() function then calls the built-in browseForFileURL() function, which opens the Select File dialog box and, if the dialog box is returned with a filename, assigns that filename to a variable. In the standard browseFile() function, shown here, the returned filename is then assigned to a text-box value for the given field, which makes the name appear in the text box:
function browseFile(fieldToStoreURL) {
  var fileName = "";
  fileName = browseForFileURL()  //returns a local filename
  if (fileName)
    fieldToStoreURL.value = fileName;
}Dreamweaver includes several local document functions that aid in the reading, editing, and storing of current and external documents. The getDocumentPath() function is one of these; as the name states, this function returns the path of the specified document. The path returned is in the file://URL format, so that a file located at c:sitesindex.html returns file://c|/sites/ as its path.
The getDocumentPath() function takes one argument: the source document. This argument can be "document", "parent", "parent.frames[number]", or "parent.frames['framename']" as described earlier in the getDocumentDOM() function. If the document specified has not been saved, getDocumentPath() returns an empty string.
The Configuration folder can be considered the hub of Dreamweaver extensibility. It contains not only all the standard HTML files, such as the behaviors and objects, that are read into the system when Dreamweaver starts but also various other files that control the look and feel of the menus in other areas. As such, it's often useful to be able to find the path to the Configuration folder so that other files can be created, read, edited, and stored. And that's exactly what getConfigurationPath() does.
One sample use of this function, included with Dreamweaver, is part of the secret behind the Rollover object. To a trained eye, the Rollover object is unlike any other—in fact, it's not really an object at all; it's a command masquerading as an object. The getConfigurationPath() function plays a key role in the JavaScript file rollover.js with this code:
var rolloverCmdURL = dreamweaver.getConfigurationPath() +
                     "/Commands/Rollover.htm";
var rolloverDoc = dreamweaver.getDocumentDOM( rolloverCmdURL );
In the first line, getConfigurationPath is used to locate the Rollover.htm file in the ConfigurationCommands subfolder and assign it to a variable. This enables the object to retrieve the DOM for manipulation with the getDocumentDOM() function.
Note
Like getDocumentPath(), getConfigurationPath() formats the path as file://URL.
Dreamweaver depends on the establishment of a local site root for much of its Web site management facility: All site-root–relative links and references are based upon the location of the site root folder. The capability to uncover its file location is important for any behaviors or other extensibility files that work on the site root level. Dreamweaver supplies such a capability with the getSiteRoot() function.
Very straightforward to use, getSiteRoot() does not take an argument, and it returns a file://URL format reference to the local site root of the currently selected document. If it returns an empty string, the file has not been saved.
If you're working with a complex document with a lot of images, AP elements, tables, and text, you're going to have a lot of HTML to deal with. Accessing the DOM for that page can take up a significant chunk of your memory. If you're working with multiple pages, you could begin to run low on memory before the behavior closes and the memory is automatically freed. With the releaseDocument() function, you can get back the memory as soon as possible, whenever you request it.
The releaseDocument() function's one argument is the DOM of the document in question. You obtain the DOM argument by using the getDocumentDOM() function. You can see this function demonstrated in Dreamweaver's displayHelp.js file, which is used to direct all the help requested, contextually.
Should a help file get too big for an alert dialog box, you might need to provide access to a larger file. Dreamweaver enables you to open any specified file—including an expanded help file—within the primary browser. The browseDocument() function takes one argument, the path to the required file (an absolute URL):
dreamweaver.browseDocument("http://www.idest.com/help/etable.htm");As noted in Chapter 33, you can use browseDocument() to access an absolute URL from the Web or a file from a local drive. To display a local file, you combine browseDocument() with another function such as getConfigurationPath(). The example offered here shows how to use the two functions together to programmatically display Dreamweaver's InsertMenu.htm file:
function displayMenu() {
   var menuPath = dreamweaver.getConfigurationPath() +
"/Objects/InsertMenu.htm";
  dreamweaver.browseDocument(menuPath);
}
The openDocument() and createDocument() functions provide similar capabilities although they possess similar restrictions. The openDocument() function is equivalent to selecting File
The createDocument() function does not need an argument to work and automatically returns the DOM of the new document. For example, the following code
var theNewDoc = dreamweaver.createDocument();
is the same as using getDocumentDOM() for a new page.
The openDocument() function requires an argument in the form of a file://URL. If the URL is given in relative terms, the file is relative to the extensibility file calling the function. For instance, to open a file located one directory up from the Commands folder, you need to refer to it as follows in a custom command:
dreamweaver.openDocument("../Extensions.txt");You can also use the same technique referred to earlier in the browseDocument() function to access files with the Configuration folder as a base.
Note
Although the twin functions, openDocument and createDocument(), cannot be used within a behavior, they can be called from a custom command or Property inspector. Therefore, it's possible to use the popupCommand() function to access a command that employs openDocument() or createDocument().
After all your edits and modifications have been finished, you need a way to store the file. The aptly named saveDocument() function performs that chore for you. This function takes two arguments, documentObject and fileURL; the first corresponds to the DOM of the file to be saved, and the second to the location where this file is to be saved. Again, fileURL is relative to the extensibility file.
Note
If you omit the fileURL argument in Dreamweaver 4 or later, the file is saved to its current location if it has already been saved; if not, a Save dialog box is displayed.
The saveDocument function returns true if successful and false if the file-storing attempt fails. If the file specified is noted as read-only, Dreamweaver attempts to check it out; if it is unsuccessful, an error message appears.
Dreamweaver templates are based on a combination of locked and editable regions. Normally, these regions are designated in the Document window, but you can use the editLockedRegions() function to lock and unlock a template's regions programatically. The editLockedRegions() function works by entering true as the function's argument if you want to unlock all the current document's locked regions, and false to lock them again. After the routine calling editLockedRegions() ends, all regions revert to their default status.
Warning
Because this function can potentially have undesirable results, Adobe recommends that only custom data translators use editLockedRegions().
Although the popupAction() and runCommand() functions are not directly useful to behavior creators because they cannot be called from within a behavior, they do enable considerable cross-pollination of Dreamweaver extensible objects. Invoking these functions calls an existing behavior or command and presents its dialog box to the user—except that you use these functions to call the behaviors or commands from within a custom object, command, or Property inspector.
The popupAction() function takes two arguments: the name of the action file and the general function call of the action. The action chosen must be located in the Dreamweaver 9ConfigurationBehaviorsActions subfolder. For example, code to call the Play Sound behavior might look like this:
var goPS = dreamweaver.popupAction("Play Sound.htm","MM_controlSound(,,)");Note
To call an action in a subfolder of the Actions folder, specify the path. For example, if you want to call one of the standard actions under the Set Text submenu, such as Set Text of Layer—these actions reside in the ActionsSet Text subfolder—it's necessary to state the action name as Set TextSet Text of Layer.
The general function call can be found near the end of the applyBehavior() function, where the return value is specified, or as the behaviorFunction() return value. The popupAction() function returns the completed function call, including whatever parameters are selected by the user. In the previous example, if the user had chosen "Play" and selected "brazil.mid" as the file, the result (goPS) would be similar to the following:
"MM_controlSound('play',document.CS911946210190.'brazil.mid')";Note
The second argument is a unique name generated by Dreamweaver as part of the function.
Everything is written into the user's page, except the event handler and its corresponding function call, both of which are handled by the calling object, command, or Property inspector.
The runCommand() function is a bit simpler; this function requires only one argument: the name of the command file. Any file named must be located in the Dreamweaver MX 2004ConfigurationCommands folder. The runCommand() function does not return a value but simply executes the specified command.
Dreamweaver provides two functions to help with the localization of your behaviors around the globe. Many countries use font encodings other than Latin 1, which is standard in the United States and several Western European countries. To convert a string of text for a user interface from Latin 1 encoding to that of the user's machine, use the latin1ToNative() function. The argument, a text string, should be already translated into the other language. To convert a text string from the user's encoding system to Latin 1, use the inverse function, nativeToLatin1().
Note
Neither of these functions has an effect in Windows systems, which are already based on Latin 1.
As more programs such as Fireworks and Director are capable of outputting HTML, behaviors and other extensions are being employed to access their documents. It's often necessary to find the absolute URL of a selected file in order to get the document's DOM or open it. The relativeToAbsoluteURL() function returns this needed information, given three arguments:
docPathURL: The portion of the current document's relative pathname excluding the filename. For example, if the file in question were to be found at
imagesaustria.gif, the docPathURL would beimages/.siteRootURL: The file://URL of the current site root, as returned from the
getSiteRoot()function.relativeURL: The full relative pathname of the selected file (for example,
images/austria.gif).
The syntax for the function is as follows:
var absoluteURL =
    dreamweaver.relativeToAbsoluteURL(docPathURL,siteRootURL,relativeURL);
Of the three arguments, only docPathURL is a little tricky. After you have the relativeURL, which can be returned from the browseForFileURL() function, you need to examine the pathname and extract the first part of the path leading up to the actual filename. To do so, use the JavaScript function lastIndexOf to find the final "/" character and extract the previous substring. For example:
function docBase() {
  var docURL = dreamweaver.getDocumentPath("document");
  var index = docURL.lastIndexOf('/'),
  if ( index == −1 ) {  // If there is no additional path, return nothing
    return "";
  }
  else {
    return docURL.substring(0, index);
  }
}You've seen most of the behavior API functions applied in a previous section, "Step 2: Create the action file." You use the behavior API to create behaviors. Its primary functions are shown in Table 2-3:
Table 2-3. Behavior API Primary Functions
Function | Role |
|---|---|
| Determines whether an action is allowed for the selected HTML element |
| Sets the width and height of the parameter form dialog box; only define this function if you are creating a Parameters dialog box larger than 640 × 480 pixels |
| Attaches the behavior function to the selected tag |
| Restores user-selected values to the parameter form for re-editing |
| Writes a function within |
| Removes a behavior from the HTML file |
| Notes the behavior arguments that need to be altered if the file is moved |
| Attaches a Help button to the behavior's parameter form dialog box |
For discussions of the uses of the canAcceptBehavior(), applyBehavior(), inspectBehavior(), and behaviorFunction() functions, see the preceding sections. Following are discussions of the other behavior API functions.
To speed display, the windowDimensions() function sets specific dimensions for the parameters form that the user sees as the dialog box. If this function is not defined, the window dimensions are computed automatically. This function takes one argument, platform, which is used to specify whether the user's system is Macintosh or Windows. The legal values for platform are: macintosh or windows. windowDimensions() returns a string with the width and height in pixels. For example:
function windowDimensions(platform) {
if (platform.charAt(0) == 'm') {  // Macintosh
    return "650,500";
  }
  else {                          // Windows
    return "675,525";
  }
}
You can see this function in some of the standard behaviors. However, Adobe recommends that it be used only when the behavior's dialog box must be larger than 640 × 480.
Normally, Dreamweaver automatically handles removal of a behavior's event handler and associated JavaScript when the user chooses the Remove (–) button in the Behaviors panel. However, as behaviors grow in complexity and become capable of adding additional support code to the HTML document, you must use the deleteBehavior() function on a case-by-case basis. To better understand how deleteBehavior() is used, it's best to look at a couple of examples.
Two standard behaviors, Play Sound and Swap Image, use the deleteBehavior() function. Play Sound inserts an <embed> tag that contains a unique ID. To remove the code, deleteBehavior() first reads a function call string, just like the one returned by applyBehavior(). If the function finds an <embed> tag with the matching ID that is not referenced elsewhere on the page, the code is deleted. Here's the implementation of deleteBehavior() for Play Sound:
function deleteBehavior(fnCallStr) {
  var argArray,sndName,doc,tagArray,i,embedName;
  argArray = extractArgs(fnCallStr);
  if (argArray.length > 3) {
    //remove "document.", use unique name
    sndName = dreamweaver.getTokens(argArray[2],".")[1];
    //Find all EMBED calls that we created (name starts with "CS"),
    doc = dreamweaver.getDocumentDOM("document"); //get all
    tagArray = doc.getElementsByTagName("EMBED");
    for (i=0; i<tagArray.length; i++) {  //with each EMBED tag
      embedName = tagArray[i].name;
      if (embedName == sndName) { //if same embed
        if (numOccurences(sndName)<2) { // and embed ref'd no where else
           tagArray[i].outerHTML = ""; //delete the embed
           break;
  } } } }
}
Swap Image doesn't insert additional <embed> or other tags; it inserts additional event handlers to make implementing rollovers a one-step process. When a Swap Image behavior is deleted from the page, all the additional event handlers must be stripped out as well. To do so, the deleteBehavior() function first reads in the behavior function call string and then searches for the Preload ID. This is a unique name inserted by Dreamweaver if the user checked the Preload option when running the behavior. If the preloadID is found, the preload handler, such as onLoad = MM_preloadImages(), is removed. Next, the Swap Image deleteBehavior() searches to see if the Swap Image Restore code was added—and if so, deletes that event handler as well.
If you've ever had to relocate a Web site from one directory to another, you know what laborious job it is to make sure that all references are intact. Dreamweaver takes some of the tedium out of this chore. When you use Save As from Dreamweaver, all the file paths within HTML attributes, such as the image source files and link href files, are automatically updated. Dreamweaver extends the same functionality to URLs contained within behaviors.
For example, suppose that you have constructed a Web page that uses the Check Browser action to route users to various URLs, depending on the browser they are using. Should you elect to save your Web page in a different folder, for whatever reason, Dreamweaver automatically updates the referenced URLs.
For this property to work correctly, a new function must be included in the behavior. The function, identifyBehaviorArguments(), passes the argument structure to Dreamweaver so it can update the URLs, if necessary. The function also identifies the AP element objects in the behavior that Dreamweaver must correct if the Convert Layers to Tables command is used.
The identifyBehaviorArguments() function accepts a string that contains the behavior function call, with arguments. The function then extracts the arguments into an array and identifies which arguments in the array are URLs, which ones are AP element objects, and which ones are neither. There are four main return values:
URL: When the argument is a file or file path
NS4.0ref: When the argument identifies an AP element in Netscape syntax, such as
document.layers['Layer1']IE4.0ref: When the argument identifies an AP element in Internet Explorer syntax, such as
document.all['Layer1']other: When the argument is none of the preceding
You can see an example of the identifyBehaviorArguments() function in the Check Plugin action:
function identifyBehaviorArguments(fnCallStr) {
  var argArray;
  argArray = extractArgs(fnCallStr);
  if (argArray.length == 5) {
    return "other,URL,URL,other";
  }
  else {
    return "";
  }
}
As with the inspectBehavior() function, the array for the function call string is one element longer than the number of arguments—the initial array element is the function name itself.
The displayHelp() function inserts a Help button on custom behavior dialog boxes, below the standard OK and Cancel buttons. This function takes no arguments and is usually defined to display a help message or file. The two typical techniques, depending on what you want to accomplish, are the alert() method or the Dreamweaver JavaScript extension, browseDocument(). To display a brief message, use the alert() method, as in the following code:
function displayHelp() {
  alert("This behavior works only with .rmf files.");
}
When you need to bring up a much longer file, use the browseDocument() function:
function displayHelp() {
  dreamweaver.browseDocument("http://www.idest.com/dreamweaver/");
}
You can also reference local files using browseDocument(). See the browseDocument() description in the section "Dreamweaver JavaScript API extensions," earlier in this chapter.
Warning
Do not include the JavaScript file displayHelp.js in your behaviors. This is the file that Dreamweaver uses to call its own Help pages.
As with most other object-oriented programming languages, it's good programming practice to build a function once and recall it when needed. Dreamweaver includes a large library of such useful functions, which are maintained in the Dreamweaver MX 2004ConfigurationSharedMMScriptsCMN folder. The functions are grouped by category into JavaScript files; currently 18 such files exist, including docInfo.js, DOM.js, file.js, and string.js. Although they are used extensively throughout the standard behaviors, nothing prevents you from using them in your own routines. To access them, you insert only one line in your behavior JavaScript file, as shown the following:
<SCRIPT SRC="../../Shared/Mm/Scripts/Cmn/string.js"></SCRIPT>
Table 2-4 shows some of the most commonly used functions available in the Shared folder and the file in which they can be found.
Table 2-4. Useful Common Functions
Function | File | Description |
|---|---|---|
| docInfo.js | Returns an array of object references for any specified tag in the current document or, if the document is in a frameset, in all frames. |
| docInfo.js | Returns an array of tags for any specified tag in the current document or, if the document is in a frameset, in all frames. |
| file.js | Opens the Select File dialog box and inserts the results into a specified text box. |
| menuItem.js | Removes the |
| menuItem.js | Removes the |
| menuItem.js | Adds |
| menuItem.js | Adds a specified value formatted as |
| niceName.js | Changes JavaScript object references such as |
| niceName.js | Extracts object names and array numbers/names and encloses them in quotes, if necessary. |
| string.js | Removes inappropriate characters such as |
| string.js | Concatenates strings given in an argument. For example, |
| string.js | Reviews a string and adds the escape character ( |
| string.js | Removes any escape characters ( |
| string.js | Takes a function call and extracts the arguments into an array without quotes. |
| string.js | Returns an array of named objects within a given tag found on the current page. |
| UI.js | Returns the JavaScript object reference for any named object. For example, if you have an image named |
Creating a behavior is often far more than just stringing together a number of predefined functions. Specific techniques exist for many special needs, and if you don't know them, you can spend many hours redeveloping the wheel. In this section, you learn several methods that can help you streamline your work.
In Dreamweaver, every tag capable of being used to launch a behavior has a default event. Although you can alter the default events for various tags by editing the HTML files in the Events folder, as described in Chapter 12, these changes affect only your own system, not those of other users. You can, however, specify the desired event on a behavior-by-behavior basis—in fact, you can specify a series of desired events.
The event specification takes place in the canApplyBehavior() function. Usually, this function returns either true or false, depending on whether the proper conditions for implementing the behavior have been met. If, however, the conditions have been met and you want to specify an event to use, you can set canApplyBehavior() to return a string of acceptable events.
In the following example, the page is inspected. If an AP element is found, the default event is overridden in favor of onKeyDown:
function canAcceptBehavior() {
  var nameArray = dreamweaver.getObjectRefs("NS 4.0","document","LAYER");
  if (nameArray.length > 0) {
return "onKeyDown";
}
else {
return false;
}
}It's also possible to specify a series of preferred events, in reverse order of preference, like this:
return "onKeyDown, onKeyPress, onKeyUp";
If one event handler is not available—perhaps because the user specified an older browser—the next is selected.
Most event handlers don't require a return value to be implemented, but some, such as onMouseOver and onMouseOut, do. Generally, Dreamweaver behaviors don't take this into account, but you can by declaring a special variable, document.MM_returnValue. You can see the return value variable in operation in the standard Display Status Message behavior.
The document.MM_returnValue variable is declared as the last line in the function definition. Thus, Display Status Message reads as follows:
function MM_displayStatusMsg(msgStr) { //v2.0
  status = msgStr;
  document.MM_returnValue = true;
}
Naturally, the return value could also be false.
Although it was not widely used, the capability to return multiple functions began in Dreamweaver 1.2. Previously, all behavior functions had to be self-contained, and one could not call on any helper functions. Now, however, multiple functions can easily be defined and returned via behaviorFunction(). After they are written into the user's page, all the returned functions are stored in a single <script>...</script> tag pair.
The technique for inserting multiple functions is fairly straightforward. First, list the defined functions in a comma-delimited string in behaviorFunction(). The one trick is to make sure that your primary function—the one called by the event handler—is listed not first, but last. This technique is illustrated in the following code for my custom Resize Layer Patch behavior:
function behaviorFunction() {
  return 'reDo,resizePatch';
}
Here, the primary function is resizePatch() and is used as such in applyBehavior():
function applyBehavior() {
  return 'resizePatch()';  //return fn call with args
}Although creating a custom behavior is not a simple task, it is a vastly rewarding one—from both the programmer's and the user's perspectives. Dreamweaver gives you tremendous power to automate advanced Web page techniques with access to the Document Object Model. As you ponder building your own behaviors, remember the following:
If you can achieve a result in JavaScript, chances are good you can create a behavior to automate that task.
Dreamweaver includes an expanded Document Object Model (DOM) that enables the programmer to examine and modify virtually every aspect of an HTML page.
You can use Dreamweaver's built-in JavaScript extensions and API functions to build your own actions.
Dreamweaver's JavaScript extensions enable you to open existing documents, as well as create and save new ones.
Many useful functions can be found in the Dreamweaver 9ConfigurationSharedCommonScripts folder.
In the next chapter, you learn how Dreamweaver's server behaviors work and how to build your own custom ones.