
IN THIS CHAPTER
Using Shockwave and Flashin Dreamweaver
Applying a Flash element
Dreamweaver Technique: Building a Flash Interactive Slide Show
Managing Flash links
Using Flash buttonsand Flash text
Creating inline controlsfor Shockwave movies
Playing Shockwave moviesin frames
Triggering behaviors from Flash movies
Animated splash screens, sound-enabled banners, button bars with special fonts, and other exciting Web elements are often built with Adobe's Flash. Flash combines vector graphics and streaming audio into great-looking, very-low-bandwidth files that can be viewed in a browser using the Flash Player plugin. Flash's vector graphics have also turned out to be just the thing for Web-based animations. Beginning with version 4, Flash gained its own scripting language, ActionScript, and added MP3 compression to its streaming audio. Over later versions, Flash morphed into a solid application platform, with player implementations in cell phones, handheld devices, and even billboards. With a huge base of installed Web-based players—as of this writing, well over 90 percent of browsers can view basic Flash content—Flash is an excellent way to liven up a Web page.
But Flash is not Adobe's only solution for building interactive presentations for the Web. To many Web designers, Shockwave has represented the state of the art in Web interactivity since Adobe (formerly Macromedia) first created the format in 1995. With Shockwave, multimedia files created in Adobe's flagship CD-ROM authoring package, Director, can be compiled to run in a browser window. This functionality gives Web designers the capability to build just about anything—including interactive Web interfaces with buttons that look indented when pushed, arcade-style games, multimedia Web front-ends, and complete Web sites built entirely in Director—bringing a CD-ROM look-and-feel to the Web. Today, Shockwave continues to be an important force on the Web, as the ongoing success of Adobe-started Shockwave.com amply demonstrates.
As you might expect, Adobe makes it easy to incorporate Flash and Shockwave files into your Dreamweaver projects. All these formats have special objects that provide control over nearly all their parameters through the Property inspector—and each format is cross-browser compatible by default. Using Dreamweaver's Flash Button and Flash Text tools, it's delightfully simple to incorporate customized, well-crafted Flash elements in your Web page without knowing a bit of Flash.
To take full advantage of the enhanced graphics potential of Flash and the multimedia capabilities of Shockwave, you need to understand the differences between Director and Flash, as well as the various parameters available to each format. In addition to covering this material, this chapter shows you how to use independent controls—both inline and with frames—for your Shockwave and Flash movies.
Note
One of the most exciting recent innovations in Dreamweaver is the implementation of Flash video. This topic is covered in Chapter 26.
Director (the program you use to make Shockwave movies) and Flash share many features—interactivity, streaming audio, support for both bitmaps and vector graphics, and shocked fonts. Both can save their movies in formats suitable for viewing on the Web. So how do you choose which program to use? Each has its own special functions, and each excels at producing particular types of effects. Director is more full-featured, with a complete programming language called Lingo that enables incredible interactivity. Director movies can also include Flash animations. Director, however, has a much steeper learning curve than does Flash. Flash is terrific for short, low-bandwidth animations with or without a synchronized audio track; however, the interactive capabilities in Flash are limited compared to Director.
Director is really a multimedia production program used for combining a variety of elements: backgrounds, foreground elements called sprites, and various media such as digital audio and video (see Figure 25-1). With Director's Lingo programming language, you can build extraordinarily elaborate demos and games with Internet-specific commands. When you want a high degree of interactivity, build your movie with Director.

Figure 25-1. Director works mainly with bitmaps and video and enables multimedia programming and 3D visualizations.
One of the primary differences between Director and Flash is the supported graphic formats. Director is generally better for bitmap graphics, in which each pixel is mapped to a specific color; both GIF and JPEG formats use bitmap graphics. Flash, on the other hand, uses primarily vector graphics, which are drawing elements described mathematically. Because vector graphics use a description of a drawing—a blue circle with a radius of 2.5 centimeters, for instance—rather than a bitmap, the resulting files are much smaller. A fairly complex animation produced with Flash might be only 10K or 20K, whereas a comparable digital video clip could easily be 10 times that size.
The other feature that distinguishes vector graphics from bitmap graphics is the smoothness of the line. When viewed with sufficient magnification, bitmap graphics always display telltale stair steps or jaggies, especially around curves. Vector graphics, on the other hand, are much smoother. In fact, Flash takes special advantage of this characteristic and enables users to zoom into any movie—an important effect that saves a lot of bandwidth when used correctly.
However, these differences were significantly blurred with the recent releases of both products, starting with Director 7, which incorporated its own native vector graphics and introduced the capability to include Flash movies within Director movies. Director MX 2004 strongly supports 3D-graphics creation. Flash 4 blurred the line the other way by incorporating streaming MP3-encoded audio and QuickTime integration, things that were traditionally the province of Director. In Flash 5, Flash's scripting capabilities were significantly beefed up with the expansion of ActionScript into a JavaScript-based programming language. Flash CS3 (see Figure 25-2), the most recent incarnation, contains many exciting new features, such as support for built-in visual effects, incorporating video into Flash movies, enhanced graphic design tools, a customizable ActionScript editor, and much more.

Figure 25-2. Flash is a truly multifaceted tool capable of outputting motion graphics and application interfaces with ease.
Flash animations can be used as special effects, cartoons, and navigation bars within (or without) frames. Although Flash isn't the best choice for games and other complex interactive elements, you can use Flash to animate your navigation system—complete with sound effects for button-pushing feedback.
If Flash is a power tool, Director is a bulldozer. Director has been significantly expanded to handle a wide variety of file types—QuickTime, MP3, RealAudio, and RealVideo, for example—with advanced streaming capabilities. Supporting multimedia interactivity is Director's own programming language, Lingo, which has also been enhanced. Furthermore, Director now includes multiplayer support for network game play and chat rooms, XML parsing, embedded compressed fonts, up to 1,000 sprite channels, and a potential frame rate of 999 frames per second. Luckily, Dreamweaver enables you to pack all that power into a Web page with its Shockwave object.
Dreamweaver makes it easy to bring Shockwave and Flash files into your Web pages. The Insert bar provides an object for each type of movie, located in the Media menu of the Common category.
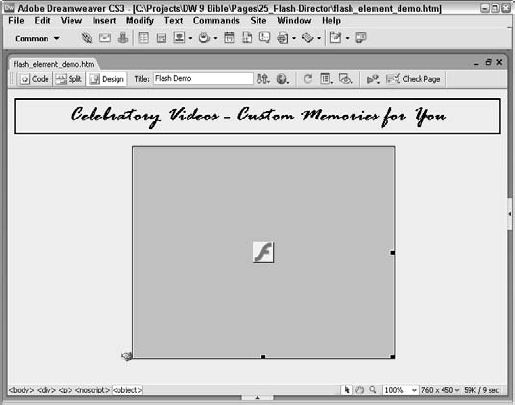
Because Shockwave and Flash objects insert both an ActiveX control and a plugin, Dreamweaver enables you to play the movie in the Document window. When not playing, Dreamweaver displays a plugin placeholder icon (see Figure 25-3).
Before you can successfully include a Shockwave file, you need to know one small bit of information—the dimensions of your movie. Dreamweaver automatically reads the dimensions of your Flash file when you insert the Flash movie object. Unfortunately, if you're incorporating a Shockwave movie, you must enter the dimensions in the Shockwave Property inspector.
To find the width and height of a Shockwave movie, load it into Director and then choose Modify
Note
It is essential to know the movie's height and width before you include it in Dreamweaver-built Web pages. During the development phase of a Dreamweaver project, I often include the movie dimensions in a filename, as an instant reminder to take care of this detail. For example, if I'm working with two different Shockwave movies, I can give them names such as navbar125×241.dcr and navbar400×50.dcr. (The .dcr extension is automatically appended by Director when you save a movie as a Shockwave file.) Because I consistently put width before height in the filename, this trick saves me the time it takes to reopen Director, load the movie, and choose Modify
To include either a Shockwave or Flash file in your Web page, follow these steps:
Position the cursor in the Document window where you'd like the movie to appear.
Insert the movie using any of the following methods:
Choose Insert

From the Media menu of the Insert bar's Common category, click either the Shockwave or Flash Button.
Drag the movie object from the Assets panel to the Document window. Remember to choose the appropriate category in the Assets panel: Shockwave or Flash.
In the Select File dialog box, enter the path and the filename in the File Name text box or click the Browse button to locate the file. Click OK.
Note
If you drag the movie from the Assets panel, this step is not applicable because Dreamweaver automatically sets the File attribute to that of your movie file.
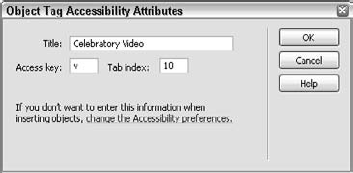
If you clicked OK in the Select File dialog box, and if Media is selected in your Accessibility preferences (Edit
In the Access Key field, enter a one-letter access key for your object. To select the object in the browser, press Alt (Command) + access key; for example: Alt+G (Command+G).
Note
Entering an Access Key value only places the
accesskeyattribute in the<object>tag; it's up to the browser to properly interpret what action, if any, should be taken when the access key combination is pressed.In the Tab Index field, enter a number for the tab index of your object. By entering a number, you can specify the order in which users tab through objects and links on your page. Pressing Tab successively jumps from the object or link whose tab index is set to 1, to the object or link whose tab index is set to 2, and so on. For this to work correctly, you must specify the
tabindexattribute for all the page's objects and links.Dreamweaver inserts a small plugin placeholder in the current cursor position, and the Property inspector displays the appropriate information for Shockwave or Flash.
If you inserted a Shockwave movie, be sure to enter the correct width and height dimensions in the Property inspector. Dreamweaver supplies this information automatically for Flash files.
Preview the Flash or Shockwave movie in the Document window by clicking the Play button in the Property inspector. You can also choose View
End the preview of your file by clicking the Stop button in the Property inspector or choosing View
The code inserted is a recently evolved amalgam of techniques designed to work across browsers old and new. The previously accepted method is to use an <embed> tag nested within an <object> tag; together, these two tags covered both browsers that used Internet Explorer–devised ActiveX controls (<object>) and those that used the Netscape LiveConnect method (<embed>). In February, 2006, in response to a patent lawsuit, Microsoft modified Internet Explorer 6 to require action from the user—typically a mouse click—before ActiveX-based active content would play. This meant that all Flash movies, whether they were just eye-candy or essential navigation, would not display unless clicked on by the site visitor.
To work around this restraint, while staying outside of the patent infringement, Adobe (then Macromedia) developed a JavaScript based solution. In the Adobe solution, three bits of code are added to the page:
A
<script>tag to include a JavaScript file,AC_RunActiveContent.js, which is automatically stored in the Scripts folder at the site root.A JavaScript function call that dynamically writes out the same content found in the
<object>and<embed>tags.A
<noscript>tag that wraps around the<object>and<embed>tags, which effectively acts as a back-up if the site visitor does not have JavaScript enabled.
Warning
The number one reason people find that their Flash movies do not play when published to their site is the failure to upload the Scripts folder with the AC_RunActiveContent.js file. Dreamweaver recognizes this JavaScript file as being dependent; if you have enabled the option to show the Dependent Files dialog box when your files are put to the Web, you'll avoid this issue.
Dreamweaver uses this active content aware style of code for any new Flash or Shockwave files inserted into your pages. It can also update the code for any previously created pages when they are opened, if desired. Make sure that both Active Content options in the Code Rewriting category of Preferences are selected to take full advantage of the enhanced coding possibilities. For more details, see Chapter 4, "Setting your Preferences."
Shockwave and Flash have some different features in the Dreamweaver Property inspector. These differences are covered separately in the following sections.
After you've inserted your Shockwave file, you're ready to begin entering the specific parameters in the Property inspector. The Property inspector takes care of all but one Shockwave attribute, the palette parameter. Some of the information, including the ActiveX Class ID, is automatically set in the Property inspector when you insert the movie.
Generating HTML within Director
In Director, you can generate a file with all the appropriate HTML code at the same time that you save your Shockwave movie with just the selection of a checkbox. When you choose File
When you open the Director-generated HTML file, you see the name of your file and the Shockwave placeholder, correctly sized and ready to preview. To move this object into another Web page in progress, just select the Shockwave object and choose Edit
Note
In the Dreamweaver 9ConfigurationCommands folder on the CD-ROM that accompanies this book, you can find a custom command called Insert Shockwave HTML that automates the process of inserting a Shockwave movie and its Director-generated HTML. If you'd prefer a version developed by Adobe that does the same job, visit the Dreamweaver Exchange to download the Insert Shockwave extension. To access the Dreamweaver Exchange, choose Commands
To set or modify the parameters for a Shockwave file, follow these steps:
Click the Shockwave placeholder icon.
In the Shockwave Property inspector, enter the width and height values in the W and H text boxes, respectively, as shown in Figure 25-5. Alternatively, you can click and drag any of the three resizing handles on the placeholder icon.
Tip
If you press the Shift key while dragging the corner resizing handle, you maintain the current aspect ratio.
Set and modify other Shockwave movie attributes as needed; see Table 25-1 for a list.

Table 25-1. Property Inspector Options for Shockwave Objects
Description | |
|---|---|
Align | Enables you to choose an option to alter the alignment of the movie. In addition to the browser default, your options include Baseline, Top, Middle, Bottom, Texttop, Absolute Middle, Absolute Bottom, Left, and Right. |
Bg | Enables you to specify a background color for the movie area. Note that this color also appears while the movie is loading and after it is done playing. |
V Space | Enables you to increase the amount of space between other elements on the page and the top and bottom of the movie plugin by entering a pixel value in the V (Vertical) Space text box. Again, the default is zero. |
H Space | Enables you to increase the space to the left and right of the movie by entering a value in the H (Horizontal) Space text box. The default is zero. |
Name | Enables you to enter a unique name in the unlabeled field on the far left of the Property inspector. The name is used by JavaScript and other languages to identify the movie. |
W | Sets the width of the movie. |
H | Sets the height of the movie. |
Class | Applies the CSS class to the movie. |
As with other plugins, you can pass other attributes to the Shockwave movie via the Parameters dialog box—available by clicking the Parameters button on the Property inspector. Use Tab or the Add (+) button to insert additional parameters. Enter the attributes in the left column and their respective values in the right. To remove an attribute, highlight it and click the Remove (–) button.
When you insert a Shockwave or Flash file, Dreamweaver writes a number of parameters that are constant and necessary. In the <object> portion of the code, Dreamweaver includes the ActiveX Class ID number as well as the codebase URL; the former calls the specific ActiveX control, and the latter enables users who don't have the control installed to receive it automatically. Likewise, in the <embed> section, Dreamweaver fills in the pluginspage attribute, designating the location where Navigator users can find the necessary plugin. Make sure you don't accidentally remove any of this information—however, if you should, all you have to do is delete and reinsert the object.
Only one other general attribute is usually assigned to a Shockwave file, the palette parameter. If you want to deploy this attribute, you have to add it by hand in Code view. There are two possible values for palette takes a value of either background or foreground:
background—The movie's color scheme does not override that of the system; this is the default.foreground—The colors of the selected movie are applied to the user's system, which includes the desktop and scrollbars.
palette is not supported by Internet Explorer.
Warning
Web designers should take care when specifying the palette=foreground parameter. This effect is likely to prove startling to the user; moreover, if your color scheme is sufficiently different, the change may render the user's system unusable. If you do use the palette parameter, be sure to include a Director command to restore the original system color scheme in the final frame of the movie.
Flash movies require the same basic parameters as their Shockwave counterparts—and Flash movies have a few additional optional parameters as well. As it does for Shockwave files, Dreamweaver sets almost all the attributes for Flash movies through the Property inspector. The major difference is that several more parameters are available.
To set or modify the attributes for a Flash file, follow these steps:
After your Flash movie has been inserted in the Document window, make sure that it is selected. Dreamweaver automatically inserts the correct dimensions for your Flash movie.
Set any attributes in the Property inspector as needed for your Flash movie. (Refer to the previous descriptions of these attributes in the section "Specifying Shockwave Properties.") In addition, you can also set the parameters described in Table 25-2.
Table 25-2. Additional Property Inspector Options for Flash Objects
Flash Parameter | Possible Values | Description |
|---|---|---|
Autoplay | Checked (default) | Enables the Flash movie to begin playing as soon as possible. |
Loop | Checked (default) | Plays movie continuously if checked; otherwise, movie plays once. |
Quality | Controls anti-aliasing during playback. | |
High (default) | Anti-aliasing is turned on. This can slow the playback frame rate considerably on slower computers. | |
Low | No anti-aliasing is used; this setting is best for animations that must be played quickly. | |
Auto High | The animation begins in High (with anti-aliasing) and switches to Low if the host computer is too slow. | |
Auto Low | Starts the animation in Low (no anti-aliasing) and then switches to High if the host machine is fast enough. | |
Src | Specifies the | |
Scale | Determines how the movie fits into the dimensions as specified in the Width and Height text boxes. | |
Show All (default) | Displays the entire movie in the given dimensions while maintaining the file's original aspect ratio. Some of the background may be visible with this setting. | |
Exact Fit | Scales the movie precisely into the dimensions without regard for the aspect ratio. It is possible that the image could be distorted with this setting. | |
No Border | Fits the movie into the given dimensions so that no borders are showing and maintains the original aspect ratio. Some of the movie may be cut off with this setting. |
To avoid unexpected results, be careful when setting the Scale parameter. If you have to size a Flash movie out of its aspect ratio, the Flash Player must know what to do with any extra room it has to fill. Figure 25-6 demonstrates the different results that the Scale attribute can provide. Only the picture on the left is at its proper dimensions.
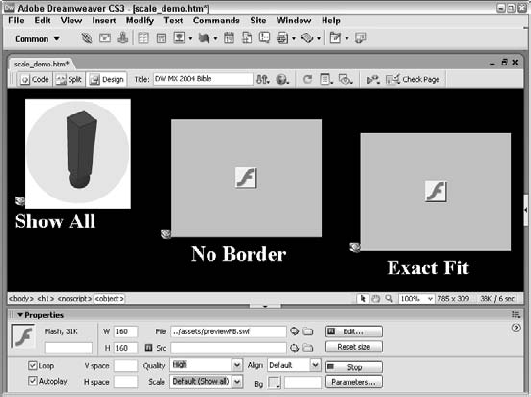
Figure 25-6. Your setting for the Scale attribute determines how your movie is viewed when resized with the plugin width and height measurements.
Tip
Dreamweaver makes it easy to rescale a Flash movie. First, in the Property inspector, make sure the original width and height of your file are displayed in the W and H text boxes. Then, while holding down the Shift key, click and drag the corner resizing handle of the Flash placeholder icon to the new size for the movie. By Shift+dragging, you retain the aspect ratio set in the Property inspector, which enables you to quickly enlarge or reduce your movie without distortion.
Flash has two additional attributes that can be entered through the Parameters dialog box (click the Parameters button on the Property inspector): salign and swliveconnect. The salign attribute determines how the movie aligns itself to the surrounding frame when the Scale attribute is set to Show All. In addition, salign determines which portion of the image is cut off when the Scale attribute is set to No Border. The alignment can be set to L (left), R (right), T (top), or B (bottom). You can also use these values in combination. For example, if you set salign to RB, the movie aligns with the bottom-right edge or the lower-right corner of the frame.
The swliveconnect attribute comes into play when you're using FSCommands or JavaScript in your Flash movies. FSCommands are interactive commands, such as Go to URL, issued from inside the Flash movie. The Netscape browser initializes Java when first called—and if your Flash movie uses FSCommands or JavaScript, it uses Java to communicate with the Netscape Plugin interface, LiveConnect. Because not all Flash movies need the LiveConnect connection, you can prevent Java from being initialized by entering the swliveconnect attribute in the Parameters dialog box and setting its value to false. When the swliveconnect=false parameter is found by the browser, the Java is not initialized as part of the loading process—and your movie loads more quickly.
Flash has evolved into a truly multifaceted tool with the capability to convey graphics, video, streaming sound, and data with equal ease. One major hurdle facing Flash use on the Web, however, is integration with HTML. As you've seen, it's fairly easy to drop a Flash movie into a page and have it play automatically. But to really integrate it into your page, you want to control more aspects of how it looks and how it acts. The traditional route to solving this dilemma is to craft each Flash movie for a particular layout—a time-consuming and often expensive task. Now, Adobe has created an easier way to integrate Flash movies and Web pages: Flash elements.
Tip
If you have more than one Flash or Shockwave movie—whether a Flash element or not—on your page, you can control them all by choosing View
Flash elements are a product of the Flash MX evolution. Starting with the first MX release, designers had the capability to create components in Flash; components are self-contained objects that enable designers to quickly add frequently used functionality to a Flash movie. Initial components included user interface objects, such as checkboxes, radio buttons, and drop-down menus. A key advantage of these components is that after they are inserted on a page, the designer can easily change various associated parameters, such as labels, color, font, and even content. Whereas the parameters of Flash components must be changed within Flash, the parameters of a Flash element can be altered in Dreamweaver. A Flash element is, in actuality, a compiled Flash component. Flash elements are stored in a format different from that of the standard Flash movie. You can identify a Flash element by its .swc file extension as opposed to the .swf associated with a Flash movie.
The process for working with Flash elements is a bit different from that of a Flash movie. Here's an overview of how Flash elements work:
When you insert a Flash element, you're asked where you want to store the file, rather than which source file to use. Dreamweaver is actually placing a copy of the compiled
.swcfile in your site in.swfformat.After the file has been copied to your specified location, the Flash placeholder appears on your page. All standard Flash attributes are available in the Property inspector.
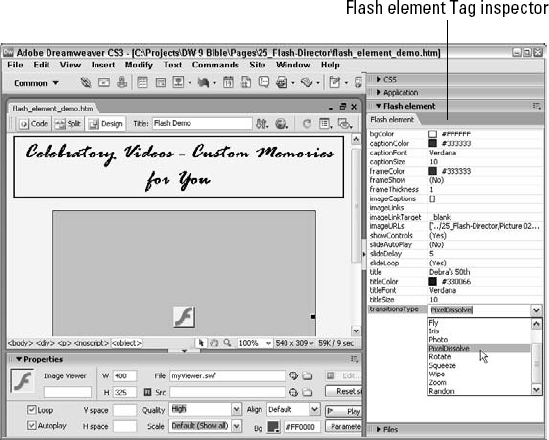
The Tag Inspector panel displays a Flash element tab that lists all the specific parameters for the selected object. Modify the parameters by selecting the corresponding default value; depending on the type of parameter, a new interface may appear. For example, the
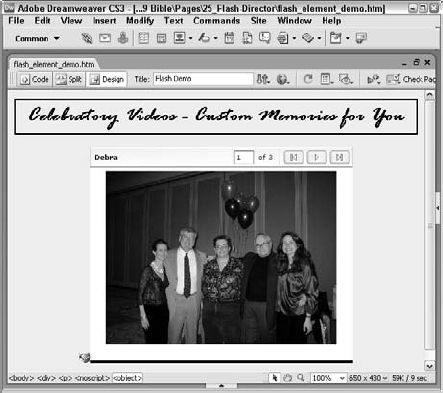
bgColorattribute, which sets the color for the background, displays a color picker. ThetitleSizeattribute, on the other hand, uses a standard text field for entering new font size values for the object's title.Review the Flash element in Dreamweaver by clicking Play on the Property inspector. To test it out fully, preview the page in the browser either locally or on your site, as shown in Figure 25-7.
Upload to your site as you would normally. The Flash file is considered a dependent file of the page and is transferred automatically by Dreamweaver.
Dreamweaver comes with one Flash element, Image Viewer. More Flash elements are available through third parties on the Adobe Exchange and other sites. The following sections describe how to add an Image Viewer to your Web page and how to use it.
The Image Viewer Flash element is, in essence, a slide-show utility. With it, you can specify any number of images to display in a contained area, complete with transitions and navigation controls. Images are loaded dynamically and automatically scaled to fit into the viewing area, which you can resize. You also have control over the background color and overall title, and you can individually caption pictures for easy identification. Preset navigation controls enable users to move from one picture to another in sequence or go directly to a particular image. Ten different transitions are available to choose from—or you can opt to use them all, randomly.
Note
The latest version of the Flash player supports dynamic loading of JPG, GIF, and PNG image formats.
Adding the Image Viewer Flash element to your page is just like inserting a Flash movie—with one little twist. To bring an Image Viewer into your Web page, follow these steps:
Choose Insert
When the Save Flash Element dialog box is displayed, enter a name for the Flash movie to be stored in your site. The Image Viewer file is assigned a
.swffile extension automatically.When you're finished, click Save to close the dialog box and insert the Flash movie.
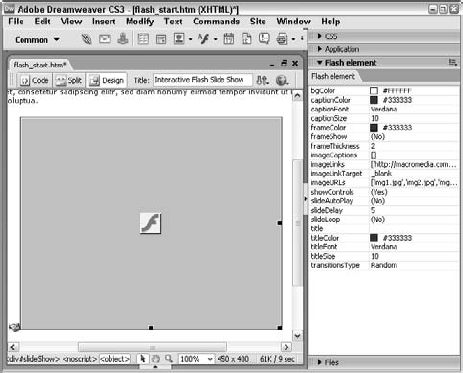
Dreamweaver inserts the placeholder for the Image Viewer, initially set to 400 pixels wide by 325 high, as shown in Figure 25-8. As with any other Flash movie, you can use the resizing handles to change the dimensions of the movie.
Whereas changing parameters is, in many Flash movie cases, an optional operation, it's a necessity with the Image Viewer. At the very least, you must specify which images the Flash element should show. That, however, is just the tip of what's possible. In all, the Image Viewer has 19 different parameters that you can alter.
To simplify entry of a wide range of parameters, the Image Viewer offers four different types of attribute value fields:
Text field: A typical text field for entering values directly, used in the Image Viewer to specify caption size, frame thickness, and other numeric values—as well as standard text for titles.
Warning
There is no error checking on the values entered in the text fields. Any unusable values (if you enter
teninstead of10forcaptionSize, for example) are ignored.Color picker: Dreamweaver's standard color picker, which appears when the color swatch is selected.
Menu list: A list of acceptable values for the associated parameter. The menu list is used for parameters that require a Yes or No (such as
slideLoop), as well as for those with a much more extensive list to choose from (such ascaptionFont).Note
All the drop-down lists are editable—which means that you can enter your own values to supplement the provided ones. In only one case—the
imageLinkTargetattribute—is this truly useful; in all other situations, choose a value from the provided list.Array values: Displays a separate dialog box for entering an array of values. The Image Viewer Flash element uses array lists for the captions (the
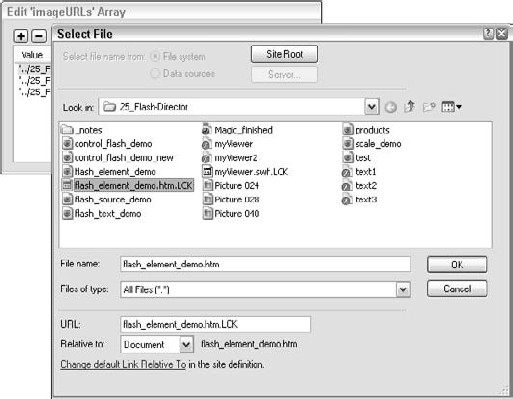
imageCaptionsattribute), links (imageLinks), and source files (imageURLs). When picking links and source files, the Edit Array Values dialog box also provides a folder icon, which opens a Select File dialog (see Figure 25-9). Dynamic values cannot be assigned. Values can also be entered by hand into the field; they must be quoted with single quotes and separated by commas.
Warning
Be sure to upload the images referenced in the Image Viewer to the specified location on your remote server; Dreamweaver does not see them as dependent files and does not transfer them automatically.
Table 25-3 details Image Viewer parameters. Required entries are noted with an asterisk (*).
Table 25-3. Image Viewer Parameters
Type of Attribute | Use | |
|---|---|---|
| Color picker | Sets the solid color of the surrounding the image; this option does not affect the background color of the controls. |
| Color picker | Sets the color of the captions displayed with each image. |
| Menu list | Sets the font face used for the captions. |
| Color picker | Sets the color for the border, if any, around the Image Viewer. |
| Menu list | Determines whether a border around the Image Viewer should be shown. |
| Text field | Sets the size of the border. |
| Array values | Sets the text to accompany each of the images. |
| Array values | Sets the links associated with the images; such links can be used to show a larger version of the image displayed. |
| Menu list | Sets the target for the linked files; standard target values |
| Array values | Lists the URLs of the source files shown in the Image Viewer. URLs should either be document-relative or absolute; site-root–relative URLs do not work properly. (Default is |
| Menu list | Determines whether the controls are displayed. If the controls are not shown, be sure to enable the |
| Menu list | Determines if the slide show should start automatically. |
| Text field | Sets the delay between images during a running slide show, in seconds. Default value is 5. |
| Menu list | Determines whether the slide show should continuously repeat. |
| Text field | Sets the overall title for the Image Viewer, which appears to the left of the controls. |
| Color picker | Sets the color for the title. |
| Menu list | Sets the font face for the title. |
| Text field | Sets the font size for the title. |
| Menu list | Determines which transition (if any) to use between images. Options are None, Blinds, Fade, Fly, Iris, Photo, PixelDissolve, Rotate, Squeeze, Wipe, Zoom, and Random (default). |
Although none is available at the time of this writing, Adobe and independent developers are known to have other Flash elements in the works. The best source for Flash elements—as it is for other Dreamweaver extensions—is sure to be the Adobe Exchange. Visit the Exchange by choosing Commands
Building a Flash Interactive Slide Show
In this Dreamweaver Technique, you use the Flash Image Viewer to create interactive slide show, complete with transitions and captions.
From the Techniques site, expand the 25_Flash folder and open the
flash_start file.If necessary, select View
Choose Insert
In the Save Flash Element dialog box, navigate to the 25_Flash folder, enter slideshow in the File Name field, and click Save.
The Flash placeholder is inserted and the Flash element panel opened.
The first attributes to customize are the caption and title colors.
In the Flash element panel, select the color swatch next to captionColor and sample the dark brown from the left side of the Relative Realty logo; follow the same procedure to change the titleColor color swatch.
Select the property field next to imageCaptions, and click the Edit Array Values icon that appears.
When the Edit imageCaptions Array dialog box appears, click Add (+) and enter the phrase Living Room; click Add (+) two more times to add Kitchen – East View and Kitchen – West View. When you're done, click OK to close the dialog.
In the imageLinks property field, select and delete the entire entry:
['http://www.adobe.com/','http:/www./adobe.com/','http://www.adobe.com/'].
Although you can include a separate link for each of your slides, this is not the desired behavior for this slide show.
Now you're ready to choose the images for the slide show. Select the imageURLs property field, and click the Edit Array Values icon.
In the Edit imageURLs Array dialog box, select the first entry and then click the folder icon that appears.
When the Select File dialog opens, browse to the images folder within the Techniques site root and choose apt_view1.jpg.
Repeat steps 10 and 11 to select apt_view2.jpg and apt_view3.jpg to replace the second and third entries, respectively; click OK when you're done.
Select the slideLoop property field, and choose (Yes) from the drop-down list.
In the Title field, enter Your Next Apartment.
Select the transitionsType field, and choose Wipe from the list.
Save your page.
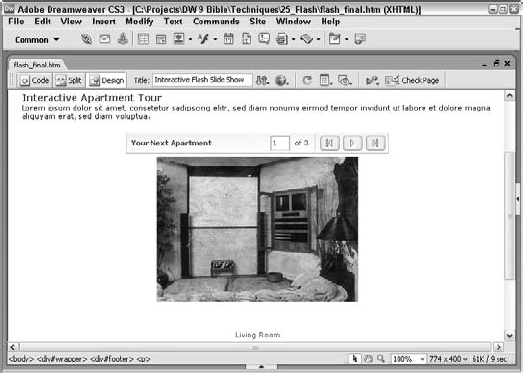
You can test your slide show right in Dreamweaver by selecting the Flash element and clicking Play on the Property inspector, or you can click F12 to preview in your browser.
The original argument against using Flash was: "Not everyone has the Flash plugin, so not everyone can see Flash movies." Nowadays, this argument is more or less moot with Flash plugin market penetration at 98+ percent for Flash Players 2, 3, and 4; 97+ percent for Flash Player 5; 96+ percent for Flash Player 6; and, as of this writing, just under 90 percent for Flash Player 7.
Although Flash is often used to create standalone movies, cartoons, and interactive games, it is also capable of making excellent navigation aids. One feature of traditional user interfaces—audio feedback, the sound that you hear when a button has been clicked onscreen—has been long missing on the Web because of the lack of a universally available sound engine. With navigation buttons created in Flash, sound is very easy to incorporate, as are animation effects and smooth blends. Best of all, these effects require extremely low bandwidth and often weigh less on a page than a comparable animated GIF file, even without the sound.
Dreamweaver designers can add the power and beauty of Flash objects to their Web page design palette. Designers can also create both animated Flash buttons and static Flash text (covered later in this chapter) directly within Dreamweaver. Flash buttons are based on template designs created in Flash and customized in Dreamweaver. This separation of design and implementation enables Flash graphic designers to create the overall look for a navigational button or button series, and Dreamweaver layout artists can incorporate this look into the proper page design, adding the appropriate button text, links, and background color where needed. Flash buttons, like any Flash movie, can be previewed in Dreamweaver and resized as needed.
Tip
If your appetite is whetted by Flash buttons, but you'd like more control—as well as the possibility of adding sounds and making your buttons dynamic—check out the author's extension, FlashBang! You can find information about this extension at www.flashbangmedia.com.
Dreamweaver comes with 44 different Flash Button templates, with additional styles available at the Adobe Exchange. The buttons are intended to be used primarily as links to other Web pages, although some are designed as VCR-like player controls. To insert a Flash button, follow these steps:
Make sure that the current document has been saved. If you're working on a new document, Dreamweaver requires that you save it before adding a Flash button.
Select the Flash Button object from the Media menu on the Insert bar's Common category or choose Insert
Select a button type from the Style list. The previews shown in the Sample area are live demonstrations and play as designed when moused over and/or clicked. There is, however, one exception: No sound is heard in preview; you have to preview the Flash button in the browser to get the full effect.
Enter the button text label in the Button Text field. If you leave this field blank, the button will have no label. The Button Text field is physically limited to 50 characters, although for most practical purposes, your text will be shorter. Certain symbols, such as those in the Control group, ignore the text and font settings.
Select a typeface from the Font drop-down list. The fonts listed are TrueType fonts found on your system. Most of the button templates have a preselected font and text size. If the default font is not found on your system, a small alert appears at the bottom of the dialog box.
Enter the font size, in points, in the Size field.
If the button is to link to another page, enter the absolute or document-relative URL in the Link field. Alternatively, you can click the Browse button to locate the file.
Flash movies don't handle site-root–relative links correctly, so your link needs to be either absolute, such as
www.idest.com/dreamweaver/, or document-relative. Use document-relative links only if the Flash button is to be stored in the same folder as the page referenced.If you are working in a frame-based site or you want the link to open in another page, select an option from the Target drop-down list. The standard system targets—
_blank, _self, _parent, and_top—are always available. Additional frame names appear if the Flash button is inserted in an existing frameset.If the Flash button is to be placed on a page or in a table with a background color other than white, select the Bg Color swatch to choose an appropriate background. Alternatively, the hexadecimal color number or standard color name may be entered directly into the Bg Color text field.
In the Save As text box, enter a path and filename for the Flash button file. If you like, you can use the suggested default name in the site root. You also can click the Browse button to choose a different location.
Click Apply to insert the button in the cursor location on the page.
Click OK when you're finished.

Tip
If you'd like to see what other styles are available, open the Insert Flash Button dialog box and select Get More Styles. Your primary browser launches and goes to the Dreamweaver Exchange, where you can search for new styles. After you install the additional extensions using the Extension Manager, you need to relaunch Dreamweaver to see the new styles. Note that selecting Get More Styles immediately closes the dialog box without creating a button.
After your Flash button is inserted, it can be modified on the page. Select the Flash Button object to activate the Flash Button Property inspector that, along with the standard Flash Property inspector, offers two new useful custom controls: Edit and Reset Size. Click Edit to reopen the Insert Flash Button dialog box and enable you to modify any of the settings. Click Reset Size if you have altered the dimensions of the Flash button—by dragging one of the sizing handles or entering new values in the Width and/or Height fields—and want to return to the original size.
Tip
If you move an existing Flash button to a frame-based design, click the button and then click Edit in the Property inspector. To make it easy to target your content chosen by the Flash button link, you can find names for all the frames in your new frameset under Target.
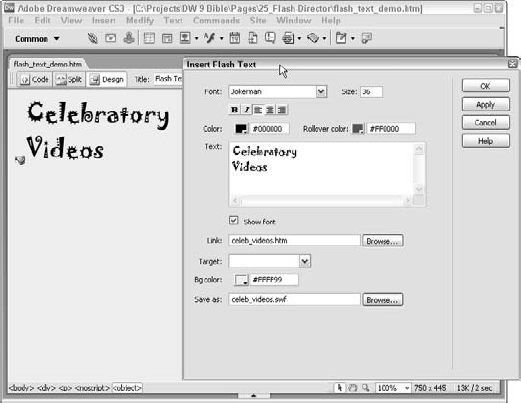
The addition of Flash text to Dreamweaver goes a long way toward solving one of the Web designer's most perplexing problems: how to achieve good-looking text that uses nonstandard fonts. HTML enables you to specify the use of a nonstandard font in a Web page, but the font appears in a user's browser only if the user happens to have that particular font installed on his or her system. For this reason, few designers stray outside tried-and-true options, such as Arial, Helvetica, and Times New Roman, for the majority of their content. This use of limited fonts is especially grating to print designers coming to the Web who rely on typography as a primary design tool. The advent of Dynamic HTML promised to bring a wider selection of typefaces with so-called dynamic font technology, but lack of built-in cross-browser support for any one system dashed those hopes.
The Flash text feature enables the designer to use any TrueType font to create low-weight, jaggies-free headings, right from within Dreamweaver. The ubiquitous nature of the Flash Player ensures cross-browser support without resorting to GIF images, which are often not as crisp as required. Moreover, with Flash text, you can easily declare a second color for automatically enabled rollovers—you don't even have to attach a Dreamweaver behavior.
The Flash text feature is especially useful for creating headings in a corporate-approved typeface. Because it doesn't involve downloading a font resource, as dynamic font technologies do, there is no concern about the misuse of copyrighted fonts. The only downside to Flash text when compared to a dynamic font technology is that Flash text cannot be searched on a page. To overcome this limitation, Web designers can include key phrases in <meta> tags.
To use the Flash Text object, follow these steps:
Make sure that you have saved your page before proceeding.
Select Flash Text from the Media menu on the Insert bar's Common category or choose Insert
Select the typeface from the Font drop-down list.
Enter the font size in the Size field.
Choose Bold and/or Italic styles for your text, if you want.
Select the alignment on the page: left, center, or right.
Select a basic color from the color swatch or enter a hexadecimal value or valid color name in the Color field.
If you want, you can choose a secondary color for the text to change to when the user moves his or her mouse over the Flash text from the Rollover Color swatch.
Enter text in the Text field. Other than practical considerations, there's no real limit to the amount of text that can be entered, and line returns are acceptable.
If you want to see the text in the default font in the Text field—rather than your selected font—disable the Show Font option.
If you want, enter an absolute or document-relative URL in the Link field. As with Flash buttons, site-relative links are not available in Flash Text objects.
If you're working in a frame-based site or want the link to open in a new browser window, choose the appropriate Target from the drop-down list.
Optionally, choose a background color from the Bg Color swatch.
Enter a path and filename to store the object in the Save As field. Alternatively, click the Browse button to locate a folder. If you're using document-relative links in the Flash Text object, be sure to store the object in the same folder as the current document.
Click Apply to preview what the button will look like in your document and click OK when you're finished.
Warning
When you are editing a Flash text button, clicking Apply overwrites the existing button file and replaces it with your new, edited version. Alas, there is no undo for the Apply command, so think twice before clicking that button!
As with Flash buttons, you can resize a Flash Text object by dragging the resizing handles; press the Shift key while dragging to constrain the dimensions to their initial width and height ratio. Click Reset Size on the Property inspector to restore the original dimensions. To edit a Flash Text object, click Edit on the Property inspector or simply double-click the object to open its Insert Flash Text dialog box.
When you create a Flash Text object, Dreamweaver makes a GIF representation that can be displayed during layout—you may notice some roughness in the lines, especially if you resize the object. You can, at any time, click Play on the Flash Text Property inspector (or choose Preview in Browser) to see the true Flash object with its smooth vector shape.
As with any plugin, your Web server has to have the correct MIME types set before Shockwave files can be properly served to your users. If your Web page plays Shockwave and Flash movies locally, but not remotely, chances are good that the correct MIME types need to be added. The system administrator generally handles configuring MIME types.
The system administrator needs to know the following information to be able to correctly configure the MIME types:
Shockwave: application/x-director (
.dcr, .dir, .dxr)Flash: application/x-shockwave-flash (
.swf)
Both Shockwave and Flash are popular plugins, and it's likely that the Web server is already configured to recognize the appropriate file types.
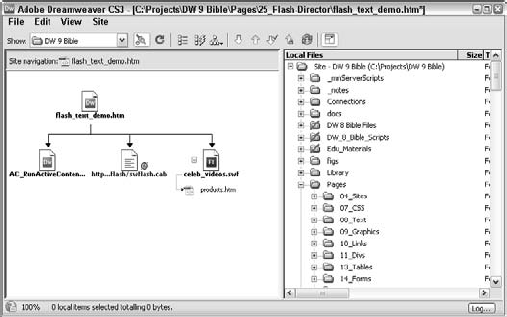
Many Web sites rely heavily on Flash movies, substituting movies for entire pages that would otherwise be created with HTML. Others take advantage of Flash's interactivity in their main navigation buttons. Adding links to buttons in Flash is easy, but embedding multiple URLs into multiple SWF files can make modifying a site's structure a nightmare, forcing you to re-create every SWF file in your site. Luckily, Dreamweaver comes to the rescue with link management features that are SWF-savvy.
Dreamweaver extends its link management capabilities to include the links contained in Flash SWF movies. Edit links within an SWF file manually in the Site Map, or move SWF files in the Site Files view and let Dreamweaver clean up behind you.
Within the Files panel, you can drag SWF files to new folders just as you would an HTML file. Unless your Update Links When Moving Files preference is set to Never, Dreamweaver either modifies the links in the SWF file accordingly or prompts you for permission to do so.
Warning
Be careful with the type of links you use—Flash (or, more accurately, browser playback of Flash) can't handle every type. Absolute URLs are very common in Flash movies because they can be used in every situation. Document-relative links may be used successfully in all cases if the Web page and the Flash file are stored in the same folder. Site-root–relative links, such as /products/widgets.htm, should not be used in Flash movies.
To modify the links in an SWF file manually, follow these steps:
Display the Site Map of a site by pressing F8 to open the Files panel, selecting the site from the drop-down list, clicking the Expand/Collapse button to display the expanded Files panel, and clicking the Site Map button.
Choose View
Locate the SWF file that you want to modify. If it contains any links, a plus sign is shown next to its icon. Click the plus sign to expand a branch of links from the SWF file, as shown in Figure 25-12.
To change a link, select it and choose Site
Select a new file by navigating to an HTML file or entering a URL. Click OK when you're finished.
Note
If your preferences call for Dreamweaver to prompt you before updating links, Dreamweaver asks you to confirm that you want the link changed.
The link in your SWF file is changed.
Warning
Dreamweaver changes links within SWF files, but the links in the original Flash document that you edit in Flash itself remain unchanged. Make sure you update your Flash document before exporting a revised SWF file.
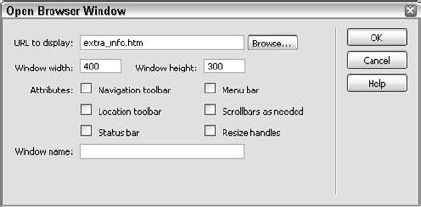
Flash includes several of its own behaviors for creating interactivity, but Flash behaviors don't use JavaScript within the HTML page as Dreamweaver behaviors do. A Flash-heavy project might benefit from Dreamweaver's Open Browser Window or Popup Message behaviors as much as the next site. The methodology in this section shows you how to trigger Dreamweaver behaviors from buttons in a Flash movie.
What Flash buttons do is specified in the Flash authoring environment, not in Dreamweaver. Dreamweaver can attach behaviors to HTML elements, such as anchor tags and body tags, but not to plugins. The solution lies in creating dummy buttons in Dreamweaver and copying the JavaScript code from those links into the actions attached to Flash buttons, within Flash itself.
To trigger Dreamweaver behaviors from Flash buttons, follow these steps:
Create a new Dreamweaver document or open an existing one.
Create a null link that represents a button in your Flash movie. If you want a Flash button to open a new browser window, attach the Open Browser Window behavior to your null link, as shown in Figure 25-13.
Place your cursor within the null link, and select the
<a>tag from the Tag Selector in Dreamweaver's status bar to completely select the link.Choose View
<a href="javascript:;"
   onClick="MM_openBrWindow('index.htm','newWindow',
   'status=yes,scrollbars=yes,width=200,height=300')">
 Play</a>
Select everything between the quotes (
"...") in theonClickattribute—including the parentheses—and copy it to the clipboard. This is the actual JavaScript that you want the Flash button to execute.In Flash, select the button to which you want to add the Dreamweaver behavior and then open the Actions pane.
Click the Add Action (+) button, and choose Actions
javascript:and then paste the contents of the clipboard—your JavaScript code—so that you have something that looks like the following:
javascript:MM_openBrWindow('myBuddy.htm','','scrollbars=yes','width=250,height=200')Repeat steps 2 through 7 for each additional button or behavior you'd like to use. Note that multiple function calls in a
javascript:statement must be separated by semicolons:javascript:
funcCall1(arglist); funcCall2(arglist); etc.Export your Flash movie as an SWF file, and place it into the same page in Dreamweaver where you built your null links. Note that the
<head>tag of this page contains JavaScript functions that match your null links and the JavaScript inside your Flash movie.Delete your null links—but not the JavaScript functions in the
<head>tag—and publish your page.
When users click the buttons in your Flash movie, javascript: URL sends the commands to the browser, executing the JavaScript functions in your Web page. Flash buttons open new browser windows, pop-up messages, and so on. This works in Netscape and in Internet Explorer.
Tip
Shockwave authors can also use JavaScript URLs from Lingo to trigger Dreamweaver behaviors in a manner similar to the procedure just shown. JavaScript-savvy people can also reference their own JavaScript functions using this method.
You can only modify Flash movies so much within Dreamweaver—certain changes require that the movie source be altered in Flash itself. Dreamweaver now provides a direct connection to Flash: Flash Edit. You can now edit your Flash movies from within Dreamweaver (provided, of course, that you have Flash MX or later installed on your system and the FLA source file). Dreamweaver doesn't do the actual movie editing work, of course. Here's how it works.
When you click the Flash Edit button, Dreamweaver launches Flash; you edit your movie in Flash, save your update, exit Flash, and end up back in Dreamweaver. It makes for a seamless Dreamweaver/Flash collaboration.
To edit a Flash movie from within Dreamweaver, follow these steps:
In Dreamweaver, open the document that contains the Flash movie.
Do one of the following to begin editing your movie in Flash:
Select the Flash movie placeholder, and in the Flash Property inspector, click the Edit button.
Ctrl+double-click (Command+double-click) the Flash movie placeholder.
Right-click (Control+click) the movie placeholder, and choose Edit With Flash from the shortcut menu.
Dreamweaver launches Flash and automatically opens the selected movie's source FLA file or prompts you to open it manually. (To enable Flash to open the FLA file automatically, you must assign it to the Flash object's Src field in Dreamweaver.)
In Flash, make changes to your movie. The Flash Document window indicates that you are editing a movie from Dreamweaver, as shown in Figure 25-14.
When you are finished editing in Flash, click the Done button. Flash saves your changes to the source FLA file, updates the SWF file, and then whisks you back to Dreamweaver.

Together, the interactive power of Shockwave and the speedy glitz of Flash can enliven Web content like nothing else. Dreamweaver is extremely well suited for integrating and displaying Shockwave and Flash movies. Here are some key points to keep in mind:
Saving your Director movies as Shockwave movies enables them to be played on the Web with the help of a plugin or ActiveX control.
Flash movies are a way to enhance your Web pages with vector animations, interactivity, and streaming audio. Flash movies require the Flash Player plugin or ActiveX control.
Dreamweaver has built-in objects for both Director and Flash movies. All the important parameters are accessible directly through the Property inspector.
Dreamweaver automatically writes code to handle the active content requirements applied by recent versions of Internet Explorer; however, you must be sure to upload the generated JavaScript file found in the Scripts folder.
You need only three parameters to incorporate a Shockwave movie: the file's location, height, and width. Dreamweaver automatically imports a Flash movie's dimensions. You can get the exact measurements of a Shockwave movie from within Director.
Aside from inserting Flash movies, Dreamweaver offers three other kinds of specialized Flash objects: Flash buttons, Flash text, and Flash elements. The included Flash element, called Image Viewer, is a highly configurable slide-show viewer, perfect for displaying any number of digital photographs with a range of transitions.
Dreamweaver behaviors can be triggered from a Shockwave or Flash movie.
You can launch Flash to edit Flash movies right from within Dreamweaver.
In the next chapter, you learn how to add video to your Web pages.