
Chapter 1: Controlling Control Panel
In This Chapter
![]() Rooting around in the Control Panel
Rooting around in the Control Panel
![]() Updating device drivers
Updating device drivers
![]() Taking control of AutoPlay
Taking control of AutoPlay
![]() Working with programs and features
Working with programs and features
![]() Rewinding the clocks
Rewinding the clocks
![]() Switching languages
Switching languages
![]() Accessing easily
Accessing easily
The inner workings of Windows reveal themselves inside the mysterious (and somewhat haughtily named) Control Panel.
The Control Panel itself isn’t a program or an app; it’s kind of a gathering of dozens of programs — a fairly easy way to get to a plethora of programs that watch and adjust Windows settings. Those individual programs, the ones that do the work, are Control Panel applets. The applets are grouped together and categorized, and the main categories are what you see as the eight categories in the Control Panel.
Most of this book is peppered with descriptions of Control Panel applets: After all, they’re the key to controlling much of Windows behavior, both good and bad.
In this chapter, I give you an overview of what’s available in the Control Panel, point you to detailed explanations elsewhere in this book, and explain some of the key settings that don’t fit into other chapters.
Exploring the Real Control Panel
Over on the tiled Metro side of the Windows 8.1 fence, people seem to get to either the Settings panel or the Change Settings (sometimes called PC Settings) screen and figure they’re in the Control Panel.
That’s a bit like getting off a plane in a Rome airport and thinking you’re in the Sistine Chapel. The Control Panel, which lives on the desktop side of Windows 8.1, isn’t nearly as pretty as its stunted tiled-side wannabes — and it has many more nooks and crannies.
Bringing up the Control Panel
Among the dozens of ways to bring up the Control Panel in its understated glory, use one of two methods:
![]() With your fingers, switch to the desktop by tapping the Desktop tile on the Start screen. Then swipe from the right to bring up the Charms bar. Tap the Settings charm and then at the top, tap the Control Panel entry.
With your fingers, switch to the desktop by tapping the Desktop tile on the Start screen. Then swipe from the right to bring up the Charms bar. Tap the Settings charm and then at the top, tap the Control Panel entry.
![]() With a mouse, right-click the Start screen in the lower-left corner of the screen and choose Control Panel. Yep, that works on both the new tiled Metro Start screen and on the old-fashioned desktop — although on the Metro Start screen you have to hover for a few seconds for the Start screen to appear.
With a mouse, right-click the Start screen in the lower-left corner of the screen and choose Control Panel. Yep, that works on both the new tiled Metro Start screen and on the old-fashioned desktop — although on the Metro Start screen you have to hover for a few seconds for the Start screen to appear.
The real Control Panel looks like Figure 1-1. If you don’t see a window sitting on the desktop, filled with icons and a decidedly touch-unfriendly network of tiny hot links, you haven’t found the Holy Grail. Try again, pilgrim.

Figure 1-1: Navigational aids in the Control Panel.
Scouting out the Control Panel
The main categories of the Control Panel span the breadth (and plumb the depth) of Windows. Here’s how the Control Panel breaks them out:
![]() System and Security: Use an enormous array of tools for troubleshooting and adjusting your PC, backing up your data, controlling how Windows conducts searches, checking your performance rating, and generally making your PC work when it doesn’t want to. Unfortunately, this category also includes all the tools you need to shoot yourself in the foot, consistently and reliably, day in and day out. Use this part of the Control Panel with discretion and respect. I talk about Device Manager and checking drivers later in this chapter. I cover the following components elsewhere in this minibook:
System and Security: Use an enormous array of tools for troubleshooting and adjusting your PC, backing up your data, controlling how Windows conducts searches, checking your performance rating, and generally making your PC work when it doesn’t want to. Unfortunately, this category also includes all the tools you need to shoot yourself in the foot, consistently and reliably, day in and day out. Use this part of the Control Panel with discretion and respect. I talk about Device Manager and checking drivers later in this chapter. I cover the following components elsewhere in this minibook:
• Action Center and the Troubleshooter: Book VII, Chapter 2
• Windows Firewall, Defender, and other components of the mighty security arsenal: Book IX, Chapter 3
• Remote Assistance: Book VII, Chapter 2
 If you’re here because someone you don’t know has asked you whether it’s okay to connect to your computer, STOP and think about it! The Remote Assistance scam ranks very high on many a creep’s social engineering list. Yes, even if she says she’s from Microsoft.
• Windows Update: Book VIII, Chapter 4
• Power Options: Book VI, Chapter 1
• File History: Book VIII, Chapter 1
• BitLocker: Book IX, Chapter 4
• Storage Spaces: Book VII, Chapter 4
• Admin Tools, including Disks and Event Logs: Book VIII, Chapter 4
![]() Network and Internet: Covers just about everything you need to hassle with networking. Many security settings in this category duplicate those in the Security category. I cover three topics in this category elsewhere in this book:
Network and Internet: Covers just about everything you need to hassle with networking. Many security settings in this category duplicate those in the Security category. I cover three topics in this category elsewhere in this book:
• Network Status and troubleshooting: Book VIII, Chapter 4
This includes the frequently asked question regarding the Windows notification that makes your computer accessible to the rest of your network and a brief discussion of virtual private networks (VPNs).
• HomeGroups: Book VII, Chapter 5
• The Internet Options applet: Book VI, Chapter 6
The applet in this category pertains only to Internet Explorer. (Isn’t it just like Microsoft to list Internet Options in the Control Panel, when they aren’t Internet options at all — just IE options?) I also cover Firefox and Chrome.
![]() Hardware and Sound: The “all other” category. I talk about AutoPlay settings later in this chapter. Other topics include
Hardware and Sound: The “all other” category. I talk about AutoPlay settings later in this chapter. Other topics include
• Devices and Printers: Book VII, Chapter 7
• Display Resolution: Book VI, Chapter 2
• Power Options: Book VI, Chapter 1
![]() Programs: Covers many actions you want to perform on Windows and other programs, short of stomping on them and yanking out their still-beating hearts, offering them to the merciless demons who dwell within (and you thought I didn’t have any issues with Windows). In this chapter, I talk about uninstalling/changing programs, turning Windows features on and off, and changing default filename associations and default programs.
Programs: Covers many actions you want to perform on Windows and other programs, short of stomping on them and yanking out their still-beating hearts, offering them to the merciless demons who dwell within (and you thought I didn’t have any issues with Windows). In this chapter, I talk about uninstalling/changing programs, turning Windows features on and off, and changing default filename associations and default programs.
![]() User Accounts and Family Safety: Family Safety built in to the Control Panel may be useful for very young kids, but as soon as they figure out (or a friend tells them) how to use a proxy server or VPN, the game’s pretty much over. I don’t talk about Family Safety in this book at all. But I do cover two other topics in this category:
User Accounts and Family Safety: Family Safety built in to the Control Panel may be useful for very young kids, but as soon as they figure out (or a friend tells them) how to use a proxy server or VPN, the game’s pretty much over. I don’t talk about Family Safety in this book at all. But I do cover two other topics in this category:
• User Accounts: Book II, Chapter 4
The tiled Metro PC Settings method for creating and handling User Accounts runs rings around the method here in the Control Panel.
• Windows Credentials: Book VII, Chapter 5
![]() Appearance and Personalization: In this chapter, I talk about the Ease of Access Center, which has some cool tricks for everybody, whether you need to ease your access or not; see the upcoming “Enabling Ease of Access Features” section. These other topics appear in other chapters in this book:
Appearance and Personalization: In this chapter, I talk about the Ease of Access Center, which has some cool tricks for everybody, whether you need to ease your access or not; see the upcoming “Enabling Ease of Access Features” section. These other topics appear in other chapters in this book:
• Desktop, themes, colors, and the like: Book VI, Chapter 2
• Display: Book VI, Chapter 2 (desktop)
![]() Clock, Language, and Region: I cover all these topics in this chapter. Set the time and date — although double-clicking the clock on the Windows taskbar is much simpler — or tell Windows to synchronize the clock automatically. You can also add support for complex languages (such as Thai) and right-to-left languages (such as Arabic), and change how dates, times, currency, and numbers appear. And what the heck is an input method? All is revealed later in this chapter.
Clock, Language, and Region: I cover all these topics in this chapter. Set the time and date — although double-clicking the clock on the Windows taskbar is much simpler — or tell Windows to synchronize the clock automatically. You can also add support for complex languages (such as Thai) and right-to-left languages (such as Arabic), and change how dates, times, currency, and numbers appear. And what the heck is an input method? All is revealed later in this chapter.
![]() Ease of Access: Change settings to help you see the screen, use the keyboard or mouse, or ask Windows to flash part of your screen when the speaker would play a sound. Also set up speech recognition for the built-in, Windows speech recognition routines. I have more details about the options — and a recommendation — at the end of this chapter.
Ease of Access: Change settings to help you see the screen, use the keyboard or mouse, or ask Windows to flash part of your screen when the speaker would play a sound. Also set up speech recognition for the built-in, Windows speech recognition routines. I have more details about the options — and a recommendation — at the end of this chapter.
Many Control Panel settings duplicate options you see elsewhere in Windows, but some capabilities that seem like they should be Control Panel mainstays remain mysteriously absent. You have at least 157 different ways in the Control Panel to turn on Windows automatic updating, for example (okay, so I exaggerate a little), but you don’t find the controls for choosing whether you want the tiled, “immersive” Metro IE or the old-fashioned desktop IE to be your default browser. Just sayin’.
 If you want to change a Windows setting, by all means, try the Control Panel but don’t be discouraged if you can’t find what you’re looking for. Instead, look in this book’s Table of Contents or index.
Relying on Device Manager
Device Manager is your point of first resort when something goes wrong with the hardware — the devices — on your system. It’s a Control Panel applet that gives you limited access to information about every piece of hardware Windows identifies on your system.
 Unless your network card implodes or the cat takes a leak on one of your PC’s exhaust vents, the most common source of hardware problems lies in the device driver — the program (sometimes a huge program) that handles the interaction between Windows and your device.
When you install a new piece of hardware, chances are very good that it’ll install all by itself, without any intervention from you. Simply plug most USB devices into a Windows machine, Windows installs all the drivers it needs, and you’re off and running in no time.
 However, once in a blue moon, Windows either can’t find or has trouble installing the device driver. When that happens, I never — absolutely never — use the device driver software that came in the box with the new hardware (by the time the manufacturer ships the box and you buy it, the driver may have gone through ten revisions!). Instead, I go to the manufacturer’s website and download the latest version of the driver. Here are a few tips on downloading the right driver:
![]() If you can’t find a Windows 8.1 version, use a Windows 7 (or even a Vista) version.
If you can’t find a Windows 8.1 version, use a Windows 7 (or even a Vista) version.
![]() If you’re running a 32-bit version of Windows (see Book I, Chapter 3), be careful to get the 32-bit version of the driver. Similarly, the 64-bit version of Windows takes only a 64-bit driver. Drivers don’t mix and match bittedness.
If you’re running a 32-bit version of Windows (see Book I, Chapter 3), be careful to get the 32-bit version of the driver. Similarly, the 64-bit version of Windows takes only a 64-bit driver. Drivers don’t mix and match bittedness.
Don’t update a driver just because it’s newer than the one you have. That way lies madness. You should update a driver only if the old one isn’t working right, or if you know for a fact that the new driver has some specific capability you really need. Fixing what isn’t broken can often break what didn’t need to be fixed, and life’s too short to fix a problem caused by what you didn’t need to fix in the first place.
With a good driver in hand, use Device Manager to install the new driver. Follow these steps:
1. Bring up the Control Panel by swiping on the desktop, choosing the Settings charm, then Control Panel; or right-clicking in the lower-left corner and then choosing Control Panel.
Details at the beginning of this chapter in the section “Bringing up the Control Panel.”
2. Choose System and Security, then System, and on the left choose Device Manager.
Windows opens the Device Manager applet, as shown in Figure 1-2.
3. Tap or click the wedge sign next to the heading that contains the device you want to update.

Figure 1-2: The Device Manager applet.
In Figure 1-2, I selected the wedge sign next to Display Adapters (also known as a video card). Windows shows which display adapters are installed and recognized.
You may have to try several headings to find the right one. If you guess wrong, just tap or click again to collapse the heading you expanded. Don’t worry. You aren’t breaking anything. Yet.
4. Tap and hold or double-click the device to open the Device Properties dialog box (see Figure 1-3), and then tap or click the Driver tab to display details about the driver.
You can identify the latest driver by its date, version number, or both.
5. If your new driver is on a USB drive, put it in the PC; if it’s sitting on the hard drive, make sure you know where it is.
6. Tap or click the Update Driver button.
Windows asks whether it should search automatically for updated driver software or browse your computer for driver software.
If you tell Windows to search automatically, it goes out to Microsoft’s big driver database in the sky and retrieves whatever Microsoft thinks is the best driver. Unfortunately, Microsoft has a bad track record for storing and proffering old, sluggish (but usually stable) drivers. That’s why you went out and retrieved the manufacturer’s recommended driver in the first place.
Note that Windows does not automatically check the manufacturer’s site for the latest drivers. Instead, it relies on the drivers that have been checked in to its driver database — and many of those drivers are weeks, months, or years out of date.

Figure 1-3: The driver date and version are easy to see.
7. Tap or click Browse My Computer for Driver Software; then point Windows to the location of your updated driver and tap or click Next.
Windows may step you through installing the new driver. Or it may tell you that the driver you have is the best one for your device. In either case, I suggest you take Microsoft’s suggestion and leave it at that.
I always, always reboot my PC after installing a new driver, even if it isn’t required. That gives Windows a chance to trip and fall while the event’s still clearly in my mind. It also gives me a chance to reboot to the Last Known Good Configuration if I want to roll back the driver. See Book VIII, Chapter 2 for a discussion of Last Known Good Configuration.
Stuffing AutoPlay
I talk about AutoPlay settings briefly in Book VI, Chapter 7, when I discuss how to handle audio CDs and video DVDs when you insert them into your PC. Here’s the rest of the story.
When you put a CD, DVD, or USB drive into a PC, Windows pops up with a notification that asks you what it should do with the new data. This AutoPlay capability has been around since the times of Windows XP. AutoPlay was invented to make it easier for people to play CDs, transfer photos from SD cards, or move data around on a USB.
A typical AutoPlay interaction goes in two steps. First you see a blue toaster notification rolling out of the right side of the screen that asks whether you want to choose what happens when that particular event (such as inserting an audio CD) happens. If you tap or click that toaster notification, you get a second notification that asks what you want to do. See Figure 1-4.

Figure 1-4: Windows asks whether you want to set an AutoPlay option. If so, you get to choose how to handle the situation.
Unfortunately, AutoPlay can be used for insidious purposes. All hell broke loose in January,2009, when somebody figured out how to jigger AutoPlay so it gave Windows users a bogus option to Open Folder to View Files. The option appears in the Install or Run Program section, but many people didn’t notice the subtlety. If you clicked the Open Folder . . . option, Windows didn’t open a folder at all. It ran a program that infected the PC with the Conficker worm.
There was quite an uproar at the time as Microsoft had trouble plugging the hole. And a whole lot of people got infected with Conficker, in many cases from dodgy USB drives.
Windows finally has some robust tools for handling inserted media. For example, you’re asked how you want to handle a newly inserted CD with music on it. If you choose to play the music, your choice is remembered, and from that point on, any new music CD you insert in your PC gets played — Windows doesn’t ask, it just does. Similarly for SD cards and pictures, or USB drives and files — if you tell Windows to open the folder to view files once, in the future, Windows always opens similar USB drives so you can view the files.
 Windows performs this magic by analyzing the kinds of files on the inserted media and then consulting a list to see what it should do with a specific kind of file on a specific kind of media: Music on CDs, for example, may be treated differently than music on USB drives; an inserted blank CD will trigger yet another action.
You may have set Windows to perform some AutoPlay function that you really don’t want. Or you may want to go back to the blissful state where Windows doesn’t assume anything and asks you every time how to handle inserted media. Here’s how to set things right:
1. Bring up Control Panel by swiping on the right side of the desktop, then choosing the Settings charm and picking Control Panel at the top; or right-clicking the Start screen in the lower-left corner and then choosing Control Panel.
Details at the beginning of this chapter in the section “Bringing up the Control Panel.”
2. Select the Hardware and Sound category and then tap or click the AutoPlay link.
The AutoPlay dialog box, as shown in Figure 1-5, appears.
3. To turn off AutoPlay, deselect the Use AutoPlay for All Media and Devices check box.
It’s a good choice if you’re concerned about getting infected.

Figure 1-5: Set AutoPlay defaults here.
4. If you aren’t quite so paranoid, choose default actions associated with each of the indicated kinds of media.
For example, with Memory Card, you can choose to import pictures and videos with the tiled Windows 8.1 Photos app. Under CDs, you can have audio CDs play with Windows Media Player.
5. Tap or click Save.
Your changes take effect immediately. If you ever find yourself doubting your choices, come back to the dialog box and, at the bottom, tap or click the Reset All Defaults button. That starts you out again with a clean slate.
If you're curious about the gory details, I have an analysis on how Conficker jimmies Windows into showing bogus AutoPlay entries in my Windows Secrets Newsletter article at www.tinyurl.com/dbgndc with further details at www.tinyurl.com/mck9ys.
Uninstalling/Changing Programs
Windows lives only to serve — or so I’m told — and, more than anything, Windows serves programs. Most people spend time working inside programs, such as Firefox, Outlook, Word, Adobe Photoshop, or QuickBooks. Windows acts as traffic cop and nanny, but doesn’t do the heavy lifting. Programs rule. Users rely on Windows to keep the programs in line.
Installing programs on the old-fashioned desktop side of Windows is easy. When you want to install a program, you typically download the program and double-click the downloaded file, or insert a CD into your CD drive and follow the instructions. You’ve done that a hundred times.
Installing tiled Windows 8.1 Metro apps is simpler still: Windows does it for you, when you get the app from the Windows Store (see Book III, Chapter 5). In fact, that’s the only way to install tiled Metro apps — Microsoft doesn’t let you do it any other way.
Removing well-behaved programs on the desktop side is just as easy, if you follow the instructions in this section. Changing programs, on the other hand, is a different kettle of fish, as you soon discover.
Windows includes a one-stop shopping point for removing and making massive changes to old-fashioned desktop programs. To get to it, bring up the Control Panel (find out how at the beginning of this chapter), and then under the Programs heading, tap or click the Uninstall a Program link. You see the dialog box shown in Figure 1-6.
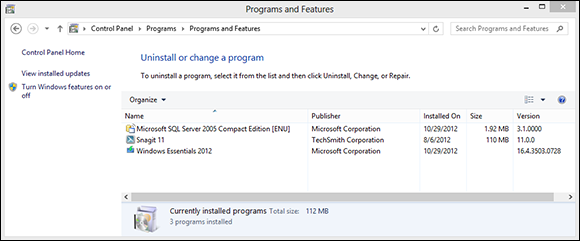
Figure 1-6: Remove a program the proper way.
When Windows talks about changing programs, it isn’t talking about making minor twiddles — this isn’t the place to go if you want Microsoft Word to stop showing you rulers, for example. The Uninstall or Change a Program dialog box is designed to activate or deactivate big chunks of a program — graft on a new arm or lop off an unused head (of which there are many, particularly in Office). In the Uninstall or Change a Program dialog box for Office 2010, for example, you may tell PowerPoint that you want to use its Organization Chart add-in. Similarly, you may use the Uninstall or Change a Program dialog box to obliterate Publisher, if you don’t want it darkening your drives. That’s the kind of large-scale capability I’m talking about.
Yes, it’s true. If you want to install a big chunk of a program, you have to tap or click the Uninstall a Program link in the Control Panel. The terminology stinks. Windows really should say something like “Bring up a program’s installer or uninstaller.” But I guess speaking the truth plainly would be too confusing.
Windows itself doesn’t do much in the Uninstall or Change a Program dialog box. Windows primarily acts as a gathering point: Well-behaved programs, when they’re installed, are supposed to stick their uninstallers where the Uninstall or Change a Program dialog box can find them. That way, you have one centralized place to look in when you want to get rid of a program. Microsoft doesn’t write the uninstallers that the Uninstall or Change a Program dialog box runs; if you have a gripe about a program’s uninstaller, you need to talk to the company that made the program.
A few school-of-hard-knocks comments pertain:
![]() If you have any problems at all uninstalling a program using the Windows uninstaller, get a free copy of Revo Uninstaller and give it a shot. I talk about Revo Uninstaller in Book X, Chapter 5. Many programs — especially legitimate antivirus programs — have uninstallers available on the manufacturers’ website. Google is your friend.
If you have any problems at all uninstalling a program using the Windows uninstaller, get a free copy of Revo Uninstaller and give it a shot. I talk about Revo Uninstaller in Book X, Chapter 5. Many programs — especially legitimate antivirus programs — have uninstallers available on the manufacturers’ website. Google is your friend.
![]() If you want to remove a program and it isn’t listed here, there’s a 99-percent chance that the program you want to remove is a piece of scumware. Hop on to Google and search for the name of the program — make sure you copy it precisely — and add the term uninstall. You may be in for some interesting times.
If you want to remove a program and it isn’t listed here, there’s a 99-percent chance that the program you want to remove is a piece of scumware. Hop on to Google and search for the name of the program — make sure you copy it precisely — and add the term uninstall. You may be in for some interesting times.
![]() You rarely use the Uninstall or Change a Program dialog box to remove parts of a program. Either you try to add features in a program that you forgot to include when you originally installed the program — most commonly with Office — or you want to delete a program entirely, to wipe its sorry tail off your hard drive.
You rarely use the Uninstall or Change a Program dialog box to remove parts of a program. Either you try to add features in a program that you forgot to include when you originally installed the program — most commonly with Office — or you want to delete a program entirely, to wipe its sorry tail off your hard drive.
Why sweat the small stuff? When you install a program, install it all. With large hard drives so cheap that they’re likely candidates for a landfill, it never pays to cut back on installed features to save a few megabytes. In for a penny, in for a pound.
![]() Some uninstallers, for reasons known only to their company’s programmers, require you to insert the program’s CD into your CD drive before you uninstall the program. That’s like requiring you to show your dog’s vaccination records before you kick it out of the house.
Some uninstallers, for reasons known only to their company’s programmers, require you to insert the program’s CD into your CD drive before you uninstall the program. That’s like requiring you to show your dog’s vaccination records before you kick it out of the house.
When you start a program’s uninstaller, you’re at the mercy of the uninstaller and the programmers who wrote it. Windows doesn’t even enter into the picture.
Turning Windows Features On and Off
The ability to turn certain parts of Windows on or off goes back to the days of Windows 3.1. Once upon a time, the feature was useful to reduce the bloat — the footprint — of Windows. Now, that isn’t such a compelling reason. But it’s become an interesting location for adding gonzo programs like Hyper-V, which piggyback on the Add a Feature approach to run heavy-duty installers.
Most frequently, parts of Windows get blocked off in order to minimize the chances of you shooting yourself in the foot. The theory goes that if you’re smart enough to turn on a feature, you’re smart enough to use it.
So much for theories.
On rare occasions, you may want to intentionally disable a part of Windows because you don’t want to deal with the consequences of having it available. People used to disable Internet Explorer to minimize their chances of getting infected with IE-borne viruses — although it’s highly debatable whether they actually accomplished anything by doing so.
If you find instructions to enable or disable certain pieces of Windows — turn Windows features on or off, in the parlance — here’s how to do it:
1. Bring up Control Panel by swiping on the right side of the desktop and then choosing the Settings charm and picking Control Panel at the top, or right-clicking the Start screen in the lower-left corner and then choosing Control Panel.
Details at the beginning of this chapter in the section “Bringing up the Control Panel.”
2. In the lower left, select the Programs category; then in the Programs and Features section, tap or click the Turn Windows Features On or Off link.
The Windows Features dialog box appears, as shown in Figure 1-7.

Figure 1-7: Enable or disable big swathes of Windows here.
3. Enable or disable Windows features by selecting or deselecting, respectively, the appropriate boxes.
Note that you can tap or click the + sign next to some features to allow you to enable or disable specific pieces of the programs.
In Figure 1-7, I selected the Hyper-V check box to enable Microsoft’s Virtual Machine hypervisor. Details in Book VIII, Chapter 5.
4. Click OK.
The pieces of Windows get added or blocked immediately.
Setting Default Programs
The term default program gets confusing because the phrase has four completely different meanings in The Land of Windows. To-wit:
![]() You can set up default programs to handle newly inserted media. I talk about AutoPlay earlier in this chapter. For example, you can tell Windows to run Windows Media Player when you put a music CD in your CD drive.
You can set up default programs to handle newly inserted media. I talk about AutoPlay earlier in this chapter. For example, you can tell Windows to run Windows Media Player when you put a music CD in your CD drive.
![]() You can tell Windows to associate a default program with a specific filename extension. (See Book VI, Chapter 1.) The chosen program is the one that gets run when you double-click a file in File Explorer or an attachment to an e-mail. For example, if you associate the filename extension .docx with Microsoft Word, when you double-click a DOCX file inside File Explorer or attached to an e-mail message, Word appears with the DOCX file loaded and ready for bear.
You can tell Windows to associate a default program with a specific filename extension. (See Book VI, Chapter 1.) The chosen program is the one that gets run when you double-click a file in File Explorer or an attachment to an e-mail. For example, if you associate the filename extension .docx with Microsoft Word, when you double-click a DOCX file inside File Explorer or attached to an e-mail message, Word appears with the DOCX file loaded and ready for bear.
![]() Similarly, you can associate a default program with a specific Internet (or Windows) protocol. For example, you can tell Windows that you want it to have Firefox handle http:// addresses. That way, if you click a hot link http:// address in, say, your word processor or e-mail program, Windows hauls out Firefox and has it bring up the indicated address.
Similarly, you can associate a default program with a specific Internet (or Windows) protocol. For example, you can tell Windows that you want it to have Firefox handle http:// addresses. That way, if you click a hot link http:// address in, say, your word processor or e-mail program, Windows hauls out Firefox and has it bring up the indicated address.
![]() You can choose a specific program as your default web browser or e-mail program. You can also tell Windows that you want a specific program to handle picture or music files. This capability is related to the filename extension association, but there are differences, explained in a moment.
You can choose a specific program as your default web browser or e-mail program. You can also tell Windows that you want a specific program to handle picture or music files. This capability is related to the filename extension association, but there are differences, explained in a moment.
Changing the default for a filename extension
Here’s how to set the default program for a specific filename extension or Internet protocol:
1. Bring up Control Panel by swiping on the right side of the desktop, then choosing the Settings charm and picking Control Panel at the top, or right-clicking the Start screen in the lower-left corner and then choosing Control Panel.
Details at the beginning of this chapter in the section “Bringing up the Control Panel.”
2. In the lower-left, select the Programs category; then in the Default Programs section, tap or click the Make a File Type Always Open in a Specific Program link.
Microsoft doesn’t call the letters at the end of a filename (such as .doc or .jpg) a “filename extension” here because the phrase is verboten — “file type” is much more politically correct but less descriptive. Windows doesn’t show filename extensions by default, but you’ve followed the instructions in Book VI, Chapter 1 and turned them on, right?
When you tap or click the link, the Set Associations dialog box appears, as shown in Figure 1-8. The list shows more than 650 filename extensions that are already recognized by Windows, in addition to several dozen Internet and Windows protocols.
3. To change the default program associated with a filename extension, tap or click the extension, tap or click Change Program, and choose the program that you want to handle it.
For example, you can click the gif extension, which may or may not have an association on your machine, and assign it to Microsoft Paint.
4. Tap or click Close, and your change takes place immediately.
You may want to run out to File Explorer and open a file with the extension to ensure that your change works correctly.

Figure 1-8: Associate a program with a filename extension (or an Internet protocol).
Changing the default browser or e-mail program
Changing the default program assigned to a filename extension is pretty straightforward. But setting your default browser, e-mail program, music player, picture editor, and the like, is considerably more complicated.
The mechanics of making the change aren’t hard at all. The complicated part is what Windows does behind the scenes to make your changes work. Many programs inside Windows and many programs you install can handle a wide variety of filename extensions and Internet protocols. For example, Firefox can handle HTM, HTML, SHTM, XHT, and XHTML files, as well as the protocols fpt://, http://, and https://.
When you install Firefox, the installer tells Windows which kinds of files and protocols Firefox can handle. If you set Firefox as your default browser, it takes control over all those filename extensions and protocols. But if you choose another browser as your default browser, it takes all (or almost all) those filename extensions and protocols.
That’s a brief explanation of what can happen — and a warning about what can go wrong. If you go messing with individual filename extension defaults, you may put Windows in a difficult position, with some kinds of browser functions being handled by one program, and other functions handled by a different program.
So with that bit of warning — don’t mess with individual associations — here’s how to set a default web browser, e-mail program, music or video player, picture editor, maps handler, Contacts program, and so on:
1. Bring up Control Panel by swiping on the right side of the desktop, then choosing the Settings charm and picking Control Panel at the top; or right-clicking on the Start screen in the lower-left corner and then choosing Control Panel.
Details at the beginning of this chapter in the section “Bringing up the Control Panel.”
2. In the lower left, select the Programs category; then in the Default Programs section, tap or click the Set Your Default Programs link.
Windows opens the Set Default Programs dialog box, as shown in Figure 1-9.
3. Pick the program, such as a browser, e-mail program, and so on, that you want to make your default, and then tap or click Set This Program as Default.
Behind the scenes, Windows pulls up all the possible filename extensions and protocols that could be assigned to that program and switches them all over to the program.

Figure 1-9: Set a default browser, e-mail program, and many others here.
4. (Optional) To see what’s actually happening, tap or click Choose the Defaults for This Program. Then look at — but don’t touch — the filename extensions and protocols up for offer.
Be very aware that changing the default browser will prevent Internet Explorer from running on the tiled Metro side of Windows. If you set Chrome as your default browser, Chrome may or may not take over on the tiled Metro side of the fence, depending on whether the folks at Google feel comfortable with the Metro version of the Chrome browser. If IE isn’t the default browser, Windows won’t run IE on the tiled Metro part of Windows. Windows will, however, run any browser you like on the desktop side.
If you change your default browser to, say, Chrome, and later decide that you really prefer to use the Metro version of Internet Explorer, you can always come back here and set IE as your default web browser.
5. Tap or click OK.
Your changes take place immediately.
If you changed a default program with many filename extensions, it’d be a good idea to run out to File Explorer and make sure that it behaves the way you think it should.
Adding and Switching Clocks
If you want to change the clock in the lower-right corner of the desktop — perhaps add a clock, change the time, or change the format of the date or time — it’s easy. Here’s how:
1. In the lower-right corner of the desktop, tap or click and hold on the clock. Choose Adjust Date and Time.
The Date and Time dialog box appears, as shown in Figure 1-10.

Figure 1-10: Change the time.
2. To change the current date and time or set up a new time zone, tap or click the appropriate buttons.
Be aware that some calendar programs don’t take kindly to having their time zones changed. Some of them get confused and can’t decide whether to adjust the time of your appointments or leave them as is. (If you were in Los Angeles when you set an appointment for 9:00 Monday morning and you fly to New York, what should happen to your appointment? It’s not a simple question!)
3. To change the date format (to show day-month-year, for example), tap or click the Change Date and Time button and then tap or click the Change Calendar Settings link.
I’m partial to displaying dates in the dd-mmm-yy format, such as 25-Sep-13, so I set my Short Date format to dd-MMM-yy, and then clicked OK three times.
4. (Optional) To put a second digital clock in the system notification area — the bottom-right corner of the desktop — tap or click the Additional Clocks tab and follow the instructions.
5. When you’re happy with the changes, tap or click OK.
Your clocks change at once.
Changing Languages
Windows language support has improved enormously in the past few versions. One very common request is to change the keyboard: You may have a German, British, or Thai keyboard, which is completely different from anything you’ve ever seen. Although you can fake an umlaut, for example, using the Character Map program (see Book VI, Chapter 3), if you use a lot of umlauts, it makes sense to get a keyboard that has umlauts built in.
When you change the keyboard language — Windows calls the program behind it the Input Method Editor — Windows doesn’t really change the keyboard at all. It just re-assigns things, so what you see on the keycaps corresponds to what appears onscreen. It’s a mapping function, even with enormously complex languages.
Here’s how to change the mapping that Windows uses to accommodate different languages and their keyboards:
1. Bring up Control Panel by swiping the right side of the desktop, then choosing the Settings charm and picking Control Panel at the top; or right-clicking the Start screen in the lower-left corner and then choosing Control Panel.
Details at the beginning of this chapter in the section “Bringing up the Control Panel.”
2. On the right side, in the Clock, Language and Region section, tap or click the Add a Language link.
The Change Your Language Preferences dialog box appears, as shown in Figure 1-11.
3. If you don’t see the language that you want to use, tap or click the Add a Language link.
If you do see the language you want — say, you want to add a Dvorak keyboard layout as an option for U.S. English — tap or click the Options link on the right and then tap or click Add an Input Method. Windows shows you dozens of different U.S. keyboards, and you can take your pick.

Figure 1-11: To make a specific language’s keyboard available to Windows, install the language first.
After you tap or click Add a Language, you’re presented with a list of more than a hundred languages.
4. Pick the language(s) you want and then tap or click Add.
Tamazight Tifinagh, anyone? You return to the Change Your Language Preferences dialog box in Figure 1-11.
5. If you have more than one language or keyboard layout installed, make sure your preferred language is on top by tapping or clicking the Move Up/Move Down links and then close the dialog box.
Windows puts a small icon on the taskbar, immediately to the left of the clock. If you started in the English language, the ENG icon appears.
6. To change languages — that is, to change the mapping Windows uses from your keyboard to the characters displayed onscreen — tap or click the icon and choose your language or keyboard.
Enabling Ease of Access Features
Windows has a large number of Assistive Technology options that make it easier for people who need help to interact with the beast. For example, Ease of Access settings can make it easier to see what’s on the screen, interact with the computer, hear the audio output, and much more.
The easiest way to set up Ease of Access options is to run through the five-question wizard Microsoft puts under the Let Windows Suggest Settings link. To get there, bring up the Control Panel using the method described at the beginning of this chapter under “Bringing up the Control Panel.” Then, on the lower right, under Ease of Access, tap or click Let Windows Suggest Settings.
The questions cover problems you may have with vision, manual dexterity, hearing, speech, and reasoning/dyslexia. Answer the questions, and Windows comes up with a custom-tailored set of recommended settings, which you can accept or reject, one by one.