
160 Tivoli Business Systems Manager Version 2.1: End-to-End Business Impact Management
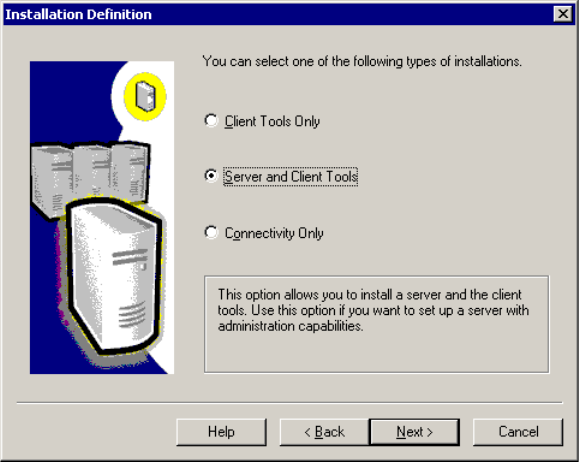
8. In the Installation Definition dialog shown in Figure 6-6, select Server and
Client Tools and click Next for the Instance Name dialog. This selection is
required for SQL database server and the history server.
Figure 6-6 Installation Definition dialog
Chapter 6. Base services implementation 161
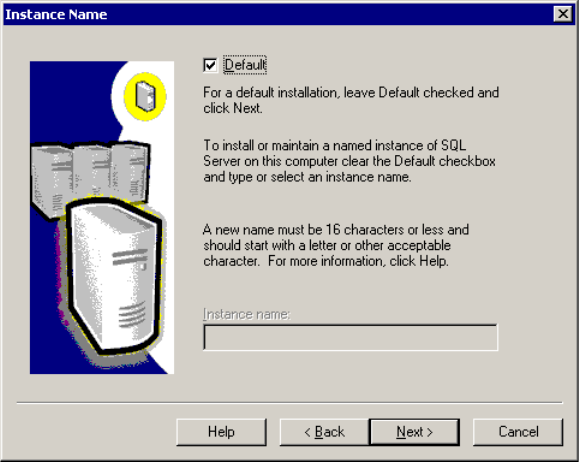
9. Leave Default checked, and click Next for the Setup Type dialog.
If the default option is not available, you may need to cancel the installation
and remove the previously installed instances using Add/Remove Programs
in Control Panel, then restart the new installation.
Figure 6-7 Instance Name dialog

162 Tivoli Business Systems Manager Version 2.1: End-to-End Business Impact Management
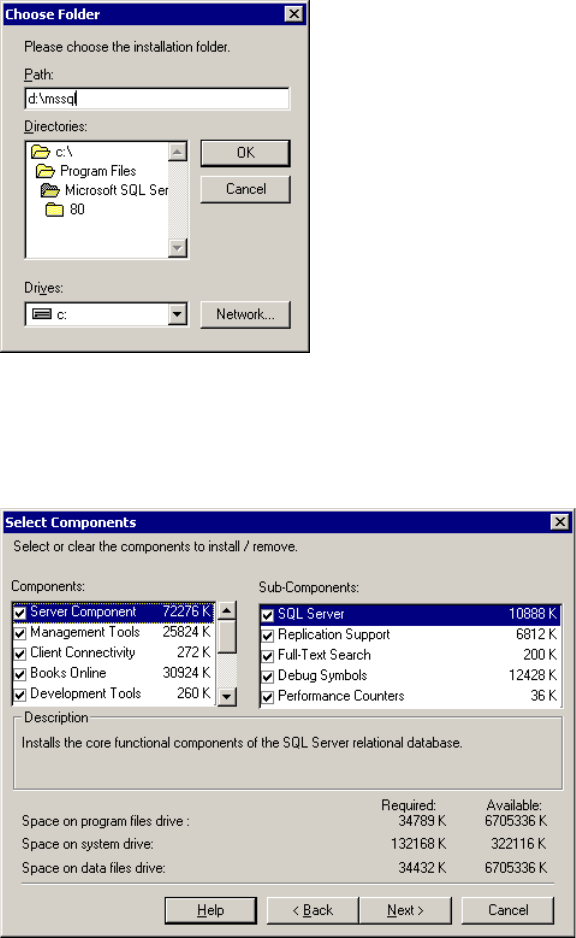
10.At the Setup Type dialog in Figure 6-8, select Custom. Click the Browse
button for Program Files, then Data Files to open the Choose Folder dialogs
and change their respective installation folders. D:/ is the default installation
folder for both Microsoft SQL 7.0 and Microsoft SQL 2000. Ensure adequate
available free space as recommended for your production system servers.
Figure 6-8 Setup Type dialog
Attention: Do not put MSSQL in the installation destination path. It will be
appended by the installer. If you type D:MSSQL, then the installation will take
place in D:MSSQLMSSQL.
Chapter 6. Base services implementation 163
11.Type the installation folder into the Path box as shown in Figure 6-9, and click
OK to return to the Setup Type dialog. Click Next for the Select Components
dialog.
Figure 6-9 Choose Folder dialog
12.Accept all the selected default components and their sub-components as
shown in Figure 6-10. Ensure your production system servers have adequate
available free space. Click Next for the Services Account dialog.
Figure 6-10 Select Components dialog
..................Content has been hidden....................
You can't read the all page of ebook, please click here login for view all page.