
7
Advanced Sound System Design
Many of the examples we’ve already covered put forward the important concept that in music and sound for games you are not dealing with “an event = a sound”, instead, you are constructing a model or system to deliver dynamic content from the static assets of sound waves. Nowhere is this idea more important than when dealing with kinetic systems such as weapons and vehicles. (As you’ve made it this far we’re going to assume that you are going to want to try everything out for yourself so we’ll dispense with the separate exercises.)
Weapon Systems
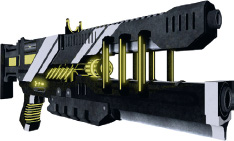
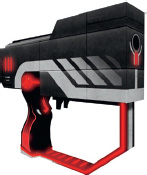
700 Weapons Locker 01
At the start of Area 700 there’s a target range and a weapons locker that contains several weapon examples. As you work through the following sections, you can select the appropriate weapon by pressing the number keys on your keyboard. We’ve removed the bullet impact sounds for these initial weapons so you can more clearly hear the firing sounds. We’ll come back to them in the Impact, Whizz-by and Handling sounds section.

All the weapon systems in UDK are scripted, so if you didn’t do the scripting examples in Chapter 4 for the player footsteps, now is the time to go back and make sure that you have UDK set up correctly to use our, and your, custom scripts. See “Scripting 101” in Chapter 3 and the scripting discussion in Appendix C.
Our custom scripts are all in C:UDKUDK(***)DevelopmentSrcMyModClasses. The scripts for the original UDK weapons these are based on can be found in C:UDKUDK(***)Development SrcUTGame or UTGameContent.
(Out of interest you can see where any [SoundCue]s are referenced by scripts by right-clicking on the SoundCue and choosing “List Objects that reference this object.”)
One Shot
Weapon: One_Shot_Pistol
Go to the weapons locker at the start of the target range. Then select the weapon UTWeap_GAT_ One_Shot_Pistol (press number 1 on your keyboard).
This weapon fires only once when the trigger or left mouse button (LMB) is clicked.

Although it might appear to be unrelated, this weapon actually extends the UDK ShockRifle script.
Open the script for this weapon:
C:UDKUDK(***)DevelopmentSrcMyModClassesUTWeap_GAT_One_Shot_Pistol.uc
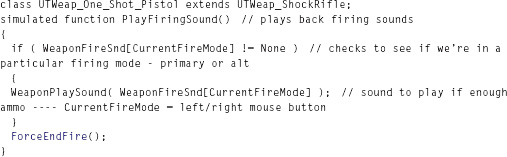
In the bottom half of the script you can see the reference to the [SoundCue] for the fire sound:

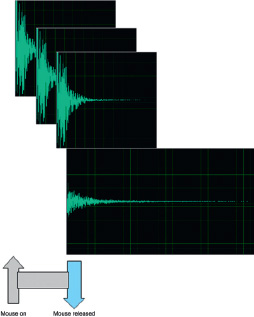
In this instance the [SoundCue] uses only one sound file repeatedly, but you could extend it so that it varies slightly in pitch or swaps between several samples using the [Random] object. As most weapons are based on the repetition of a mechanical process you will find that they do not vary a great deal from shot to shot. Some very subtle pitch change can work to create some variation and also to alleviate the phasing that can occur with multiple instances of the same weapon.
The other thing to note is that the weapon is stopped from simply looping round and refiring by the ForceEndFire command. This effectively makes the FireInterval (which controls the rate of fire) redundant:
With the next few exercises you’re going to be editing the scripts to replace the existing sounds. Before you do, it is a good idea to copy the scripts you are going to alter to a safe place so you can later put back the original versions.
Exercise 700_00 One Shot Weapon
Replace the sound of the pistol with your own sound.
Tips
1. Copy the script UTWeap_GAT_One_Shot_Pistol.uc from C:UDKUDK(***)DevelopmentSrcMyModClasses and put it in a warm safe place, away from direct sunlight.
2. Right click on the version that remains in the MyMod / Classes folder and via the properties menu make sure that the Readonly flag is unchecked (you might want to do this for the whole folder while you’re at it). Now open the script in Notepad or any other text editor and change the SoundCue entry to refer to one of your own.
3. Remember, we need the full file path for the [SoundCue]. Get this by right-clicking on your [SoundCue] within the Content Browser and selecting Copy Full Name to Clipboard. You can then paste this over the top of the existing reference:
WeaponFireSnd[0]=SoundCue’GATA_Sound.Weapon.Pistol_One_Shot_Cue’
4. Save your script and close the UDK editor.
5. As you have now altered a script, you will need to compile these again.
6. Open up the UnrealFrontEnd.exe from C:UDKUDK(***)Binaries and choose Compile Scripts from the Script Menu.

7. Check for any errors. Nine times out of ten errors are the result of spelling mistakes.
8. Now open the Exercise Room 700_00. You see that this replicates the target range from the level.
9. From the weapons locker when you now select the UTWeap_GAT_One_Shot_Pistol weapon you should hear your own firing sound.
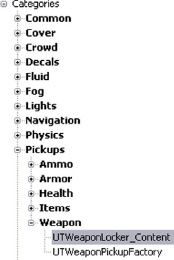
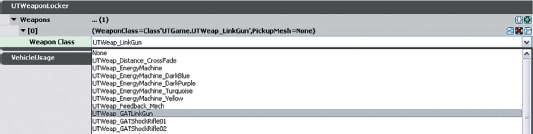
To set up your own Weapons Lockers select the Weapons Locker from the Actor classes tab (Actor Classes/Pickups/Weapon/UTWeaponLocker_Content) and right click in your level to add. In the Weapons Locker properties (F4) click the green plus sign to add a Weapon and choose your Weapon from the Weapon Class drop down menu.
Retriggered Firing
Weapon: ReTriggered_Pulse_Weapon
The second weapon UTWeap_GAT_ReTriggered_Pulse_Weapon (press number 2 on your keyboard) will refire for as long as you hold down the LMB until you run out of ammo.
In this example, it’s set to a FireInterval of 0.3 seconds, which is a slow 200 rounds per minute (RPM). This is fine for the kind of sci-fi energy bolt it’s firing at the moment:

(You’ll notice that it has two FireIntervals; this is because the weapon also has an alternate right mouse button firing mode.)
Depending on your intended use, you could set the FireInterval to be smaller, which would give you a greater number of rounds per minute:
![]()
If you wanted to use this method for a machine gun, which can fire at anything between 600 RPM and 1,200 RPM, then you may find that you run into a couple of problems. We’ll deal with these next.
Exercise 700a_00 Making Your Own Retriggered Weapon
Replace the sound of this sci-fi pulse-type weapon with your own.
Tips
1. Copy the script UTWeap_GAT_ReTriggered_Pulse_Weapon.uc from C:UDKUDK(***)DevelopmentSrcMyMod Classes and put it in a safe place.
2. Open the version that is still in the MyModClasses folder and edit the SoundCue entry to refer to one of your own.
3. Again remember, we need the full file path for the SoundCue. Get this by right-clicking on the [SoundCue] within the Content Browser and selecting Copy Full Name to Clipboard. You can then paste this over the top of the existing reference:
WeaponFireSnd[0]=SoundCue’GATA_Sound.Weapon.WEAPON_ReTriggered_Pulse_Cue’
4. Change the FireInterval to one appropriate for your sound:
(FireInterval(0)=0.3)
5. Save your script, close the UDK editor, and recompile the scripts using the UnrealFrontEnd.exe.
6. Open exercise room 700_00 again and the UTWeap_GAT_Retriggered_Pulse_Weapon from the Weapons Locker should now use your sound.
Retriggered Firing with Tail
Weapon: ReTriggered_MechwithTail
Retriggered weapon sounds usually work well for mechanical weaponry; however, there are two issues. The first is that as the sounds are overlapping they can use up your voice count (see Chapter 6 Voice Instance Limiting and Prioritization, and “Audio Optimization” in Appendix B) very quickly in environments with multiple weapons. The second is that if your sample is relatively long and your retriggering frequent, you may introduce phasing caused by the interference between the waveforms. You can alleviate phasing to some extent by using a [Modulate] node within your [SoundCue] to make subtle pitch variations.
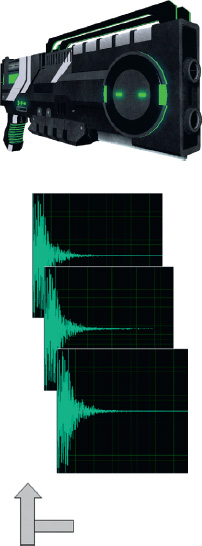
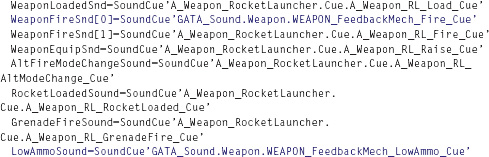
Another partial solution to both phasing and voice issues is to use a short fire sound that retriggers but then add the longer tail element when the input trigger is released. You can hear this in effect with the UTWeap_GAT_Retriggered_MechwithTail weapon (select number 3 on your keyboard):
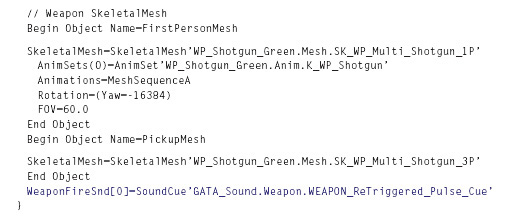
Opening the UTWeap_GAT_ReTriggered_MechwithTail.uc script, we can see the two cues and where they are referenced. As you can see, this script is significantly more complex as it is now based on the rocket launcher, which has alternate firing and weapon load sounds:
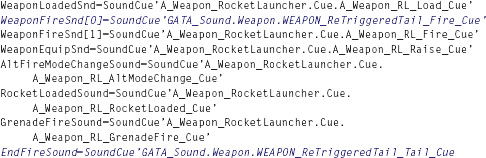
This has a FireInterval of 0.1 seconds, which is the same as 600 rounds per minute. By using relatively short fire samples and leaving the tail until the release of the button/trigger, we can avoid some of the worst effects of phasing and limit the voice count. But sometimes we want to go even faster – see the Looping examples below.
Exercise 700b_00 Making Your Own Retriggered with Tail Weapon
Tips
1. Copy the script UTWeap_GAT_ReTriggered_MechwithTail.uc from C:UDKUDK(***)DevelopmentSrcMyMod Classes and put it in a safe place.
2. Replace the SoundCue references with your own:
3. Save your script, close the UDK editor, and recompile the scripts using the UnrealFrontEnd.exe.
4. Use the exercise room 700_00 again to test it.
5. Try swapping out some of the sounds for the Alt fire (right mouse button) as well.
Weapon Status Feedback System
Weapon: Feedback_Mech
In Chapter 6 we discussed how useful sound can be in giving feedback to the player and the example was given of a weapon that gives feedback to the player about the status of its ammo through sound.

Swap to the UTWeap_GAT_Feedback_Mech weapon (press number 4 on your keyboard).
This weapon retriggers while the fire button is held down, but when the ammo level gets below 25 it swaps to a new [SoundCue] as a warning to the player that the ammo is about to run out.
Ammo full:

See the UTWeap_GAT_Feedback_Mech.uc script for the system and SoundCue references:
Again, try swapping these out for your own [SoundCue]s and playing around with the variables (AmmoCount>) within the script to see what they do.
Make a Point
Weapon: Make_a_point
Number 5 on your keyboard will give you the UTWeap_GAT_Make_a_Point weapon. It is based on a principle mentioned earlier in the book, that it can often work well for your sound to “make a point, then go away”—or at least fade out a little. Many retriggered weapons within a confined area during a firefight can quickly combine into less of a “wall of sound” and more of a “wall of mud.” In this weapon we’ve layered in an initial fire sound on top of the normal retriggered sound. This allows us to have the retriggered element slightly lower in volume but still emphasize that the weapon is being fired by having a powerful “crack” at the start.
The script calls a StartFireSound simultaneously with the start of the retriggered element, and it ends with a tail on button release:
(C:UDKUDK(***)DevelopmentSrcMyModClassesUTWeap_GAT_Make_A_Point.uc)


Once we’ve announced that the weapon has started to be fired, the fact that it is then continuing to be fired is less important as we’re already aware of it. This approach can help to thin out an otherwise busy mix (and is applicable to many other audio elements as well as weapon firing).
Looping Mechanical Weapon
Weapon: Looping_Mech_Weapon
The issues mentioned earlier with retriggered weapons become acute with weapons such as miniguns, which have very high fire rates. These weapons can achieve fire rates as high as 6,000 rounds per minute. (This is why they are most often vehicle mounted, as you need the vehicle to carry the weight of all the ammo!)

Let’s take a slightly less extreme example of a weapon that fires 3,000 rounds per minute (i.e., one every 0.02 seconds). In the first 0.4 seconds after the player has pressed the fire button, the sound has been triggered 20 times and is therefore taking up 20 of our voices already.
This firing sound sample is actually one second long, and so before it has finished playing you will have 49 voices being used. (See Appendix B for tips on how to monitor your voice count). With such extreme rates of fire, the retriggered approach breaks down and we need to look at a looping solution. By editing the initial transient of the weapon fire sound into a separate file, we can loop this element and then add the tail on the trigger/button release.
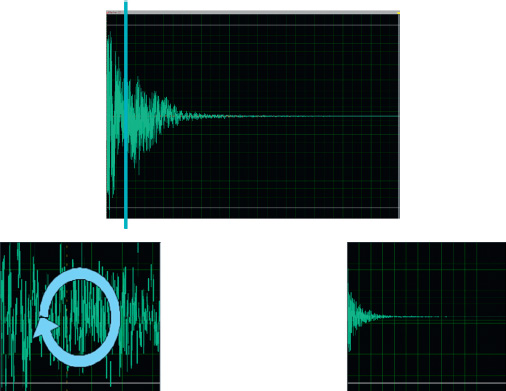
The weapon sound is divided into an initial element to be looped followed by a tail element that will play on release.

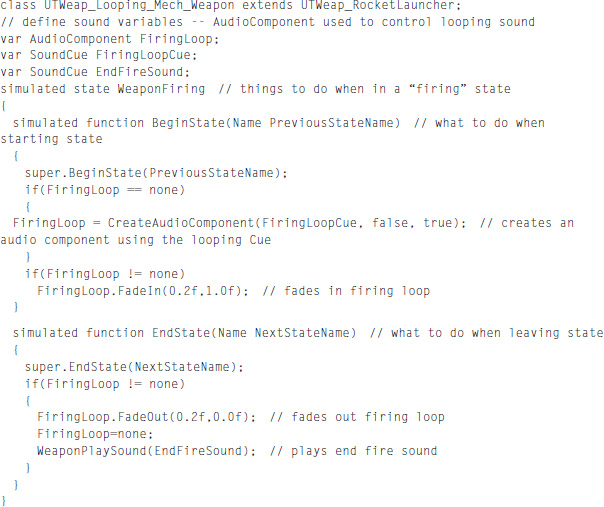
Switch to the UTWeap_GAT_Looping_Mech_Weapon (press number 6 on your keyboard) weapon to hear an example. The two SoundCues referenced are as follows:
![]()
You can see from the script (UTWeap_GAT_Looping_Mech_Weapon.uc) that the loop cue is faded in very quickly on fire, held looping, and then the EndFireSound plays the tail on the trigger release. Your [SoundCue] for the looping section must have a [Loop] node in it:
Exercise 700c_00 Making Your Own Looping Mechanical Weapon
Replace the loop and tail elements of this weapon to create your own.
Tips
1. Find a weapon shot sample that’s not too big and booming. Remember, you’re going to be looping this quickly so something with more of a top-end element will be more appropriate. (If you listen to real miniguns, they have a very characteristic sound.)
2. Use your audio editor to chop your sample into a loop section and a tail section and make sure the looping section loops smoothly. (See Appendix D for audio editing tips.)
3. Make a copy of UTWeap_GAT_Looping_Mech_Weapon.uc for backup, then replace the references to [SoundCue]s in the original script with your own.
4. Close and compile, then try it out in Exercise Room 700_00.
Looping Sci-Fi Weapon
Weapon: GAT_LinkGun
Unlike the repeated transients of looping mechanical based weapons, many Sci-Fi type weapons use loops for more of a constant beam-like quality.
Open the UTWeap_GAT_LinkGun (press number 7 on your keyboard). For now this is an exact replica of the UDKLinkGun. Its primary fire shoots a projectile, but its secondary fire (right mouse) is a beam of plasma, which also has a looping impact sound when it is in contact with a surface or bot.

The beam for AltFire consists of three elements: a starting sound (StartAltFireSound) that is simultaneous with the start of the looping sound (WeaponFireSnd), and finally a sound that plays when you release the AltFire button (EndAltFireSound).

If the beam impacts on a surface or pawn, then an additional loop is layered in.

the firing and handling sounds are handled by the UTWeap_GAT_LinkGun.uc script:
Sound for the alternative fire mode (right mouse button) (looping):
WeaponFireSnd(1)=SoundCue’A_Weapon_Link.Cue.A_Weapon_Link_AltFireCue’
Sound for when activating the alternative fire mode (right mouse button):
StartAltFireSound=SoundCue’A_Weapon_Link.Cue.A_Weapon_Link_AltFireStartCue’
Sound for when deactivating the alternative firing mode (right mouse button):
EndAltFireSound=SoundCue’A_Weapon_Link.Cue.A_Weapon_Link_AltFireStopCue’
The effect of the beam impact from the link gun is handled by the UTAttachment_GAT_LinkGun.uc script, adding either a normal impact or a flesh impact loop:
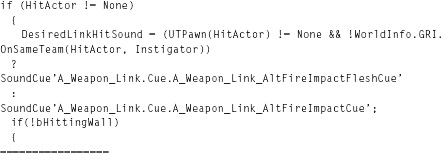
Sound for when alternative fire mode (right mouse button) impacts with player/bots:
SoundCue’A_Weapon_Link.Cue.A_Weapon_Link_AltFireImpactFleshCue’
Sound for when alternative fire mode (right mouse button) impacts with surface/material.
SoundCue’A_Weapon_Link.Cue.A_Weapon_Link_AltFireImpactCue’
Exercise 700d_00 Making Your Own Link Gun
So far you have been replacing the [SoundCue]s within our existing weapons. Now you are going to make a unique copy of a weapon to call your very own.
Tips
1. Navigate to C:UDKUDK(***)DevelopmentSrcUTGameClasses and copy the following files: UTWeap_LinkGun.uc UTAttachment_LinkGun.uc UTProj_LinkPlasma.uc
2. Go to C:UDKUDK(***)DevelopmentSrcMyModClasses and paste your copies here.
3. Before you edit them you should right-click and select these files’ properties in Windows Explorer and then uncheck the “Read only” flag.
4. Give each file a new name like one of these:
UTWeap_MYLinkGun.uc
UTAttachment_MYLinkGun.uc
UTProj_MYLinkPlasma.uc
5. Now you need to open up each of these scripts with Notepad and make sure that all references to itself within the script—that is, all references to UTWeap_LinkGun.uc or UTAttachment_LinkGun.uc, or UTProj_LinkPlasma.uc—are updated with your new name. So you would replace UTWeap_LinkGun.uc in the text with UTWeap_MYLinkGun.uc and so on. The easiest way to do this is with Notepad’s Find and Replace function. This is available from the Edit menu.
6. Once this is done, you can replace the [SoundCue] references with your own, compile these scripts (UnrealFrontEnd. exe/Script/Compile Scripts), and check for any errors.
7. Now you can restart the UDK Editor and add a weapons locker to exercise room 700d_00.
8. Within the Weapons Locker properties, you should now see that your new weapon is available from the selection of weapon classes.
Layers for Weapons
701 Weapons Locker 02
Spatial Layers
Weapon: Spatial_Layers
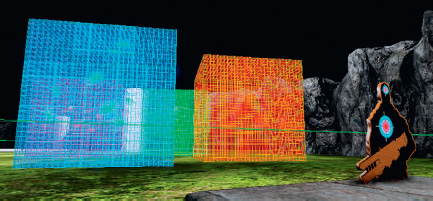
As you get to the end of the target range, there is another weapons locker that gives you two new weapons. Start with the UTWeap_GAT_Spatial_Layers weapon (press number 1 on your keyboard) and fire it outside, then inside, the blue and orange glowing fields. What you will hear is that different reverb layers are added to the fire sound depending on the location of the player. The reverbs you can enable in a game are often a bit of a blunt instrument so you may want to exclude some weapons from this system and implement a specific imitation reverb system. This is straightforward to do from a programming perspective, but we have provided a slightly less elegant example so that you can clearly see what’s going on.

The blue and orange fields are each encapsulated by a [TriggerVolume]; these are used as events in Kismet to layer in different reverbs. A line of code has been added to this weapon’s script (UTWeap_GAT_Spatial_Layers.uc) so that we get a console event in Kismet every time the weapon is fired:
PlayerController(Instigator.Controller).ServerCauseEvent(‘SpatialLayersFired’);
This [Console Event] leads to two [PlaySound]s, one for an outdoor slapback reverb type layer and one for an urban type reverb layer.
Whether or not you hear these layers blended alongside the firing sound (which still originates in the script) depends on whether the player character is inside one of the two [TriggerVolume]s, which set the volume multiplier for each sound.
Ideally this would be hard coded and then you would just have to define the areas in the game (probably aligned to [ReverbVolume]s) where the different reverbs would be layered in. This would also be possible to do for looped weapons, although you’d need your programmer to be on the ball to manage a perfect sample-level synchronization with the dry loop and the looping layers.
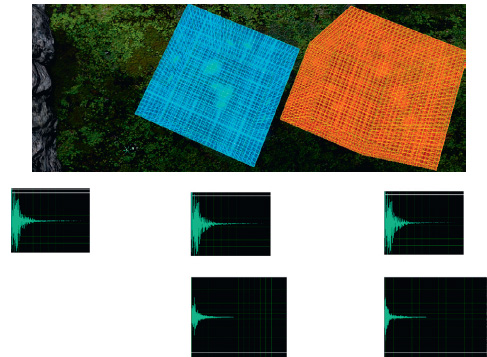
Spatial Tails
Weapon: Spatial_Tails

For this area select the UTWeap_GAT_Spatial_Tails weapon (press number 2 on your keyboard). We’ve looked at how having long samples for retriggered weapons can lead to problems. The difficulty is that the sounds that define larger spaces are by their nature long. In this example, the dry fire sound itself is unaffected but it is the choice of tail that varies according to the player’s location.
Here is a retriggered weapon followed by varying tails:

The volume of the three [PlaySound]s for the tail samples is controlled by the two [TriggerVolume]s surrounding the green and purple fields (and when both are untouched, the volume of the outside tail is at its maximum).
Weapons Sounds: Attenuation and Character Over Distance
702 Weapon: Distance_CrossFade
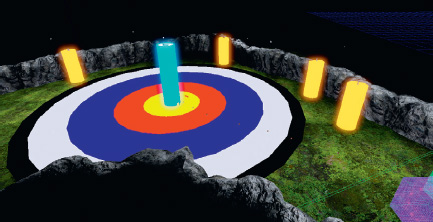
As weapons are such an important feature of many games, it may also be that the standard spatialization effect of applying a low-pass filter over distance is not satisfactory. The large target on the ground represents the crossfade over distance settings for the weapon that the bot next to the central tower is firing (UTWeap_GAT_Distance_CrossFade). When you approach this area, you can use the H key on your keyboard to teleport to different positions within the target and hear how the sound of the weapon varies according to your distance from it. (We’ve chosen to teleport you as in the current UDK build there are some issues with the Distance Crossfade function. When you pass a crossfade boundary it incorrectly retriggers the sound.)
Your choices on the character of the weapon over distance will depend on the game type, number of simultaneous weapons, and purpose of the weapon sound. This example is relatively straightforward with the script simply calling the following [SoundCue]:
WeaponFireSnd[0]=SoundCue’GATA_Sound.Weapon.WEAPON_Distance_CrossFade’


As you can see, there are five versions of the weapon sound depending on your distance from its source. These are governed by the settings within the [Distance Crossfade] node. The image above illustrates how the different elements attenuate over distance. (Again, this would be more difficult to achieve with a looping weapon because all the elements would have to be kept perfectly in sync as they crossfaded between each-other.)
Sniper Rifle
703 Weapon: Sniper
After taking the elevator to the top of the tower, you can once again enjoy the simple pleasures of the UTWeap_GAT_Sniper weapon. A right mouse click enables a zoom, but the unsteady breathing causes the view to move up and down. By pressing H on the keyboard, the player can temporarily hold their breath to steady the sights.
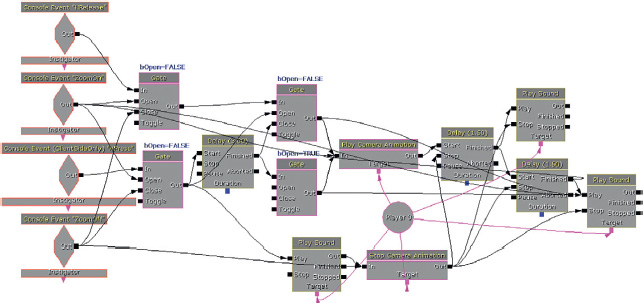
The sniper fire sound and zoom-in looped sound are referenced from the script as normal, but also embedded in the script UTWeap_GAT_SniperBase.uc are two console events that allow us to receive messages in Kismet for the breathing system:
![]()
The ZoomOn console event is received when the zoom is activated by a right mouse button press. This triggers a [Play Camera Animation] Action that contains a matinee-based animation for the camera to move up and down. At the same time, it opens a [Gate] to allow the H-press keyboard input event through.
The camera animation and associated breathing sounds (produced by the two [PlaySound]s on the right) loop around until the H-press event plays a breath hold and stops the animation. The [Delay] then lasts for three seconds to enable the player to take a shot before the breath runs out and we return to the swaying camera animation and breathing events. If the player releases the H key during this time, it also restarts the camera animation. (The console event ZoomOff is triggered by the right mouse button being released. This action closes the [Gate]s and switches off the zoom view, which is all controlled from within the script itself.)
Impact, Whizz-by, and Handling Sounds
Weapon firing sounds do not work in isolation. They are part of a system that includes the whizzbys, impacts, and ricochets together with the Foley sounds for the weapons handling, reloading, and equipping. In UDK the handling sounds are dealt with within the UTWeap scripts, but impact sounds are handled by the UTAttachment scripts for instant hits weapons (such as the Shock Rifle) or UTProj scripts for projectile weapons (such as the Link Gun LMB Fire).
Weapon Impacts
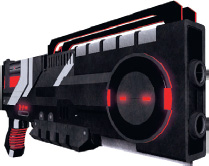
704 Weapons Locker 03
The weapons in the locker at the second target range have had their impact sounds added back in.
Weapon: Pistol_Surface_Types
You will have seen when you created your own copy of the link gun earlier that the impact sound effects are generated using an additional script for the Weapons named UTAttachment. The first weapon (number 1 on your keyboard) uses the UTWeap_GAT_Pistol_Surface_Types.uc script together with the UTAttachment_GAT_Pistol_Surface_Types.uc script.
The Attachment script detects the Material Type and then references a [SoundCue] depending on that type in the same way that the player footsteps worked in Chapter 3. (Parts of the script have been removed for clarity as indicated by ------):

The surface material of the shooting range is already set to Physical Material Stone. (You can check the physical material that this uses by right-clicking on the surface and selecting Materials/Find Instance in Content Browser. You can then double-click the material to open the Material editor and see the physical material it references.) You’ll remember that this is one of the existing physical materials in UDK along with Default, Dirt, Energy, Foliage, Glass, Liquid, Metal, Sand, Water, Water_Shallow, and Wood.
In the Attachment script we have added stone as a possible surface type and then referenced our own [SoundCue]. You can add your own by simply duplicating the line of script, incrementing the array (the numbers in brackets), defining the material type, and then referencing your [SoundCue]. You can see that for the targets themselves we have defined our own new physical material types. For a reminder on how to do this yourself, see the exercise “Custom Materials for Custom Footsteps” in Chapter 3. In this case we’ve linked GunShotSurfaces01 to a metal impact [SoundCue] and GunShotSurfaces02 to a wood impact [SoundCue].
Weapon: Machine_Gun_Surface_Types
The second weapon in this area (number 2 on your keyboard) derives from the scripts UTWeap_ GAT_MachineGun_Surface_Types.uc and UTAttachment_GAT_MachineGun_Surface_Types.uc. It has the same surface types defined (stone, metal, wood) as the pistol.
With impact sounds that are heard frequently (from a machine gun, for instance), it’s obviously important that you try to avoid repetition. Within your [SoundCue]s for impacts, you should consider applying some of the techniques covered in Chapter 2 such as modulation of pitch and volume and the randomized recombination of sounds. Bear in mind that, like footsteps, any sounds with a particularly memorable character will stand out, so you should weight them within the [Random] object to appear less often. For example, you might want the frequency of a ricochet element within your [SoundCue] to be significantly less for a machine gun that fires 2,000 rounds per minute than for a one-shot pistol. You may really like ricochets, but remember that, as well as perhaps getting tiresome after the 700th listening, these relatively long sounds can also contribute significantly to your voice count.
Impacts on NPCs and Player Characters
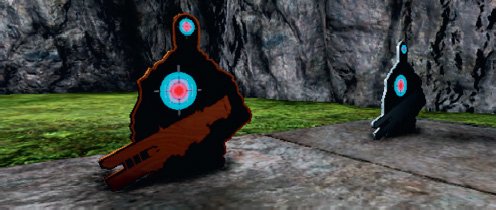
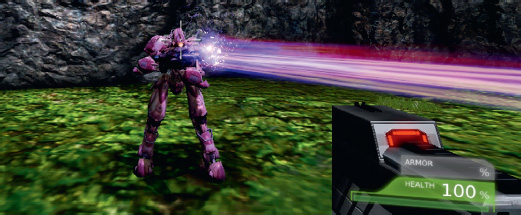
Another sound you will hear regularly (if you’re any good) is the sound of your weapon’s impact on the nonplayer characters (NPCs). You can try this out on the poor defenseless bot at the end of the target range.
These are set using the class UTPawnSoundGroup_Liandri.uc from the folder C:UDKUDK(***) DevelopmentSrcUTGameClasses:
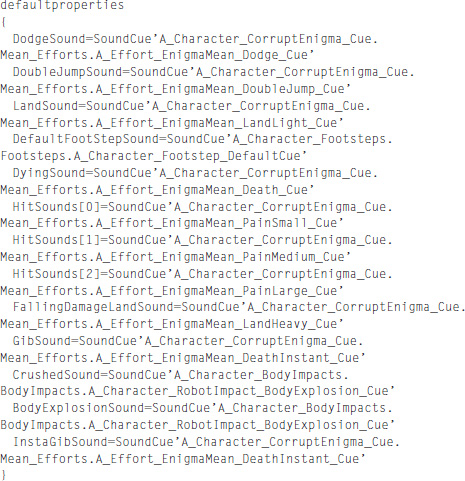
Impacts on the player character are referenced here:
C:UDKUDK(***)DevelopmentSrcUTGameClassesGATPawnSoundGroup.uc
![]()
They are usually heard simultaneously with the Hit, Crushed or Gibbed sounds here:
C:UDKUDK(***)DevelopmentSrcUTGameClassesGATPawnSoundGroup_GATCharacter.uc
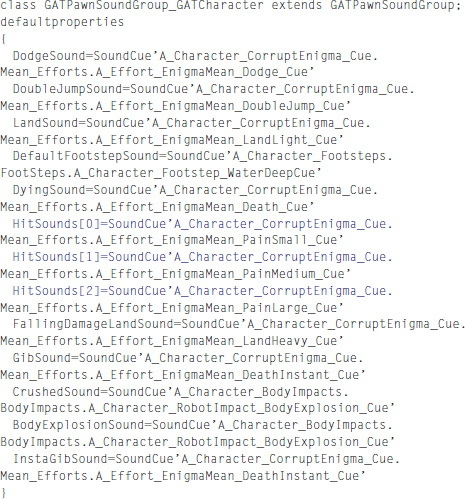
You can replace all of these with references to your own [SoundCue]s and recompile the scripts in the usual way.
Whizz-Bys
If you’re hearing a bullet whizz by your head, then the good news is that you’re still alive. As most bullets travel faster than the speed of sound, the usual order of things would be to be hit by the bullet first, then hear the actual shot, and in your dying moments reflect on how you really wish it were easier to get that convincing outdoor tail to the sound that you’ve been trying to achieve for weeks. Fortunately, most games aren’t that cruel and usually give you plenty of opportunity to realize that the distant twinkle you’ve just been admiring is the reflection off a sniper’s sights. The weapon that the bot you just killed was carrying is a shock rifle, and the sound it makes as it whizzes by the player’s head is referred to in UDK as a BulletWhip.
The original shock rifle UTWeap_ShockRifle.uc (C:UDKUDK(***)DevelopmentSrcUTGame ContentClasses) refers to the Attachment class UTAttachment_ShockRifle.uc (in the same folder), which calls the [SoundCue] illustrated here:
BulletWhip=SoundCue’A_Weapon_ShockRifle.Cue.A_Weapon_SR_WhipCue’
The weapon that the bot was/is using is (Mymod) UTWeap_GAT_BotShockRifle.uc, so you can swap out the BulletWhip here (UTAttachment_GAT_BotShockRifle.uc):
BulletWhip=SoundCue’GATA_Sound.Weapon.WEAPON_Bulletwhip_01’
Weapon Loading, Handling, and Selecting Sounds
The default weapons in UDK do not have the elaborate reloading animations that are present in many games, but the scripts do reference sounds for when the player picks up the weapon, swaps to, or discards the weapon from use. For example, the shock gun contains the following entries:
(C:UDKUDK(***)DevelopmentSrcUTGameContentClassesUTWeap_ShockRifle.uc)

You can swap these out for any of your copied or new weapons in the same way as the other operations you have been doing. If you’re working with a team that can supply you with some more sophisticated reloading animations, then you can actually avoid scripts for these items by calling your [SoundCue]s directly.
Adding Sound to Animations
Weapon: Animation
If you switch now to the third weapon (UTWeap_GAT_Animation) you picked up at the most recent weapons locker (number 3 on your keyboard), you can see that the right mouse button triggers an Alt Fire mode.
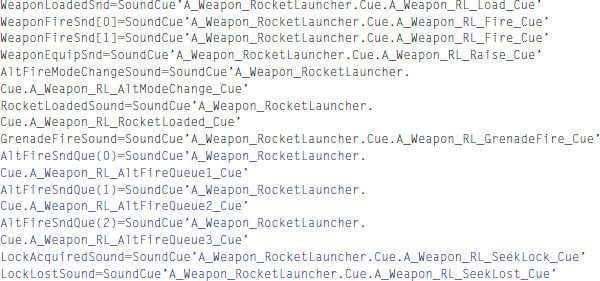
This weapon is based on the rocket launcher and the Alt fire loading sounds are scripted in the UTWeap_GAT_Animation.uc:

These sounds align to the animations of the weapon, but if you are working with an animator and have a new weapon (or any other kind of animation), you can also call your sounds directly from the animation rather then scripting them. If you’re not a scripting expert or are not working with one, then this is a much easier approach.

If you open any of the weapons packages you can see that the Anim group contains an AnimSet. Double-click this item to open the AnimSet Editor.
By selecting the Anim tab you can see the individual animations that make up the weapon’s movement, and pressing the Play button in the Animation window will allow you to see them in action.
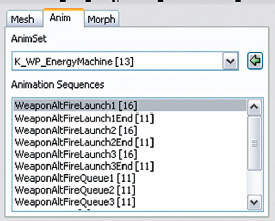
The lower menu in the AnimSequence tab will allow you to add Notifies to this animation at specific time points.

Having added an AnimNotify_Sound, you can reference a [SoundCue] from the Content Browser and this will then play every time this animation is used. We’ve given you a copy of this weapon (UTWeap_GAT_Animation_CLEAR) with no sounds attached so you can use this AnimNotify method of attaching your own sounds to it.
This menu also allows the addition of the AnimNotify_Footstep. This would be attached to new imported characters and creatures to notify the footstep/material types system we were using in Chapter 3—the Footdown variable usually relates to left (0) and right (1) feet. This would be referenced by a script (like the GATPawnSoundGroup.uc we are using for our player character in the tutorial level) to detect the physical material of the surface and then reference the appropriate [SoundCue] you’ve designated for that material.
(An aspect of animation and sound we haven’t discussed is matching face animations to dialogue. This is because it’s really the job of the animation department—not yours. If you’re interested in taking a look into this aspect of animation, then right-click on a skeletal mesh in your Content Browser and choose Create New FaceFX Asset. Doubleclicking on this new asset will open the Face FX Studio editor. From the top menu, select Actor/Animation Manager and click on the Create Animation button. You will be asked to select a [SoundCue] and it will then analyze the SoundNodeWave within it and try to match the phonemes in the sound file with the text you have typed in. Getting this right is a complex process, so if you want to pursue this challenge then see the UDK documentation.)
Weapons Summary
Whether you want simple volume attenuation, low-pass filtering over distance, or more advanced crossfading over distance depends entirely on the circumstances in which it will be heard and its importance to the game. We’ve focused on mechanical and sci-fi-type weapons as these are most common, but all these techniques are equally applicable to everything from melee weapons like axes and swords to magic spells. For a shooter game you would probably combine all of these systems together with whatever real-time acoustic processing systems are available.
To summarize:
• You should first consider the most appropriate system for the nature of the weapon:
• Single shot
• Retriggered
• Looping for speed
• Looping for consistency
• Or others
• Decide if it is important that the weapon supplies some kind of feedback to the player.
• Consider adding “prebaked” layers and different tail samples for different types of reverberant environment.
• Consider crossfading between different sounds over distance.
• Consider weapon fire, flybys, impacts, and ricochets together as one inter-related system.
• Consider using AnimNotifies called from the animation itself to get the timing of more complex reload or firing animations in sync.
All of this is, of course, tied into the design of the weapon sounds themselves. For some discussion on this subject, please turn to Appendix E/Example Challenges: Weapons.
As you can see, complex systems such as those for weapons are instances where the roles of sound designer, scripter, and programmer are truly interconnected. We recommend that you learn as much about everything as you can! To learn more about weapon design from the experts, see the bibliography for this chapter.
(If you have an interest in taking scripting further, we’ll be discussing some alternative tools in “Scripting” in Appendix C: UDK Tips.)
Vehicle Systems
Simulation of a real car engine is a hugely complex system made of many separate sound sources, each reacting in a different way to the driver input and other physics states on the vehicle. UDK is certainly not the best vehicle (ouch!) for convincing car simulations, but we will try to cover the basic principles. Although we call these “vehicle” systems that you’d associate with a car or motorbike, these principles are equally applicable to vehicles such as skateboards or jet skis, or indeed any other sound that has a complex relationship with in-game variables.
Simple Vehicle: Manta
705a Manta
At the racetrack toward the end of the tutorial level, get into the Manta (vehicle A on the left) by pressing E and fly around to see how it sounds in response to your input and the vehicle’s speed.
Each vehicle in UDK is based on three scripts:
This defines how the vehicle behaves
UTVehicle_***** (C:UDKUDK(***)DevelopmentSrcUTGameClasses)
This defines the effects and [SoundCue]s
UTVehicle_Content_****** (C:UDKUDK(***)DevelopmentSrcUTGameContentClasses)
This is the Actor that is created in game. (It refers to the Content script.)
UTVehicleFactory_****** (C:UDKUDK(***)DevelopmentSrcUTGameContentClasses)
The Content script references the following sounds.
Engine sound
![]()
Collision
CollisionSound=SoundCue’A_Vehicle_Manta.SoundCues.A_Vehicle_Manta_Collide’
Enter the vehicle
EnterVehicleSound=SoundCue’A_Vehicle_Manta.SoundCues.A_Vehicle_Manta_Start’
Exit the vehicle
ExitVehicleSound=SoundCue’A_Vehicle_Manta.SoundCues.A_Vehicle_Manta_Stop’
Scrape
![]()
JumpSound=SoundCue’A_Vehicle_Manta.Sounds.A_Vehicle_Manta_JumpCue’
Duck
DuckSound=SoundCue’A_Vehicle_Manta.Sounds.A_Vehicle_Manta_CrouchCue’
Explosion
ExplosionSound=SoundCue’A_Vehicle_Manta.SoundCues.A_Vehicle_Manta_Explode’
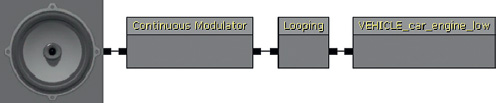
You can find these [SoundCue]s in the Content Browser. If you open the A_Vehicle_Manta_UT3g. SoundCues.A_Vehicle_Manta_EngineLoop [SoundCue], you can see that it contains a node that we have not yet fully discussed, the mysterious [Continuous Modulator].

You’ll notice in game that the engine loop of the Manta varies depending on the velocity of the vehicle. This velocity (in the range of numbers from 0 to 5,000) is passed to the [Continuous Modulator] in the [SoundCue] and is used to vary both the volume of the engine loop and its pitch.

You can hear the effect of this input as it is scaled to the ranges 0 to 1 within the [SoundCue] by using the arrows on the right hand side to carefully scale the Min Output values up and down. First set the Min Output of the volume modulation to around 1.0, then play the [SoundCue] and scale the Min output value of the pitch up and down. You’ll hear the same effect as that of the straightforward (linear) velocity-to-pitch relationship when in the game.
To create your own Manta with your own sounds, use the same method as you did when duplicating the existing weapons. Make a copy of the three script files with your own name and put them in the C:UDK(***)DevelopmentSrcMyModClasses folder. Then make sure that the internal references to the script’s name within the script itself are updated to reflect the new name you’ve given it.

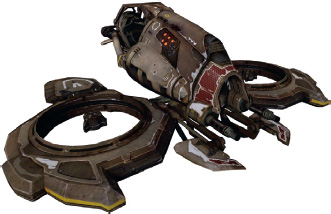
Engine-Based Vehicles: Scorpion
705b Scorpion
Now go and use vehicle B in the center. This is UDK’s Scorpion.

You’ll hear now that the velocity-to-pitch relationship is quite different with a succession of quick rises in pitch to simulate a gear changing effect. Looking at the UTVehicle_Scorpion.uc script(C: UDKUDK(***)DevelopmentSrcUTGameClasses), we can see that this uses functionality from the UDKVehicleSimCar class.
(The Scorpion, like the Manta, is also dependent on its UTVehicle_Scorpion_Content.uc and UTVehicleFactory_Scorpion.uc scripts.)
The TorqueVSpeedCurve determines how the vehicle accelerates
var() InterpCurveFloat TorqueVSpeedCurve;
EngineRPMCurve – maps the vehicles velocity onto an RPM (Revs per Minute) value
var() InterpCurveFloat EngineRPMCurve;
Looking further in the script you can see that these curves are not linear but have a number of points defined within them:
![]()
The EngineRPMCurve is the one that is passed to the [Continuous Modulator] within the A_ Vehicle_Scorpion_EngineLoop [SoundCue] (UDKGame/Content/Sounds/Vehicel/A_Vehicle_Scorpion).
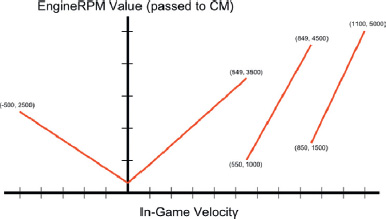
You can see from the diagram that although these values are again scaled between 0.0 and 1.0 within the [Continuous Modulator], the velocity-to-RPM curves for the pitch are significantly more complex, so we get a more variable RPM-to-pitch relationship, intended to create the impression of the vehicle moving up through gears as its velocity increases.
Because of the acceleration curve (TorqueVSpeedCurve), these actions actually happen very quickly within the game and the vehicle spends most of its time within the last section of the curve moving slowly up toward top speed.
You’ll appreciate that plotting curves in this way is not the most sound designer—friendly approach and much of the functionality for vehicles is quite inaccessible to non-programmers. Given this fact, and given that there are other things that we want to be able to do, we have had to take an alternative approach to creating our own vehicle, the GATScorpion.
Engine-Based Vehicle with Crossfades: GAT_Scorpion
705c GAT_Scorpion
Go back to the start of the racetrack, enter vehicle C on the right (GAT_Scorpion), and drive it around.
This vehicle is based on the UDK Scorpion and uses the following scripts from the C:UDK UDK(***)DevelopmentSrcMyModClasses folder:
UTVehicle_GAT_Scorpion.uc
UTVehicle_GAT_Scorpion_Content.uc
UTVehicleFactory_GAT_Scorpion.uc
It’s unrealistic to expect that a single sound can represent a convincing engine when taken through any significant degree of pitch shift because of the change in timbre that this process produces in a sound. All but the most basic vehicle simulations will instead use several recordings that are taken at different engine speeds and, as the RPM increases, there is often some pitch shift but as importantly, there is a crossfade between these different recordings so that the timbre is maintained or at least is realistic for the vehicle in question. To achieve this state, we’ve had to create a simulated system in Kismet that allows us to crossfade between samples based on the vehicle’s velocity in the game.

A [Trigger_Dynamic] is attached to the vehicle when it is spawned. When it is touched (and sends a [Remote Event]), this switches on all the [SoundCue]s, which are immediately set to silent. When the player enters the vehicle (by pressing E), we actually receive an Untouched message so the first output of the switch this is connected to is unused, and when the player does leave the area around the vehicle (and untouches the [Trigger_Dynamic]), the sound is turned off.

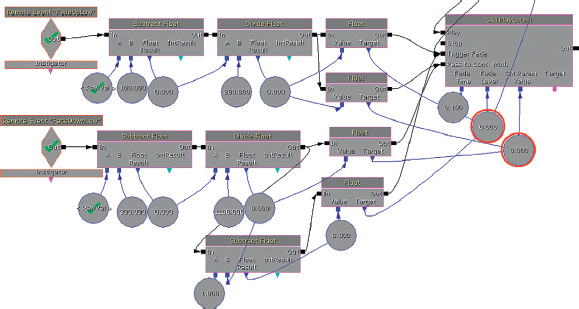
A [Get Velocity] action is polled by a [Delay] object every 0.1 second, and this velocity value is used to vary the pitch of the sounds, and at the same time to crossfade between four different [SoundCue]s:
SoundCue’GATA_Sound.Vehicle.VEHICLE_car_engine_idle_Cue’
SoundCue’GATA_Sound.Vehicle.VEHICLE_car_engine_low_Cue’
SoundCue’GATA_Sound.Vehicle.VEHICLE_car_engine_med_Cue’
SoundCue’GATA_Sound.Vehicle.VEHICLE_car_engine_high_Cue’
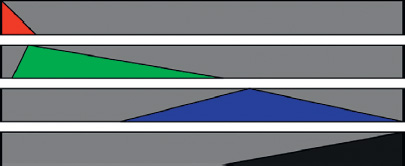
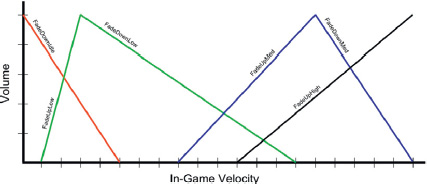
Vehicle velocity to four SoundCue’s volumes for the GATScorpion.
The first cue is an engine idle recording (shown in red in the preceding figure). The velocity is scaled using a series of maths actions and then goes to the fade level of a [GATPlaySound]. As the vehicle speeds up, the engine idle sounds quickly drop away, as you would expect.

The other elements need their volume scaled both up and down; to make this more straightforward, the velocity values are compared against different ranges to determine which scaling factor should be sent to which [GATPlaySound].
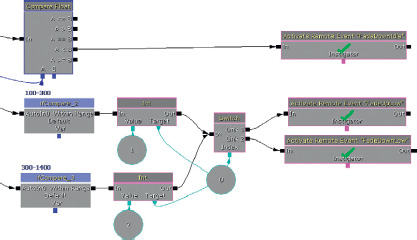
If the velocity falls within a given range of values, then the appropriate [Remote Event] receives a trigger to perform the scaling and send the result to the [GATPlaySound] fade level to adjust the volume of its [SoundCue].
Here is a summary of the compare and scaling operations:

This produces the following volume curves (with each [SoundCue] shown in a different color).
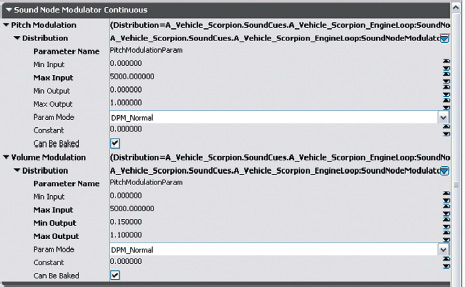
At the same time, this scaled velocity value is also sent to the CM Param value of the [GATPlaySound]. This aspect of the [GATPlaySound] uses the continuous modulator functionality to link into the vehicle’s [SoundCue]s. Within the [GATPlaySound], you can set a parameter name (such as “Pitch”) and then reference this parameter within the [SoundCue].

In the figure you can see the [SoundCue] for the low engine speed:
and the properties of its [Continuous Modulator]:
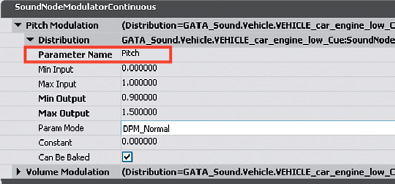
In this instance you can see that the incoming pitch values (derived from the scaled velocity values) are further scaled to produce a range of pitch change between 0.9 and 1.5.
Conclusions
Simulation of various modes of transportation in games is a specialized field often relying on proprietary tools. The component parts of the engine, induction system, and exhaust system, (not forgetting the wheels) would all be modelled not only using crossfade systems but also granular approaches to the sound sources themselves, together with a variety of DSP effects. Within the introductory confines of this book, we can only scratch the surface of what is an area of real expertise and specialism. Play around with the ranges for the GATScorpion vehicle, duplicate it to create your own version, and add your own [SoundCue]s to get used to the crossfading principle. If you are feeling particularly masochistic, you could continue to develop this system to layer in other engine elements. As an alternative we’d suggest investigating the middleware options such as FMOD and Wwise, which are both free to download and offer a much more sound designer–friendly environment for this sort of application.