
22
Theming and Personalizing Your Business Intelligence Site
In this lesson, you learn how to create a theme in SharePoint using PowerPoint, modify existing themes in the Theme Gallery, and customize the navigation to ease user navigation.
THEMES IN SHAREPOINT: AN INTRODUCTION
A theme in SharePoint is simply a set of colors assigned to specific property types. It doesn't affect the design of pages — to change the design, Page Layouts and Master Pages must be used. Where the use of themes becomes important is in creating themes based on a similar set of colors, but changing specific sets of colors to help users easily determine which subsite on a site collection they are navigating through. This is especially useful when various departments have similar site designs, and being able to tell if the page being shown is related to HR or IT would take more than a glance otherwise. Themes are all stored in the Theme Gallery, for ease of use later.
USING POWERPOINT TO CREATE SHAREPOINT THEMES
You can create themes either through the SharePoint website, or by using a PowerPoint theme, which allows for the easy reuse of corporate color schemes that are in PowerPoint templates.
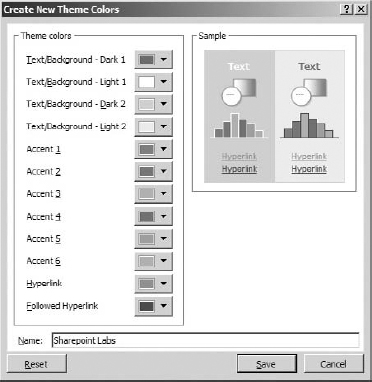
To create a new theme for use in SharePoint, open up PowerPoint and select the Design tab. Click the Colors button and choose Create New Theme Colors, as shown in Figure 22-1.
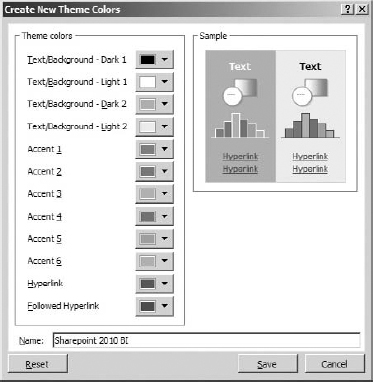
This will present a screen where you can choose the colors to use for the theme, as shown in Figure 22-2.
By clicking the Fonts button underneath Colors, you can also set the fonts used in the theme, as shown in Figure 22-3.


Now that you've created the theme, you need to save it to a theme file. Click the down arrow directly next to the Effects button, as shown in Figure 22-4.

Finally, click Save Current Theme and save the file.
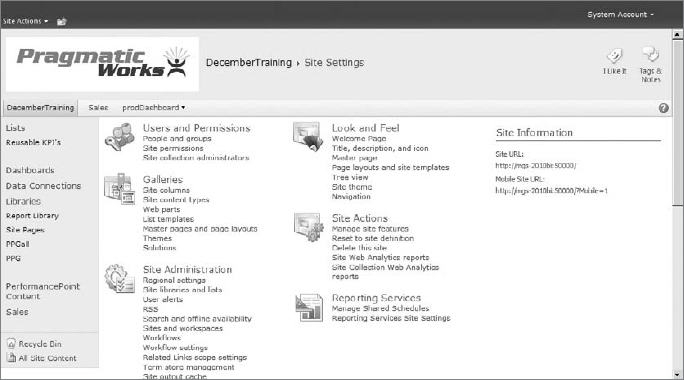
Now that you have a theme, you need to apply it to SharePoint. In the site you want to apply the theme to, click Site Actions ![]() Site Settings, and then click Site Theme, as shown in Figure 22-5.
Site Settings, and then click Site Theme, as shown in Figure 22-5.

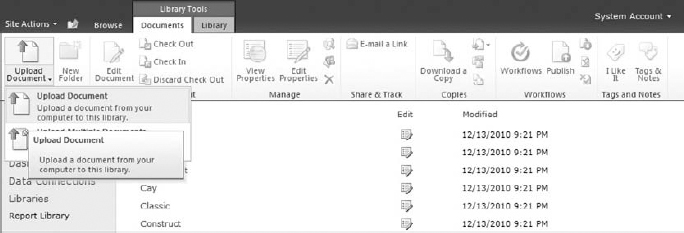
Click the Theme Gallery link in the ribbon to go to the Theme Gallery, as shown in Figure 22-6, and then upload the theme you've just created by clicking Upload Document in the Documents tab.
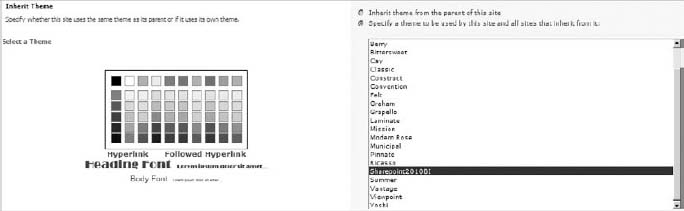
After uploading the theme, go back to the settings page and click Site Theme. Choose the theme you've just uploaded, as shown in Figure 22-7.

You can preview the theme, as well as change the individual colors. This is a great way to use a common color scheme across all the sites, and then customize a single element to distinguish the sites from each other.
The final step in the basic theming of a SharePoint site is changing the logo used by the site. You do this using the SharePoint settings website and it is a two-step process: First, the image needs to be uploaded to a library in SharePoint, and then the site image must be set to use that image. To upload an image, you must first create a library to store it in. Click Site Actions ![]() More Options, and create a document library — Image Gallery is a good name.
More Options, and create a document library — Image Gallery is a good name.
 If the Publishing Feature is activated, the image can be stored in the Images library, which you can find by clicking Site Actions
 ![]() View All Site Content.
View All Site Content.
Once the library is created, upload your logo image to the library. In the library, right-click the picture you just uploaded and choose Copy Shortcut, as shown in Figure 22-8.
Click Site Actions ![]() Site Settings again, and then click Title, Description, and Icon, as shown in Figure 22-9.
Site Settings again, and then click Title, Description, and Icon, as shown in Figure 22-9.
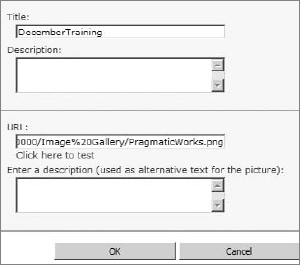
Now paste the URL you copied into the URL textbox, and click OK, as shown in Figure 22-10.
Click OK to finish changing the logo.

NAVIGATING A SHAREPOINT SITE
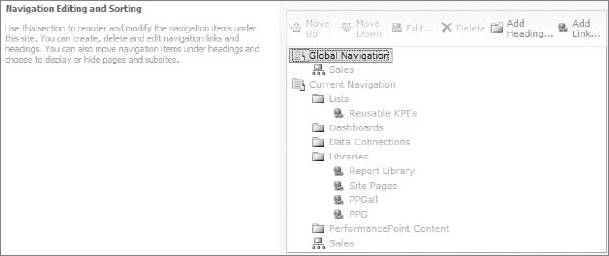
Once a SharePoint site has been themed, you need to give some thought to how users will navigate around the site. By default, the navigation bar on top, called the Global Navigation, is used to navigate to sites within the site collection, and the navigation on the left-hand side, called Current Navigation, is used to navigate lists and libraries within the current site. Though this approach works fairly well for generic SharePoint sites, some customization may be required in a BI site.
To edit the navigation, click Site Actions ![]() Site Settings, and then choose Navigation under the Look and Feel heading to bring up a screen, as shown in Figure 22-11.
Site Settings, and then choose Navigation under the Look and Feel heading to bring up a screen, as shown in Figure 22-11.
In order to find Navigation in this place, the Publishing feature must be activated — this is done by default when creating a site using the Business Intelligence Center site template, but not all templates activate this feature. In order to activate this feature, go to Site Actions ![]() Site Settings then under the Site Collection Administration section click on Site Collection Features. Now click the Activate button for the Office SharePoint Server Publishing Infrastructure feature.
Site Settings then under the Site Collection Administration section click on Site Collection Features. Now click the Activate button for the Office SharePoint Server Publishing Infrastructure feature.
The setting to display the same navigation items as the parent is available only when at a subsite level, and is grayed out when at the parent level. Only two levels of navigation are possible.
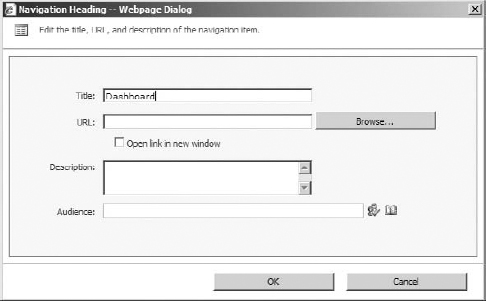
To create a new heading, click Add Heading to bring up the dialog box shown in Figure 22-12. You can restrict the navigation heading to be seen only by certain audiences by using the Audience selection.
In order to be usable by Touch-Screen interfaces, do not add a link to a drop-down menu.

Click OK to create the heading. Next, click Add Link. This will bring up an almost identical screen — in fact the only difference is that the URL field is prepopulated with http://. Give your link a title and click Browse to add the link itself, setting the screen as shown in Figure 22-13.
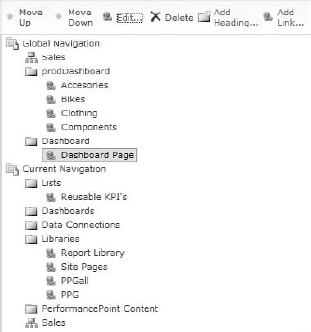
Once you've added your links, reorganizing them is a matter of clicking the Move Up and Move Down buttons until the links are in the correct order, as shown in Figure 22-14. Click OK to apply the changes when you are done.
The final use of the navigation menu links is in combination with the Query String filters created in Lesson 19. To use this functionality, check the name of the Query String Parameter Name, as shown in Figure 22-15. You can copy this name to use when creating the navigation items.

Now, on the link that was created in the navigation, add a question mark, the parameter name that you copied in the previous step, an equals sign, and the value of the member. Replace any ampersands in the member name with %26.
For example, if the page is ProductSales in the Dashboards library, the link for the Bikes member in the Products Category will be /Dashboards/ProductSales.aspx?QSProductCategory=[Product].[Product Categories].[Category].%26[1].
In this link is the name of the page, the /Dashboards/ProductSales.aspx, ? denotes that the following text is a parameter, QSProductCategory is the name of the Query String Parameter that will be receiving the value, and [Product].[Product Categories].[Category].%26[1] is the actual value being passed to the page.

Replacing & with %26 is known as URL Encoding. This is necessary because multiple parameters in a URL are separated by &.
To get the MDX member, browse the cube in SSMS (SQL Server Management Studio) and drag the member to the query window and copy it.
TRY IT
In this Try It, you create a new Theme in PowerPoint and upload it to the Theme Gallery. You also create a new link to a page within your site.
Lesson Requirements
Create a theme in PowerPoint, using the standard fonts, and change the following colors in the theme colors:
- Text/Background — Dark 1 : Blue, Hyperlink, Lighter 40%
- Text/Background — Dark 2 : Olive Green, Accent 3, Lighter 60%
- Hyperlink — Orange, Accent 6, Darker 25%
Add a Global Navigation heading called Lab Pages.
Add a Global Navigation link to the All Periods Analysis page created in Lesson 18.
Hints
- Call your theme SharePoint Labs.
- Add the navigation to Global Navigation.
Step-by-Step
- Open PowerPoint.
- Click the Design tab.
- Click Colors.
- Click Create New Theme Colors.
- Set the Theme Colors, as shown in Figure 22-16.
- Click Save.
- Click the bottom arrow next to the design ribbon, highlighted in Figure 22-17.

- Click Save Current Theme.
- Browse to a convenient location, and save the theme as SharePointLabs. The .thmx extension will be added automatically.
- Open the SharePoint site, click Site Actions
 Site Settings, and then choose Site Theme under Look and Feel to load the page shown in Figure 22-18.
 - Click Theme Gallery, then click Upload Document, as shown in Figure 22-19.
- Browse to the .thmx file you saved earlier, and upload it.
- Choose Theme Gallery for the content type, and click Save.
- Click Site Actions Site Settings, then choose Site Theme under Look and Feel.
- Choose the SharePointLabs theme.
- Click the Preview button to see Figure 22-20.
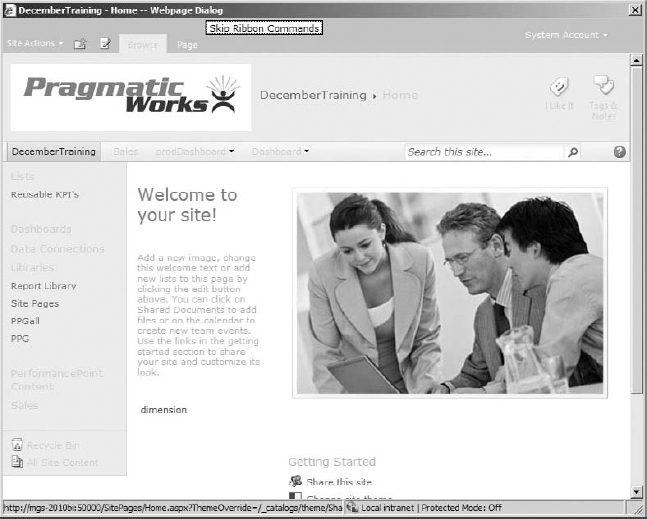
- Close the preview and click OK.
- Click Navigation under Look and Feel.
- Click Global Navigation in the Navigation Editing and Sorting tab, as shown in Figure 22-21.
- Click Add Heading, set the title to Lab Pages, and click OK.
- Click Lab Pages, and click Add Link.
- Set the title to All Periods Analysis.
- Click the Browse button, and browse to the All Periods Analysis page created in Lesson 18, as shown in Figure 22-22.

- Click OK to finish, and view a top navigation similar to Figure 22-23.


 Please select Lesson 22 on the DVD to view the video that accompanies this lesson.