
28
Tuning and Scaling SharePoint Service Applications
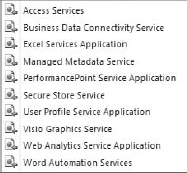
SharePoint 2010 introduced more flexible services that can be shared between farms. These applications are called SharePoint Service Applications (SSAs). SSAs are applications that are installed on a server farm and perform some specific function or functions. The unique thing about the SSAs is that they can be configured for a specific farm. SharePoint 2010 offers a plethora of service applications, as shown in Figure 28-1.
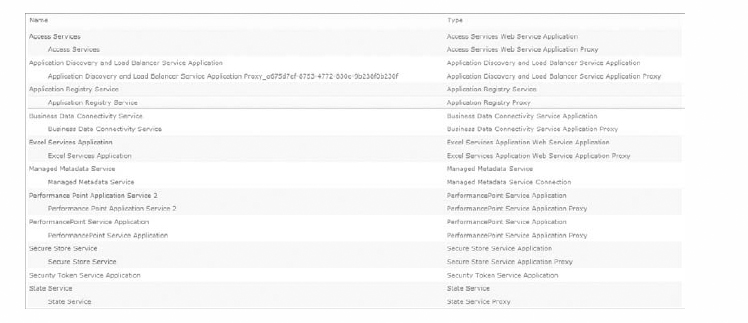
As a result, they assist in scaling your farm and handling larger loads. They are also flexible and offer richer development features. This lesson focuses on three main Business Intelligence SSAs: PerformancePoint, Excel Services, and PowerPivot Services. We explain how the concept of SSAs allows each to scale across and on server farms to assist in improving the performance of your SharePoint installation.
TUNING AND SCALING PERFORMANCEPOINT
As you create and implement more Business Intelligence, it is likely that your end users will continue to request and/or create more PerformancePoint content. As a result, you may notice some degradation in the performance of your BI sites. To mitigate this problem, all you need to do is create another PerformancePoint Service Application. Once the application is created, you can associate your various BI sites to a specific PerformancePoint Service Application.
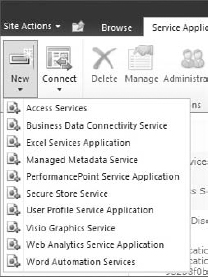
To create a custom PerformancePoint Service Application, open the Central Administration console. On the Central Administration homepage click Manage Service Applications under the Application Management section. On the Service Applications page click the drop-down arrow under New and select PerformancePoint Service Application, as shown in Figure 28-2.
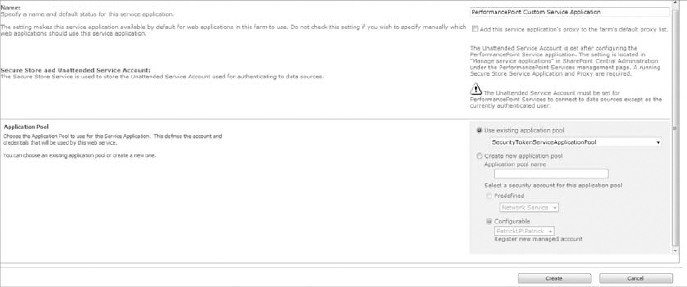
When you click New, the New PerformancePoint Service Application page opens, as shown in Figure 28-3.
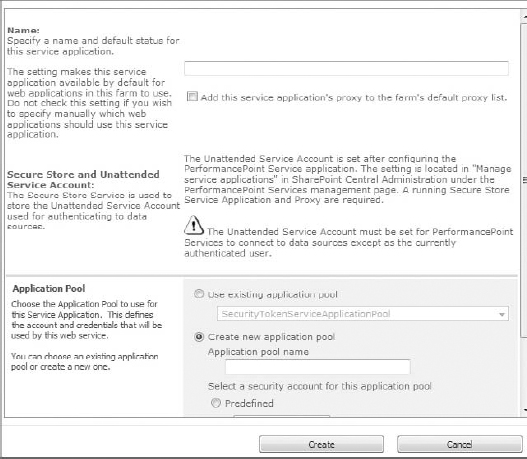
On this page you must provide a name for the new application service, use an existing application pool or create a new one, and finally, select a security account for the application pool. Once all these items have been provided, click OK and the new application service will be created.
Now that you have created the custom PerformancePoint Service Application, all you need to do is associate it to a specific BI site. To do that, go back to the Central Administration homepage. Select Manage Web Applications under the Application Management category. Click a web application in the list of available web applications. When you select the web application several items become enabled in the ribbon. Click Service Connections on the ribbon. On the Configure Service Application Associations page select the custom PerformancePoint Service Application that you want your BI site to use and click OK.
When the new service application is created, a new database is created on your SQL Server, as shown in Figure 28-4.
![]()
This database will act as the backend for the new PerformancePoint Service Application. To scale the service even further and possibly improve the performance, you could locate the data files for this database on a dedicated set of disks or on a different SQL Server. Either method should yield positive results in regard to the performance of the application.
TUNING AND SCALING EXCEL SERVICES
Several factors will affect the performance of your Excel Service Applications. The two main factors are the size and makeup of what is stored in the Excel workbooks that are hosted by your service. The size of the workbooks and the complexity of the calculations inside the workbooks contribute directly to how the application performs. As a result, you may need to scale your Excel Service Application deployment.
The techniques that you will use to scale Excel Services are similar to those used to scale PerformancePoint. As with PerformancePoint, you can scale out the application by creating a custom one and you can also scale the SQL Server deployment. Another approach that may be considered is adding more memory to the SQL Servers that host your existing PerformancePoint databases. As with any SQL Server, memory is a key hardware requirement. Because your workbooks are kept in memory, adding additional memory could improve the overall throughput on your SQL Server.
TUNING AND SCALING POWERPIVOT
The techniques used to tune and scale PowerPivot are a little different than the methods that were used in the previous sections. Similar to Excel and PowerPivot, you can create a custom PowerPivot application and create a custom association list for a specific web application. The primary difference is that to scale PowerPivot you must install it on each application server that you want to perform query processing. When a query request for PowerPivot is issued, data allocation is distributed to any PowerPivot for SharePoint server that is available. When you have a farm SharePoint installation, the default allocation methodology is round-robin. In other words, when a query is issued, the data processing is allocated to any PowerPivot server that is available; the availability is determined by the aforementioned methodology. A scaled-out deployment of PowerPivot resembles Figure 28-5.
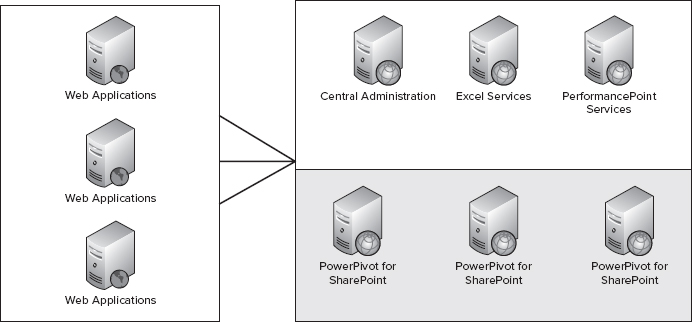
When you add more PowerPivot servers to the farm, you essentially add more query processing for all deployed web applications that are dependent upon or use the service. The negative to this is that you cannot scale PowerPivot data allocation processing for some web applications. However, similar to Excel and PerformancePoint Service Applications, you can create a custom association list that excludes the service application. This should guarantee that those web applications with the custom associations will not send query requests to the PowerPivot servers. In addition, you can also scale and improve the performance of PowerPivot Service Applications by creating custom PowerPivot Service Applications.
TRY IT
In this Try It, you create a custom PerformancePoint Service Application and a custom association list for a specific web application.
Lesson Requirements
In this lesson, you create a custom PerformancePoint Service Application that will be used in a custom association list. You then modify the association list for a specific web application so that it uses the newly created PerformancePoint Service Application.
Hints
- Use the Central Administration console to create the new service application.
- To create a custom association list, in the Central Administration console choose Manage Web Applications and select the Services Connections button that is enabled when you choose a web application.
Step-by-Step
- Open the Central Administration console.
- Click Manage Service Applications under the Application Management section.
- Click the drop-down arrow under the button labeled New on the Service Application window to see the list of service applications, as shown in Figure 28-6.
- Select PerformancePoint Service Application from the drop-down list.
- In the first textbox labeled Name, enter PerformancePoint Custom Service Application.
- Select the radio button labeled Use Existing Application Pool. Your screen should resemble Figure 28-7.
- Click the button labeled Create.
- Click OK on the new PerformancePoint Service Application screen.
- In the left navigation pane click Central Administration.
- Click Manage Web Applications under the Application Management section.
- Select the 24 Hour SharePoint web application.
- Click the button labeled Service Connections in the ribbon.
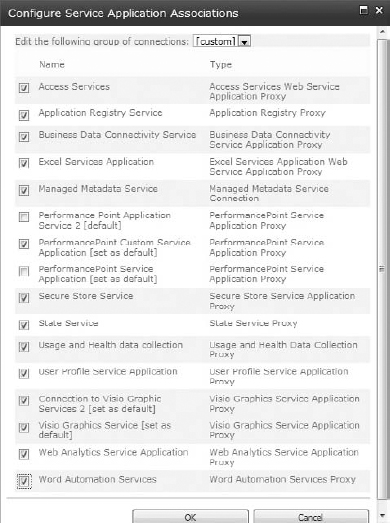
- On the Configure Service Application Associations window select [custom] from the drop-down list labeled Edit the Following Group of connections, as shown in Figure 28-8.

- Check all the boxes next to the service applications that you want to associate to the web application. Ensure that you select only the PerformancePoint Service Application Proxy labeled PerformancePoint Custom Service Application. Your screen should resemble Figure 28-9.
- Click OK.
 Please select Lesson 28 on the DVD to view the video that accompanies this lesson.