
Lesson 5. Entering and Tracking Milestones
In this lesson, you learn how to enter and track project milestones in Basecamp.
Setting Realistic Milestones
Establishing realistic project milestones is one of the key components of successful project management. In Basecamp, you can add, modify, comment on, and track milestones, as well as create to-do lists that you associate with these milestones.
Plain English
Milestone
A milestone marks a significant event in your project, targeted for a specific date. Sample milestones include the end of a phase, the completion of a project deliverable, or an important meeting.
Although Basecamp makes adding milestones a simple task, you have a better chance of successfully completing these milestones on time with a little upfront analysis.
Tip
Integrate Milestones and To-Do Lists
Creating milestones and to-do lists for your projects are part of your overall planning process, not two separate steps. It’s recommended that you review both Lessons 5 and 6, create your plan, and then enter milestones and to-do lists in Basecamp.
If you’ve used other project management systems in the past, it’s not difficult to map your milestones to Basecamp. But if formal project management is new to you, you need to think carefully about the critical milestones that you need to track. There is no one right or wrong way to set milestones in Basecamp. That said, here are a few tips to help you establish realistic and achievable milestones:
• Consider any concrete dates or deadlines that you must meet. For example, if you’re planning an event, you absolutely must finish by the date of that event. If you’re managing a design project, there might be a little more leeway about the final deadline, but you could have design reviews with your client on specific dates.
• Consider creating milestones for other important events, phases, tasks, or deliverables in your project. Alternatively, you could create milestones by date if you plan to manage tasks on a week-by-week basis. In this scenario, your milestone could be the end of a specific week, and the to-do list you associate with it could list all tasks scheduled for that week.
• Allow yourself enough time for worst-case scenarios. Don’t make your milestone dates so close that the only way to achieve them is under perfect conditions.
• Think about how your to-do lists will map to the milestones you create. Planning milestones and to-do lists together creates a more realistic project schedule.
• List your milestones and to-dos, analyze them, and make any revisions before entering into Basecamp. If you plan to collaborate with others on this, consider using the Basecamp writeboard for your initial analysis. See Lesson 11, “Collaborating with Writeboards,” for more information.
Tip
Expand on Basecamp’s Milestone Functionality with Add-ons
The numerous third-party add-ons that integrate with Basecamp enable you to create complex charts and graphs based on your milestones and much more. See Lesson 16, “Integrating Basecamp with Add-ons and Other Applications,” for more information.
Understanding Milestone Permissions
Access to Basecamp’s milestone features vary depending on the user’s role in the system (account owner, administrator, internal user, or external user).
Basecamp users from external companies who are assigned to a project can do the following:
• View milestones on the Basecamp Dashboard and the project Overview and Milestones pages.
• Mark as complete milestones assigned to them.
• Comment on milestones. They can edit their own comments within 15 minutes of posting, but they can’t delete comments.
• Add milestones, if the account owner or an administrator assigns permission on the Add People, Remove People, and Change Permissions page. They can also edit and delete the milestones they add. See Lesson 3, “Managing People, Companies, and Permissions,” for more information.
Basecamp users at your company have full access to milestone functionality, except for the ability to delete comments or assign permissions.
Account owners and administrators have full access to all milestone features.
Adding Milestones
To add your first milestone for a project, follow these steps:
- On the Basecamp Dashboard, select the project you want to open from the Your Projects list on the right side of the screen.
- Click the Milestones tab to open the Milestones page, shown in Figure 5.1.
Figure 5.1. Basecamp offers assistance when you create your first milestone.

- Optionally, view the video demo to take a visual tour of Basecamp’s milestone feature.
- Click the Create the First Milestone for This Project link. The Add a New Milestone page opens, shown in Figure 5.2.
Figure 5.2. Select a target date for your milestone.

Note
Where’s the Create the First Milestone for This Project Link?
The Create the First Milestone for This Project link appears on the Milestones page only until you create your first milestone. After that, the initial content that appears on the page is replaced with details about actual milestones. Alternatively, you can also create a milestone by clicking the Add a New Milestone button on the Milestones page or the New Milestone link on the Overview page.
- Enter a milestone title in the Enter a Title text box.
- Select the person responsible from the drop-down list. Your name appears by default, but you can also choose another user from your company or from an external company that you’ve given permission to view this project.
- The Email Now & 48 Hours Before It’s Due checkbox is selected by default, which sends the party responsible an email notification 48 hours before the milestone due date. If you don’t want to send this email, remove the checkmark.
- Select the date the milestone is due from the calendar. You can select a month in the future from the drop-down list or use the left and right arrows to navigate the calendar.
- Click the Create This Milestone button to create the milestone.
Basecamp returns to the Milestones page, which now displays a calendar with the milestone you just created. See “Viewing Milestones” later in this lesson for more information.
Tip
Track Milestone Activity with the iCalendar Feed
If you want to track your milestones on an external calendar, click the Subscribe to iCalendar link on the Milestones page to integrate your project’s iCalendar feed with your own calendar system. See Lesson 7, “Working with iCalendar,” for more information.
Adding Multiple Milestones
If you have a lot of milestones to create, you can save time by entering ten milestones on the same page. To do so, follow these steps:
- On the Basecamp Dashboard, select the project you want to open from the Your Projects list on the right side of the screen.
- Click the Milestones tab to open the Milestones page.
- Click the Add Ten at a Time link on the right side of the page. Figure 5.3 shows the Add Up to 10 New Milestones page, which opens.
Figure 5.3. Save time by adding multiple milestones on the same page.
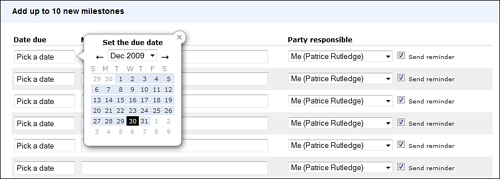
- Click in the Due Date field and select a date from the calendar that appears.
- Enter an appropriate Milestone Title. If you don’t enter a title, Basecamp won’t save your milestone.
- Select the Party Responsible from the drop-down list. Your name appears by default, but you can also choose another user from your company or from an external company that you’ve given permission to view this project.
- The Send Reminder checkbox is selected by default, which sends the party responsible an email notification 48 hours before the milestone due date. If you don’t want to send this email, remove the checkmark.
- Repeat steps 4 through 7 for any additional milestones you want to create.
- Click the Create These Milestones button to create the milestones and return to the Milestones page.
Editing Milestones
After you add a milestone, you might need to change it. For example, you could change the due date, reassign the milestone to another person, or modify email notification settings. You can edit upcoming, late, and completed milestones.
To do so, follow these steps:
- On the Basecamp Dashboard, select the project you want to open from the Your Projects list on the right side of the screen.
- Click the Milestones tab to open the Milestones page.
- Mouse over the milestone you want to edit. The Edit link appears to the left of the milestone title (see Figure 5.4).
Figure 5.4. Mouse over a milestone to display the Edit link.

- Click the Edit link to expand the page (see Figure 5.5).
Figure 5.5. Quickly make changes to your milestones.

- In the box that appears, make any desired changes. For example, you can change the milestone title, select another person to be responsible for the milestone, change the date, or change the email notification status.
- If you change the milestone date, the Shift Future Milestones Too? box appears. You can choose to shift future milestones as well as keep shifted milestones off weekends, if desired.
Note
Deciding Whether to Shift Milestones
If your project has numerous milestones, the ability to shift future milestones can be a big time saver. This feature is most useful if your milestones have dependencies. In other words, completing milestone B is dependent on completing milestone A. If your milestones are self-contained and independent of each other, shifting future milestones might not be necessary.
- Click the Save Changes button.
Basecamp updates the Milestones page with your changes.
Commenting on Milestones
If you want to communicate with other team members about a particular milestone, you can leave a comment. For example, you might want to remind others about important information relating to this milestone, post an alert about milestone roadblocks, and so forth. You can format comment text and attach files, similar to message comments.
To comment on a milestone, follow these steps:
- On the Basecamp Dashboard, select the project you want to open from the Your Projects list on the right side of the screen.
- Click the Milestones tab to open the Milestones page.
- Mouse over the milestone you want to comment on. The Comment icon appears to the right of the milestone title (refer to Figure 5.4).
- Click the Comment icon to open the Comments on This Milestone page, shown in Figure 5.6.
Figure 5.6. Add comments and attach related files.

- Enter your comments in the Leave a Comment text box.
Note
Comment Formatting Options
You can enter comments as plain text or format your text using HTML or textile codes. See the section “Formatting Message and Comment Text” in Lesson 8, “Posting and Commenting on Messages,” for more information.
- To attach one or more files, click the Attach Files to This Comment link. Click the Browse button and select the files on your computer. Depending on your operating system, you might see the Choose Files button instead. Attaching a file is particularly useful if you want project team members to comment on it. Each file must be less than 100MB and counts toward the file storage limit of your Basecamp account plan.
Tip
Try the Basic Uploader if You Have Trouble Uploading Files
Basecamp uses the Advanced Uploader by default, which enables you to upload multiple files. The Advanced Uploader requires that you have Flash 9 or greater installed on your computer and that you haven’t installed an ad-blocking plug-in on your browser. If you’re having trouble uploading, click the Basic Uploader link, which enables you to upload files one at a time. See Lesson 9, “Sharing Files,” for more information about file sharing and storage.
- Select the team members you want to send email notifications to in the Subscribe People to Receive Email Notifications section. You can notify individuals assigned to this project, both at your company as well as any external company. To save time, you can also choose to notify all people at a company. The people you select will receive email notification when you post your comment and when any related comments are posted.
- Click the Preview button to preview your comment.
- If you need to make changes to your comment, click the Edit button to return to the previous page.
- Click the Add This Comment button to post your comment.
The Milestones page indicates that this milestone has a comment and lists the number of comments. See “Viewing Milestones” later in this lesson for more information.
Editing Milestone Comments
If you discover a mistake in your comment text or decide to change your comment, you can edit it.
Caution
There Is a Time Limit for Editing Comments
You can only edit comments for up to 15 minutes after posting. After that, your only option is for an account owner or administrator to delete the comment. See “Deleting Milestone Comments,” later in this section.
To edit a comment, click the Comment icon on the Milestones page and click the Edit link next to the comment. Basecamp lets you know how many minutes are left. Figure 5.7 shows a sample comment that can still be edited.
Figure 5.7. Basecamp tells you how much longer you can edit a comment.

If time has elapsed on your comment, the Edit link is no longer available.
Deleting Milestone Comments
The account owner and administrators can delete comments posted by all members of their project teams, including themselves. Basecamp users can’t delete comments.
To delete a comment, click the Comment icon on the Milestones page and then click the Trash icon next to the comment you want to delete (refer to Figure 5.7). Basecamp asks you to confirm the deletion.
Completing Milestones
When you complete the work required to meet a milestone, you need to mark the milestone as complete in your Basecamp system. To do so, follow these steps:
- On the Basecamp Dashboard, select the project you want to open from the Your Projects list on the right side of the screen.
- Click the Milestones tab to open the Milestones page (see Figure 5.8).
Figure 5.8. A good project management system requires the accurate reporting of completed milestones.

- Select the checkbox before the milestone you’ve completed.
Basecamp marks the milestone complete as of the current date and moves it to the Completed section. The Overview page and the Basecamp Dashboard also show the milestone as completed, with a strikethrough over the milestone title.
Tip
Mark Milestones as Complete on the Dashboard
You can also complete a milestone if it appears on the Basecamp Dashboard in the Late & Upcoming Milestones section. Click a milestone link in this section, select the checkbox, and click the OK button. See “Viewing Milestones” later in this lesson for more information.
Viewing Milestones
Basecamp lets you view and update milestone progress in several places. The milestone data you can view and the tasks you can perform depend on where you are in the Basecamp system. In this section, you learn about the options for viewing milestones in Basecamp.
Viewing Milestones on a Project’s Milestones Page
A project’s Milestones page is the primary location for viewing and managing milestone activity. Figure 5.9 shows a sample Milestones page of an in-progress project.
Figure 5.9. The Milestones page for a specific project offers detailed data on upcoming, late, and completed milestones.

The Milestones page lists milestones by status and date. Late projects are highlighted in red, upcoming projects in yellow, and completed projects in green. If a project has existing comments, the Comment icon appears to the right of the milestone title with the number of comments. The Completion checkbox, to the left of the milestone title, is unchecked if the milestone hasn’t been completed yet. If it’s been completed, there is a checkmark in this box.
Mouse over the milestone title to display the Trash icon, Edit button, and Comment icon.
Viewing Milestones on a Project’s Overview Page
The Overview page for a specific project lists late milestones as well as other milestones by date. Figure 5.10 shows an example of this page.
Figure 5.10. Get a quick overview of your project, including milestone data.

Click the milestone link to open a specific milestone. A strikethrough over the milestone title indicates a completed milestone.
Viewing Milestones on the Basecamp Dashboard
The Basecamp Dashboard provides an overview of Late & Upcoming Milestones across all projects as well as recent milestones by project, as shown in Figure 5.11.
Figure 5.11. You can also update milestones from the Dashboard.

In the Late & Upcoming Milestones section, you can click a milestone link to open a dialog box that displays milestones details (see Figure 5.12)
Figure 5.12. Update milestones in this dialog box.

Mouse over the milestone title to display the Trash icon, Edit button, and Comment icon.
Clicking the milestone links in the area below the Late & Upcoming Milestones section takes you to the Milestones page. You must click a link in the Late & Upcoming Milestones section to open the box where you can update milestone data.
See Lesson 13, “Viewing Project Activity on the Dashboard,” for more information.
Viewing Milestones on the Dashboard Milestones Page
From the Dashboard, you can click the Milestones tab to view a calendar that shows the milestones for all your Basecamp projects for the next three months. Note that people at external companies can’t view this page, only people at your company.
Figure 5.13 shows this calendar view.
Figure 5.13. View a calendar of your milestones for the next three months.

Late milestones appear at the top of the page in red. You can also view milestones assigned to a specific person by selecting a name from the Show Milestones Assigned To drop-down list.
Click a milestone link on this page to move to the associated project’s Milestones page.
Note
There Are Two Milestones Pages in Basecamp
Even though their names are identical, the Milestones page you reach from the Dashboard and the Milestones page associated with each project serve a different purpose. The Dashboard Milestones page provides a calendar view of everyone’s milestones across projects, whereas the Milestones page for a specific project focuses on milestone details for that project only.
Deleting Milestones
If you make a mistake when entering milestones or decide that you don’t need a milestone for any reason, you can delete it. You can delete upcoming, late, and completed milestones.
To do so, follow these steps:
- On the Basecamp Dashboard, select the project you want to open from the Your Projects list on the right side of the screen.
- Click the Milestones tab to open the Milestones page.
- Mouse over the milestone you want to edit. The Trash icon appears to the left of the milestone title (see Figure 5.14).
Figure 5.14. Click the Trash icon to delete a milestone.

- Click the Trash icon to delete the milestone. Basecamp opens a dialog box, asking you to confirm this permanent deletion. You can’t undo a deletion.
- Click the OK button to confirm.
Basecamp removes the milestone from the Milestones page and your Basecamp system.
Caution
You Can’t Undo a Deletion
Be sure that you really want to delete a milestone before doing so. Basecamp deletions are permanent, and there is no undo.
Summary
In this lesson, you learned how to add, modify, and track project milestones. Next, learn how to add to-do lists for your project tasks.