
Lesson 1. Getting Started with Basecamp
In this lesson, you learn the basics of collaborative project management with Basecamp as well as how to set up your Basecamp account.
Introducing Online, Collaborative Project Management
Basecamp (http://basecamphq.com) is an online project management tool that emphasizes collaboration and communication over a reliance on traditional project charts, graphs, and statistics. With more than 3 million users around the world, Basecamp’s many customers include Kellogg’s, Sun Microsystems, the Mayo Clinic, National Geographic, and The World Bank, as well as many small businesses and nonprofits.
Plain English
Projects and Project Management
According to the Project Management Institute, a project is a temporary endeavor undertaken to create a unique product, service, or result. Project management refers to the organized and coordinated effort to complete that project.
With Basecamp, you can do the following:
• Collaboratively manage multiple projects and people
• Create, edit, and reuse to-do lists
• Create, track, and manage project milestones
• Integrate with calendaring systems
• Post and share messages with project teams
• Upload and share project files, including documents, audio, and video
• Track and manage project time
• Collaborate using writeboards and online chat functionality
• Create and view RSS feeds
• Access project data on your mobile device
• Extend Basecamp functionality with dozens of third-party tools and applications
Note
Basecamp History
Basecamp was released in 2004 by 37signals (http://37signals.com), a Chicago-based web design firm founded in 1999. After the success of Basecamp, 37signals changed its business model from web design to software development, releasing other popular web-based applications such as Backpack, Campfire, and Highrise.
Basecamp follows the Software as a Service Model (SaaS), which offers access to software as a web-based service. With Basecamp, there is no software to download. Everything is hosted on Basecamp’s own state-of-the-art servers.
Note
Is My Data Secure?
If you’re new to the concept of hosted software and have some questions about data security, read Basecamp’s security overview at http://37signals.com/security.
You access Basecamp via a browser such as the following:
• Internet Explorer 7 or later (for the PC)
• Firefox 2 or later (for the Mac, PC, or Linux)
• Safari 2 or later (for the Mac)
Tip
Focus on Embracing a New Way to Manage Projects
If you’re used to traditional project management software such as Microsoft Project or have completed training in formal project management methodologies, Basecamp will be a new experience for you. Instead of trying to compare features or figure out how to create a baseline or calculate the critical path (not part of the Basecamp model), focus on embracing a new, streamlined way to manage projects.
Understanding Basecamp Account Plans
Basecamp offers numerous account options, including a free account and several types of paid accounts. Basecamp accounts vary by feature and monthly price. When choosing the right plan for you, consider carefully your project management requirements. You can always upgrade to another plan, but it’s a good idea to start with a plan that will work for at least the next three to six months.
All plans include enhanced security and the ability to support unlimited users. The features that differentiate the available plans include the following:
• Number of projects. Depending on the plan you choose, Basecamp limits the number of active projects you can maintain. Archived projects don’t count toward this limit.
Plain English
Active vs. Archived Projects
In Basecamp, an active project is a project in progress. With an active project, you can add to-dos and milestones, share files, collaborate with others, and modify data. When you complete a project, you can archive it. You can view an archived project, but you can’t modify its contents unless you reopen it as an active project. See Lesson 4, “Working with Projects,” for more information about active and archived projects.
• Amount of storage. Most Basecamp plans enable you to upload and share files, with varying amounts of storage space available to you. In addition to documents, pictures, audio, and video that you upload, both active and archived projects count toward your storage limit.
• Time tracking. If you want to track the time your project team spends on tasks and create time-tracking reports, you need a plan that includes this feature.
Table 1.1 shows the differences between the available Basecamp account plans.
Table 1.1. Basecamp Account Plans

The Personal plan isn’t available when you initially sign up, but you can upgrade or downgrade to it after you’re a Basecamp customer. If you choose the Max plan, you receive a premium Campfire account at no charge, normally priced at $49 per month. Campfire (http://campfirenow.com) is 37signal’s group chat tool for business. See Lesson 12, “Working with Chat Functionality,” for more information.
Signing Up for a Basecamp Account
Signing up for a Basecamp account is a simple, straightforward task. If you choose a paid account, you receive your first 30 days free as a trial.
Figure 1.1 shows the screen that greets you the first time you visit Basecamp (http://basecamphq.com).
Figure 1.1. You can quickly sign up for a trial account from Basecamp’s home page.

To sign up for a Basecamp account, follow these steps:
- Click the Plans & Pricing link on the top navigation menu of Basecamp’s home page.
- Click the Sign Up button for the plan you prefer: Max, Premium, Plus, or Basic. The Sign Up page opens, shown in Figure 1.2.
Figure 1.2. Enter your account and credit card information on the Sign Up page.

Plain English
37signals ID
37signals ID is 37signals’ single sign-in system that enables you to create and use one username and password for all 37signals applications, including multiple Basecamp accounts. See Lesson 16, “Integrating Basecamp with Add-ons and Other Applications,” for more information about the Launchpad and Launchbar, which make accessing multiple accounts even easier.
- If you already have a 37signals ID from another 37signals application or another Basecamp account, click the Sign In link. Otherwise, enter your first and last name, email address, company name, and time zone in the Create Your Basecamp Account section.
Note
Signing Up for an Account Makes You the Account Owner
The user you enter in this section becomes the account owner who manages your Basecamp account. This person should be the one responsible for authorizing credit card payments and choosing the appropriate Basecamp plan for your business. See Lesson 3, “Managing People, Companies, and Permissions,” for more information about the account owner.
- Enter a username and password. Be sure to choose a strong password, preferably one that contains both letters and numbers.
Tip
Use an OpenID for Your Username
If you have an OpenID, you can use this identifier as your Basecamp username. An OpenID is a username and password that lets you access multiple websites supporting OpenID, including AOL, Facebook, Google, Yahoo!, and Microsoft. Click the Use OpenID link to enter your ID or to learn more about OpenID.
- Enter the URL of the Basecamp site address you want to use. For example, if your company name is Bon Appétit Catering, you might want to choose http://bonappetitcatering.basecamphq.com. Your site address can include only letters and numbers. Spaces aren’t allowed. If you enter an address that’s already taken, Basecamp prompts you to enter a new name.
Tip
You Can Change Your Basecamp URL
If your business needs change, you can change your Basecamp URL. See Lesson 15, “Managing Your Account,” for more information.
- Enter your credit card data in the Enter Your Billing Information section (if applicable). You can pay with a Visa, MasterCard, or American Express credit card. Remember that your card won’t be billed until your 30-day trial ends. If you cancel your account before the 30 days, you won’t be charged.
- Enter any optional referrer or coupon/discount codes if you have one.
- Review Basecamp’s Terms of Service, Privacy Policy, and Refund Policy.
- Click the Create My Account button to agree to these terms and create your account. Basecamp opens a dialog box that thanks you for signing up, shown in Figure 1.3. Basecamp also emails you a welcome greeting that includes your URL, username, and password.
Figure 1.3. Log in to Basecamp from your own custom URL.

- Click the OK, Let’s Go! Button to log in to your Basecamp account, shown in Figure 1.4.
Figure 1.4. The Dashboard welcomes you to Basecamp.
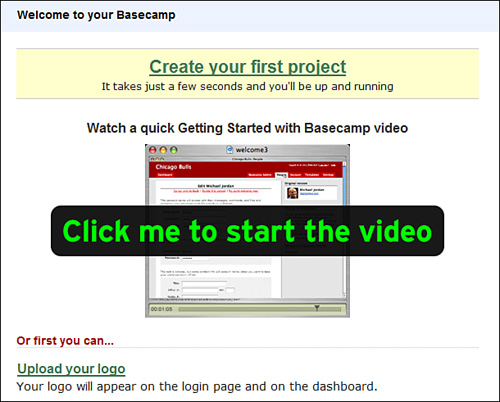
Tip
Take a Video Tour of Basecamp
For a quick video tour of Basecamp, click the Click Me to Start the Video link.
The Basecamp Dashboard offers a welcome message and some suggestions for getting started. After you create your first project, this content is replaced with details about your project’s to-do lists and milestones. Although the Dashboard includes a link to set up your first project, there are several other things you should do first, including customizing your workspace and entering your project team members.
Summary
In this first lesson, you learned about the many features Basecamp offers and how to sign up for an account. Next, it’s time to customize your workspace.