
Before we jump into the configuration part, it is good to know about the concept of Websites, Stores, and Store Views in Magento.
One of Magento's strong points is the possibility of adding multiple online stores within the same Magento installation. Using this, for example, you have the possibility of running multiple stores in several languages, offering the same (or a similar) set of products. These stores can even use the same settings if you'd like to, or only change those parameters that are important to be different. Magento uses the following naming convention, to set up a structure of online stores:
- Website: This is the main level. A Website should contain at least one Store with one Store view underneath it. In the default setup, there is one Website, one Store, and one Store View as shown in the following screenshot:

- Store: One level lower you'll find the Store. It's good to know that these three levels are just abstraction levels that you can use to organize your content and settings. The Store level isn't very important, since most settings can be altered on Website or Store View level.
- Store View: The Store View is the lowest level in the hierarchy. Store Views are generally used to create exact copies of a store, but using different languages.
When you're maintaining your store's settings or products, you'll notice that every option may be set on one of these levels. This is what we call the scope. If the customer is visiting a certain Store View, the system tries to use options set on that particular level (the Store View scope). If nothing has been set, Magento will fall back to the Store scope and if nothing is set on that level as well, then the Website scope will be used.
Even above the highest level (Website), there are also settings that are ''Global'', which means that such a setting is the same for your entire Magento installation and there's no possibility to use a different setting on a lower level. This is currently somewhat abstract, but you'll soon see how these levels can be used in practice.
If you'd like to add Websites, Stores, and Store Views, this is the area to do so. Please choose names that make sense as soon as you're going to add anything. The ''default'' names should only be used if you're sticking with one single setup.
It's important to know that this setup doesn't mean that there's a direct connection with the URL/domain names you're using. You can route URL's to Websites or Stores, as well as Store Views. The different possibilities for your domain are as follows:
myonlinestore.com: This sets up your store on a new domain.myonlinestore.com/newstore: This sets up the new store in a subfolder on your existing domain.newstore.myonlinestore.com: This set up your store on a subdomain of your existing domain.
In practice, we often see the first option, where we have a single instance of one Website, one Store and one Store View. This is what we'll be doing throughout this book. The second and third options are often used to offer the same website in a different language, for different Store Views. Using the principles above we can create the following structure:

In our example, we're working with the simplest form: one Website, one Store and one Store View. This is the right part of the previous image.
Once this is clear, it's time to actually go through the settings of Magento and make changes wherever needed.
Navigate to System | Configuration using the menu. In there, the first screen you'll see is the General section holding data, such as your base country and countries that are allowed. Note that if you're not selling internationally, it would be good to limit the available countries here, so that visitors are not able to select countries that you do not want to do business with.

There are two things here that refer back to the topic we learned in the previous section:
- In the top-left corner you can see that it is possible to select a different Website or Store View, if you have any. This is called the Scope Selector. If you do not change anything, you'll be changing the Default Config option which means that the settings being done will also be saved for any Website or Store View that you may add in the future. For our single online store, it's fine to keep this setting as Default Config, but pay attention when you are running multiple stores! Keeping an eye on the correct scope is in that case very important! Changing settings in the incorrect scope will almost certainly lead to unexpected behavior.
- On the right-hand side of every form setting, you will see [GLOBAL], [WEBSITE], or [STORE VIEW]. This means that the particular setting can be changed at that level. The Postal Code is Optional for the following countries section in the example above for instance is a [Global] setting. This means that if you decide to turn off postal (ZIP) codes for Ireland (they do not use such a system), for instance, then all websites and stores within your Magento installation will stop asking for the postal code. On the other hand, the Allow Countries section is changeable to Store View level, which means that it is possible to run an international and national online store next to each other within the same Magento environment.
Scrolling down a bit shows some other settings that you need to take care of:

In here, set the Timezone you're in and determine your regular working days. Don't worry, as your online store will also be available during weekends. Below that, enter your Store Name and contact details. The VAT Number field is important for EU businesses, and we will cover more on that topic later on.
Next, we'll have a look at the settings of the Web section (click on the Web menu on the left):

In this section you'll see the Base URL of your store, and in this case our local installation. If you installed Magento at a hosting provider, probably this is already showing your domain name. Although the setting can be changed, please be careful, because changing it without taking the correct steps could break your store!
To explain better what the default content of these fields means, the {{unsecure_base_url}} value used in first field, Base URL, is used in the fields below. Note that all fields below the Base URL field use that variable. Hence, changing the first field, will automatically change the others as well.
You might have noticed that we did not mention the first fields of the Web section, named, Url Options and Search Engine Optimization. The default settings are generally fine, but it's still good to know a little bit more on this subject.
When working with Magento, or any other web solution, it's very important to optimize your website for the search engines as much as possible. Although your customers and visitors are the most important, it will lead you nowhere if your store is doing badly in the search engines. There's really a lot you can do in this area. As mentioned, by default, Magento has already enabled Search Engine Friendly URLs. This means that the URL shown in the top of your browser would for instance look like this:
http://myonlinestore.com/shoes/womens-boot-brown
Whereas a non-optimized URL could look as follows:
http://myonlinstore.com/ catalog/product/view/id/1537/category/28
The Use Web Server Rewrites setting is set to Yes by default in Magento. This means that the Search Engine Friendly URLs will be used, which is good, but your webserver has to support it though. When you're working with Apache (or locally Xampp) this generally works fine. You should be able to find a file in the root of your site named .htaccess. Note that the file starts with a point and that it cannot have an extension (like .txt). Whenever you're editing this file, you need to keep the name as it is.
There's much, much more to discover when we are talking about Magento and Search Engine Optimization. We suggest that you first learn to use all the Magento basics in this book. After that, come back here and find more information on Magento and SEO using the following links:
http://www.wamda.com/2012/10/how-to-optimize-seo-on-a-magento-e-commerce-site
http://www.boostingecommerce.com/ultimate-magento-seo-tips-and-tricks-part-1-content
http://yoast.com/articles/magento-seo/
We continue to work in our settings page, in the Default Pages area. For example, it can be used to change which page will be the homepage of your store. In a default setup, we can leave it unchanged.
In the European Union (EU) website owners need to ask their visitors if they want to allow the usage of cookies. Cookies are small pieces of information stored on the local computer of your visitor. Magento uses them as well, so as an owner in the EU (or even if you're outside of the EU but targeting EU visitors) you need to ask your visitors for permission. Since Magento CE 1.7 there's a function for this, which you can enable the Session Cookie Management area in the current Web section. Set the Cookie Restriction Mode field to Yes, save your settings and look at the results in the frontend of your store:

In the next part, we'll look at the Design section. So save again and click on Design on the left-hand side. The first parts are used to set the design of your store and working with themes. We will cover more on this in Chapter 9, Customizing Your Store's Appearance.
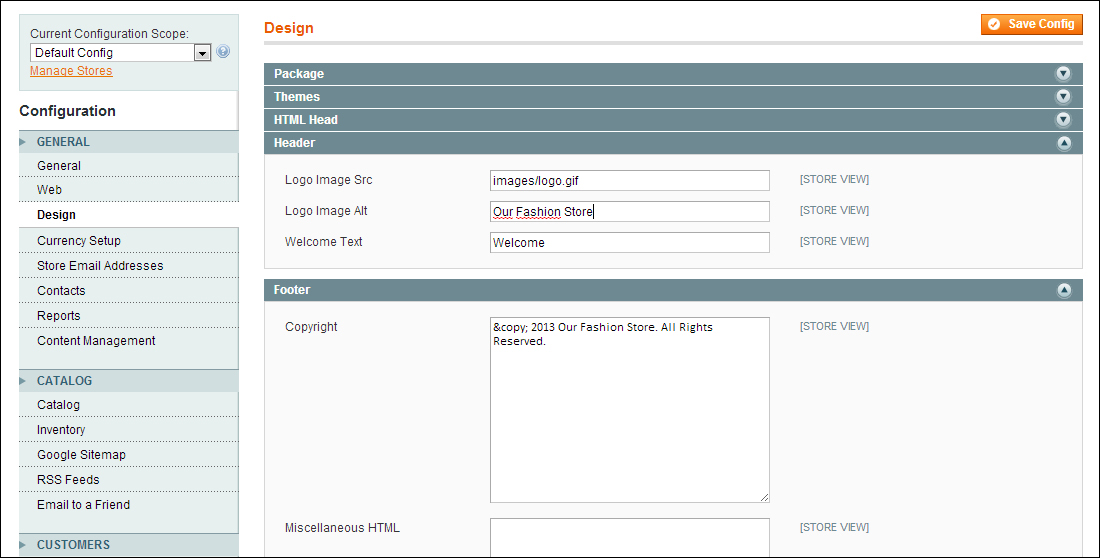
We'll look at the settings at HTML Head, where you can set your Favicon icon (used by browsers) and more important, make some SEO-related settings. Enter your Default meta title and description, just like in the following example. You may also enter a couple of keywords in the Default Keywords field, but please be aware that search engines do not really pay attention to it anymore. So don't overdo it.

You may also use the Title Suffix field if you'd like to see your store name at the end of every meta title, but it's not so common anymore to do so. Also pay attention to the Default Robots field. By default it will allow search engines to index your site. If you're on a local test installation, you do not have to worry: Google cannot access and hence will not index it. But if you're using a hosting company, you might want to allow or disallow access to your website.
A bit lower on the same page you'll find settings for Header and Footer of your store. These fields also contain some default data that you need to overwrite with your own, since these defaults remain visible to your visitors. Note that the logo field can be overwritten, but then there's no possibility to upload it. You need to move your logo image manually by using your FTP client to the correct location, which is skin/|frontend/|default/|default/|images. Note that this path is only correct if you are still using the default Magento theme. If you're on a local installation of Magento, you can simply copy and paste your file to the correct location.
Tip
In most cases, you will not be using the default theme of Magento, but will have installed something different. If you plan to do so, it could very well happen that changing the logo of your theme will work differently. Please read Chapter 8, Configuring Shipping for further instructions on installing a theme and also read the theme documentation to find out how to configure it.
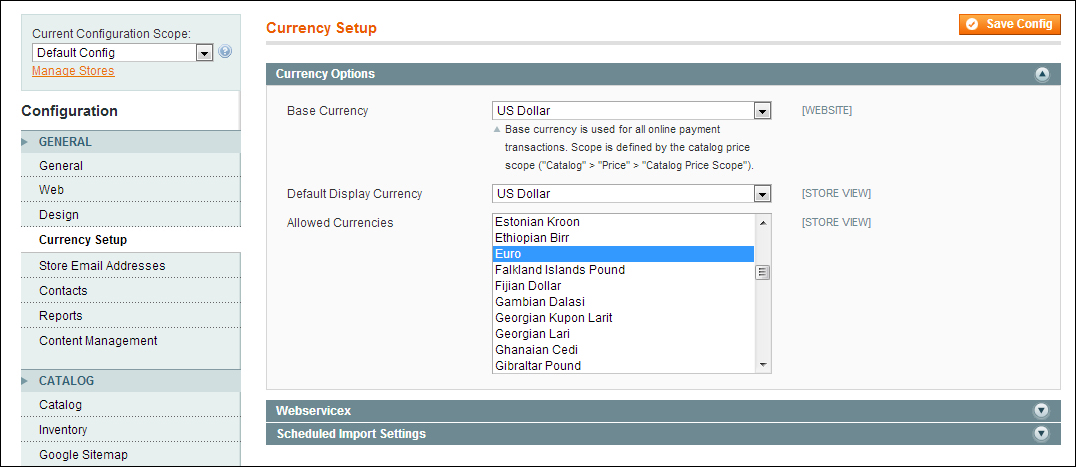
In the next section, Currency Setup, you can set how your online store should work with currencies. It's quite common to work with a single currency per Store View, but that isn't mandatory:
Please note the following:
- The Default Display Currency field can only be set on the Website level. This is the currency that is used to display the price of your products. If you want to use multiple stores using different default currencies, this automatically means that you need to create more Magento Websites. A Store View won't work in such a case.
- If you want to allow other currencies besides the default one, you can enable them by clicking on them in the list. If you want to select multiple currencies, you should press the Ctrl key while you click on them.
The last things we are going to do for now is to set up some contact details in the Store Email Addresses section:
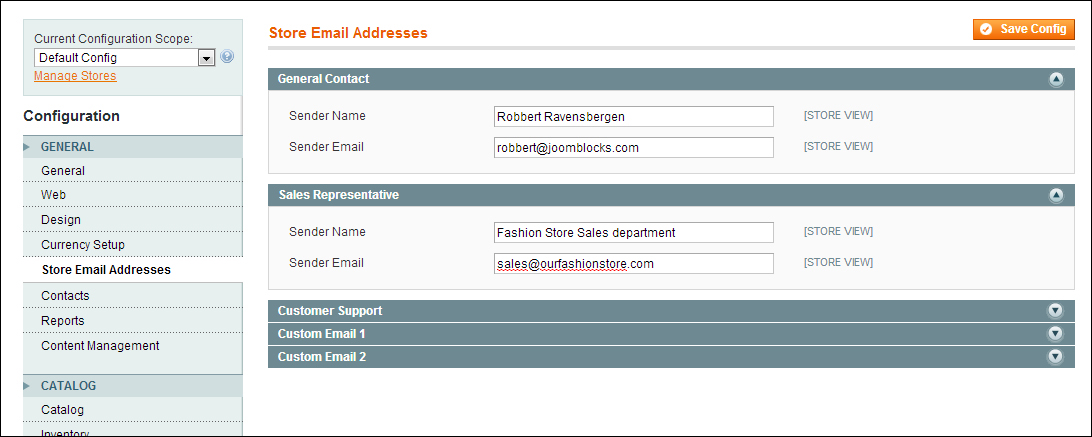
Magento works with various e-mail addresses that will be used as the sender of automatic messages by your store. Please make sure that you fill all of them. If you're a small shop owner, it's fine to use the same e-mail address for all fields, but just don't leave the defaults.
You just started to set up and personalize your online store, and also know about the hundreds of possible settings that Magento offers. There's much more actually, as you may have noticed that we only discussed the first part of the Configuration area. The other settings will be discussed during the upcoming chapters, and just at the moment when you need them.