
Calculating and setting up your tax system isn't maybe the first thing you would think of when starting your online store. But it is a very important step to take and the best time to do it is right now, before you set up your product catalog. Magento offers an extended system of tax calculations, making almost anything possible. On the other hand, there is unfortunately no ''one size fits all'' approach. Tax laws and calculations simply differ in each country and region.
So, the bad news is, we cannot give you an example for every single country here. So we have to stick with describing what Magento can do in terms of tax calculations. We are neither tax experts, so please always refer to your local tax laws to make sure that you apply to them.
If for instance, you'd like to know more about the United States sales taxes, Wikipedia is a good starting point:
http://en.wikipedia.org/wiki/Sales_taxes_in_the_United_States
Your taxes setup will contain the following elements. The majority of the needed functions can be found in the Sales menu as follows:
- General taxation settings: Navigate to System | Configuration | Sales | Tax
- Product Tax classes: Navigate to Sales | Tax | Product Tax Class
- Customer Tax classes: Navigate to Sales | Tax | Customer Tax Class
- Customer groups: Navigate to Customers | Customer groups
- Tax zones and rates: Navigate to Sales | Tax | Manage Tax zones and rates
- Tax rules: Navigate to Sales | Tax | Manage Tax rules
And finally also your products, where you'll connect your product to a Product Tax Class, followed by customers, who will be part of a specific Customer group. In most cases, you'll need a combination of all of these settings, which can be quite overwhelming.
At the beginning, let's start by making some general settings that will affect our tax calculations. Navigate to System | Configuration | Sales and click on the Tax section:
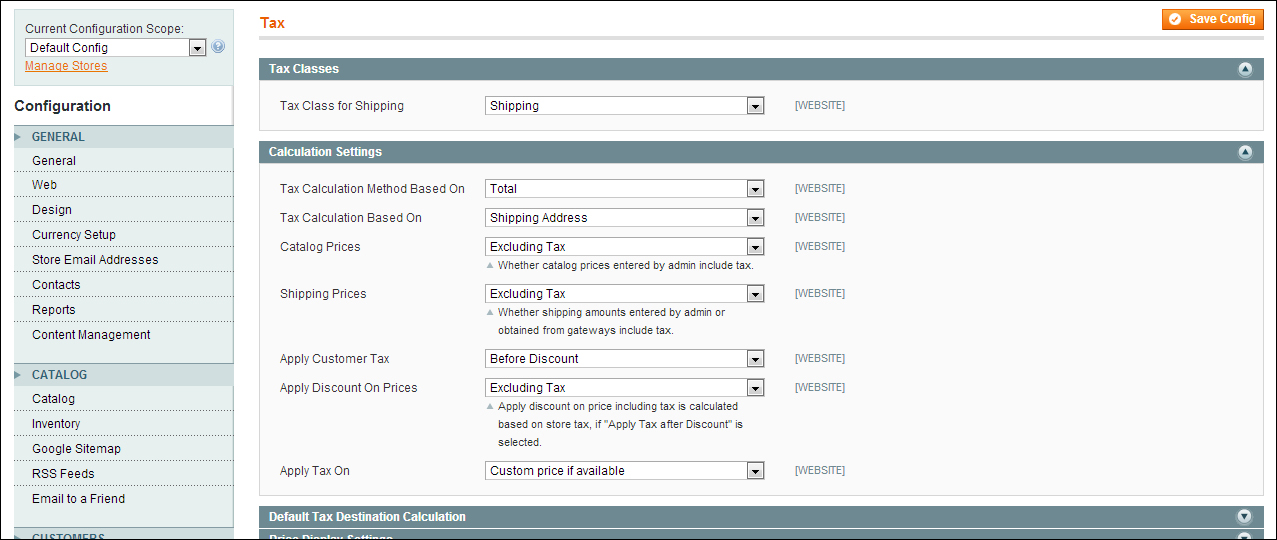
In here you'll find the following settings:
- Tax Class for Shipping: Set the Product Tax Class that is applicable for your shipping cost. By setting a separate (by default for each available) shipping class you have the possibility to use a different rate for shipping if you need to.
Following that, click on the Calculation Settings area:
- In the Tax Calculation Method Based On field, select whether the tax is based on the price of each single unit, or on the row total, which is the total for a line item in the order.
- In the Tax Calculation Based On field, select whether the tax is calculated based on the customer's shipping address, billing address, or on your store's shipping origin.
- For the Catalog Prices field, enter whether the catalog prices you'll enter for your products include or exclude tax.
- At the Shipping Prices field, select whether the shipping amount that you'll set later on will include or exclude tax.
- In the Apply Customer Tax field, enter whether tax is applicable on the original price or (if available) on the discounted price for a product.
- For the Apply Discount on Prices field, set if discounts applied include or exclude the tax.
- In the Apply Tax On field, enter if tax is applied to a custom price or to the original price.
If you aren't sure about the effect of a setting, it's fine to come back here once you have entered some products to see the result of applied settings before bringing your store live.
Note that all the mentioned settings can be set on Website level, so everything you set here will have the same behavior for all Stores and Store views within that particular Website.
Scroll down a bit and click on the Default Tax Destination Calculation, Price Display Settings, and on the Shopping Cart Display Settings area:
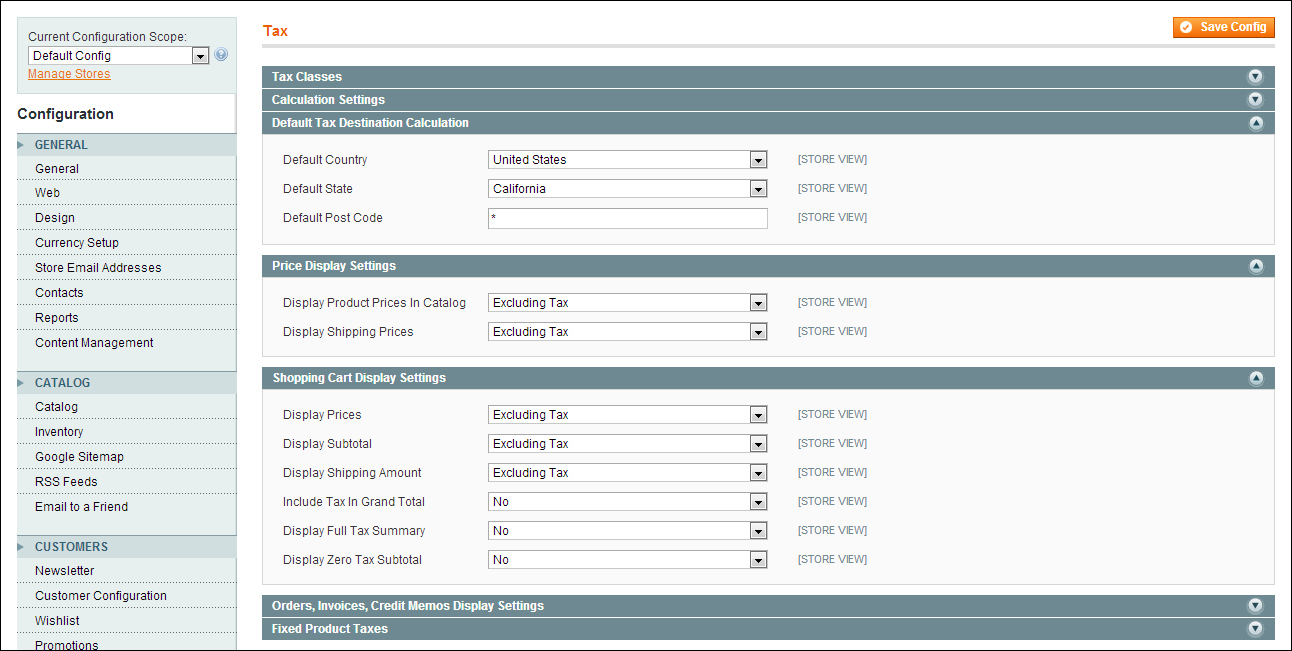
Here, begin with selecting the correct country (and state if applicable). There are only a couple of countries for which a state is available. Otherwise just leave the * mark. Next, you should set how your sales prices are to be displayed. Do you want your products and shipping costs to appear including or excluding tax in the frontend? The same questions appear for the cart display. On top of that you can also specify how to show totals and if a zero tax amount should be visible or hidden.
Underneath this section, exactly the same questions need to be answered for orders, invoices, and credit notes. It makes sense to keep all settings the same, so that your customers constantly see the same display of calculated taxes.
Tip
The last part of this settings page contains a special function named Fixed Product Taxes. This is used when you need to apply a tax on your product, where the amount depends on the product, and not on the product price. An example would be the European Waste Electrical and Electronic Equipment Tax, which consumers need to pay when purchasing new equipment. We'll not discuss this specific topic any further here, but if you need more information about it, please refer to: http://theblog.enova-tech.net/2011/04/magento-weee-and-fpt-fixed-product-tax-tutorial/ and http://en.wikipedia.org/wiki/Waste_Electrical_and_Electronic_Equipment_Directive.
The usage of Product Tax Classes is rather simple. You need at least one if you want to calculate all taxes:
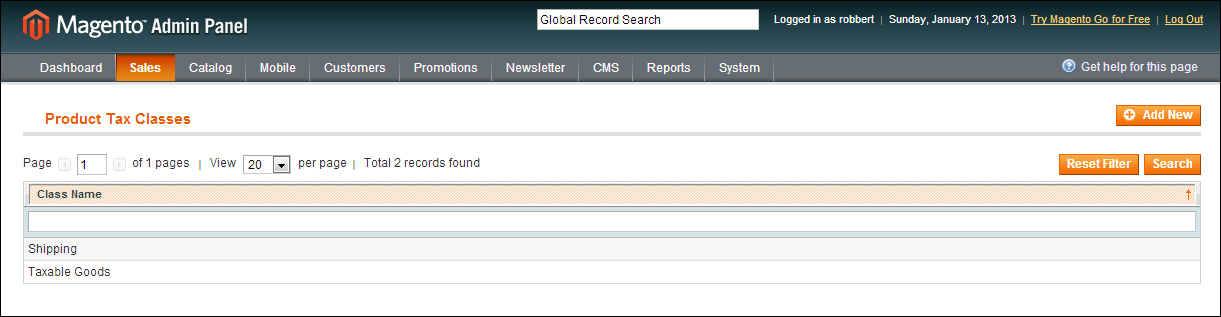
By default, Magento has already created two for you: Shipping and Taxable goods. When do you need more? Well, for instance, if in your situation you are selling products in different groups, where different tax rates are applicable. Often you'll see that products such as food have a lower tax rate than other goods, such as apparels and hardware. If you are going to sell both the categories, you simply need to create an additional Product Tax Class here, which is as simple as providing a name for it.
It's not enough to simply set up a Product Tax Class. This is because the tax you're calculating does not only depend on the product, but also on the customer you're selling it to. This is where the Customer Tax Classes comes in. You can find it in the Sales | Tax menu;

By default, there's only one tax class created, the Retail customer class. This could be enough if you're only selling to consumers, but in the case of ''business to business sales'', you often need more than one. Also here, the Customer Tax Class is just a name, that will be easy to add. The functionality is defined somewhere else, which we'll see in a minute.
A quick side step to Customer groups will be used to create several groups of customers. More on using these will follow in Chapter 6, Customer Relationships, but for now it is important to know that they exist. A Customer group is connected to the Customer Tax Classes. A Customer group can only have one Customer Tax Class associated to it. A Customer group will be assigned to every future (registered) customer and therefore influences the way taxes are calculated for that customer. You can find the Customer groups in the Customer menu as follows:

In here it becomes more important; this is the area where you'll define the different rates that Magento needs to calculate. Click on Sales | Tax | Manage Tax Rates in the menu and you'll see that Magento by default already has two predefined rates as seen in the following screenshot:

In fact these are only examples and if you do not need them, just delete or change them and create your own. But let's have a look at what's available, just to explain what you should do:
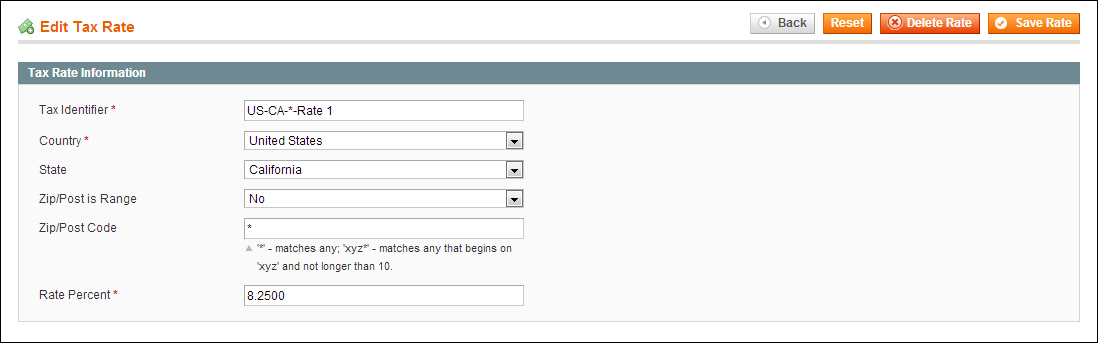
The identifier is something you can choose yourself. In here, it was chosen to use the abbreviation of the county, state, zip code, and the rate it will be used for. This comes in handy when you have to read the codes, but it isn't mandatory to do so. If you select a country where using the United States isn't applicable, the field will automatically become unavailable. The rate field determines the percentage that will be calculated.
Tip
There are situations where you will have to enter a lot of tax rates. For instance, if you need to enter all tax rates for the United States it might take you a while. We found a blogger on the net offering a csv file that you may import, but be careful, since the file is a bit older and we cannot guarantee that the rates didn't change since then: http://rricketts.com/magento-us-tax-csv-file-all-50-states/ and read more on the United States taxes here at: http://en.wikipedia.org/wiki/Sales_taxes_in_the_United_States. If you are using a csv file, use the Sales | Tax | Import/Export Tax rate menu to import your file. You may even create your own if that is convenient in your case!
In the last screen (which is actually at the top of the Sales | Tax menu) we need to bring everything together by entering our Tax rules:

In here, there's also one default record. Let's take a closer look at that one:

The first field is just a name again, that you can use to describe your tax rule. A tax rule contains one or more Customer Tax Class, one or more Product Tax Class, and one or more Tax Rate.
In the previous example this means that:
If a product is sold to a customer in the Retail group and the product has been assigned the ''Taxable goods'' class, the rate for the corresponding state will be applied. By going through the setup in the same order as we discussed it here, you should be able to define your own rates and use them in the way you need to.