
The declarative means of XAML provide quite a number of possibilities, including creating all kinds of shapes (see Chapter 5), animating elements (see Chapter 7), and playing audio and video data (see Chapter 8). However, you can unleash the real power of Silverlight only if you add a bit of code into the mix. With previous Silverlight versions, JavaScript itself proved to be a powerful tool, since Silverlight exposes a JavaScript API to developers. Part III of this book, especially Chapter 12, will cover JavaScript access in greater detail.
Silverlight 2 offers a second way to implement dynamic effects for an application: you can use a number of .NET languages, including C#, to provide code for a Silverlight application. Although this part of the book focuses on declarative XAML, we cannot do without a certain amount of code. This book prefers C# (since the market share of that language seems to be the highest among all .NET languages), but porting the examples to Visual Basic or other languages is trivial.
This chapter explains Silverlight event handling—specifically, what events are and how to intercept and process them. Most of the event handling code will be found in the XAML code-behind file (the Filename.xaml.cs file).
Most Silverlight code examples consist of at least three files—an HTML file, an XAML file, and a C# file. As long as there are no big surprises in the HTML file, I will not reproduce it here. However, in the code archive for this book (see http://www.oreilly.com/catalog/9780596519988), you will find the complete set of files for each application, including HTML files.
Note
When in doubt regarding the roles of the HTML, XAML, JavaScript, and C# files, review Chapter 3, where the basic concepts are explained.
A Silverlight event is something that occurs while a Silverlight application is running. This “something” could be a mouse click, a mouse movement, keyboard input, the application receiving or losing focus, the application being fully loaded, or something else altogether. All events are tied to an object, so it makes a difference whether the mouse click occurs while the mouse pointer is, say, over a given rectangle or text block.
Silverlight currently supports more than two dozen events, and future releases may have even more. This chapter focuses on the most important ones, and provides the background knowledge you’ll need to work with previously unknown events.
An event handler is a piece of code that is executed once an event occurs or is fired. The concept of both events and event handlers is very similar to the concept of JavaScript events in HTML.
There are two ways to assign an event handler to an event—use
declarative means or use code. Let’s start with the first option and use
mouse events. Silverlight supports several mouse events, and one of them
is MouseLeftButtonDown, which is when
a user clicks the left mouse button (this event occurs before the mouse
button is released!).
In our first example, the “Hello World” sample file from Chapter 3 resurfaces. It contains three elements: the
surrounding <Canvas>, a <Rectangle>, and a <TextBlock>. We are adding event handlers to these three elements.
Adding an event handler is easy: assign an attribute that has the same
name as the event (so, in this example,
LeftMouseButtonDown, not
OnLeftMouseButtonDown, as you would do in JavaScript). The
value of the attribute is a method name. This method gets called once
the event is fired. Example 6-1
shows the XAML file including the three event handlers.
Example 6-1. Using event handlers, the XAML file (Page.xaml, project MouseClick)
<UserControl x:Class="MouseClick.Page"
    xmlns="http://schemas.microsoft.com/client/2007"
    xmlns:x="http://schemas.microsoft.com/winfx/2006/xaml"
    Width="400" Height="300">
  <Grid x:Name="LayoutRoot" Background="White">
    <Canvas>
      <Rectangle Width="200" Height="75" Stroke="Orange" StrokeThickness="15"
         />
      <TextBlock FontFamily="Arial" FontSize="32" Canvas.Left="30" Canvas.Top="20"
        Foreground="Black" Text="Silverlight" MouseLeftButtonDown="mouseClick" />
        </Canvas>
  </Grid>
</UserControl>
The C# event handler method, residing in the Page.xaml.cs file, automatically receives two arguments, just as ASP.NET event handler functions do:
All that our simple event handling function does is to change the
text once the TextBlock element has been clicked. Example 6-2 has the code in the XAML code-behind file, as I am referring to the
.xaml.cs files.
Example 6-2. Using event handlers, the XAML C# file (Page.xaml.cs, project MouseClick)
using System;
using System.Windows;
using System.Windows.Controls;
using System.Windows.Documents;
using System.Windows.Ink;
using System.Windows.Input;
using System.Windows.Media;
using System.Windows.Media.Animation;
using System.Windows.Shapes;

namespace MouseClick
{
    public partial class Page : UserControl
    {
        public Page()
        {
            // Required to initialize variables
            InitializeComponent();
        }

        private void mouseClick(object sender, MouseButtonEventArgs e)
        {
            (sender as TextBlock).Text = "ouch!";
        }

    }
}
Most of the code is automatically generated, so in some of the future examples, we will reprint only the relevant portions of the code. Again, the book downloads will always contain complete examples.
Tip
If you use Visual Studio 2008 and type in the name of an event
handling attribute such as MouseLeftButtonDown, the IDE can
automatically create the method, including its signature, in the
code-behind file.
When you now click on the text block, the text in the text block
changes (see Figure 6-1). Unfortunately, no event
bubbling is currently being implemented. Imagine that there would also
be a MouseLeftButtonDown event
handler for the Rectangle element.
This element would not receive the click event.

The sender property assigned to the event handler
functions is therefore very convenient when you want to change the
object that fired the event. A general rule of thumb is that every
property (e.g., Foreground for a
<Rectangle> object) is directly exposed to the C#
code (and to JavaScript as well, as Part IV
of this book will show). You just have to get the actual property type
right.
Have a look at where two more mouse events are introduced:
MouseHover (when the mouse pointer is over the display area
of an element) and MouseLeave (when the mouse pointer
leaves the display area of an element). Example 6-3 sets up an XAML file with these two events and
also a specific foreground color.
Example 6-3. Changing event target properties, the XAML file (Page.xaml, project MouseHover)
<UserControl x:Class="MouseHover.Page"
    xmlns="http://schemas.microsoft.com/client/2007"
    xmlns:x="http://schemas.microsoft.com/winfx/2006/xaml"
    Width="400" Height="300">
  <Grid x:Name="LayoutRoot" Background="White">
    <Canvas>
      <Rectangle Width="200" Height="75" Stroke="Orange" StrokeThickness="15" />
      <TextBlock FontFamily="Arial" FontSize="32" Text="Silverlight"
        Canvas.Left="30" Canvas.Top="20"
        Foreground="LightGray" MouseEnter="high" MouseLeave="low" />
    </Canvas>
  </Grid>
</UserControl>
The XAML code-behind C# file (see Example 6-4)
accesses the sender argument and then just sets the
Foreground property. The data type of Foreground is a brush (see Chapter 5), so we need to create a SolidColorBrush object. As an effect, the text
is displayed in a light gray at first, but when the mouse hovers over
it, it is colored with a full black. Once the mouse pointer leaves the
display area of the text, it goes back to light gray again. Figure 6-2 shows both states of the text.
Example 6-4. Changing event target properties, the XAML JavaScript file (MouseHover.xaml.cs, project MouseHover)
private void high(object sender, MouseEventArgs e)
{
    (sender as TextBlock).Foreground = new SolidColorBrush(
        Color.FromArgb(0xff, 0, 0, 0));
}

private void low(object sender, MouseEventArgs e)
{
    (sender as TextBlock).Foreground = new SolidColorBrush(
        Color.FromArgb(0xff, 0xd3, 0xd3, 0xd3));
}
The second, and programmatic, approach to assign event handling code to an event is to use event listeners. You assign a piece of code that “listens” for the occurrence of an event. When it hears an event, it handles it appropriately. The main advantage of this approach over declarative event handlers is that it is quite easy to remove an event listener. The disadvantage is that event listeners are not as intuitive, especially for developers with a strong HTML background. But once you have seen it, getting it to work in your own applications is not hard at all.
Let’s start with the XAML code. As you can see, there is no
attribute event handler for the click event. However, there is one for
another important event: Loaded. The Loaded event is fired once an element or, as in Example 6-5, the whole XAML file has been fully loaded. We use
this event to set up the actual event listeners.
Example 6-5. Using event listeners, the XAML file (Page.xaml, project MouseClickListener)
<UserControl x:Class="MouseClickListener.Page"
    xmlns="http://schemas.microsoft.com/client/2007"
    xmlns:x="http://schemas.microsoft.com/winfx/2006/xaml"
    Width="400" Height="300">
  <Grid x:Name="LayoutRoot" Background="White">
    <Canvas Loaded="canvasLoaded">
      <Rectangle Width="200" Height="75" Stroke="Orange" StrokeThickness="15" />
      <TextBlock FontFamily="Arial" FontSize="32" Canvas.Left="30" Canvas.Top="20"
        Foreground="Black" Text="Silverlight"
        x:Name="ClickTarget" />
    </Canvas>
  </Grid>
</UserControl>
But now on to the event listeners themselves. First, you have to
find the element to which you would like to attach the event listener.
As you may have noticed in Example 6-5, the
<TextBlock> element received a name attribute (x:Name, to be
exact). The Silverlight .NET API can find elements by their name; you
just have to use the FindName()
method, which every element in a XAML file supports.
So, we have to get access to an element within the XAML. Remember
that event handler functions automatically receive a reference to the
sender as their first argument. Therefore, we can use the sender and its
FindName() method to access the text block:
private void canvasLoaded(object sender, RoutedEventArgs e)
{
  TextBlock tb = (sender as Canvas).FindName("ClickTarget") as TextBlock;
Tip
An alternative way to access the text block is to access it
directly by its name; IntelliSense already knows of ClickTarget. This is obviously more
convenient than FindName();
however, if you are using JavaScript, you will have to rely on
FindName() (or findName(), as it is called for the
scripting language) quite often. Therefore, we will use FindName() from time to time as
well.
Once we have the text block (or any other element), we can assign an event handler to it. You do it “the .NET way” by just “adding” a new event handler to the associated event:
tb.MouseLeftButtonDown += new MouseButtonEventHandler(mouseClick);
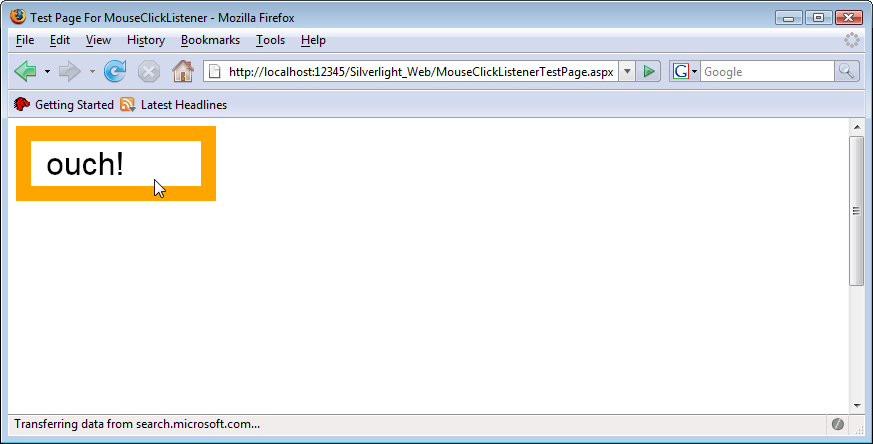
All that’s left to be implemented is the actual event handler, which again changes the text in the text block. Example 6-6 shows the complete code for the C# file, and Figure 6-3 depicts the output in the browser.
Example 6-6. Using event listeners, the XAML C# file (Page.xaml.cs, project MouseClickListener)
using System;
using System.Windows;
using System.Windows.Controls;
using System.Windows.Documents;
using System.Windows.Ink;
using System.Windows.Input;
using System.Windows.Media;
using System.Windows.Media.Animation;
using System.Windows.Shapes;

namespace MouseClickListener
{
    public partial class Page : UserControl
    {
        public Page()
        {
            // Required to initialize variables
            InitializeComponent();
        }

        private void canvasLoaded(object sender, RoutedEventArgs e)
        {
            TextBlock tb = (sender as Canvas).FindName("ClickTarget") as TextBlock;
            tb.MouseLeftButtonDown += new MouseButtonEventHandler(mouseClick);
        }

        private void mouseClick(object sender, MouseButtonEventArgs e)
        {
            (sender as TextBlock).Text = "ouch!";
        }
    }
}
We will discuss removing event listeners in Mouse Position later in this chapter.
Silverlight 2 supports these five mouse events, three of which you have already seen:
The events themselves are self-explanatory, but we should probably
discuss the difference between MouseLeftButtonDown and
MouseLeftButtonUp. When a user clicks on an element, first
MouseLeftButtonDown occurs, and then
MouseLeftButtonUp. So, a mouse click is actually complete
only when MouseLeftButtonUp has been fired. In the real
world, the distinction makes sense in only one special case: the user
hovers the mouse over an element, clicks the button, holds the button, and
then moves the mouse away again. When you use MouseLeftButtonUp, it isn’t fired over the
target object, which is desirable in some scenarios (think buttons) and
undesirable in other scenarios (think drag and drop).
Note
The mouse event handling mechanism of the vector graphics format SVG, for instance, supports three mouse events: button pressed, button released, and a completed mouse click.
When you capture a mouse event, you want to know where the mouse
pointer currently is. The “where” question has previously been answered
with “on this object.” More specifically is the question “At which
position?” This is where the second argument passed to event handler
functions, eventArgs, comes into play. It provides access
to this very information, by supporting the getPosition() method.
The getPosition() method supports an optional
argument, which is any XML element. If this is set, getPosition() retrieves the
relative position of the mouse to the given
element. Otherwise, you get the absolute coordinates (i.e.,
if you do not provide an argument or if you provide
null).
The return value of a getPosition() call is an
object with the two properties, x and y, which
of course contain the horizontal and vertical positions of the mouse
pointers. As always with the Web, the origin is in the top-left
corner.
Example 6-7 contains the XAML markup to track
mouse movements. Note how the <TextBlock> property is used to
display the location of the mouse pointer. Also, note that the main
canvas’s Loaded event again executes a method called
canvasLoaded().
Example 6-7. Determining the mouse position, the XAML file (Page.xaml, project MousePosition)
<UserControl x:Class="MousePosition.Page"
    xmlns="http://schemas.microsoft.com/client/2007"
    xmlns:x="http://schemas.microsoft.com/winfx/2006/xaml"
    Width="400" Height="300">
  <Grid x:Name="LayoutRoot" Background="White">
    <Canvas Loaded="canvasLoaded">
      <Rectangle Width="200" Height="75" Stroke="Orange" StrokeThickness="15" />
      <TextBlock FontFamily="Arial" FontSize="28" Canvas.Left="25" Canvas.Top="25"
        Foreground="Black"
        Text="X: ?? Y: ??" x:Name="MousePosition" />
    </Canvas>
  </Grid>
</UserControl>
The task of the C# code is to determine and output the current mouse pointer
position whenever the mouse is moving. The associated event name is
MouseMove, and an event listener is ideal for this:
private void canvasLoaded(object sender, RoutedEventArgs e)
{
  Canvas c = sender as Canvas;
  c.MouseMove += new MouseEventHandler(mouseMove);
}
All that’s left to do is to write the event listener, so we will
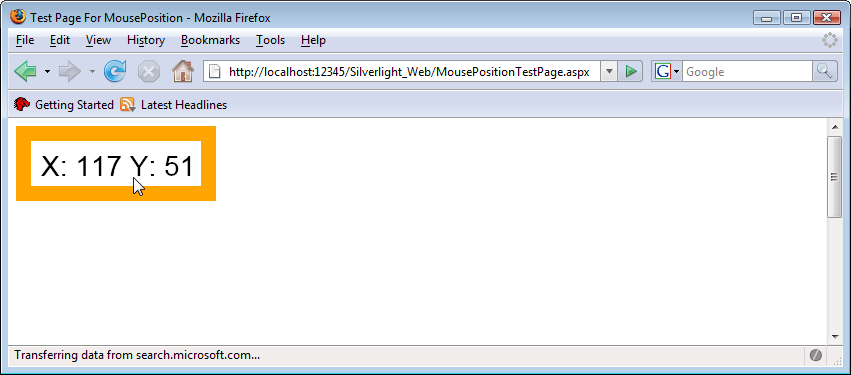
use an anonymous function here. The code determines the current mouse
position using GetPosition() and writes it into the
text box. Refer to Example 6-8 for the complete C# code,
and to Figure 6-4 to see how this
sample looks in the browser.
Example 6-8. Determining the mouse position, the XAML C# file (Page.xaml.js, project MousePosition)
private void mouseMove(object sender, MouseEventArgs e)
{
  double x = e.GetPosition(null).X;
  double y = e.GetPosition(null).Y;
  MousePosition.Text = String.Format("X: {0} Y: {1}", x, y);
}
As mentioned before, you can also remove event listeners. To do this, you “remove” from the event listener the object to which the event listener has been attached. To demonstrate this mechanism, we implement the hover effect again, but this time it can be enabled and disabled by clicking on the text. We start with the previous XAML markup from Example 6-7. The C# code, however, changes quite a bit. At first, we define two global properties. One will be used to save the attached event handler, and the other one is a Boolean value that tells the script whether we currently want to trace the mouse:
private Boolean traceMouse = false;
private MouseEventHandler handler = null;
Assigning the event handler to the canvas’s Loaded
event changes a bit, too. We assign a new event handler method called
toggle() to it:
private void canvasLoaded(object sender, RoutedEventArgs e)
{
  Canvas c = sender as Canvas;
  c.MouseLeftButtonDown += new MouseButtonEventHandler(toggle);
}
The toggle() method first needs to check whether
the mouse pointer coordinates are traced. If not, tracing must be
enabled (since we want to toggle the behavior). We use the same code as
before: whenever the mouse pointer moves, the new coordinates are
displayed. Notice how the new event handler is saved in the handler property before it is used (which
facilitates removing this event handler later on):
private void toggle(object sender, MouseEventArgs e)
{
    if (!traceMouse)
    {
        handler = new MouseEventHandler(mouseMove);
        (sender as Canvas).MouseMove += handler;
    }
If the mouse has been traced before (traceMouse
equals true), it must be deactivated; also, the event
listener must be removed. A call to
removeEventListener() takes care of that; remember that
you have to use the addEventListener() return values as
the second argument!
    else
    {
        (sender as Canvas).MouseMove -= handler;
    }
Don’t forget to toggle the traceMode variable from
true to false or from false to
true:
    traceMouse = !traceMouse;
}
Example 6-9 contains the complete code of the XAML C# file. If you run this example in the browser, you will need to click on the text to start seeing the mouse pointer coordinates. Clicking on the text again stops this.
Example 6-9. Adding and removing event listeners, the XAML JavaScript code (Page.xaml.js, project MousePositionToggle)
using System;
using System.Windows;
using System.Windows.Controls;
using System.Windows.Documents;
using System.Windows.Ink;
using System.Windows.Input;
using System.Windows.Media;
using System.Windows.Media.Animation;
using System.Windows.Shapes;

namespace MousePositionToggle
{
    public partial class Page : UserControl
    {
        private Boolean traceMouse = false;
        private MouseEventHandler handler = null;

        public Page()
        {
            // Required to initialize variables
            InitializeComponent();
        }

        private void canvasLoaded(object sender, RoutedEventArgs e)
        {
            Canvas c = sender as Canvas;
            c.MouseLeftButtonDown += new MouseButtonEventHandler(toggle);
        }

        private void toggle(object sender, MouseEventArgs e)
        {
            if (!traceMouse)
            {
                handler = new MouseEventHandler(mouseMove);
                (sender as Canvas).MouseMove += handler;
            }
            else
            {
                (sender as Canvas).MouseMove -= handler;
            }
            traceMouse = !traceMouse;
        }

        private void mouseMove(object sender, MouseEventArgs e)
        {
            double x = e.GetPosition(null).X;
            double y = e.GetPosition(null).Y;
            MousePosition.Text = String.Format("X: {0} Y: {1}", x, y);
        }
    }
}One of the most difficult JavaScript effects to implement is drag and drop. Not only can it be hard to control individual elements on the page, but browser incompatibilities ultimately break the developer’s neck. Silverlight does not come with built-in drag-and-drop support, but it is possible to implement this with rather little effort. If you plan it appropriately, the code will come together quickly.
Drag and drop always consists of three phases, which can be directly mapped on Silverlight mouse events:
MouseLeftButtonDownThe user clicks on a draggable element and the application enters drag mode.
MouseMoveThe user moves the mouse, while the mouse button remains clicked. The selected object changes position according to the current position of the mouse pointer.
MouseLeftButtonUpThe user releases the mouse button; the application leaves drag mode.
Actually, this is about 50% of the solution. The other 50% comes from a different challenge. Let’s assume that the draggable element is a 10×10 pixel square. The user clicks somewhere on the square and drags it. Let’s further assume that the user releases the square at some position—for instance, at (50,40) so that the x coordinate is 50 pixels and the y coordinate is 40 pixels. Where should the JavaScript code now put the square? At (50,40)? This would place the top-left corner of the square, so the position would be correct only if the user initially dragged the square by clicking exactly on the top-left corner. This is rarely the case, of course.
So, working with the absolute position is not a good solution.
Instead, we will work with deltas: how far did the user move the mouse?
In the first phase of drag and drop, the C# code records the current
position of the mouse pointer. Whenever the mouse is moved, the new
position of the mouse pointer is retrieved. Based on these two values,
C# can calculate by how many pixels the mouse has been moved—for
example, 15 pixels to the right and 20 pixels to the bottom. These delta
values can then be applied to the actual object that will be moved: it
also must be moved 15 pixels to the right and 20 pixels to the bottom.
(In reality, these pixel values are usually much smaller, since the
MouseMove event is fired so often.)
This algorithm is the missing half of drag and drop. Writing the code is no big challenge anymore. We start with the XAML code in Example 6-10. We once again have the surrounding rectangle and a black circle that will serve as the draggable object. Notice how the circle uses attributes to handle the three relevant mouse events.
Example 6-10. Drag and drop, the XAML file (Page.xaml, project DragDrop)
<UserControl x:Class="DragDrop.Page"
    xmlns="http://schemas.microsoft.com/client/2007"
    xmlns:x="http://schemas.microsoft.com/winfx/2006/xaml"
    Width="400" Height="300">
  <Grid x:Name="LayoutRoot" Background="White">
    <Canvas>
      <Rectangle Width="300" Height="150" Stroke="Orange" StrokeThickness="15" />
      <Ellipse Width="50" Height="50" Fill="Black" Canvas.Left="20" Canvas.Top="20"
        MouseLeftButtonDown="mouseInit"
        MouseLeftButtonUp="mouseRelease"
        MouseMove="mouseMove" />
    </Canvas>
  </Grid>
</UserControl>
We can now start to implement the actual drag and drop. Before we
do that, one word of caution. If the draggable object has processed a
mouse event, it hands it over to its parent element. And even worse,
other elements farther down in the object chain could process and act
upon this event as well (this is also called “event tunneling”).
Therefore, other elements could work with those events too, which is
usually undesirable in this scenario. So, Silverlight provides a
CaptureMouse() method. If an object calls this method, all mouse events are
directly routed to the object; other objects do not receive them any
longer. When the left mouse button is pressed (the MouseLeftButtonDown event), the initial
position of the draggable object is retained and the mouse capturing
mode is activated. The (global) moving property remembers
whether the application is in drag-and-drop mode (true) or
not (false):
function mouseInit(sender, eventArgs) {
  sender.captureMouse();
  lastX = eventArgs.getPosition(null).x;
  lastY = eventArgs.getPosition(null).y;
  moving = true;
}
If the mouse is moving, the position of the draggable object needs to be updated properly, according to the algorithm we designed at the beginning of this section. Remember, the current mouse position is determined, and then the script code calculates the delta between the current and the last known positions. The position of the draggable object is updated accordingly. Finally, the variables holding the last known coordinates are updated.
If you are updating the circle’s position, you have to take care
of one special issue: the property names you need to set are represented
by the Canvas.Left and Canvas.Top attributes.
However, these properties are not directly accessible for C#, since they
are so-called dependency properties (they depend on their parent
elements). However, there is a workaround. The static Canvas.GetLeft() and Canvas.GetTop() methods calculate the
x and y positions of any
element. In an analogous fashion, Canvas.SetLeft() and Canvas.SetTop() set these values. Now all
you have to remember is that the first argument of the event handler
function is the object firing the event—in this case, the element we
want to position. Then the rest of the code is easy:
private void mouseMove(object sender, MouseEventArgs e)
{
    if (moving) {
        Ellipse el = sender as Ellipse;
        var x = e.GetPosition(null).X;
        var y = e.GetPosition(null).Y;
        Canvas.SetLeft(el, Canvas.GetLeft(el) + x - lastX);
        Canvas.SetTop(el, Canvas.GetTop(el) + y - lastY);
        lastX = x;
        lastY = y;
    }
}
Note
You now see why we needed the moving variable.
Mouse moving events happen all the time, but you want the circle to
move only if the user is dragging it!
The final step happens when the user releases the mouse button
(the event LeftMouseButtonUp). You can
reset moving to false and unlock access to mouse events for
other elements on the page by calling the ReleaseMouseCapture() method. We will implement one additional feature here. As you
have seen, there is an orange rectangle in the XAML file. This serves as
the barrier for the draggable element: the element must not touch or
even leave this border.
We need to define a couple of class properties that provide us with the minimum and maximum coordinates where the circle is allowed:
private double minX = 15;
private double maxX = 235;
private double minY = 15;
private double maxY = 85;
We will also save the position of the circle when the user starts
a drag-and-drop operation (this
code obviously belongs in the mouseInit() method):
startX = Canvas.GetLeft(el);
startY = Canvas.GetTop(el);
Finally, when the user releases the mouse button, the current position is determined and checked against the valid coordinates. If the position is out of bounds, the draggable object is placed at the position it had at the beginning of the drag-and-drop operation:
var x = Canvas.GetLeft(el);
var y = Canvas.GetTop(el);
if (x < minX || x > maxX || y < minY || y > maxY) {
  Canvas.SetLeft(el, startX);
  Canvas.SetTop(el, startY);
}
Example 6-11 sums up the complete C# code. Figure 6-5 shows the example in action: if the user releases the mouse button now, the circle will jump back to its original position.
Example 6-11. Drag and drop, the XAML C# file (Page.xaml.cs, project DragDrop)
using System;
using System.Windows;
using System.Windows.Controls;
using System.Windows.Documents;
using System.Windows.Ink;
using System.Windows.Input;
using System.Windows.Media;
using System.Windows.Media.Animation;
using System.Windows.Shapes;

namespace DragDrop
{
    public partial class Page : UserControl
    {

        double startX, startY, lastX, lastY;
        private double minX = 15;
        private double maxX = 235;
        private double minY = 15;
        private double maxY = 85;

        private Boolean moving = false;

        public Page()
        {
            // Required to initialize variables
            InitializeComponent();
        }

        private void mouseInit(object sender, MouseButtonEventArgs e)
        {
            Ellipse el = sender as Ellipse;
            el.CaptureMouse();
            startX = Canvas.GetLeft(el);
            startY = Canvas.GetTop(el);
            lastX = e.GetPosition(null).X;
            lastY = e.GetPosition(null).Y;
            moving = true;
        }

        private void mouseRelease(object sender, MouseButtonEventArgs e)
        {
            Ellipse el = sender as Ellipse;
            el.ReleaseMouseCapture();
            moving = false;
            var x = Canvas.GetLeft(el);
            var y = Canvas.GetTop(el);
            if (x < minX || x > maxX || y < minY || y > maxY) {
                Canvas.SetLeft(el, startX);
                Canvas.SetTop(el, startY);
            }
        }

        private void mouseMove(object sender, MouseEventArgs e)
        {
            if (moving) {
                Ellipse el = sender as Ellipse;
                var x = e.GetPosition(null).X;
                var y = e.GetPosition(null).Y;
                Canvas.SetLeft(el, Canvas.GetLeft(el) + x - lastX);
                Canvas.SetTop(el, Canvas.GetTop(el) + y - lastY);
                lastX = x;
                lastY = y;
            }
        }
    }
}
Using keyboard events on the Web is always a thankless task. It’s not impossible, it’s just very hard to get it right, and many factors come into play. Different browsers have different approaches to determining keyboard input. Once a user presses a key, you get the information that a key was pressed, but only the numeric value of that key. This works beautifully for easy characters like letters and numbers, but it gets harder when you have special keys, or even operating-system-specific keys. And if you have a combination of keys, you are totally lost. For instance, Shift-9 usually types an opening parenthesis. However, with the keyboard layout I am using right now, Shift-9 creates a closing parenthesis.
Silverlight tries to amend this situation a little bit by providing two key codes in JavaScript:
A nonplatform-specific key code
A platform-specific key code
A general rule of thumb is that platform-specific key codes are close to ASCII codes (see http://www.asciitable.com/ for a good list), whereas the nonplatform-specific key codes work better for special characters.
When capturing keyboard events, the eventArgs argument (the second one passed
to the event handling function) provides the following properties:
Note
At this time, Silverlight does not provide support for the Alt (Mac: Option) key. However, this key is rarely useful, since you need it only for accessing browser menus (e.g., Alt-F for the File menu). Don’t think that you just have to avoid the shortcut keys for your browser, because other browsers and other languages use different shortcuts.
Another noteworthy point about Silverlight keyboard events is that
you can capture these events only for the root element of your XAML file:
the outer <Canvas> (script template) or <UserControl> (project template).
We will now create a text input field that displays the text
we entered, but we need to attach the event to the
<Canvas> element, as Example 6-12 shows
(using the KeyDown event; KeyUp
would be possible as well). Such a text input field was not part of
Silverlight 1.0, but it is included in Silverlight 2, and it is a good
example to illustrate how keyboard events work.
Example 6-12. Capturing keyboard events, the XAML file (Page.xaml, project TextInput)
<UserControl x:Class="TextInput.Page"
    xmlns="http://schemas.microsoft.com/client/2007"
    xmlns:x="http://schemas.microsoft.com/winfx/2006/xaml"
    Width="400" Height="300"
    KeyDown="keyPressed”>
  <Grid x:Name="LayoutRoot" Background="White">
    <Canvas>
      <Rectangle Width="200" Height="75"
        Stroke="Orange" StrokeThickness="15" />
      <TextBlock FontFamily="Arial" FontSize="32"
        Canvas.Left="30" Canvas.Top="20"
        Foreground="Black" Text="" x:Name="InputBox" />
    </Canvas>
  </Grid>
</UserControl>
In the C# code, we will need to determine which key has been pressed and then display it. Given that different keyboard layouts lead to different results, we make some very specific assumptions and:
Target our code at the ASCII characters
Allow only letters and numbers and the space character
Allow only the Backspace key to delete characters (this is more a feature than an assumption)
The ASCII table returns these key code ranges for the supported characters (except for the Backspace key, which we will tackle in a bit):
The space character has code 32.
The numbers run from 48 to 57.
The uppercase letters run from 65 to 90, and the lowercase letters run from 97 to 122.
When pressing the a key, for instance, we get the key code of the capital A, 65. So, if the Shift key has not been pressed, we need to add 32 to the key code to get the lowercase letter’s code (97 in this example). When the Space bar is pressed, it does not matter whether Shift has been pressed. If a number key has been pressed, Shift must not be pressed (remember the Shift-9 example from the introduction of this section?).
To determine whether Shift or any other modifier has been pressed,
we need to have a look at the Modifiers
property of the current keyboard event. This is internally a bit field.
Silverlight provides a static enumeration of possible modifiers, including
KeyModifier.Control and KeyModifier.Shift. Using a bitwise AND (&), we can determine whether the Shift (or Ctrl) key is
currently pressed.
So, if one valid key or key combination has been pressed, we have a
valid key code. Converting it into a char makes it readable, which allows the script
to write the new character into the text field. To do this, once again we
have to use the FindName() method:
if (e.Key == Key.Ctrl)
{
    return;
}
int keyCode = e.PlatformKeyCode;
if (keyCode == 32 || //space
   (keyCode >= 48 && keyCode <= 57 &&
     !((Keyboard.Modifiers & ModifierKeys.Shift) == ModifierKeys.Shift)) ||
        //numbers
   (keyCode >= 65 && keyCode <= 90)) { //letters
  if ((keyCode >= 65 && keyCode <= 90) &&
    !((Keyboard.Modifiers & ModifierKeys.Shift) == ModifierKeys.Shift)) {
    keyCode += 32;
  }
  InputBox.Text += (char)keyCode;
}
Now for the Backspace key. The Silverlight C# API takes care of
determining the appropriate key code for you; just compare the Key property to Key.Back. If this key is pressed, the last
character of the current input is removed. This is implemented with the
.NET Substring() method for strings:
else if (e.Key == Key.Back)
{
String text = InputBox.Text;
InputBox.Text = text.Substring(0, text.Length - 1);
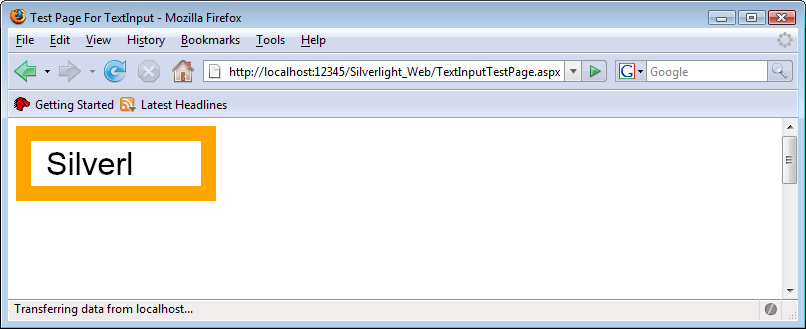
} Example 6-13 contains the complete C# code. The application then uses letters, numbers, space characters, and the Backspace key, and displays what you write (see Figure 6-6). If you want to complicate the code a little bit, you can add additional characters and also experiment with the nonplatform-specific key codes to create a user experience that is as platform-agnostic as possible.
Example 6-13. Capturing keyboard events, the XAML C# file (Page.xaml.cs, project TextInput)
using System;
using System.Windows;
using System.Windows.Controls;
using System.Windows.Documents;
using System.Windows.Ink;
using System.Windows.Input;
using System.Windows.Media;
using System.Windows.Media.Animation;
using System.Windows.Shapes;

namespace TextInput
{
    public partial class Page : UserControl
    {
        public Page()
        {
            // Required to initialize variables
            InitializeComponent();
        }

        private void keyPressed(object sender, KeyEventArgs e)
        {
            if (e.Key == Key.Ctrl)
            {
                return;
            }
            int keyCode = e.PlatformKeyCode;
            if (keyCode == 32 || //space
               (keyCode >= 48 && keyCode <= 57
                 !((Keyboard.Modifiers & ModifierKeys.Shift) ==
                    ModifierKeys.Shift)) || //numbers
               (keyCode >= 65 && keyCode <= 90)) { //letters
              if ((keyCode >= 65 && keyCode <= 90) &&
                 !((Keyboard.Modifiers & ModifierKeys.Shift) ==
                    ModifierKeys.Shift)) {
                keyCode += 32;
              }
              InputBox.Text += (char)keyCode;
            }
            else if (e.Key == Key.Back)
            {
                String text = InputBox.Text;
                InputBox.Text = text.Substring(0, text.Length - 1);
            }
        }
    }
} 
Caution
When you run this example in the browser, you first need to click the Silverlight display area to activate keyboard event handling. This is actually a security feature; otherwise, plug-ins might capture keyboard input that a user was unwittingly entering while the browser had the focus. This is the same reason Silverlight’s keyboard event handling does not work in full-screen mode. You may want to prompt users to click within the Silverlight content area prior to typing, either by specifically instructing them or by adding a button that they need to click at the beginning.
Silverlight’s event handling is not rocket science: you can use
attributes to assign event handlers, or you can write some code to attach
(and maybe remove) event listeners. For keyboard and mouse events, the
eventArgs event handler argument provides additional
information about the event. There are other types of events, too, and the
most interesting ones we will cover throughout the rest of the
book.
- http://www.asciitable.com/
The ASCII table
- http://msdn2.microsoft.com/en-us/library/ms645540.aspx
Windows-specific key codes
- http://developer.apple.com/documentation/carbon/reference/keyboardlayoutservices/KeyboardLayoutReference.pdf
Mac-specific key codes