
A camera produces a picture by capturing light reflected from a subject and recording it on the camera's photosensitive recording media — whether it's film in a traditional camera or the combination of a digital image sensor and storage device in a digital camera. That photosensitive media must be exposed to a precisely controlled amount of light in order to render the subject appropriately.
If you take photographs only of average subjects with standard illumination, the camera could be preset to deliver the proper amount of light to the image sensor each time you press the shutter release, without any manual or automatic adjustment ever being needed. In fact, that's exactly the premise behind disposable cameras. Everything is preset for a typical snapshot, either a typical outdoor scene in direct sunlight or an indoor subject about five feet from the camera's built-in flash. Such a camera is inexpensive to manufacture because it's simple — there's no focusing mechanism and no exposure adjustments. However, these cameras cannot adapt to changing lighting conditions. The camera takes successful pictures only when the subject and lighting conditions match its preset exposure parameters. Other pictures "don't come out" because of "subject failure," which means that the subject didn't conform to the very limited conditions for which the camera was designed.
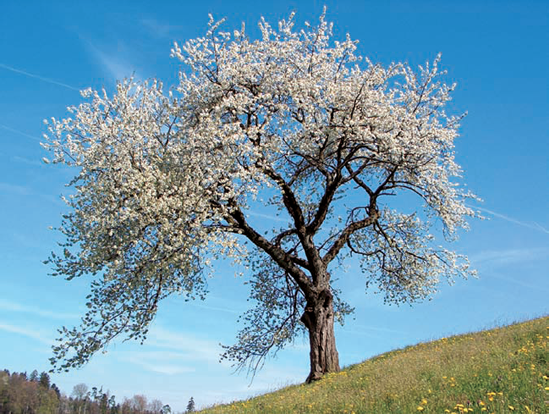
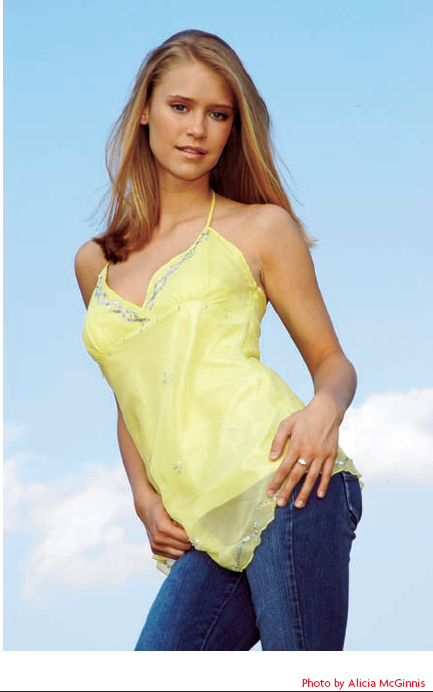
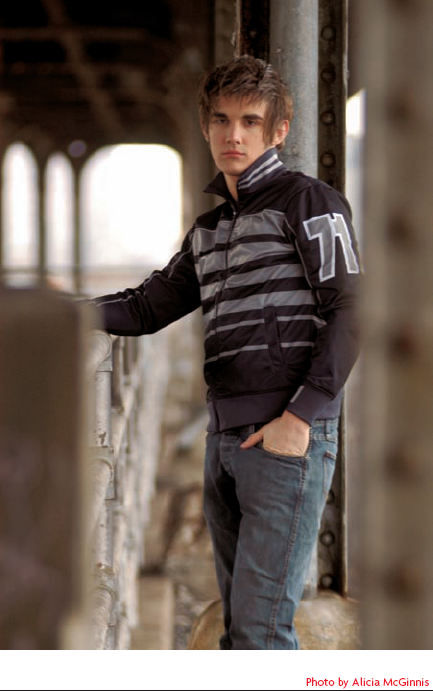
In the real world, photographic subjects and light levels vary tremendously, and photographers want to take successful pictures in conditions ranging from brilliant sunlight (figure 4-1) to dim indoor scenes (figure 4-2). To accommodate that need, most higher-end digital cameras have extensive exposure controls that allow you to adapt to widely varying lighting conditions and still deliver that precisely controlled amount of light to the image sensor. The aperture and shutter speed allow you to control how much light passes through the lens and how long it's allowed to strike the image sensor. The ISO setting lets you adjust the sensitivity of the image sensor.
In order to adjust the exposure settings properly, you (or your camera) need to know exactly how bright or dim the light illuminating the scene really is. The human eye is an unreliable tool for evaluating brightness levels because it automatically adapts to such a wide range of light conditions.

A light meter is an instrument for measuring the brightness of light. Light meters are used by architects to test light levels in buildings; by engineers to test the lights themselves; by lighting directors to set lighting on film and stage sets; and of course, by photographers to determine the correct exposure settings for photography.
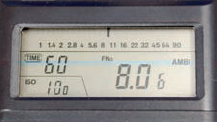
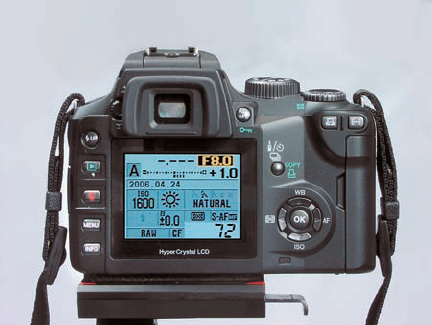
Light meters provide an objective, quantitative measurement of light levels. The meters used by engineers typically display their measurements in lux, which is a standard unit of measure for illuminance. Photographic light meters, on the other hand, normally translate that scientific measurement into EV (Exposure Value) units, and also provide a direct readout in f-stop and shutter speed for a given ISO number. (See figure 4-3.)
For generations, photographers used separate hand-held light meters to measure light levels, and then manually adjusted their camera's exposure settings based on the information from the meter. Most modern cameras have built-in light meters that are an integral part of their automatic exposure systems. The camera automatically adjusts the aperture and shutter speed in response to input from the built-in light meter. The process is faster and easier, but the light meter's role in determining the brightness of light in the scene is still the same.


There are two basic types of photographic light meters. Incident light meters measure the light falling on the subject. Reflected light meters measure the light reflected from the subject. Incident light meters read the illumination level of the scene directly, and reflected light meters take an indirect approach by measuring the reflected light and inferring the illumination level from that measurement.
Incident meters, such as the one in figure 4-4, are usually separate, hand-held units distinguished by the white diffuser dome or disk over the light sensor. The typical diffuser looks like half of a small ping pong ball.
Because an incident light meter measures the light falling on the subject, its readings aren't influenced by variations in subject reflectance. This tends to make incident light readings more reliable than a reflected light meter.
However, an incident light meter is sometimes less convenient to use because the meter must be positioned at the subject to take a reading. That's not usually a problem in the studio, but it's a major issue in sports and wildlife photography, and in other areas where the subject is inaccessible.
Reflected light meters come in various shapes, sizes, and configurations. They range from separate hand-held units, such as the one in figure 4-5, to totally integrated components of a camera body. Some take an overall reading of light reflected from an entire scene, some take a spot reading from a small portion of the scene, and some take multiple readings and then calculate an exposure for the range of light levels in the samples. Some allow you to select from any of those metering modes.
Tip
Despite their apparent inconveniences, incident light meters are a favorite tool of many professional photographers, myself included. When you measure the scene illumination with an incident light meter, you get a reliable base exposure, without bothering with gray cards or worrying about whether subject reflectance might influence the reading. An incident light meter is also a good tool for measuring lighting ratios and for testing consistent light levels across a set or scene.
Because this type of meter reads light reflected from the scene (and presumably, towards the camera), you can take readings from the camera position. This is generally more convenient for the photographer, especially when the meter is built into the camera. Also, because you don't need to position the meter at the subject, problems rarely occur with inaccessible subjects. In fact, with a telephoto lens and a meter built into the camera, you can get light readings from subjects that are hundreds of yards away as easily as you can a subject that is within arm's reach.
One drawback of reflected light meters is that the light level reading is strongly influenced by the reflectance of the subject. If your subject is significantly more or less reflective (lighter or darker) than the hypothetical average for which the meter is calibrated, then you must adjust the indicated exposure settings to compensate for that difference if you want a good exposure that accurately renders the scene.
Reflected light meters attempt to determine the illumination level of a scene by measuring how much light is reflected from that scene, and then calculating the proper exposure for the light level that is presumed to have produced the measured light reflection. The calculations are based on the assumption that the typical photographic subject reflects an average of 18 percent of the light that strikes it, which is the equivalent of a middle gray.
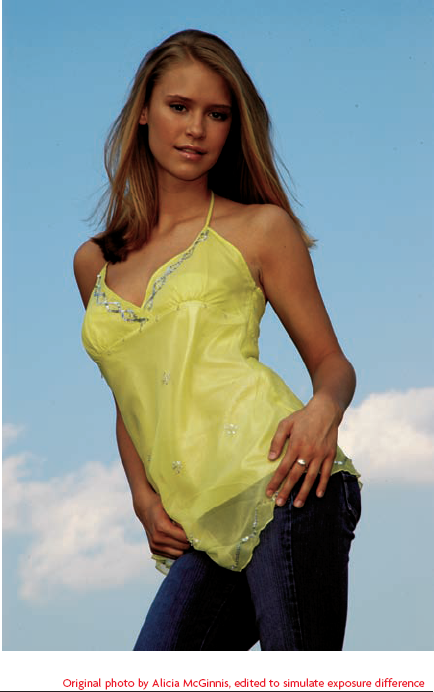
The assumptions work reasonably well for an average photographic subject, such as figure 4-6. For a typical subject, the lights, darks, and midtones all average out to the equivalent of a middle gray. When the subject reflectance matches to this expected average, the exposure reading from a reflected light meter is essentially the same as the reading from an incident light meter (which measures the amount of light falling on the scene).

Tip
Reflected light meters, including all built-in meters and auto exposure systems in digital cameras, assume that you're photographing an average subject — one that reflects an average of 18 percent of the light striking it. If your subject reflects more or less light than the hypothetical average, the exposure settings indicated by the meter will be wrong, and you must adjust those settings if you want to get a good rendering of the subject.
The problem is that not all photographic subjects conform to the assumed average reflectance. High key subjects (figure 4-7), with their predominance of light tones, reflect a much higher percentage of the light. Low key subjects, which are composed of mostly dark tones, reflect much less light than the hypothetical average. Backlit subjects may include large overwhelmingly bright areas, and so on.
A reflected light meter doesn't know whether it is reading light reflected from a white snow bank or a black pile of coal. It always interprets differences in reflected light level as if they were corresponding differences in the scene's illumination level. The amount of light reflected from a snow scene is the same as the light reflected from an average subject in much brighter light, so a reflected light meter calculates an exposure that renders both scenes as the same medium gray.
As long as your subject conforms to the expected norms by reflecting about 18 percent of the light illuminating the scene, a reflected light meter provides accurate and reliable exposure readings. But the exposure settings indicated by a reflected light meter get seriously skewed when a subject reflects significantly more or less light than that standard.
The most straightforward way to deal with this problem is to always try to determine your exposure by metering a subject that is reasonably consistent with the reflectance standard. But what do you do when the subject you want to photograph doesn't meet the standard reflectance that the meter expects? Well, one solution is to temporarily replace the problem subject with one that does match the reflectance standard, and use the standard subject to determine the correct exposure.
Photographic supply stores sell a variety of standardized reference targets that you can use to give your camera's light meter a reliable basis for determining the correct exposure in most any lighting situation. The traditional 18 percent gray card, is simply an 8 × 10 inch card with a solid matte gray surface on one or both sides. It's inexpensive and very effective. Some photographers prefer the convenience of a collapsible gray fabric disc instead of a rigid card. The spring-loaded disc stores in a small pouch, and pops open to provide a larger metering target than a typical gray card. There are also larger and smaller gray cards, some made of cardboard, some made of plastic, some fold, some don't.
Tip
Standard 18 percent gray cards are usually a clean neutral gray, so they make a good reference for white balance as well as exposure readings. Use them as a target for establishing a custom white balance setting on your camera.
The technique for using a gray card (or disc, or other standard target) to determine the correct exposure is simple and straightforward. Just follow these steps:
Set up your shot normally, with the background, subject, and lighting you want to use for the finished image. Then take a moment to evaluate the scene to see if it contains an average distribution of lights, darks, and midtones. If the overall scene or the main subject is noticeably lighter or darker than average, the reflected light meter in the camera will misinterpret the disproportionate reflectance as a different illumination level and give you the wrong exposure. For a high-key subject such as the one in figure 4-8, the result is underexposure — unless you give the camera's meter a better target to use for its exposure calculations.
Place a gray card into the scene to serve as a metering target, as in figure 4-9. Be sure to position the card where it receives the same light as the main subject you want to photograph, and make sure that the card's surface is free of shadows or glare.
Take an exposure reading from the gray card and lock the settings. If your camera has a spot metering mode, use that to read the exposure for the gray card without including any of its surroundings. If your camera doesn't offer a spot metering mode, you can zoom in on the gray card and/or move closer so that the gray card fills the viewfinder before you take the exposure reading. (Make sure you don't cast a shadow on the gray card when you get up close.)To lock in the exposure setting from the gray card, use the camera's exposure lock feature if it has one. (You probably don't want to hold the exposure by half-pressing the shutter release because that typically locks the focus as well as exposure.) If your camera doesn't offer an exposure lock, note the exposure settings indicated for the gray card, and how much they differ from the settings indicated for the overall scene.
Tip
Photographic accessory makers sometimes incorporate 18 percent reflectance gray reference targets into other products. For example, the cases for some portable photographic lights are the right shade of gray, as are the back side of some umbrellas. I've even seen microfiber lens cleaning cloth in 18 percent gray.
Remove the gray card from the scene and reframe the shot with your original subject in place.
Take the picture using the exposure settings from the gray card. If you were able to lock those settings in step 3, all you need to do is press the shutter release. If your camera doesn't offer an exposure lock feature, you can either manually set the aperture and shutter speed to match the settings that the camera's light meter indicated for the gray card, or use exposure compensation to adjust the auto exposure to those same settings. Using the gray card exposure gives you a much more natural rendition of the scene as shown in figure 4-10.


Tip
When photographing a product or other subject with critical color, place a gray card along one edge of the frame where it will be cropped out of the final image, or shoot an extra frame with a gray card inserted into the scene. Make sure the gray card receives the same light as the subject. The gray card serves as a known reference sample to use for color and brightness adjustments during post processing in Photoshop. When you match the gray on the gray card, the subject color should be right, too.
In the days of cameras with built-in light meters and sophisticated exposure systems, separate light meters may seem like an anachronism. Although separate light meters are no longer an essential piece of photographic gear found in every photographer's bag, they remain a useful supplemental tool. They're compact, easy to use, and come in handy in numerous situations, such as:
Reading the illumination level of a scene directly with an incident light meter. You generally get a more reliable reading than you can with the camera's built-in reflected light meter readings because incident light meters aren't influenced by variations in subject reflectance.
Checking the light levels in a scene before unpacking your camera. That way, you know in advance whether there's enough available light for hand-held shots, or you need to set up lights, tripod, or the big shoe-mount flash.
Checking light levels frequently as you set up lights or observe changes in natural lighting. It's faster and easier with a hand-held meter, and you don't waste camera batteries just checking the scene.
Testing lighting ratios. You can do it with an in-camera meter in spot metering mode, but a hand-held meter is more convenient.
Using a flash meter to determine exposure settings to use with studio flash lighting or other off-camera flash units.
Using a spot meter for ultra precise readings. Hand-held spot meters usually have a smaller angle of view than most camera's spot metering mode.
Metering extreme situations that the camera's built-in meter may not handle well. Separate light meters often have a greater sensitivity range than the built-in meter in some cameras.
The actual operation of most hand-held light meters is pretty much the same. After you turn the meter on, taking a light reading is usually a quick one-button operation. On some older models, you may need to adjust dials and align numbers to get the reading, but most newer models have a digital display. You normally preset the ISO and either the shutter speed or aperture. Then, when you take the reading, the meter supplies the missing exposure setting. Some meters may add optional displays and additional features, such as the ability to save readings in memory and compare them, but the basic operation is generally very similar from meter to meter.
Tip
You may be able to use your subject's skin (or your own) as a substitute gray card. Typical Caucasian skin reflects approximately twice as much light as a standard gray card. In other words, it's one stop brighter than middle gray. Knowing that, you can take a reflected meter reading from the skin (a spot meter reading from your hand works well), and then open up one stop to compensate for the difference in reflectance between skin and a gray card. Darker-skinned people may need different amounts of exposure compensation. You'll need to test to see how your skin color relates to middle gray, but once you do, you'll never be without a handy reference for light meter readings.
A plain, hand-held reflected light meter is probably the easiest of all light meters to use, but it's the least accurate. To use it, you just point the meter toward the scene, press the button, and then read the exposure settings from the display.
Meters such as the one in figure 4-11 are good for overall readings of average subjects, but the wide angle of view of the meter's sensor makes it difficult to know how much of the scene is included in the reading. (This particular model includes a small incident dome accessory, but the normal reflected light sensor is located just to the right of the sliding white dome.) Also, like all reflected light meters, their accuracy is heavily influenced by variations in subject reflectance.

A spot meter is a special type of reflected light meter with a lens and viewfinder that enable you to select and meter a small portion of the scene. The biggest advantage of the spot meter is that you know exactly what portion of the scene you're metering because you can see it, clearly marked in the viewfinder. The light level reading comes from that portion of the scene and nowhere else. A spot meter is useful in situations such as getting a good exposure reading from the front surface of a backlit subject without the bright backlight affecting the reading.
Note
Spot meters are particularly well suited to working with the Zone System because they enable you to measure the range of brightness of various portions of the scene. See Chapter 5 for more information on the Zone System.

A spot attachment for a general-purpose light meter might have an angle of view of 5-10 degrees, which is equivalent to a telephoto lens. Special-purpose spot meters, such as the one in figure 4-12, usually have an angle of view of only 1 degree, which enables you to be very precise in selecting what part of the scene you're metering.
You can try a few basic approaches when you use a spot meter.
Select a portion of the scene that should render as a midtone, equivalent to middle gray, and measure that area only. Use the indicated exposure settings as is.
Select the most important part of the subject and meter that area with the spot meter. Adjust the indicated exposure settings as needed to compensate for any difference in reflectance between the metered area and middle gray. For example, if you're shooting a portrait of someone with typical Caucasian skin and meter the highlighted side of the face, you need to increase the indicated exposure by one stop to compensate for the lighter skin tone compared to the 18 percent gray standard.
Select and read several areas of the scene, including the brightest highlight areas and the darkest shadow areas in which you want to retain detail. Note the range of brightness between the extremes and make sure it doesn't exceed the exposure latitude of your camera (usually five to seven stops for a JPEG image, and nine stops or more for Camera Raw). Set your exposure to the midpoint between the exposures indicated for the brightness extremes.
An incident light meter reads scene illumination by sampling the light falling on the subject. This is the most accurate and reliable kind of exposure reading you can get for most subjects, and it's generally available only with a separate hand-held light meter. Some reflected light meters have an accessory diffusion dome attachment that allows them to take incident light readings, but I prefer using a meter like the one in figure 4-13, which is designed primarily for incident readings. The larger diffusion dome does a better job of gathering a good light sample from multiple lights, and the swivel head makes it easier to position the dome next to your subject.
To take an exposure reading with an incident light meter, you position the meter at your subject location so that it is in the same light as your subject and point the meter's diffusion dome towards the camera lens. The diffusion dome collects light from a full 180-degree field, and the meter calculates the exposure based on the brightness of the light striking the dome. The indicated exposure setting from a good incident light meter is normally very accurate without any need to compensate for subject reflectance, backlights, or anything of the sort.
Incident light meters are also a handy tool for testing lighting ratios — the ratio of brightness in the highlights (lit by the main light) and the shadows (lit by the fill light). To measure lighting ratios you just need to modify your incident light metering technique slightly.
Measure the brightness of the light on the highlight side of the subject in much the same way you would take a base exposure reading, but instead of pointing the dome toward the camera lens, point it half way between the lens and the main light source. Note the exposure indicated by the meter.
Reposition the meter to read the brightness of the light on the shadow side of the subject by positioning the meter's diffusion dome so that it's lit by the fill light, but not the main light. Usually, all you need to do is pivot the diffuser to point it toward the fill light and use your other hand to shade it from the main light. Take another reading in that position and note the results.
Calculate the difference in the two readings, expressed as a ratio. A one-stop difference means that the highlight side is twice as bright, which is a 2:1 ratio, and so on.
The duration of the short burst of high-intensity light from a photographic flash is too brief to register on a standard light meter. A flash meter is a special purpose light meter that can accurately read the brightness of the light from studio flash.
Flash meters can be reflective, spot, or incident style meters, but the incident style is most common. Flash meters typically have an ambient light reading mode in addition to flash mode, so the same meter can read both flash and continuous light. Some high-end models are true multipurpose light meters, combining both spot and incident reading styles with the ability to take both flash and ambient light readings.

In use, the only difference between a regular light meter and a flash meter is that you need to sync the meter with the flash in order to take a light reading. You typically do that in one of two ways:
In cord mode, you connect the sync cord from the flash to a PC socket on the flash meter as shown in figure 4-14. Pressing the button to take a meter reading triggers the flash, just like pressing the shutter release on the camera.
In non-cord mode, there is no direct connection between the meter and the flash unit. You select non-cord mode and press the button on the meter to prepare to take a reading. The flash meter goes into a sort of stand-by mode, waiting for the flash. Then you trigger the flash separately with a test fire button or remote control. The flash meter detects the sudden pulse of light and records its intensity.

These days, cameras normally have light meters built into the camera body as part of the camera's automatic exposure system. The built-in light meter is what enables the camera to detect the light level of the scene and automatically adjust the exposure settings accordingly. In many point-and-shoot cameras, the entire process is completely automated, leaving the photographer with very little knowledge of, or control over, the exposure settings. In contrast, most digital SLRs and high-end consumer cameras display full exposure information in the viewfinder and give the photographer at least some measure of control over the exposure settings.
The key to effective use of an in-camera meter (and the rest of the camera's automatic exposure system), is to understand a couple of facts about the metering system in your camera and its strengths and limitations.
Virtually all in-camera exposure meters are reflective light meters, which means that they attempt to calculate the scene illumination level (and thus the proper exposure settings) from the amount of light reflected from that scene. The accuracy of that calculation is heavily influenced by differences in subject reflectance. If the subject reflects significantly more or less light than the standard 18 percent reflectance, you must adjust the exposure indicated by the meter to compensate for that difference.
Most of the better cameras offer the option of using different metering modes that take light readings from different parts of the viewfinder as the basis for their exposure calculations. The secret to getting the best results from your camera's light meter and exposure system is to select the best metering mode for the shooting situation and use its strengths to your advantage.
The simplest form of in-camera light metering is average metering. As the name implies, it reads light levels across the entire viewfinder and calculates an exposure based on the overall average. It works well for average scenes such as figure 4-15 with its equal amounts of lights, darks, and midtones. However, average metering mode is easily fooled by any scene that doesn't average out to the standard 18 percent reflectance.
Center-weighted average metering is a popular variation on average metering mode that gives the brightness of objects in the central portion of the viewfinder more weight in the exposure calculation than objects around the outer edges of the frame. The assumption is that the object of main interest is likely to be near the center of the frame and it should get exposure preference over peripheral objects. This helps keep a strip of bright sky across the top of the frame from skewing the exposure for a flower or a person's face in the center. Although center-weighted metering helps in some situations, it actually makes the metering system more susceptible to variations in subject reflectance within that central metering area.

Spot metering mode is the polar opposite of average metering. Instead of calculating exposure based on the average brightness of the entire viewfinder, spot metering samples the brightness of a small screen area and ignores the rest. The spot metering zone is usually a small area in the center of the screen. Some cameras offer multiple, selectable spot metering zones. Sometimes, the spot metering zones correspond to the camera's autofocus points, and the active zone selection moves in tandem with the autofocus point selection.
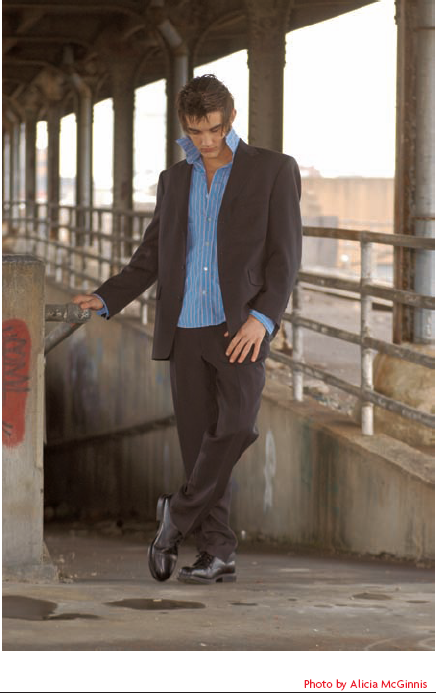
Spot metering mode allows you to select the exact portion of the scene on which you want to base your exposure. It's very useful for situations where large areas of very light or dark tones would create an exposure bias that would detract from the central subject, such as backlighting, high key, or low key scenes. For example, to shoot the backlit portrait in figure 4-16, the photographer used spot metering to base his exposure on the model's face, which allowed the bright background to be overexposed. A different metering mode would have biased the exposure towards the large bright background, resulting in an underexposed face.
Working in spot metering mode allows you to be very precise in your metering, but it usually requires a more deliberate shooting technique that consciously separates the light metering step from the actual exposure. The process goes something like this:
Evaluate the scene to determine what portion will make a good basis for the exposure reading. Ideally, you select a midtone with about 18 percent reflectance, but you can also select a lighter or darker tone and set the exposure compensation to adjust the exposure accordingly.
Frame the shot to position the active spot metering zone on the selected area. Note that the framing for the spot exposure reading is usually not the way you want to frame the final shot.
Take an exposure reading and lock it in. If your camera has an exposure lock feature, use it to lock in the exposure settings. Holding the exposure settings by half-pressing the shutter release isn't usually a viable option because that typically locks the focus as well as exposure, and you probably need to refocus after reframing the shot. If your camera doesn't offer an exposure lock, make a mental note of the exposure settings indicated for the spot reading, and then switch to manual exposure mode and set those aperture and shutter speed values manually.
Frame and focus the shot for your final composition and take the picture using the exposure settings from step 3.

Camera manufacturers use names like Evaluative Metering, 3D Matrix, and Digital ESP to describe a metering mode that samples light levels at dozens of locations across the frame and then uses sophisticated algorithms to compute an exposure to balance the range of brightness it finds. This metering mode is a huge improvement over the traditional averaged reflected light reading.
Matrix metering is much less susceptible to differences in subject reflectance. The exposure is based on a large number of samples that include a range of lights and darks as well as the standard 18 percent reflectance midtone. It's more tolerant of light or dark areas within the frame, such as the sky behind the model in figure 4-17.
Matrix metering mode is a good choice for general photography. It delivers good exposures across an impressively wide range of lighting situations. However, it's not totally immune to exposure errors due to differences in subject reflectance. Matrix metering can still be fooled by any kind of extreme lighting, such as strong backlight or a high key or low key subject without a normal range of tones anywhere in the frame.
Most of the better digital cameras offer more than one metering mode and allow the photographer to select which mode to use for a given photograph. That selection is an important part of the creative process. The camera doesn't know whether you're photographing a typical landscape or a snow scene, so it's up to you to evaluate the scene and select the most appropriate metering mode (and exposure compensation).
Selecting the metering mode is usually fairly simple to do. The details of the selection process vary from camera to camera, but the following steps for changing metering modes on an Olympus E-500 is a typical example:
Press the Metering button (the left arrow button) on the back of the camera. The meter selection menu appears on the LCD display (see figure 4-18).
Use the selection wheel to move the highlight to the icon for the metering mode you want to select.
Press the OK button on the back of the camera to activate the highlighted metering mode.
In addition to the menu selection for metering mode, some cameras enable you to quickly switch metering modes while the camera is at eye-level by using some combination of buttons and dials.


When you press the shutter release to take a picture with most digital cameras, a whole series of events unfolds. As you press the shutter release button half way down, the camera focuses the lens, meters the light level, adjusts the exposure settings according to the scene brightness detected by the light meter, and displays that information in the viewfinder. Then, when you press the shutter release button down the rest of the way, the camera actually takes the picture (which is a multistep process of its own).
Normally, this entire process takes place in a fraction of a second with the picture framed up just as you want the finished image to look. However, most cameras lock the focus and exposure settings and hold them as long as you keep the shutter release half-pressed. This feature allows you to frame the picture initially to place an autofocus point or spot metering zone at an advantageous location, half-press the shutter release to hold the focus and exposure settings, and then reframe the shot slightly before taking the picture. Many photographers get into the habit of pausing momentarily with the shutter release half-pressed, even if they don't plan to reframe the shot. It's an opportunity to take stock of the situation and check the automatic focus and exposure settings before committing the image to memory by pressing the shutter release fully.
Sometimes you may want to further separate the exposure determination from the other shooting steps — usually because you need to insert a gray card into the scene as a target for the light meter reading. That's when the exposure lock feature comes in handy (if your camera has one). The exposure lock is usually a separate button (see figure 4-19) that you can press to lock down the current exposure settings and prevent them from changing as you reframe and refocus the shot. On this camera, it's labeled AEL for auto exposure lock.
For most cameras that offer the feature, the procedure for using the exposure lock goes something like this:
Aim the camera at the target you want to use for exposure determination (usually a gray card), and half-press the shutter release button to take the light reading and calculate the exposure.
With the shutter release still half-pressed, press the exposure lock button to freeze the exposure settings. Then you can let go of the shutter release button.
Remove the gray card from the scene, reframe the shot, and make whatever other adjustments you need to make. The exposure lock keeps the exposure settings from changing, even if you walk away from the camera for several seconds.
When you're ready, take the shot by pressing the shutter release all the way down in one motion. As long as you don't pause at the half-press stage, the camera will use the locked exposure settings instead of recalculating the exposure.
Exposure compensation (sometimes called exposure bias) is a very useful — and often overlooked — camera feature. It enables you to increase or decrease the exposure that the camera calculates from the light meter reading, without resorting to manually setting the aperture and shutter speed yourself. The camera continues to function in automatic exposure mode, automatically responding to changes in light levels, but with the exposure adjustment you specify applied to each exposure the camera calculates.
You most often use the feature to adjust the exposure to compensate for differences in subject reflectance, such as a highly reflective snow scene that the camera would misinterpret as a scene with exceptionally bright illumination and underexpose if you don't override the normal exposure.
Exposure compensation is usually displayed in EV (exposure value) units, and shown as positive or negative values relative to the camera's normal automatic exposure calculation. So, +1 EV is one stop more exposure than the base exposure as indicated by the light meter reading, and −1 EV is one stop less exposure than the base. Most cameras allow you to apply exposure compensation in one-third or one-half EV units for reasonably precise adjustments.
The actual procedure for making exposure compensation adjustments varies. On the Olympus E-500, you use the feature by pressing the exposure compensation button (which is located near the shutter release button) and turn the selector wheel to dial in the amount of exposure compensation desired. The camera displays the exposure compensation setting in the viewfinder and in the information screen on the display screen on the back of the camera (see figure 4-20).
Reflected light meters, including the meter in your camera's automatic exposure system, rely heavily on the assumption that a typical photographic subject reflects an average of about 18 percent of the light illuminating the scene. The exposure settings indicated by the meter and auto-exposure system are calculated based on that assumption. Although this approach works well for most average subjects, there are several photographic situations where the scene illumination and/or subject reflectance vary from the norm enough to cause the meter to give erroneous exposure readings.
When that happens, you need to use your judgment to override the meter and adjust the exposure settings in order to get a good exposure. Let's take a look at a few of the more common situations where that is necessary.
One of the classic exposure problems is backlighting, where the subject is lit from behind or surrounded by a very bright background. It could be a person silhouetted against a bright sky, or subject with a background of brilliantly lit snow or sand that is much brighter than the light on the main subject. If the subject casts a shadow towards the camera, you have a backlight situation.
When you try to photograph a backlit subject, the overwhelming brightness of the background dominates the light meter's reading, causing the foreground subject to be significantly underexposed. Figure 4-21 simulates the kind of results you can expect from shooting a backlit subject with typical auto-exposure settings.
The solution is to use your camera's spot metering mode to selectively read the brightness of the main subject and omit the overly bright background from the light level reading. The result is a good exposure for the main subject (as shown in figure 4-22), although it usually means that the background is somewhat overexposed. Also, if the part of the scene where you took the spot reading is significantly more or less reflective than the 18 percent gray standard, you may need to apply the appropriate exposure compensation for that difference.
A high key subject is one that is composed primarily of white or light colors with only small areas of darker shades. A snow scene is a high key subject, as is a portrait of a person wearing a white shirt and posed on a white background.
High key subjects are almost guaranteed to fool any reflected light meter because the meter assumes average subject reflectance even though the light-colored subject is reflecting much more light. The high levels of reflected light make the meter think the illumination level is much brighter than it really is, so the indicated exposure settings underexpose the shot. Figure 4-23 is a simulation of a snow scene shot with exposure settings as indicated by a normal meter reading. In this case, the underexposure doesn't look too bad on its own, but it isn't a very good representation of the scene as the photographer experienced it. Figure 4-24 shows a more natural rendering of the scene, which required plus one EV exposure compensation to counteract the meter's underexposure.
Tip
If your camera doesn't have a spot metering mode that allows you to selectively meter a small portion of the scene from your normal camera position, you can zoom in and/or move closer to fill the frame with the area you want to meter as the basis for your exposure. Use the exposure lock feature (or manually exposure settings) to set your exposure based on that reading. Then you can return to your normal shooting position, reframe the shot, and fire away.

Average, spot, and matrix metering modes all fall into the same trap when faced with this kind of situation. The matrix mode may do a little better job than the other two if there are a few dark areas in the scene to help establish the lower end of the value range. The best way to get a good exposure of a high key subject is to take an incident light reading with a hand-held light meter. The next best solution is to use spot metering mode and either select a naturally occurring area of average reflectance, or use the gray card technique to supply your own metering target. If that's not convenient, you can just use exposure compensation to counteract the meter's tendency toward underexposure by adding a stop or two.
A low-key subject consists of predominantly black or dark colors with relatively small areas of lighter shades. Reflected light meters misinterpret the low light levels from the low-reflectance subject as low illumination levels and indicate exposure settings that overexpose the image.
Figure 4-25 simulates the result of shooting a low key subject with the exposure settings indicated by a normal meter. There's good detail in the model's dark hair and jacket, but the skin tones are washed out and the image lacks the dramatic effect that the photographer intended. Figure 4-26 shows the result of basing the exposure on the model's skin and letting the dark areas go nearly black.

Another common exposure problem is a light source or other bright object appearing in the frame. This often occurs in interior scenes where a lamp or large window is in the picture. Outdoors, you can have the problem if the sun is in the frame, either directly or as a reflection off a glass or metal surface. The problem is that the light meter assumes that it's reading all reflected light, and the higher intensity of the direct light source overwhelms the rest of the scene, making it seem brighter than it really is. As a result, the meter underexposes the rest of the scene.


Figure 4-27 simulates this kind of situation with the bright windows behind the model causing a normal meter reading to underexpose the main subject. In contrast, figure 4-28 shows the corrected exposure. Adding about a stop to the exposure produced better skin tones and more detail in the model's jacket.
This problem is very similar to the high key subject problem in many ways. The cause is different, but the result is the same (underexposure) and so are the solutions (incident readings, spot metering, or exposure compensation of plus one or two EV).
A sunset such as figure 4-29 is the ultimate case of a light source in the frame. You're usually shooting straight into the setting sun, which puts the brightest of all lights right in the center of the image. That will definitely skew normal light meter readings.

The way to deal with this situation is to remember that the sunset effect is from the clouds, not the sun. Therefore, you need to base your exposure on the clouds and eliminate the sun from the exposure calculations. The easiest way to do that is to use spot metering mode to read the light level of some clouds.
Tip
For richly colored sunsets, try deliberately under exposing with an exposure compensation of minus 1 or 2 EV. It's not the most accurate rendition of the scene, but it sure looks nice.
Frame the shot to position the spot metering zone on a cloud with a nice medium tone, lock the exposure setting, then reframe the shot, and take the picture.
In the days before in-camera meters and automatic exposure systems, photographers learned about proper exposure from experience and developed exposure guidelines for many common situations. You may no longer need to rely on these rules of thumb for your primary exposure determination, but they can still be very useful to know. Familiarity with some of the time-honored guidelines, such as the following, can provide a reference point to help you recognize problem situations where your camera's auto exposure system is giving you the wrong information, and provide clues to how you can compensate for the error.
Sunny day: The sunny-16 rule is probably the best known exposure guideline — and the easiest to remember. It also establishes the exposure baseline on which other guidelines depend. It states that the proper exposure for an average subject in direct mid-day (10am to 4pm) sun is f−16 at the shutter speed equivalent to the reciprocal of the ISO setting. So, for ISO 100, the sunny-16 exposure is f−16 at 1/100 second.
Open shade: The lighting condition where your subject is in the shade, not direct sun, but is lit by large expanse of open sky. For example, a subject that is on the shadow side of a hill or in the shade of a building on a sunny day is in open shade. Open up two stops (plus two EV) over the sunny-16 exposure.
Cloudy day: For a typical cloudy day — a light overcast or when the sun goes behind a cloud — open up three stops (plus three EV) over the sunny-16 exposure. For heavy cloud cover or a stormy sky, you may need to open up four stops or more.
Snow, sand, and water: Snow, sand, and water all reflect lots of light back into a scene, effectively making it brighter than it would be from the direct illumination alone. As a result, you need to stop down one stop (minus one EV) to compensate for all that extra light bouncing around. Stop down two stops if you're photographing the snow or beach itself rather than a person or other subject in the scene. A bright scene will fool your meter, so read the scene (or start with the sunny-16, open shade, or cloudy day guidelines), then apply compensation to achieve the correct exposure.
Office interior: Lighting levels vary in offices, but most offices with bright overhead fluorescent lighting fall into a general range. Typical exposures are around f−2.8 at 1/60 with ISO 400 (plus or minus a stop or two).
Home interior: Residential interiors are usually dimmer than offices and vary a lot. A typical exposure for average home lighting at night is around f−2.8 at 1/15 with ISO 400, but dimmer rooms may require as much as five stops more exposure.
City streets at night: A typical exposure for subjects lit by streetlights is about f-2.8 at 1/8 with ISO 400. If there's a lot of extra light from signs, cars, store windows and the like, the exposure might be closer to f-2.8 at 1/60 with ISO 400.
School and church auditoriums: The lighting level is often pretty close to average home lighting, and the exposure is around f-2.8 at 1/15 with ISO 400.
Gymnasiums: A typical exposure for an indoor sports venue is f-2.8 at 1/60 with ISO 400.
Stage shows: The lighting can vary tremendously for music performances and other acts with a lot of lighting effects. For a play, the lighting is usually more predictable — somewhere around f-2.8 at 1/60 with ISO 400.
Outdoor sports stadiums: During the day, you can use the sunny-16 rule, adjusted for shade or clouds as needed. At night, under the lights, the exposure is usually in the neighborhood of f-2.8 at 1/125 with ISO 400.

Use these guidelines as a starting point for an initial test exposure, and then evaluate your results with your camera's preview image and histogram display; adjust your settings as needed to improve subsequent exposures.
What's the proper exposure for a scene lit by firelight, candle light, oil lamps, and the like?
The light given off by an individual candle is fairly predictable, so you can calculate an exposure. (An exposure of f−2.8 at 1 second with ISO 400 should be about right for a subject one foot from a single candle.) The illumination from firelight, on the other hand, varies significantly depending on the size of the fire, as does the light from oil lamps and groups of candles. When you're shooting a firelight scene, the light source (the fire) is usually included in the frame, along with the subject and a lot of dark background. The best way to meter this kind of scene is to take a spot reading off the subject and ignore both the bright light of the fire and the dark background. Don't forget to adjust the exposure if the subject you're metering is lighter or darker than the 18 percent reflectance standard. For Caucasian skin, the exposure compensation is plus one stop.
What's the best exposure for fireworks and lightning against a night sky?
Fireworks and lightning are both relatively small, bright light sources that travel across the black background of the night sky. The combination of extreme high contrast and the brief duration of the light make them almost impossible to meter properly. Manual exposure based on a guideline derived from experience is the only way to go.
What's the correct exposure for a full moon in the night sky?
Most people think it takes a long time exposure to photograph the moon — after all, you're shooting at night and it's dark outside. However, that's not the case at all. The surface of the moon is illuminated by direct sunlight. It's a bright sunny day on the moon, and you need to set your exposure accordingly if you expect to retain the surface detail. Theoretically, you should get good results with a sunny-16 exposure of f−16 at 1/100 with ISO 100, or an equivalent exposure, such as 1/400 at f−8. That exposure might actually work on a clear, dry night at high altitude, but at lower altitudes, you may need to open up a stop or two to compensate for light lost to atmospheric haze. Still, your exposure is going to be a lot closer to a sunny day than your darkened surroundings lead you to expect.